Basics of Working in the Final Cut Pro Interface
(p. 43)
Â
Using Keyboard Shortcuts, Buttons, and Shortcut Menus
(p. 45)
Â
Customizing the Interface
(p. 48)
Â
Undoing and Redoing Changes
(p. 51)
Â
Entering Timecode for Navigation Purposes
(p. 52)
Basics of Working in the Final Cut Pro Interface
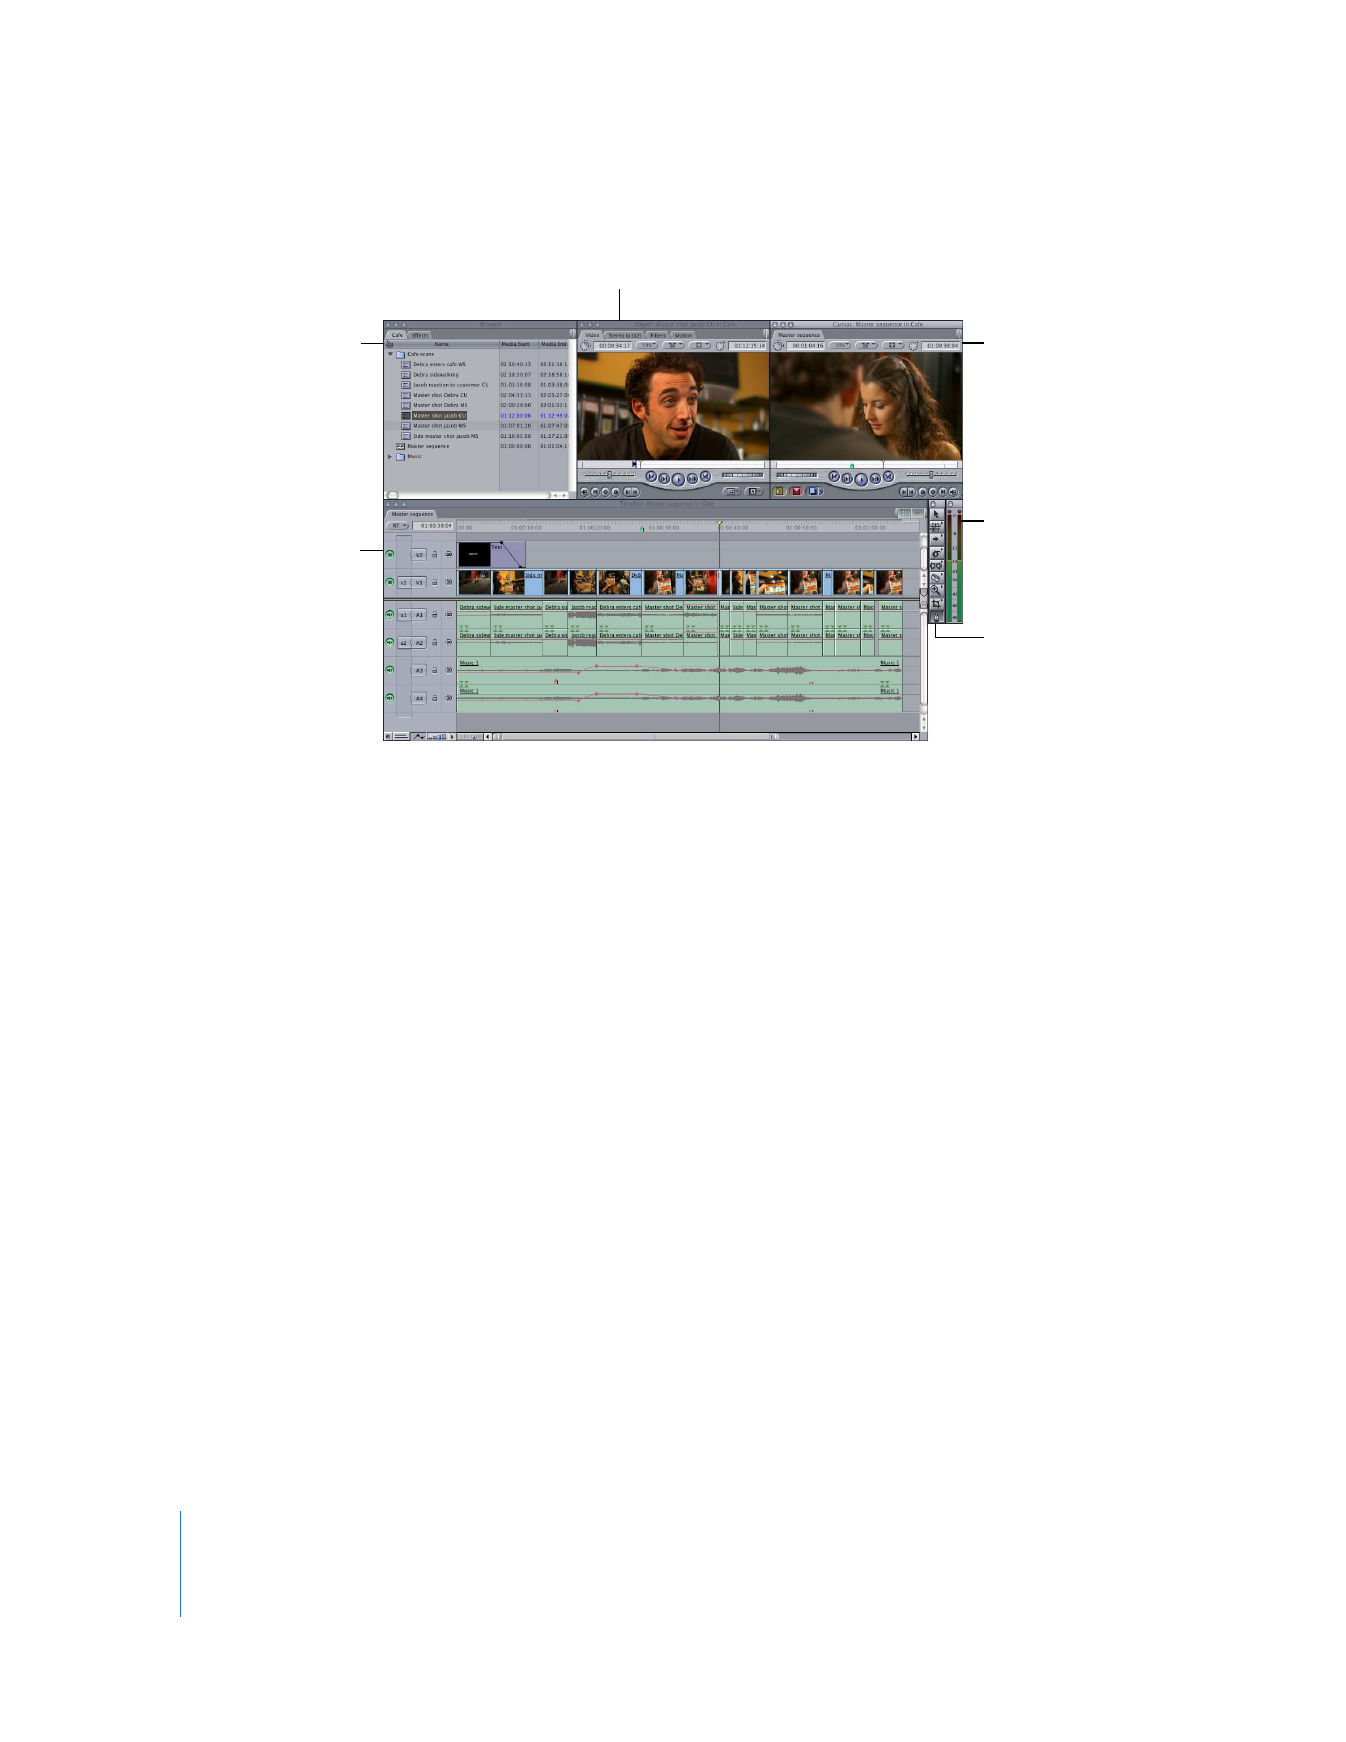
There are four main windows in Final Cut Pro that you use while you are making your
movie. You may want to open Final Cut Pro so you can view these windows and
familiarize yourself with them.
Note: If you’re opening Final Cut Pro for the first time, you’re prompted to choose an
Easy Setup (a collection of settings that determines how Final Cut Pro works with your
editing system) and a scratch disk (the hard disk where you’ll store your captured
media files). For more information about these settings, see “
Opening Final Cut Pro and
Choosing Your Initial Settings
” on page 163.
To open Final Cut Pro:
m
In the Finder, double-click the Final Cut Pro icon in the Applications folder.
You may also choose to add the Final Cut Pro icon to the Dock for easier access. For
more information, see Mac Help.
You’ll see these windows when you open a sequence with clips already in it. These
windows are covered in more detail in the chapters that follow.

44
Part II
Learning About the Final Cut Pro Interface
Before working in a window in Final Cut Pro, you must make sure it’s the currently
selected (or “active”) window. Otherwise, your actions and commands might trigger
actions in another window.
Important:
Menu commands and keyboard shortcuts apply to the active window.
To determine the active window:
m
Look for the highlighted title bar.
To make a window active, do one of the following:
m
Click anywhere in the window.
m
Press one of the following keyboard shortcuts:
 Browser: Command-4
 Viewer: Command-1
 Timeline: Command-3
 Canvas: Command-2
 Audio meters: Option-4
Note: There is no keyboard shortcut to open the Tool palette.
m
Choose Window, then in the submenu, choose the window you want to display.
Audio meters: These
floating meters let you
monitor audio levels.
Viewer: Used to preview and prepare source
clips for editing, as well as adjust filter and
motion parameters to clips.
Browser: This is where
you organize the media
in your project.
Canvas: Allows you
to view your edited
sequence, as well as
perform a variety of
editing functions.
Works in parallel with
the Timeline.
Timeline: This displays
sequences.
Tool palette: This
contains tools for
selecting, navigating,
performing edits, and
manipulating items.

Chapter 4
Overview of the Final Cut Pro Interface
45
II