About Timeline Display Options in the Sequence Settings Window
You can access almost all of the Timeline display options in the Timeline Options tab of
the Sequence Settings window. Exceptions and alternate ways of accessing the same
options are noted when possible.
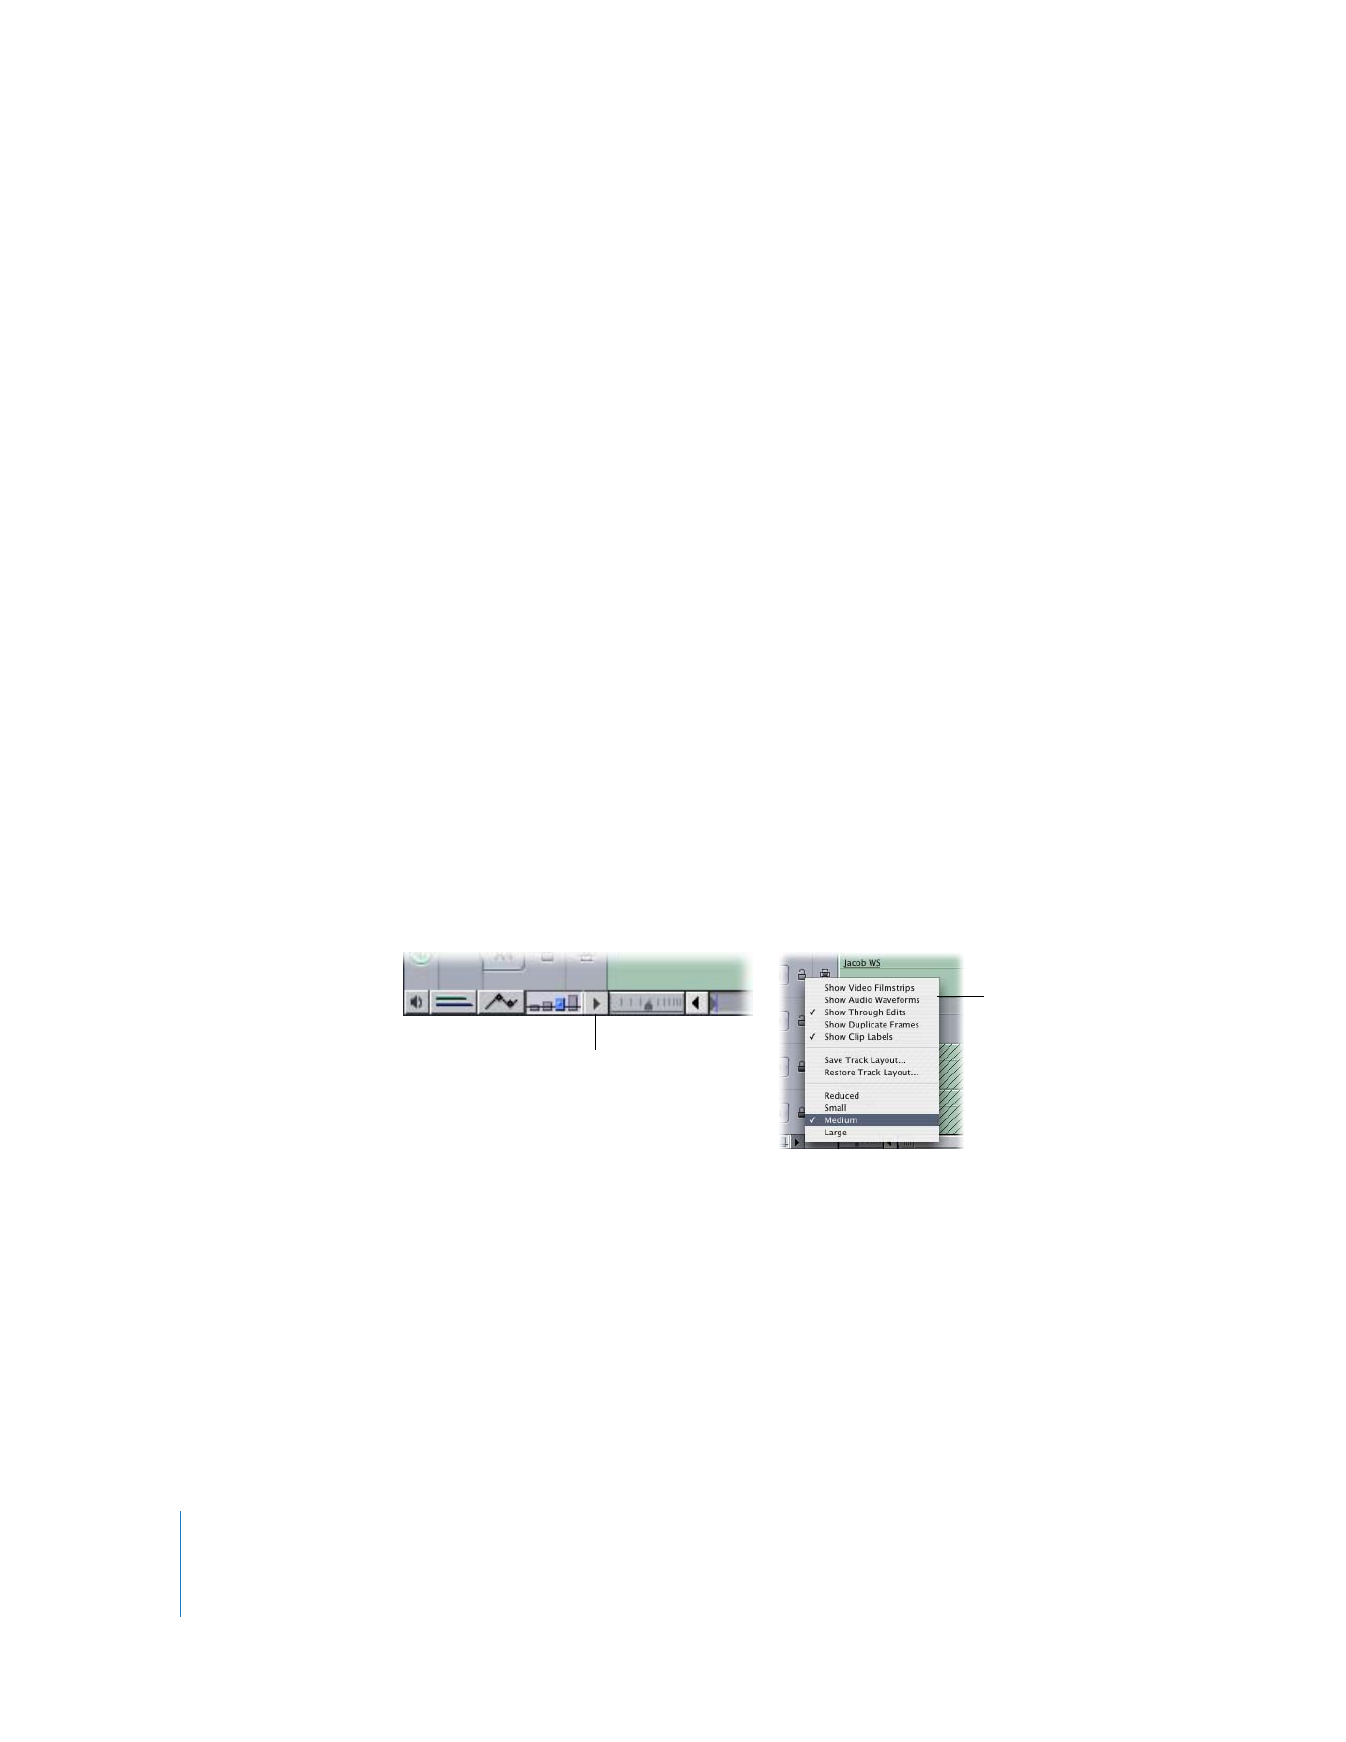
Click here to view
the Track Layout
pop-up menu.
Track Layout
pop-up menu
Chapter 9
Timeline Basics
125
II
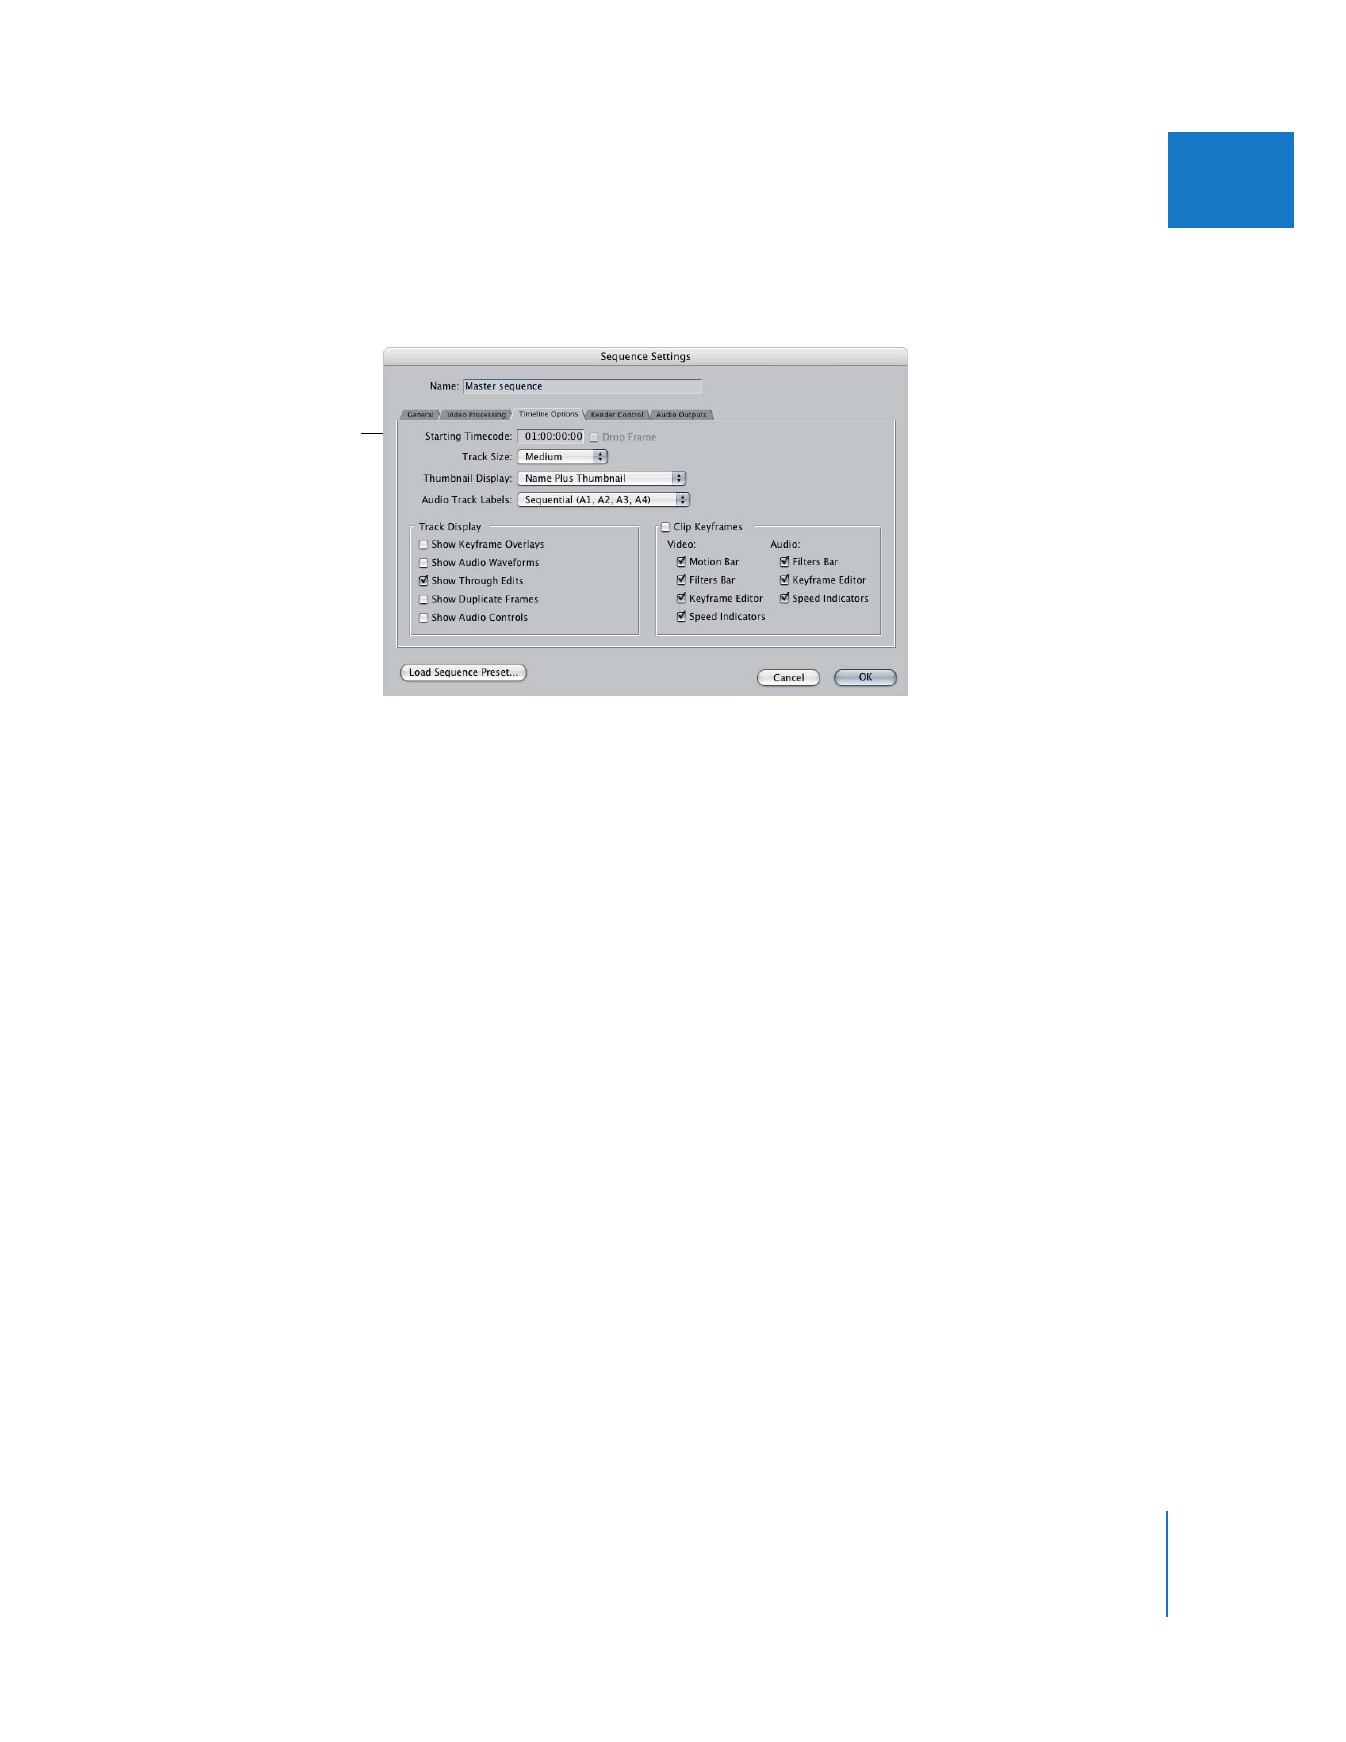
To change Timeline display options in the Sequence Settings window:
m
Select a sequence in the Browser or Timeline, choose Sequence > Sequence Settings,
then click the Timeline Options tab.
General Options
These are basic display options you can change at any time. Several options, such
as the default number of video and audio tracks, are only available in the Timeline
Options tab of the User Preferences window, because these options only affect default
settings for new sequences.
 Starting Timecode: This sets the starting timecode number in the Timeline for
new sequences.
 Drop Frame: Select this option to display drop frame timecode in the Timeline (this
only applies to NTSC format video that has a frame rate of 30 fps). For more
information on drop frame and non-drop frame timecode, see Volume II,
Chapter 25, “Working With Timecode.”
 Track Size: Choose a track size to set the vertical height of tracks in the Timeline. (You
can also use the Track Height controls in the Timeline.)
 Default Number of Video and Audio Tracks: You can only specify the default number of
video and audio tracks you want new sequences to have. This option is only available
in the Timeline Options tab of the User Preferences window.
 Thumbnail Display:
 Name: Displays only the name of the clip without thumbnail images.
 Name Plus Thumbnail: Displays the video frame at the In point of the clip and the
clip name.
 Filmstrip: Displays as many thumbnail images as possible for the current zoom
level of the Timeline.
Settings in the
Timeline Options tab

126
Part II
Learning About the Final Cut Pro Interface
 Audio Track Labels: Choose whether audio tracks are labeled as individual audio
tracks (A1, A2, A3, and so on) or as members of a pair (A1a and A1b, A2a and A2b,
and so on). For more information, see Volume II, Chapter 17, “Audio Editing Basics.”
Track Display
 Show Keyframe Overlays: Select this option to display opacity overlays (thin black
lines) over your video tracks, and audio level overlays (thin red lines) over any clips in
the audio tracks of the Timeline. These lines indicate video transparency or audio
levels. For more information, see Volume III, Chapter 15, “Adjusting Parameters for
Keyframed Effects.”
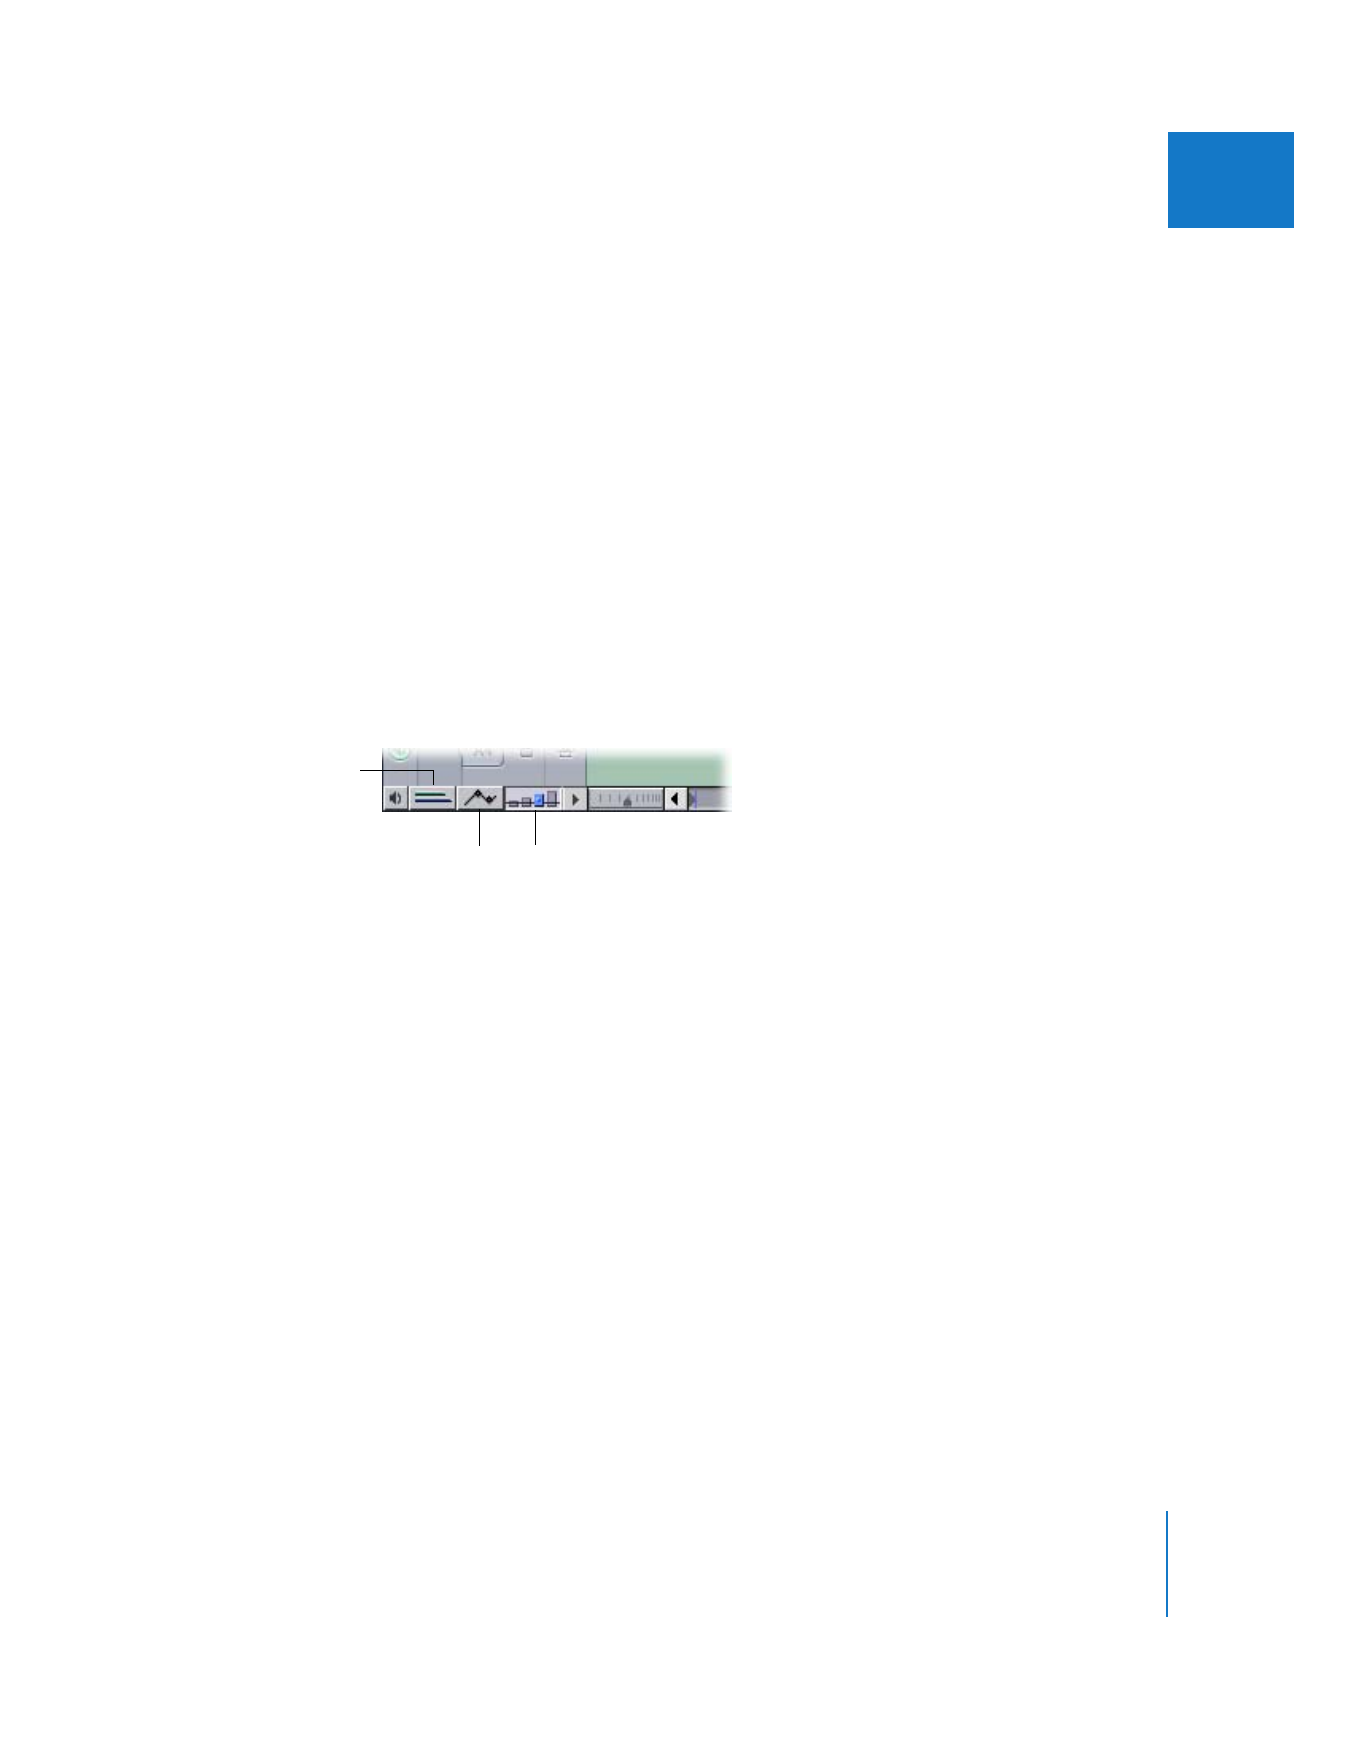
You can also use the Clip Overlays control in the Timeline to show or hide overlays.
 Show Audio Waveforms: Select this option to display audio waveforms superimposed
over audio clips in the Timeline. You can also toggle audio waveforms by pressing
Option-Command-W. This option is also available in the Track Layout pop-up menu
in the Timeline.
Audio waveform
Without audio
waveform

Chapter 9
Timeline Basics
127
II
 Show Through Edits: A through edit is an edit composed of two adjacent frames that
have the same reel number and subsequent timecode numbers. For example, if you
use the Razor Blade tool to cut a clip in half, that edit point is considered a through
edit. Select this option to display through edit indicators—two red triangles—where
they exist. This may help you discover unnecessary edit points in your sequence,
which you can then delete. This option is also available in the Track Layout pop-up
menu in the Timeline. For more information, see Volume II, Chapter 13, “Cutting Clips
and Adjusting Durations.”
 Show Duplicate Frames: Select this option to display frames that are used in your
sequence more than once. When duplicate frames are displayed and you select a
clip, you can see a list of all clips that contain the same frames as the selected clip.
For more information about working with duplicate frame indicators, see “
Options
for Displaying Duplicate Frames
” on page 130. You can also select this option from
the Track Layout pop-up menu in the Timeline.
 Show Audio Controls: Select this option to display the mute and solo buttons to the
left of each audio track in the Timeline. You can also toggle the Audio controls
button in the Timeline. For more information, see “
Audio Controls
” on page 120.
Through edit
indicator
128
Part II
Learning About the Final Cut Pro Interface
Clip Keyframes
You can click the Clip Keyframes control to display the keyframe graph area—
additional space below each video and audio track in which to view and edit keyframes
for effects that are applied to your clips.
This area can be divided into four optional regions showing keyframes and parameters
for motion effects, video filters, and audio filters applied to your clips. For more
information about customizing and using the keyframe graph area, see Volume III,
Chapter 14, “Changing Motion Parameters.” You can also see Volume III, Chapter 15,
“Adjusting Parameters for Keyframed Effects.”
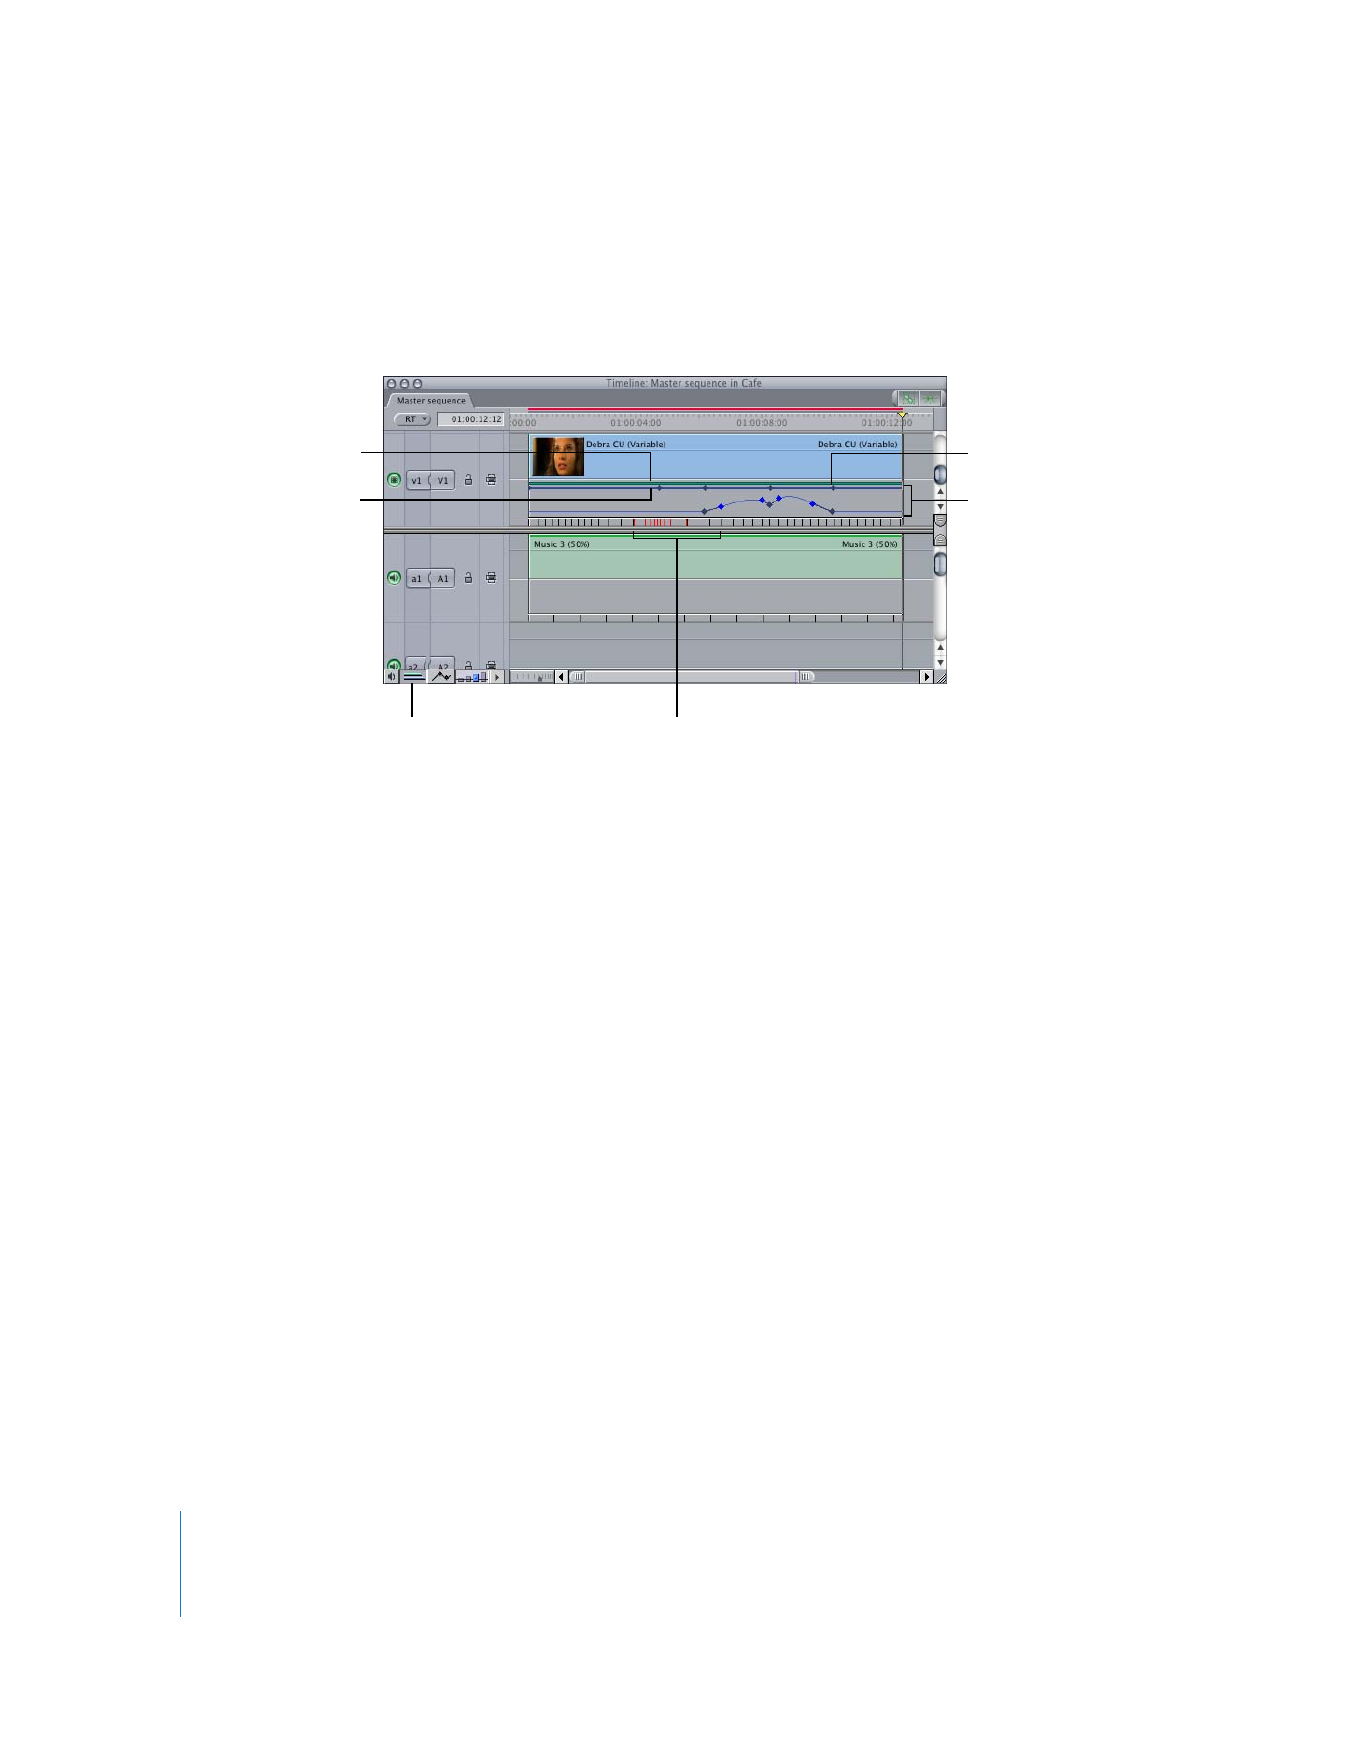
 Filters bar: If a clip has one or more video or audio filters applied, a green bar
appears in this space for the duration of that clip. If keyframes are added to a filter in
a given clip, those keyframes appear as diamonds on this bar, where they can be
edited or moved using the Selection tool.
 Motion bar: If a clip’s motion settings are modified, a blue bar appears in this space
for the duration of that clip. If keyframes are added to the motion settings for a given
clip, those keyframes appear as diamonds on the bar to which they apply, where
they can be edited or moved using the Selection tool. This bar is only available for
video tracks.
Motion bar and motion
keyframe indicated by a
blue diamond
A blue bar indicates a
clip’s motion settings
have been altered.
Keyframe editor
A green bar indicates a
filter has been applied to
the clip.
The spacing and color of the tic
marks indicate the speed and
direction of the clip’s playback.
Clip Keyframes control
Chapter 9
Timeline Basics
129
II
 Keyframe editor: The keyframe editor shows you keyframe graph lines for motion or
filter parameters. These graphs are identical to those found in the keyframe graph
area of the Motion and Filters tabs in the Viewer. You can edit keyframes in the
keyframe editor using the Selection and Pen tools. The keyframe editor can only
display the keyframe graph line of one effect parameter at a time.
 Speed indicators: Speed indicators show you the speed of clips in your sequence
using tic marks. The spacing and color of these tic marks indicate the speed and
playback direction of your clips. The speed indicators of clips in the Timeline update
in real time as you make variable speed adjustments to clips in your sequence,
showing you exactly how you’re altering a clip’s timing. There are no user-adjustable
controls in the speed indicator area. For more information about viewing speed
indicators while making speed changes to clips in a sequence, see Volume III,
Chapter 17, “Changing Clip Speed and Time Remapping.”