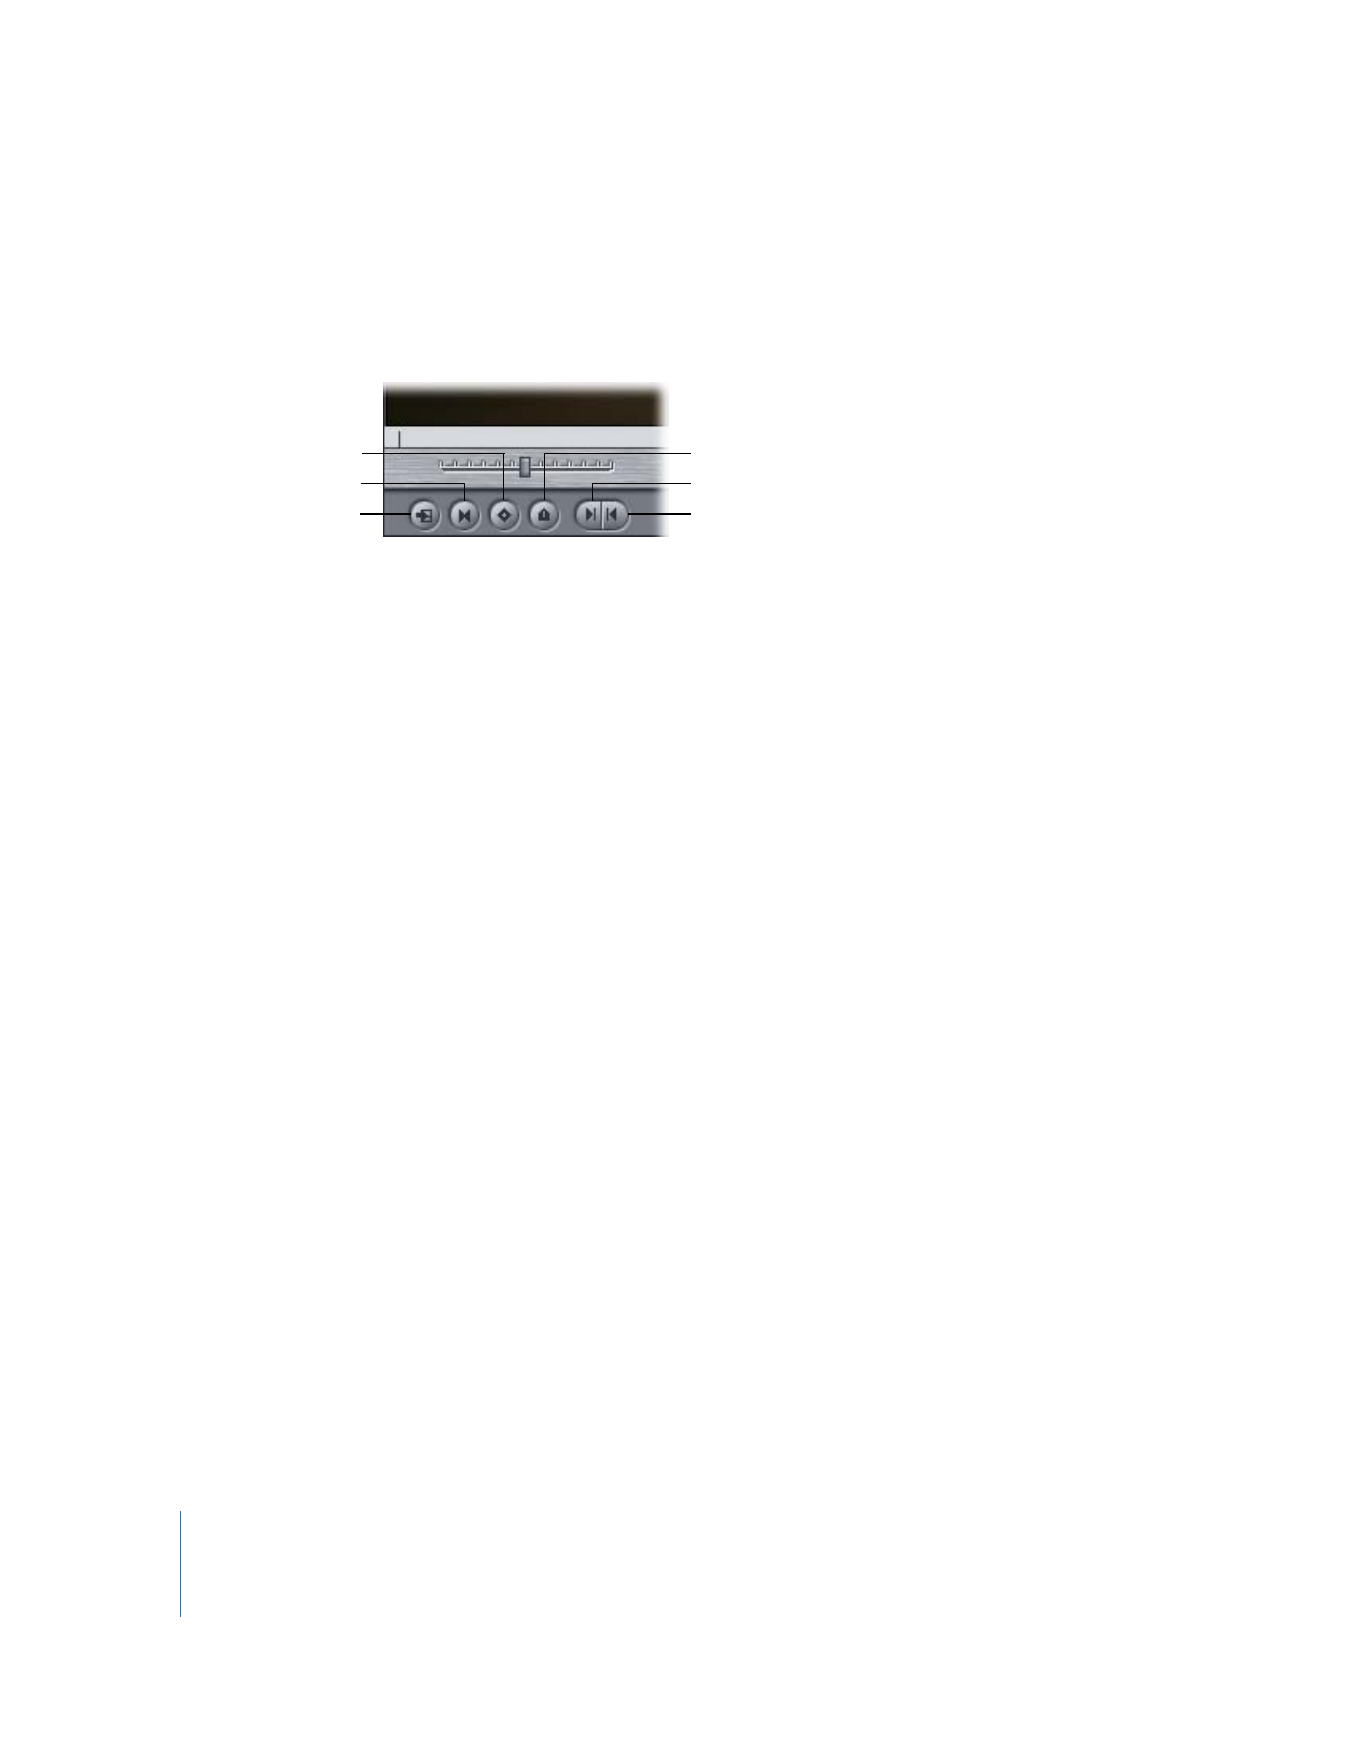
Marking Controls
Marking controls let you set In and Out points, add markers and keyframes, and
navigate to matching frames in master or affiliate clips (this is called performing a
match frame). There are keyboard shortcuts for each control.
 Show Match Frame (F): When you click this button, Final Cut Pro searches the current
sequence for the same frame shown in the Viewer. Specifically, Final Cut Pro looks for
any sequence clips that are affiliated with the clip in the Viewer. If the frame shown
in the Viewer is used in the current sequence, the Canvas/Timeline playhead is
positioned to that frame. The result is that you see the same frame in both the
Viewer and the Canvas, but the clip you see in the Canvas is actually an affiliate of
the clip in the Viewer. This is useful if you want to see where you have already used
a particular frame in your sequence.
Each time you click the Show Match Frame button, Final Cut Pro navigates to the next
occurrence of that frame in the sequence. To make sure you find the first occurrence of
the frame, you can move the Canvas/Timeline playhead to the start of the sequence.
For a more comprehensive discussion of the Match Frame controls, see Volume II,
Chapter 24, “Matching Frames and Playhead Synchronization.”
 Mark Clip (X): Click to set In and Out points at the boundaries of the clip.
 Add Motion Keyframe (Control-K): Click to add a keyframe to the current clip at the
position of the playhead for clip parameters such as Scale, Rotate, Crop, Distort, and
so on. By default, this button sets keyframes for all clip motion parameters at once.
To add keyframes for individual parameters, Control-click this button and choose a
parameter from the shortcut menu. For more information, see Volume III, Chapter 15,
“Adjusting Parameters for Keyframed Effects.”
 Add Marker (M): Click to add a marker at the current playhead position. While editing
you can use markers to make notes about important points in your sequence, such
as areas to change, potential edit points, or sync points. For more information, see
Volume II, Chapter 4, “Using Markers.”
Important:
If a clip is selected in the Timeline, and the playhead touches that clip, a
marker is added to the sequence clip, not the sequence.
 Mark In (I): Click to set the In point at the current position of the playhead.
 Mark Out (O): Click to set the Out point at the current position of the playhead.
Mark Clip
Mark Out
Show Match Frame
Add Motion Keyframe
Add Marker
Mark In
Chapter 6
Viewer Basics
83
II