Specifying Scratch Disks
A scratch disk is a hard disk, internal or external to your computer, where Final Cut Pro
stores captured digital video and audio, as well as rendered media files created during
editing. (Rendering is the process of creating temporary video and audio render files
for portions of your sequence that Final Cut Pro cannot play in real time.) By default,
Final Cut Pro uses the hard disk on which the application is installed.
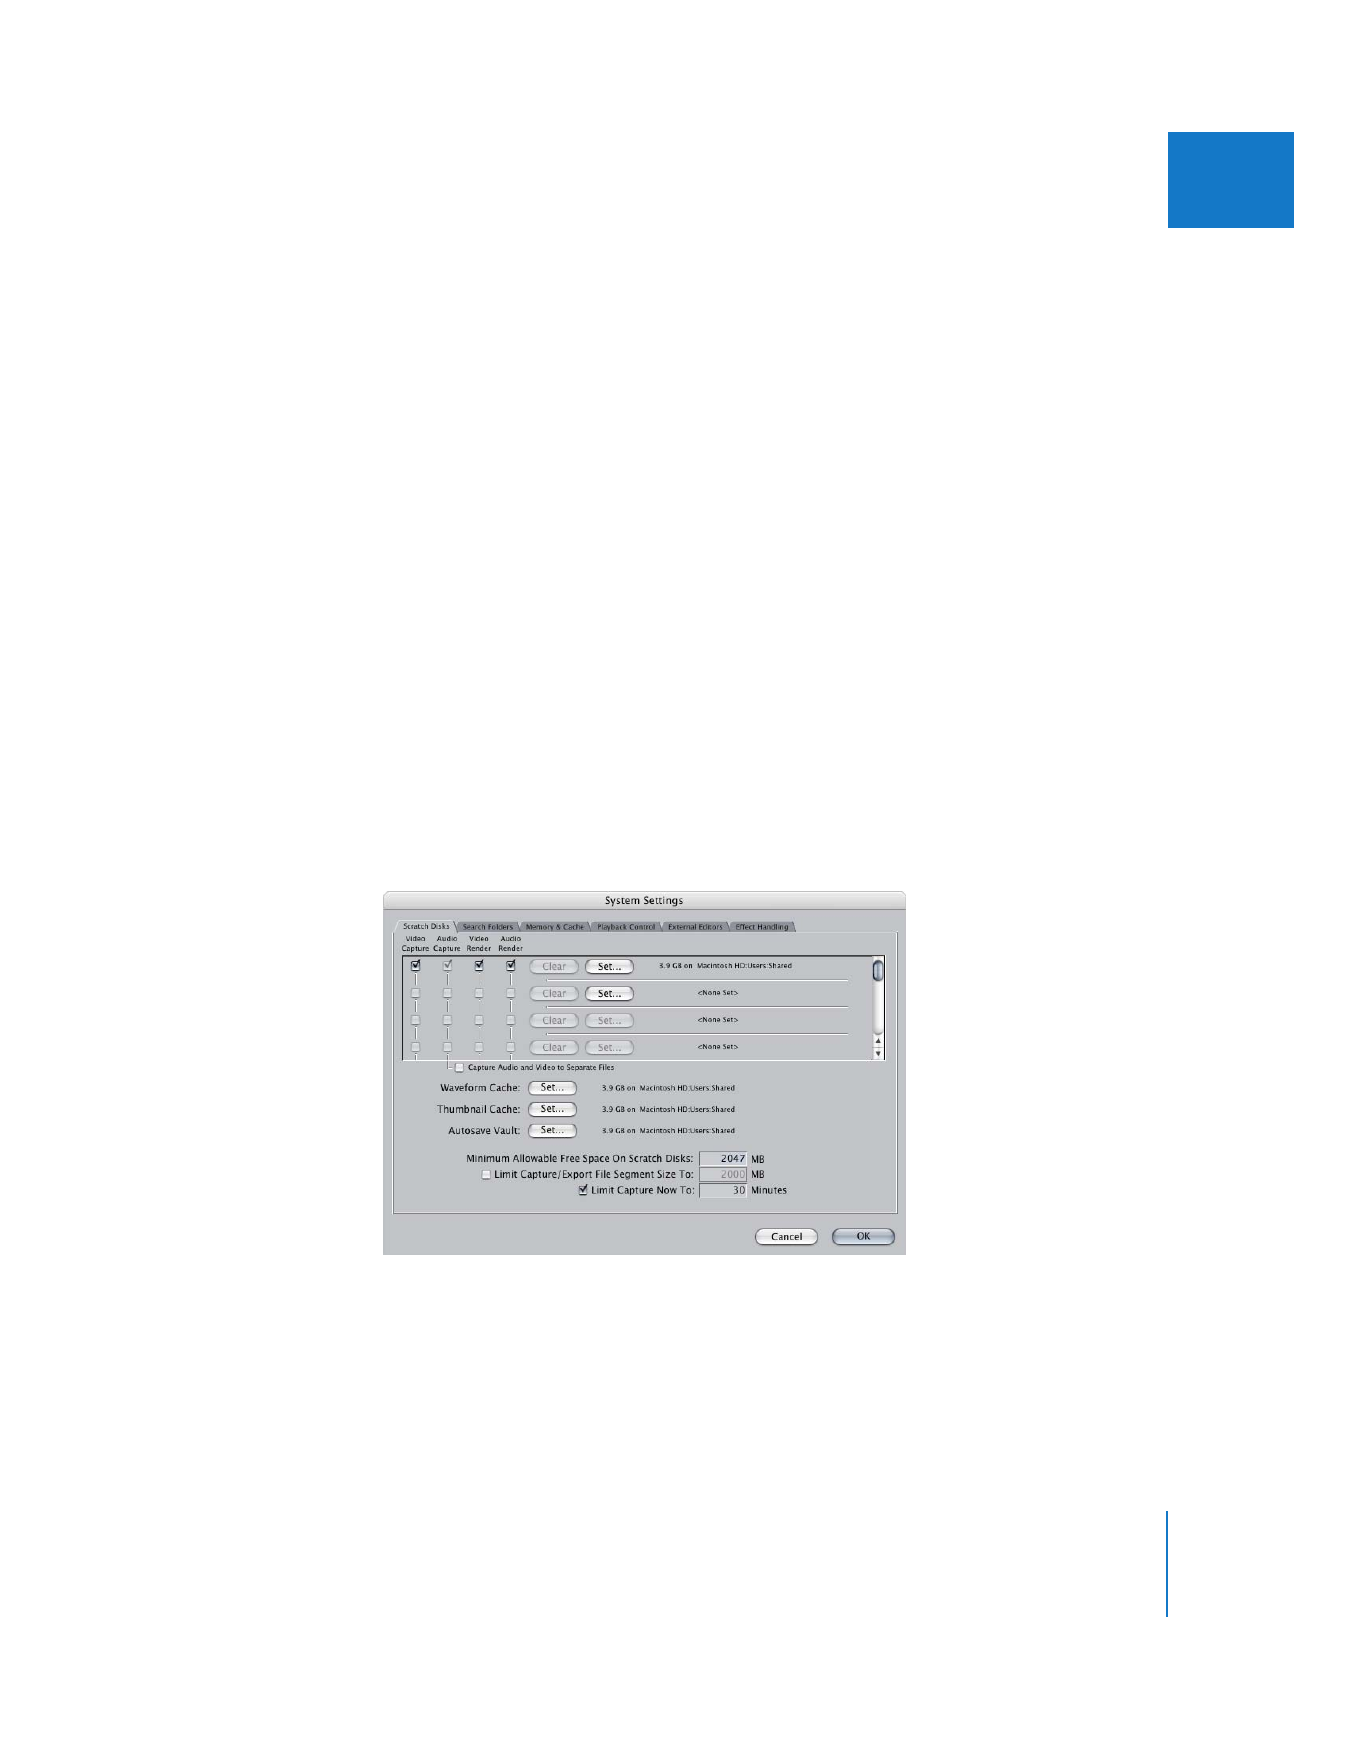
You use the Scratch Disks tab in the System Settings window to choose where you
want to save the video and audio files that you capture and the render and cache files
that Final Cut Pro creates. You can also specify other settings related to the size of
captured and exported files and the minimum available space allowed on scratch disks.
To specify one or more scratch disks and associated settings:
1
Choose Final Cut Pro > System Settings, then click the Scratch Disks tab.
If this is the first time you’ve opened Final Cut Pro, this window appears automatically
after you’ve chosen an Easy Setup.

166
Part III
Setting Up Your Editing System
2
To specify a disk or a folder on a hard disk as a scratch disk:
a
Click Set.
b
In the dialog that appears, locate and select the disk you want to use.
Only connected external disks or installed internal disks are listed. If your hard disk
doesn’t appear, make sure that it’s connected properly and correctly initialized and
mounted. For more information, see the documentation that came with your
computer, your hard disk, or your disk-formatting software.
c
Click Select (the button includes the name of the disk you selected).
The specified disk is listed next to the Set button, along with the amount of available
disk space.
3
To capture video and audio to separate files, select the Capture Audio and Video to
Separate Files checkbox.
Note: For capturing DV media, it’s usually best to leave this checkbox unselected. For
more information, see “
Capturing Video and Audio Separately
” on page 287.
4
Select the checkboxes corresponding to the type of files you want to store on each
scratch disk: Video Capture, Audio Capture, Video Render, and Audio Render.
5
To choose a folder where Final Cut Pro will automatically save copies of your project for
backup purposes:
a
Click Set next to Autosave Vault.
b
In the dialog that appears, locate and find the disk you want to use, then click Choose.
6
Specify additional settings for capturing and exporting files:
 Minimum Allowable Free Space On Scratch Disks: Enter a value to set the minimum
space you want to keep available on a scratch disk. The default value here is usually
sufficient. If you have limited scratch disk space, you may want to set this to the
amount of disk space you want available for render files. If you use most of your disk
space for captured clips, you may run out of space when rendering.
 Limit Capture/Export File Segment Size To: Select this option only if you’re capturing or
exporting clips that may be used on other systems with a file size limitation. Any files
that are larger than the limit entered here (which defaults to 2 GB) are written as
separate files, in which the end of one file contains a reference to the next (so the
first file appears to be a continuous file).
 Limit Capture Now To: This option limits the duration of media files captured using
the Capture Now command. For more information, see “
Limiting the Duration of the
Capture Now Process
” on page 281.
To remove a scratch disk:
1
Choose Final Cut Pro > System Settings, then click the Scratch Disks tab.
2
Click Clear next to the scratch disk you no longer want to use.

Chapter 11
Connecting DV Video Equipment
167
III