Synchronizing Equipment with a Blackburst Generator
With most professional editing systems, you capture video, audio, and timecode via
separate cables. It’s important that when you capture, the VTR and the video and audio
interfaces are synchronized via a common video timing signal. If digital audio samples
and video lines and frames are not precisely synchronized, they eventually drift apart
because they are captured at slightly different rates.
Using a common sync source is especially important when you are independently
capturing long segments of video and audio to synchronize together later. If your
audio deck and capture interface are not both receiving the same timing information,
the sync between the audio and video portions of clips might drift over time.
A blackburst generator provides a common timing signal (or clock) to lock together
the timing clocks of all devices in a system. This is sometimes referred to as external
sync or house sync because every device in an entire facility can be timed to this
common reference.
Professional VTRs, camcorders, audio devices, and interfaces often have the ability to
accept sync signals from an external device. These connectors are labeled “genlock”
(short for generator lock), “external sync”, “reference input”, or “reference video”. On some
equipment, the normal composite video input of a device can be used to lock to
external sync.
Important:
To synchronize your video or audio devices and interfaces, they must all
accept an external clock source (such as a blackburst generator).
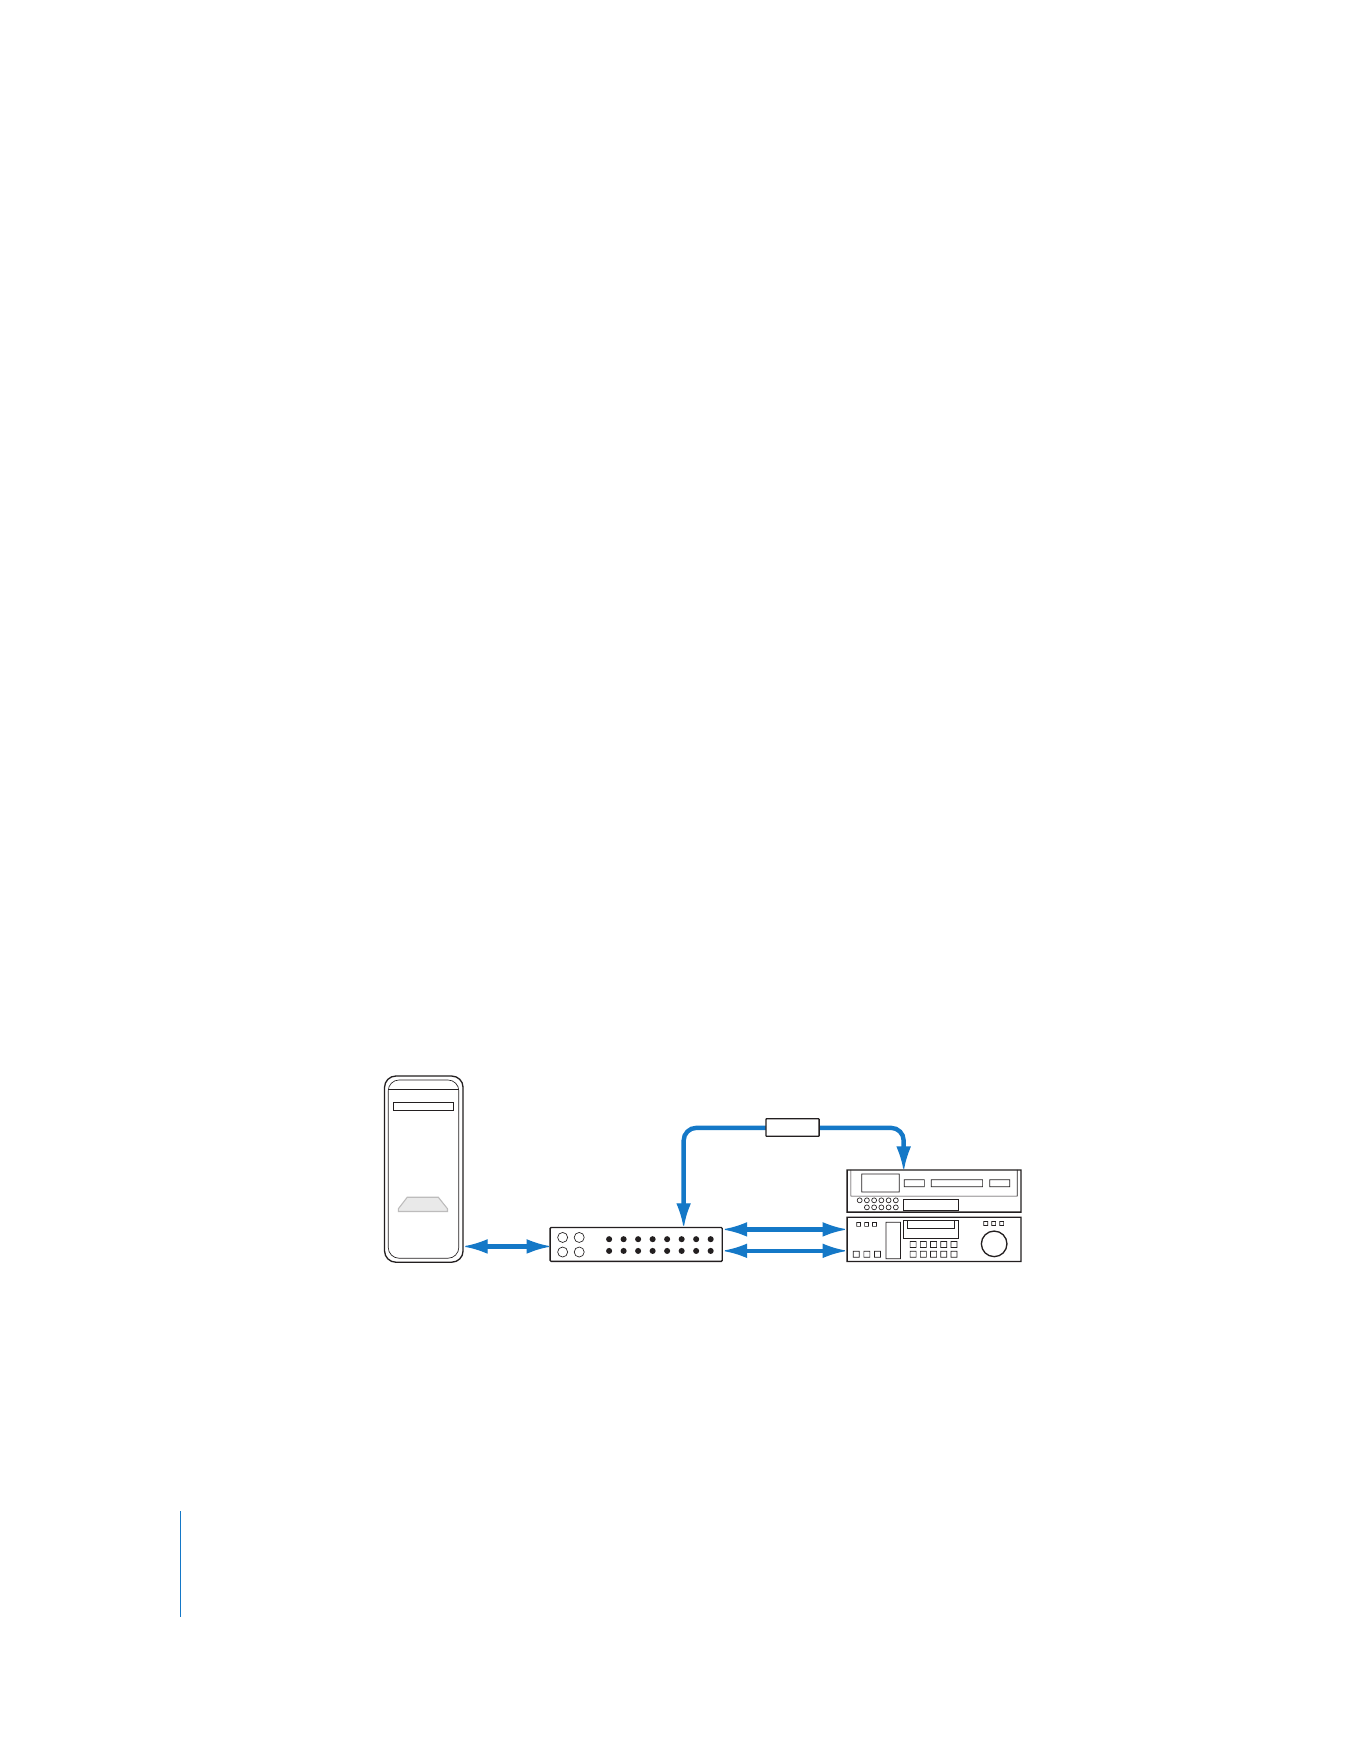
When you genlock a deck and a video or audio capture interface, one output of the
blackburst generator should be connected to the external sync input of the video or
audio deck, and another output should be connected to the external sync input of your
audio interface.
PCI card
Computer
Analog or digital VTR
Video
Reference video
Reference video
Breakout box
Audio
Blackburst
generator

Chapter 12
Connecting Professional Video and Audio Equipment
201
III
To connect your audio deck outputs to a third-party audio interface for
synchronized, genlocked audio capture:
1
Install a supported audio interface card in your computer, or connect a supported
audio interface.
For more information, see the documentation that came with the audio interface and
your computer.
2
If you are using a PCI card audio interface that came with a breakout box, connect the
breakout box to the PCI card using the included cable.
3
Connect the audio outputs of your audio device to the audio inputs of your audio
interface.
4
Connect the remote device control cable.
For details, see the next section.
5
To genlock your audio deck to your audio or video interface:
a
Connect one of the blackburst generator’s outputs (there should be several) to the
genlock or external sync input on your audio deck.
b
Connect another of the blackburst generator’s outputs to the genlock or external
sync connector on your video or audio capture interface (depending on which one
you are using to capture audio).
6
Plug in and turn on your blackburst generator.
7
If you are using a blackburst generator, choose Final Cut Pro > User Preferences, and in
the General tab of the User Preferences window, make sure that “Sync audio capture to
video source if present” is selected.
8
If you’re using Final Cut Pro to control your audio deck, make sure that the device
control switch on the equipment is set to Remote.
For more information, see Volume IV, Chapter 23, “Choosing Settings and Preferences.”
9
Once your deck and video capture interface are genlocked together, you still need to
calibrate the timecode capture offset (found in the Device Control Presets tab in the
Audio/Video Settings window) prior to capture.
For more information about calibrating timecode for capture, see Volume IV,
Chapter 26, “Device Control Settings and Presets.”

202
Part III
Setting Up Your Editing System