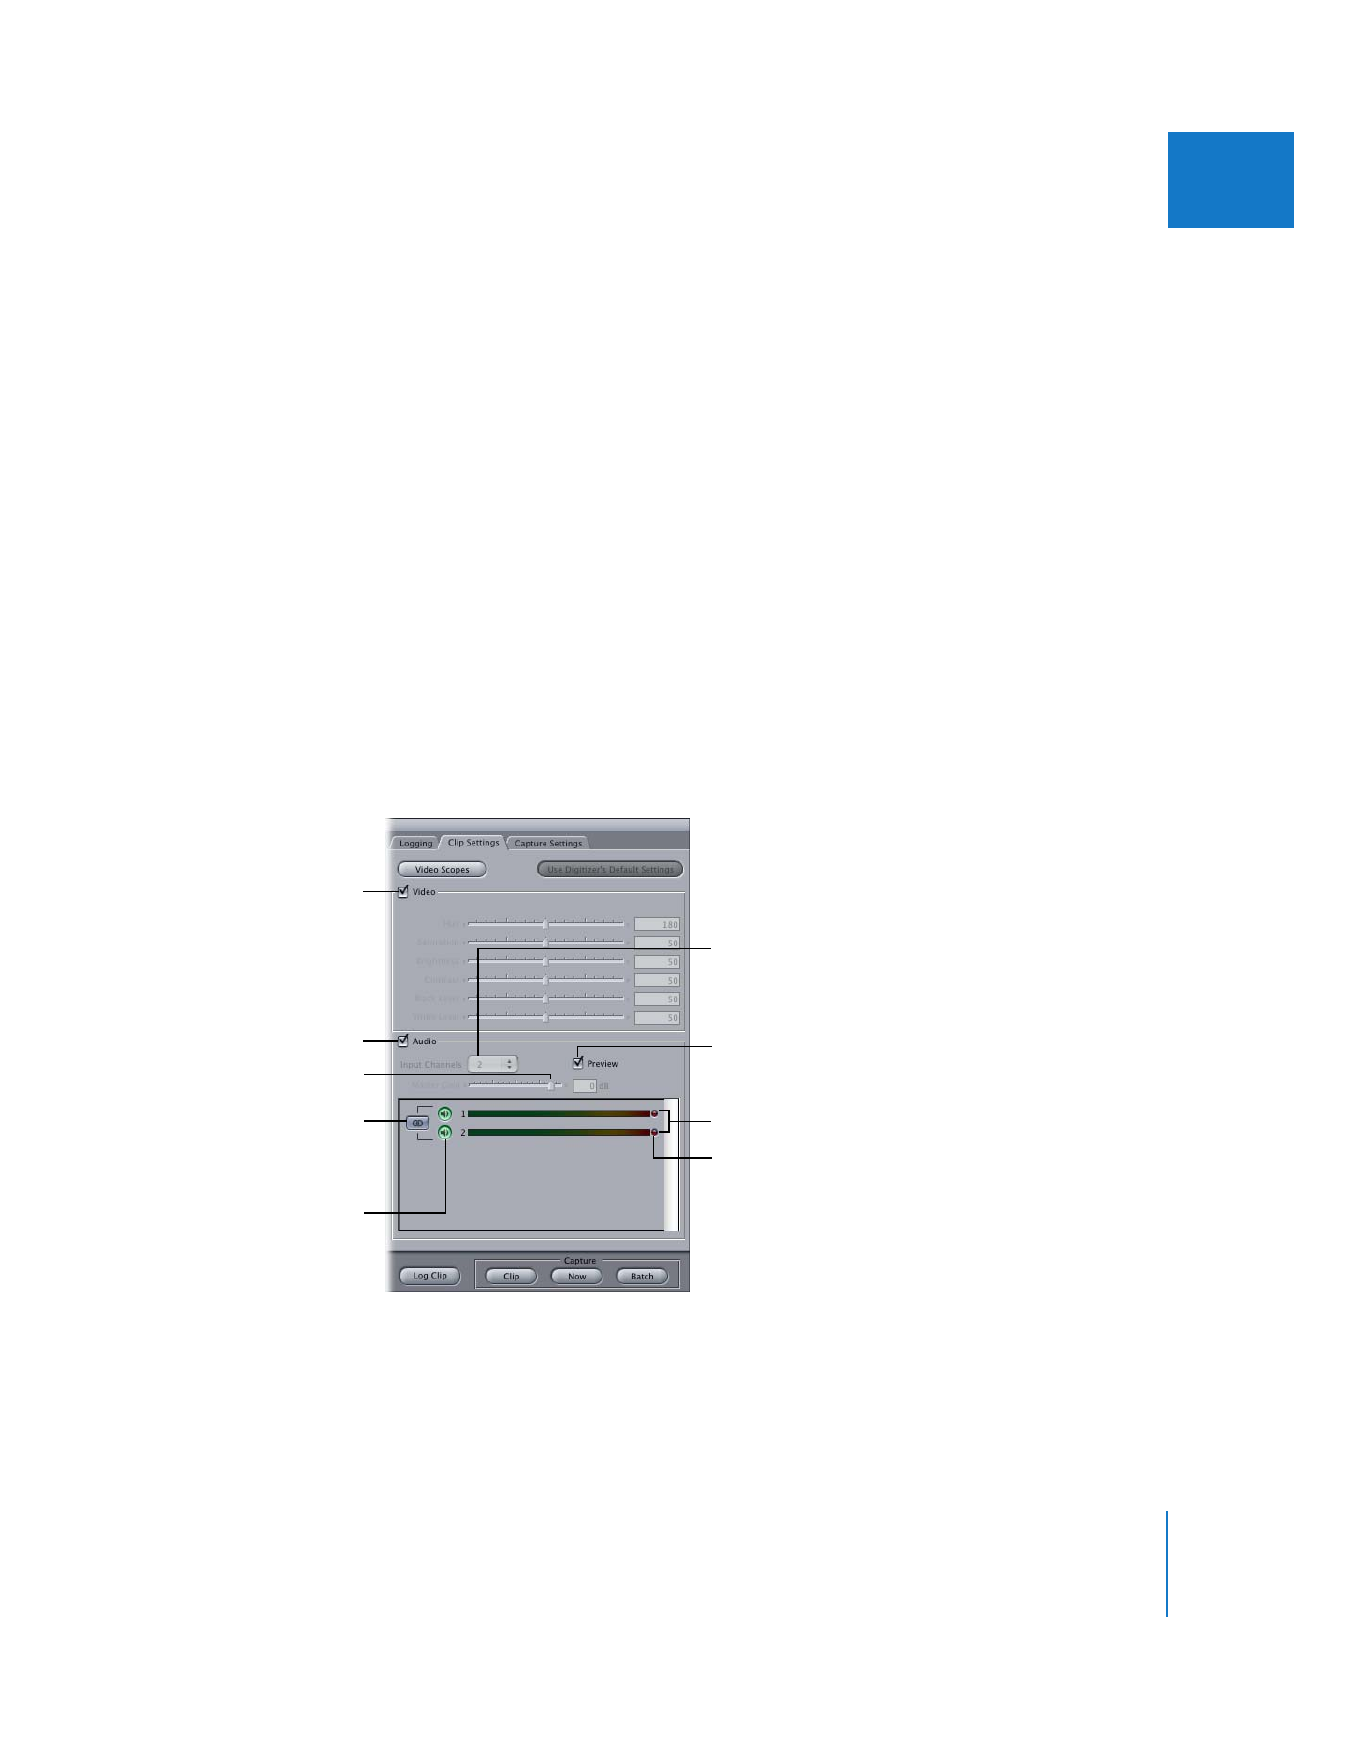
Multichannel Audio Channel Selection
The audio area of the Clip Settings tab allows you to select which audio channels you
want to capture, and whether each channel is grouped in a stereo pair or treated as an
independent mono channel. Each audio input control corresponds to an input on the
audio device or interface determined by your current capture preset. If you are using a
third-party audio interface, it is important that you know which output channels of
your deck are connected to the input channels of your interface.
Individual audio channel
meters
Select this option to
monitor incoming audio
during logging and
capturing.
Select this option to
enable video capture.
Select this option to
enable audio capture.
Stereo/Mono control
Capture Audio Channel
control
If no audio interface is
connected, you can
choose how many audio
inputs you want to
capture from this
pop-up menu.
Clipping indicator
Master Gain slider

298
Part IV
Logging, Capturing, and Importing
 Audio capture checkbox: Select this option to enable audio capture for the current clip.
 Input Channels: When an audio interface is connected to your computer and selected
in your current capture preset, Final Cut Pro automatically detects the number of input
audio channels available. In this case, the pop-up menu is grayed out.
If no audio device is connected, you can choose how many audio inputs you
eventually want to capture from (once an audio interface is connected). This is
helpful when you are logging tapes without an audio device connected. Don’t select
more audio inputs than you will have available when you capture.
Note: If your audio interface is disconnected, and you log clips with more audio
input channels than your audio interface has, Final Cut Pro restricts the number of
audio channels that are captured to the number of available input channels on the
interface. For example, if you log clips with eight audio input channels, and then
batch capture those clips using an audio interface that only supports four input
channels, only four channels are captured.
 Preview: Select this option to listen to the incoming signal on the audio output
selected in the Sound pane of System Preferences. Each audio channel you enable
for capture is routed to a corresponding output on your audio interface, while
disabled channels are not heard. If your audio interface has less audio outputs than
the number of channels you are capturing, the audio is downmixed to two channels
(mono channels are panned to the center and stereo pairs are previewed in stereo).
This does not affect your captured media files; only the preview of audio during
logging and capturing is affected.
 Master Gain: This slider allows you to adjust the gain on all audio channels
simultaneously. You can also enter a gain or attenuation value in decibels in the
corresponding field.
Note: Not all devices support a master gain control from Final Cut Pro.
 Individual channel meter: Each audio channel meter shows the current level of the
audio entering your audio interface.
Note: If the Preview option is enabled, and an audio channel is disabled for capture,
then the audio meter does not display levels.
 Clipping indicator: Each audio channel meter has a clipping indicator that lights up
when audio levels above 0 dBFS are encountered. This indicator stays lit until you
stop and start playback again.
 Stereo/Mono control: Enabling this control tells Final Cut Pro to capture the two
corresponding audio channels as a stereo pair. When this control is disabled, you can
select one or both audio channels for capture. In this case, each channel is captured
and handled as a discrete mono channel.
 Capture Audio Channel control: Enabling this control tells Final Cut Pro to capture the
corresponding audio channel.
Chapter 18
Capturing Audio
299
IV
To choose which audio channels to capture:
1
Make sure your audio interface is connected and selected in your current capture preset.
2
Choose File > Log and Capture (or press Command-8).
3
Click the Clip Settings tab.
4
Check that the number of input audio channels in the Input Channels pop-up menu
matches the number of channels available on your audio interface.
Note: The audio interface used for capturing is determined by the currently selected
capture preset. For more information about capture presets, see Volume IV, Chapter 25,
“Capture Settings and Presets.”
5
Select which channels from your audio interface you want to capture.
Important:
When you select channels in the Clip Settings tab, you are selecting input
channels on the audio interface, not on the video or audio deck itself. For easy and
consistent audio capturing, you should connect the audio outputs on your deck to the
input channels with the same numbers. For example, if you are capturing from a Digital
Betacam deck, you should connect output channels 1–4 of the deck to input channels
1–4 of your audio interface.
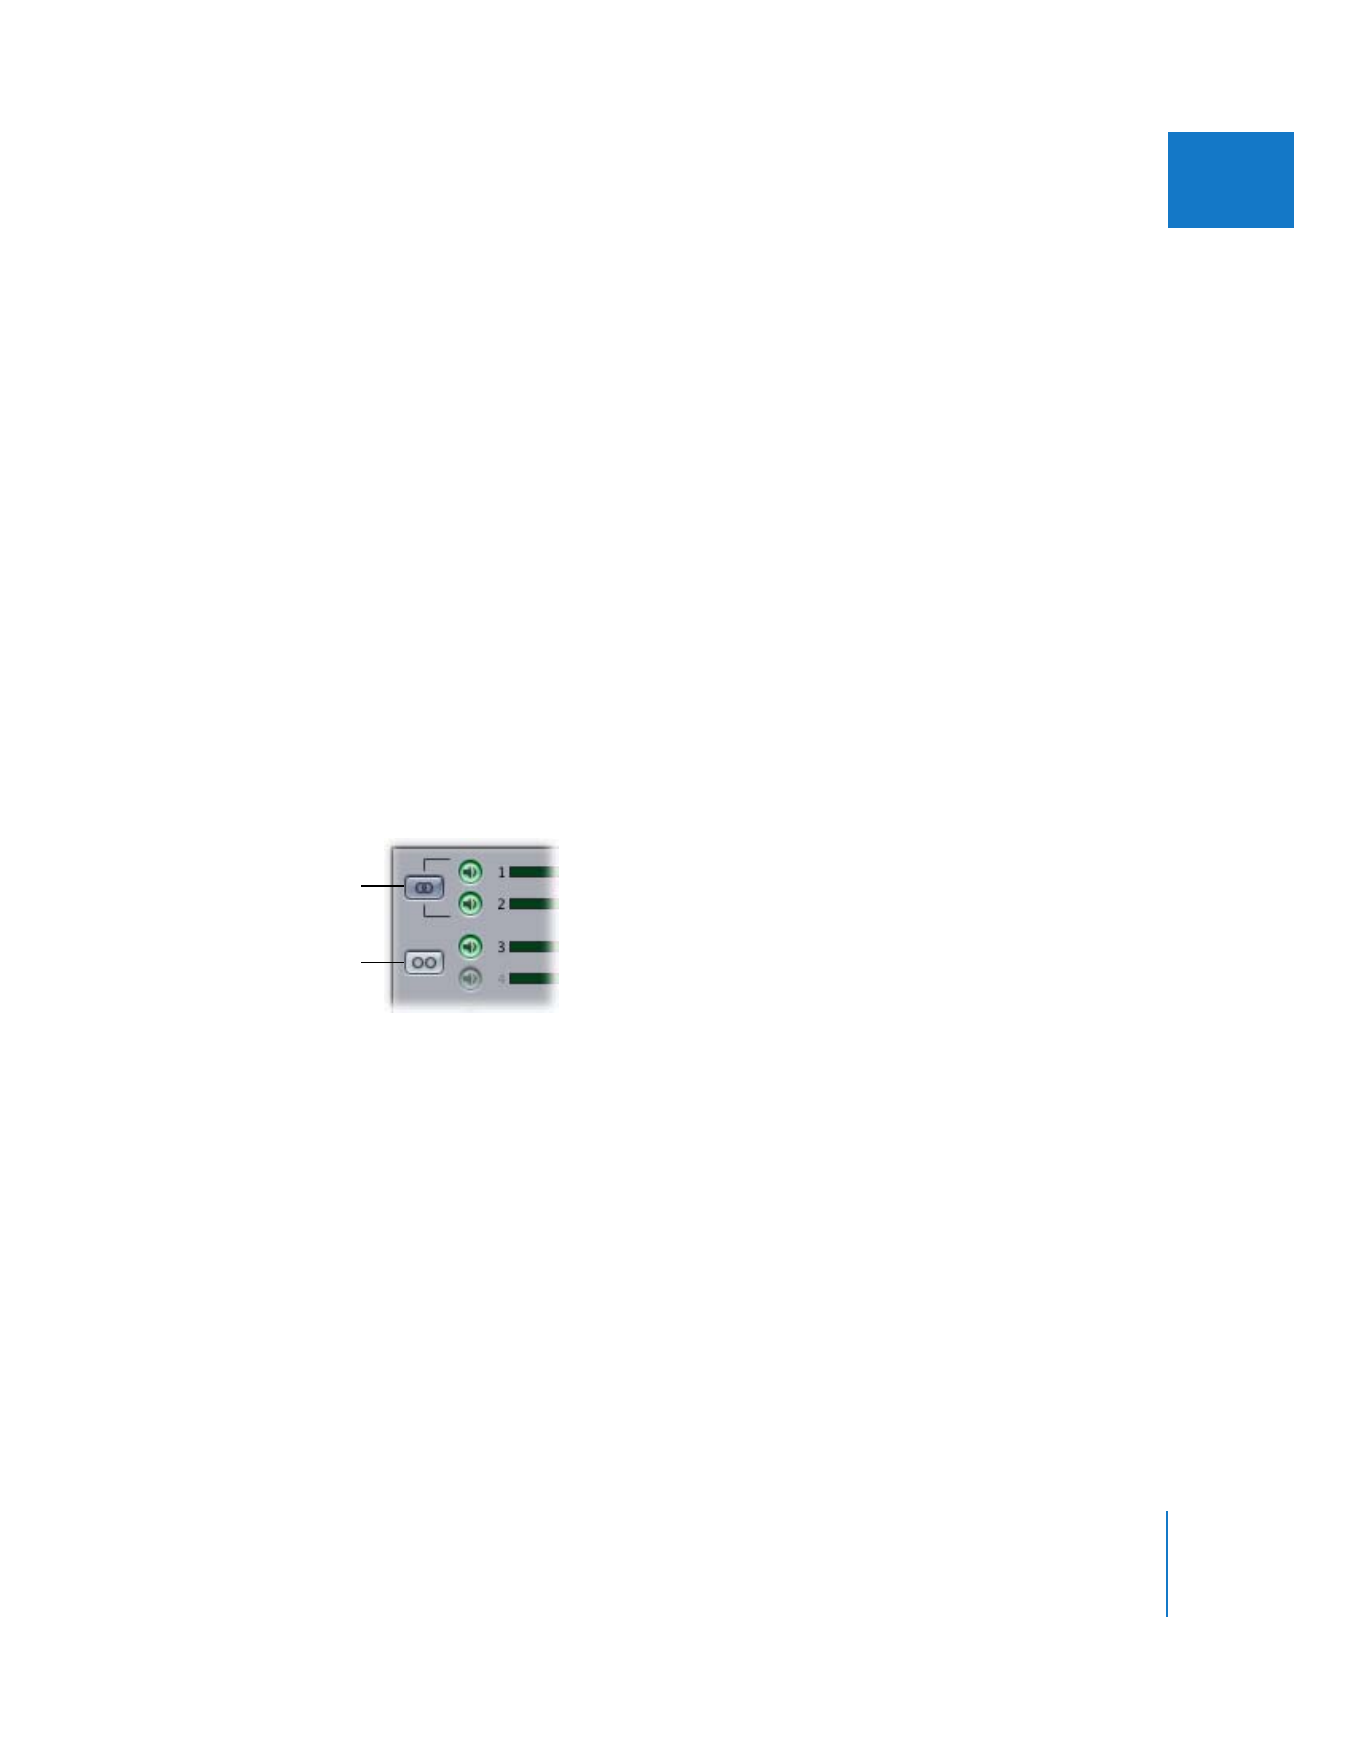
6
Click the Stereo/Mono control next to any pair of audio channels that you want to
capture as a stereo pair, so it’s darkened.
Stereo/Mono control is
enabled.
Stereo/Mono control is
disabled. Audio inputs
can be selected
independently.

300
Part IV
Logging, Capturing, and Importing
How Multichannel Audio Files Are Stored on Disk
Final Cut Pro stores multichannel audio media as QuickTime media files. Each audio
channel captured is stored in its own track within a single QuickTime media file:
 Mono grouping: Each mono channel is captured to its own track in the QuickTime
media file.
 Stereo grouping: Each stereo channel is captured to a single interleaved track in the
QuickTime media file. A stereo interleaved audio track contains both left and right
audio samples.
For example, suppose you are capturing from an 8-channel audio device. The way the
audio is stored in QuickTime tracks depends on which channels you group as mono or
stereo. Here is just one example of track layout within a multichannel QuickTime
media file: