Learning About the Batch Capture Dialog
The Batch Capture dialog provides settings and options when you are batch capturing
multiple clips at one time.
To open the Batch Capture dialog:
1
Select one or more clips in the Browser.
2
Do one of the following:
 If the Log and Capture window is open, click the Capture Batch button in the
lower-right corner.
 Choose File > Batch Capture (or press Control-C).
 Control-click any of the selected items in the Browser, then choose Batch Capture
from the shortcut menu.
Settings and Options for Batch Capture
The following section describes the settings in the Batch Capture dialog.
Select the desired options.
Select your capture settings.
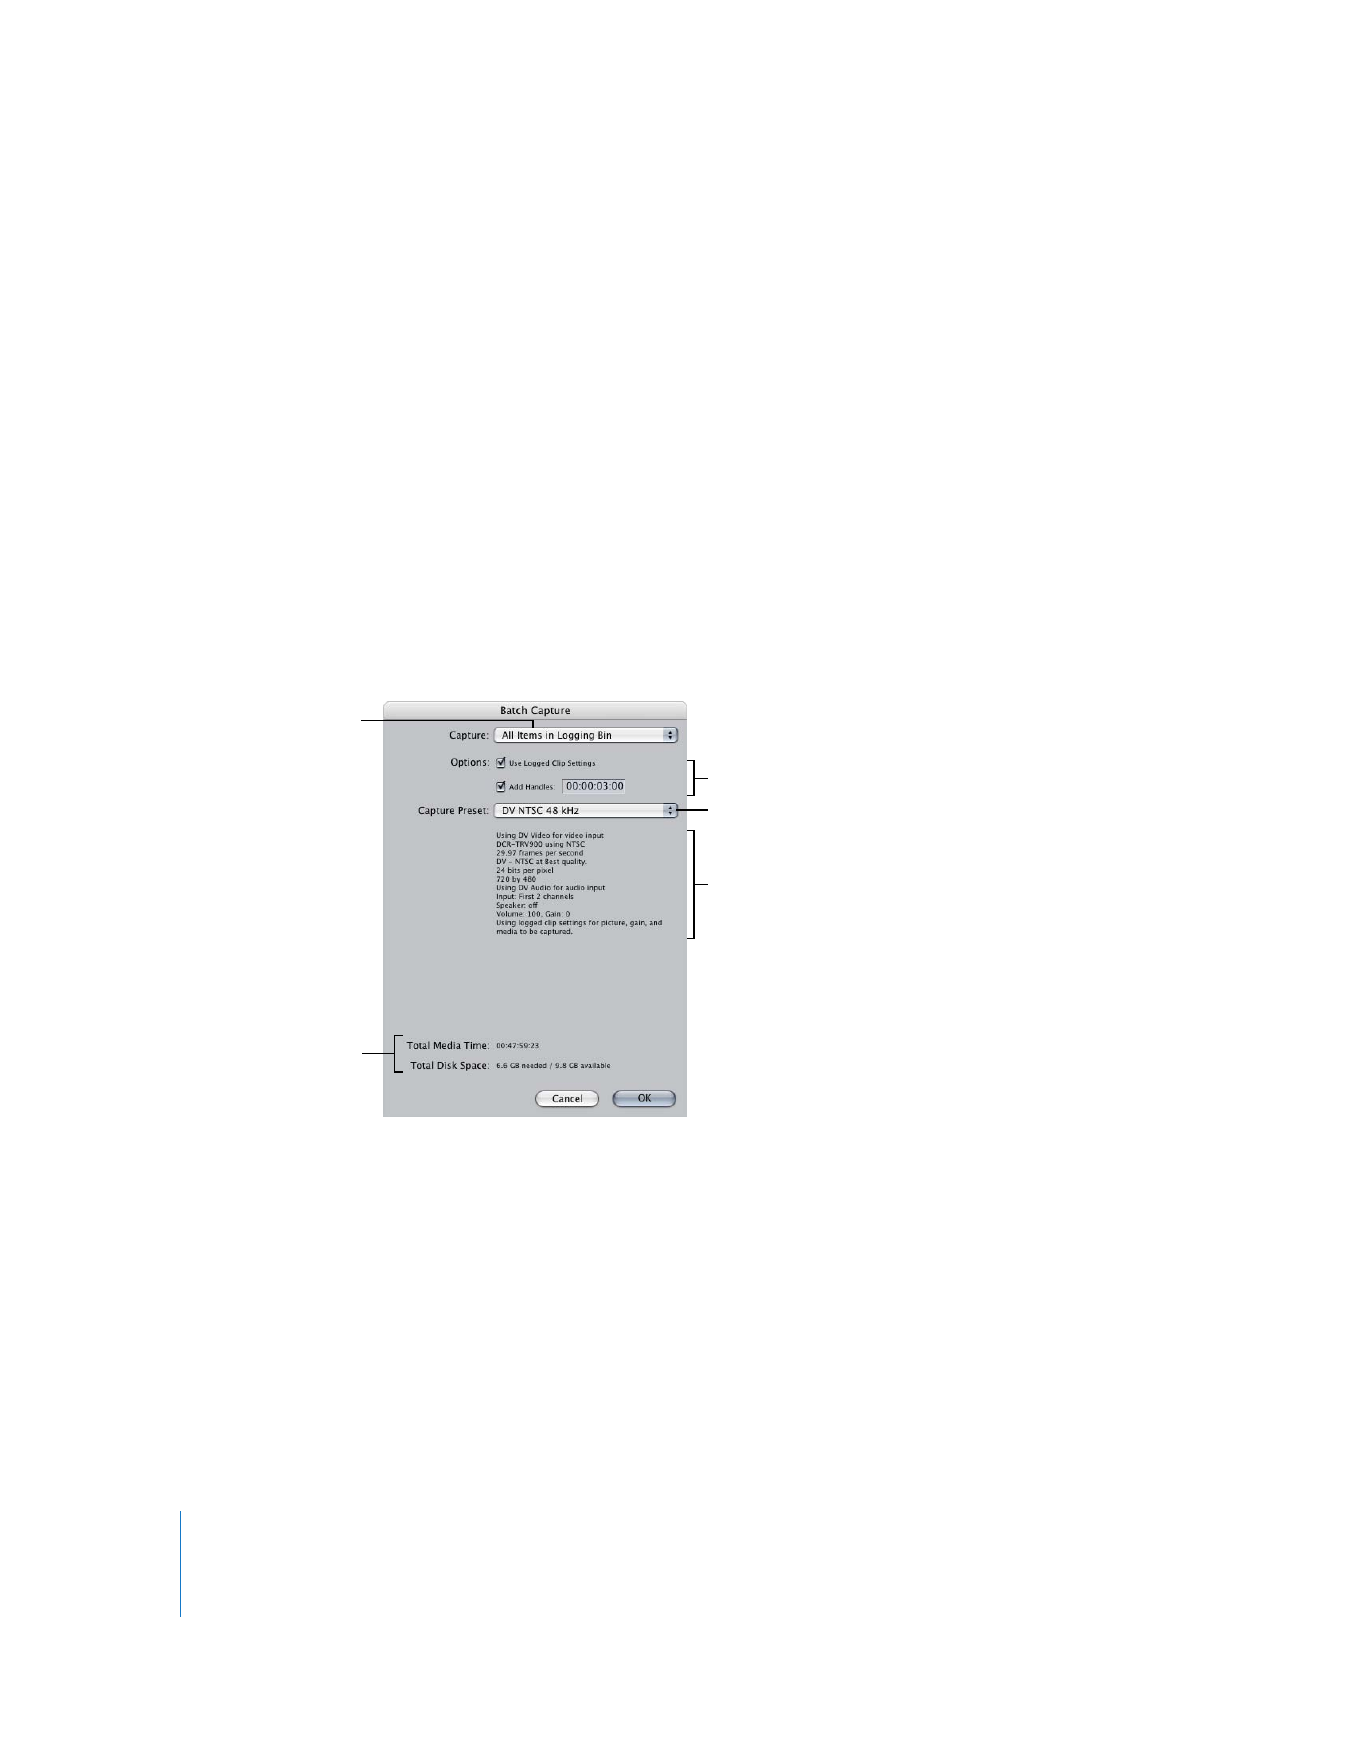
Choose the kind of clips
you want to capture from
this pop-up menu.
These calculations are
based on the capture
settings you specify.
Summary of capture settings

Chapter 17
Capturing Your Footage to Disk
275
IV
 Capture pop-up menu: Lets you capture offline clips, online clips, or both. The items
that appear in this pop-up menu differ depending on whether you open the Batch
Capture dialog by clicking the Capture Batch button in the Log and Capture window
or by using the shortcut menu from within the Browser.
 When you click the Capture Batch button in the Log and Capture window, you are
limited to capturing clips inside the current logging bin.
 When you choose Batch Capture from the shortcut menu within the Browser, you can
capture any items that are selected in the Browser; you are not restricted to
capturing only from the current logging bin.
 All Items in Logging Bin/All Selected Items: Captures all clips in the current logging
bin (or all selected items in the Browser), whether or not they’ve already been
captured. If there are only offline clips, this is the only option available. If you’re
recapturing online clips to the same folder on the same scratch disk that the clips’
current media files are stored in, the clips’ media files will be overwritten with new
media files. If you’re recapturing online clips and the currently selected scratch disk
folder is different from the one the clips’ original media files are in, the original
media files are preserved, and new media files are written to disk. After capture,
the clips reference the new media files.
 Selected Items in Logging Bin: If you selected specific clips in your logging bin, you
can choose to capture only these. This is a good way to capture or recapture clips
from a specific reel or a limited number of clips that you isolate using the Find
command or by sorting a specific Browser column. This option is only available
when you initiate batch capturing from the Log and Capture window and you
have selected items within the current logging bin in the Browser.
 Offline Items in Logging Bin/Offline Items Only: Captures only the offline clips in the
current logging bin (or the current selection in the Browser). If there are no offline
clips available, this option doesn’t appear.
 Aborted Clips: If you stopped an earlier batch capture, you can choose to capture
just the clips that weren’t captured.
 Use Logged Clip Settings: Select this checkbox to capture all your clips using the
settings you specified for each individual clip during the logging process. If this
checkbox is unselected, all your clips will be captured using the current settings in
the Clip Settings tab of the Log and Capture window and the capture preset
currently chosen in the Capture Settings tab. This includes video and audio track
selections, analog video level settings (only available with some video interfaces),
and capture preset settings such as image dimensions, frame rate, and so on. For
more information, see “
Changing Capture Settings
” on page 266.

276
Part IV
Logging, Capturing, and Importing
 Add Handles: Select this checkbox to capture additional frames beyond the head (In
point) and tail (Out point) of each clip captured, then enter a duration in the handle
timecode field. Handles are useful if you’ve logged your clips starting at precisely the
first and last frames that you think you want to use, but you want to capture a little
bit more media just in case you need additional frames for performing dissolves and
other transitions.
 Capture Preset pop-up menu: If the Use Logged Clip Settings checkbox is unselected,
you must choose a capture preset from the Capture Preset pop-up menu. This
capture preset is used for all media files you batch capture. A summary of the
settings you specify appears below this pop-up menu.
 Total Media Time: Lists the total time of the selected media, based on the capture
settings you specify.
 Total Disk Space: Lists the disk space needed for the captured media, based on the
capture settings you specify, as well as the space available on your scratch disk.