About Automatic Filenaming During Capture Now
Unless you enter text in the Description field, Final Cut Pro automatically names
media files (and captured clips) using the following convention: Untitled, Untitled1,
Untitled2, and so on.
If you’re capturing a clip using the Capture Now command and the currently
specified name is already taken by a clip in the current Scratch Disk folder, the letter
or number at the end of the name is incremented. For example, if you use Capture
Now to capture a clip named “Office Clips1” and there’s already a clip in that project’s
Scratch Disk folder with the same name, the name is changed to “Office Clips2.” If
there is already a media file called “Office Clips A”, the current media file is called
“Office Clips B”.
Alphabetical incrementing occurs if the last letter is preceded by a separating
character such as a space, underscore, or dash. For example, “ClipName-A” is
incremented to “ClipName-B”, but “ClipNameA” is incremented to “ClipNameA1”. If the
last letter in the clip name is preceded by a number, both the number and letter are
incremented. For example, “ClipName-2Z” is followed by “ClipName-3A”.

284
Part IV
Logging, Capturing, and Importing
To break a long DV clip into subclips based on starts and stops:
1
Capture a long clip from a DV tape containing several starts and stops.
Note: If you’re capturing the contents of an entire DV tape, make sure that the “On
timecode break” pop-up menu in the General tab of the User Preferences window is
set to Make New Clip, to ensure that no timecode breaks are captured. For more
information, see Volume IV, Chapter 23, “Choosing Settings and Preferences.”
2
Do one of the following:
 Select the clip in the Browser.
 Open the clip in the Viewer.
3
With the Viewer active, choose Mark > DV Start/Stop Detect.
Note: If you have any exceptionally long clips, you can break these up further by adding a
few more markers manually. For more information, see Volume II, Chapter 4, “Using Markers.”
4
Switch the Browser to list view and locate the clip you were working on in the Viewer.
For more information, see “
Choosing Views in the Browser
” on page 61.
5
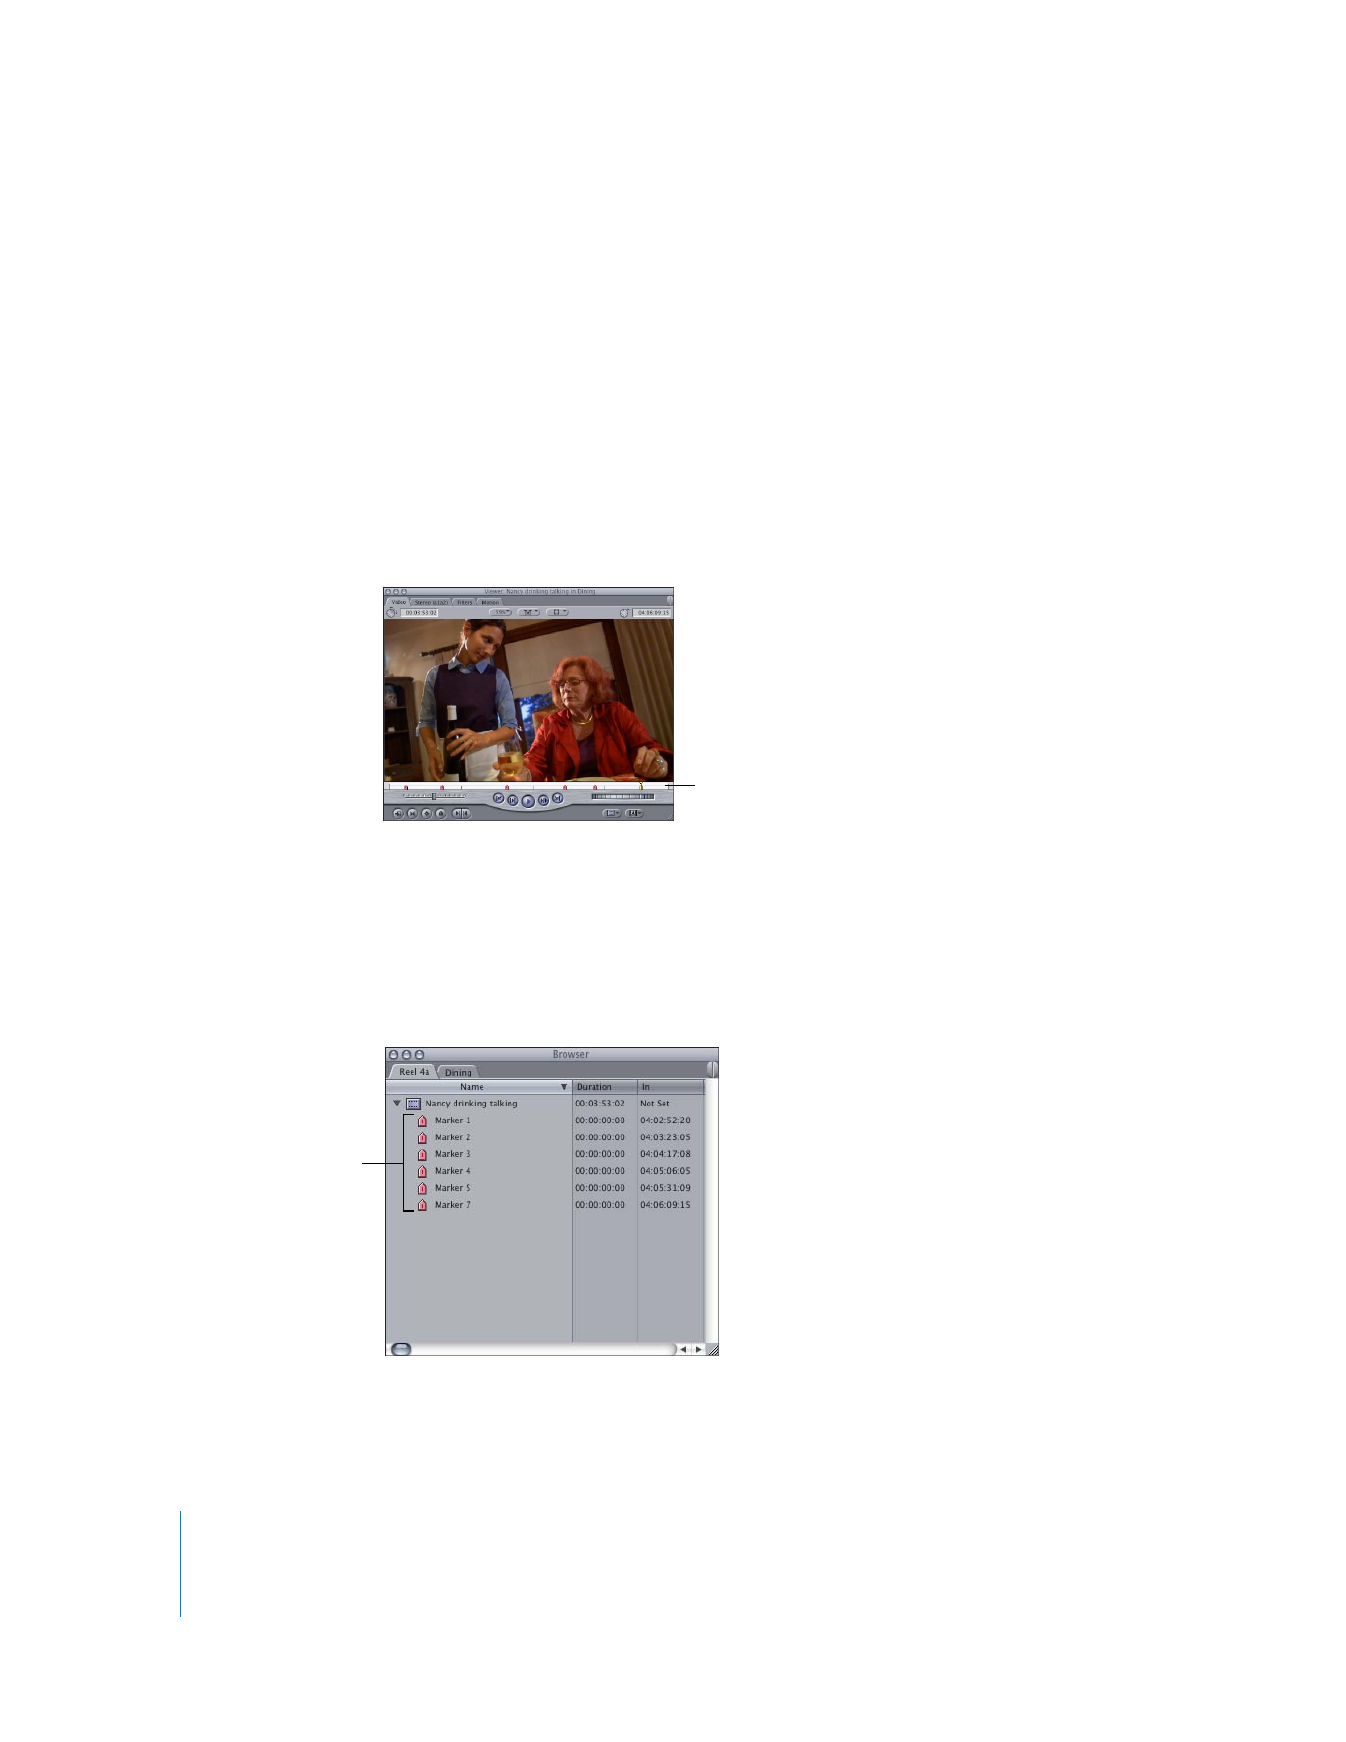
Click the disclosure triangle to view the clip’s markers.
If you want to give any of the markers a more descriptive name, simply click the marker
in the Browser, then click the marker’s name to select it. You can now change the name.
A marker appears in front
of every start and stop
in the clip.
Markers for a clip

Chapter 17
Capturing Your Footage to Disk
285
IV
6
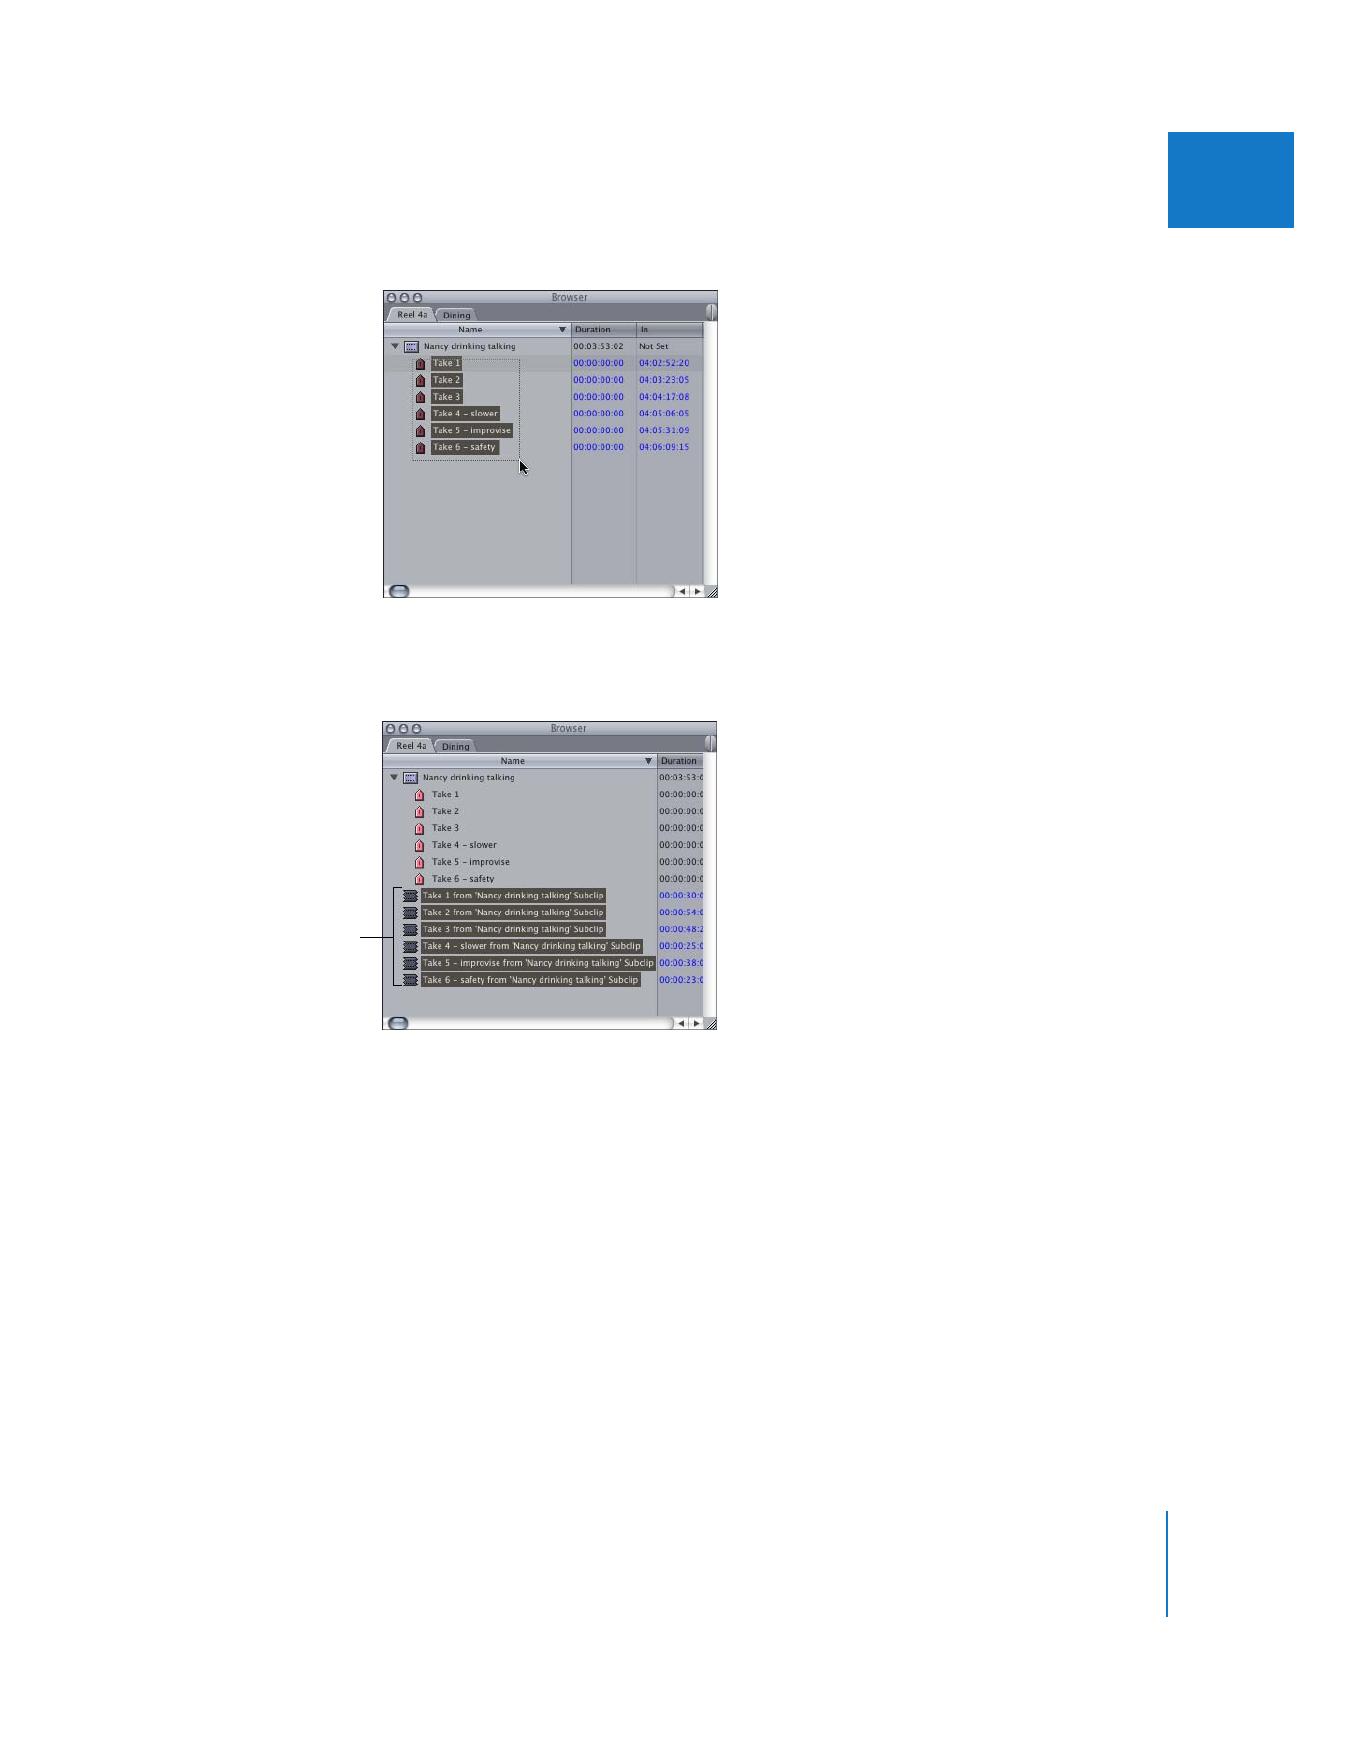
Drag in the Browser to select all the markers.
7
Choose Modify > Make Subclip.
Note: If you gave your markers new names, your subclips will use them.
The subclips appear in addition to the original clip with the markers. You can rename
the subclips, if you want. You can review the subclips, deleting any clips you might not
need. If you do remove unused clips, you can use the Media Manager to remove your
unused footage from disk, leaving the media for your remaining subclips alone. For
more information, see Volume IV, Chapter 7, “Overview of the Media Manager.”
All of the material
between the markers
you selected should now
appear as subclips.

286
Part IV
Logging, Capturing, and Importing