Adding Markers to Clips While Logging
As you log, you can set markers within clips to note significant parts for future
reference. Markers can be used for several purposes.
 Reference: Each marker can contain a name and associated note to help you identify
the content or other noteworthy information.
 Navigation: You can move the playhead from marker to marker in the Viewer and
the Timeline to quickly go to specific parts of a clip.
 Creation of subclips: You can also use markers to automatically create subclips, or
parts of a larger clip, in the Browser. For example, when you log a lengthy clip for
capture, you can arrange the markers to break the clip into smaller subclips for use
while you edit. For more information on creating subclips, see Volume II, Chapter 2,
“Creating Subclips.”
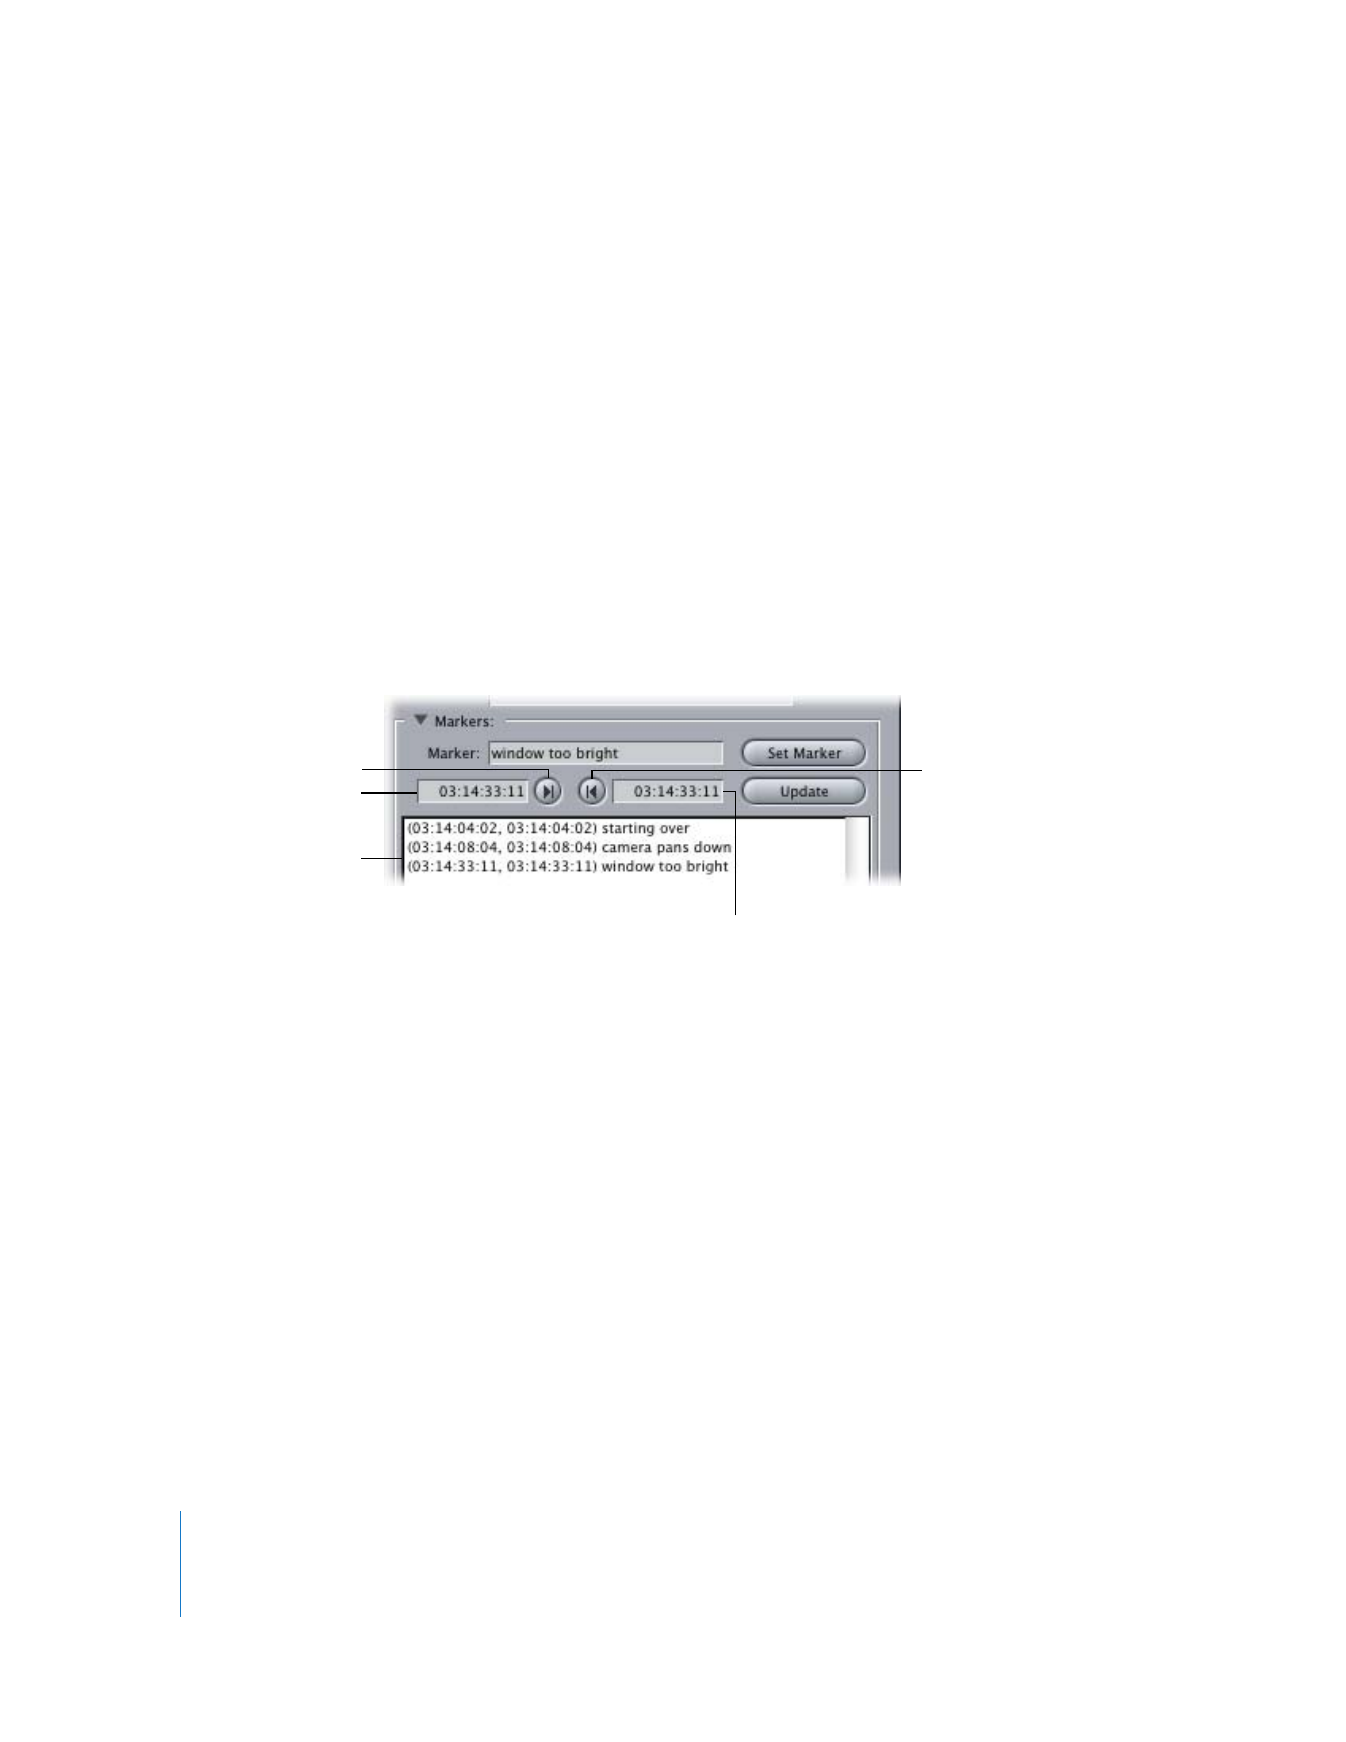
Marker Controls in the Logging Tab
Click the disclosure triangle next to Markers to see the marking controls.
 Marker: Enter a name or comments to go with the marker in this field. The marker
name remains until you change it.
 Set Marker: Once you’ve set the marker In and Out points, click this to create a
new marker.
 Set Marker In: Click this to set a marker In point, or enter a timecode number in this
timecode field.
 Set Marker Out: Click this to set a marker Out point, or enter a timecode number in
this timecode field.
 Update: To update a marker in the list, click to select it, make your changes, then
click Update. The marker in the list then displays the new information.
 Marker list: Displays all markers and associated information for the current clip.
Setting Markers in a Logged Clip
You can set as many markers as you like. Markers appear in a list and can be edited and
deleted. Markers you set for clips during the logging process also appear in the
Browser, the Viewer, and the Timeline.
Marker list (after clicking
the Set Marker button)
Marker In Point Timecode
field
Set Marker In
Set Marker Out
Marker Out Point
Timecode field

Chapter 16
Logging Clips
263
IV
To add markers to a clip you are logging:
1
Click the disclosure triangle next to Markers to see the marker controls.
2
Enter a name for the marker in the Marker field.
3
Find the frame where you want to set a Marker In point, by doing one of the following:
 Use the transport controls.
 Enter a timecode number in the Marker In Point Timecode field.
4
Click the Set Marker In button.
5
Find the frame where you want to set a Marker Out point, by doing one of the following:
 Use the transport controls.
 Enter a timecode in the Marker Out Point Timecode field.
6
Click the Set Marker Out button.
7
Click the Set Marker button.
When you click the Log Clip button, all the marker information in this section is saved
with the clip and the window clears.