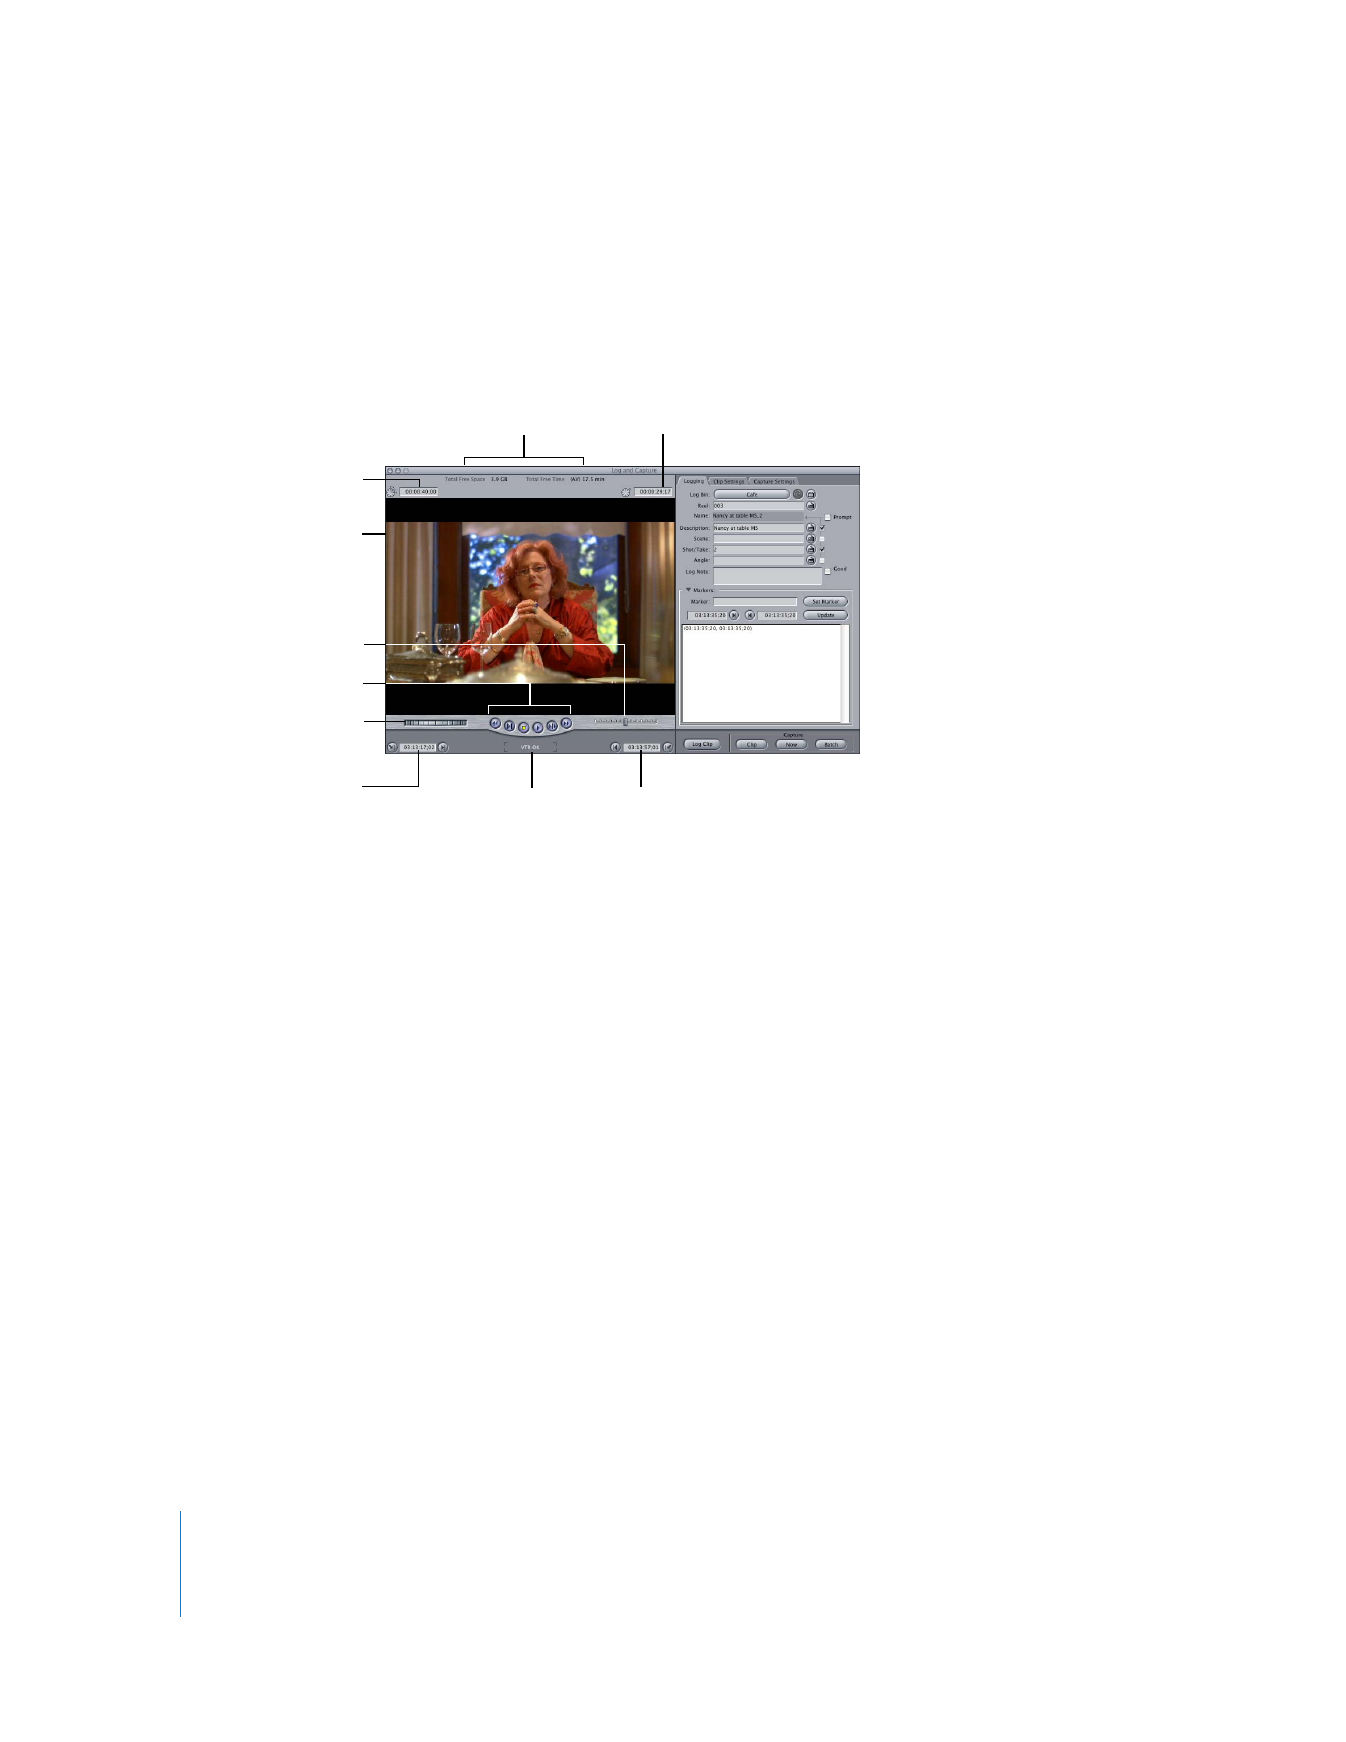
Preview Area
This section of the Log and Capture window lets you view video from tape while you
log and capture it. If your camcorder or deck is not on or there is no tape inserted,
you’ll see color bars or black. The following controls appear if your camcorder or deck is
on and properly connected, and device control is enabled.
Video Preview Area
 Available space and time: Final Cut Pro displays the amount of available space on the
current scratch disk and the amount of capture time available, which depends on the
capture preset chosen in the Capture/Input pop-up menu in the Capture Settings tab.
 Device status: Shows the readiness of camcorders and decks connected to your
computer and being controlled by Final Cut Pro. If you see “VTR OK,” your equipment
is connected and working properly. If you see another message or for more
information, see “
Understanding Device Control Status Messages
” on page 204.
 Timecode Duration field: Displays the duration, in timecode, between the current
tape In and Out points. If you enter a duration in this field, the Out point is adjusted.
 Current Timecode field: Displays the timecode number of the current frame of your
source tape. You can enter a timecode number in this field to navigate to that
timecode point on your tape.
∏
Tip: You can drag timecode values to the Log and Capture timecode fields from other
timecode fields in Final Cut Pro, such as Browser columns. Hold down the Option key
while you drag a timecode value from a column in the Browser to either the Timecode
Duration or the Current Timecode field.
Clip In Point
Timecode field
Current Timecode
field
Clip Out Point
Timecode field
Timecode Duration field
Video preview area
Device
status
Shuttle control
Jog control
Available space
and time
Transport controls
Chapter 15
Overview of Logging and Capturing
241
IV
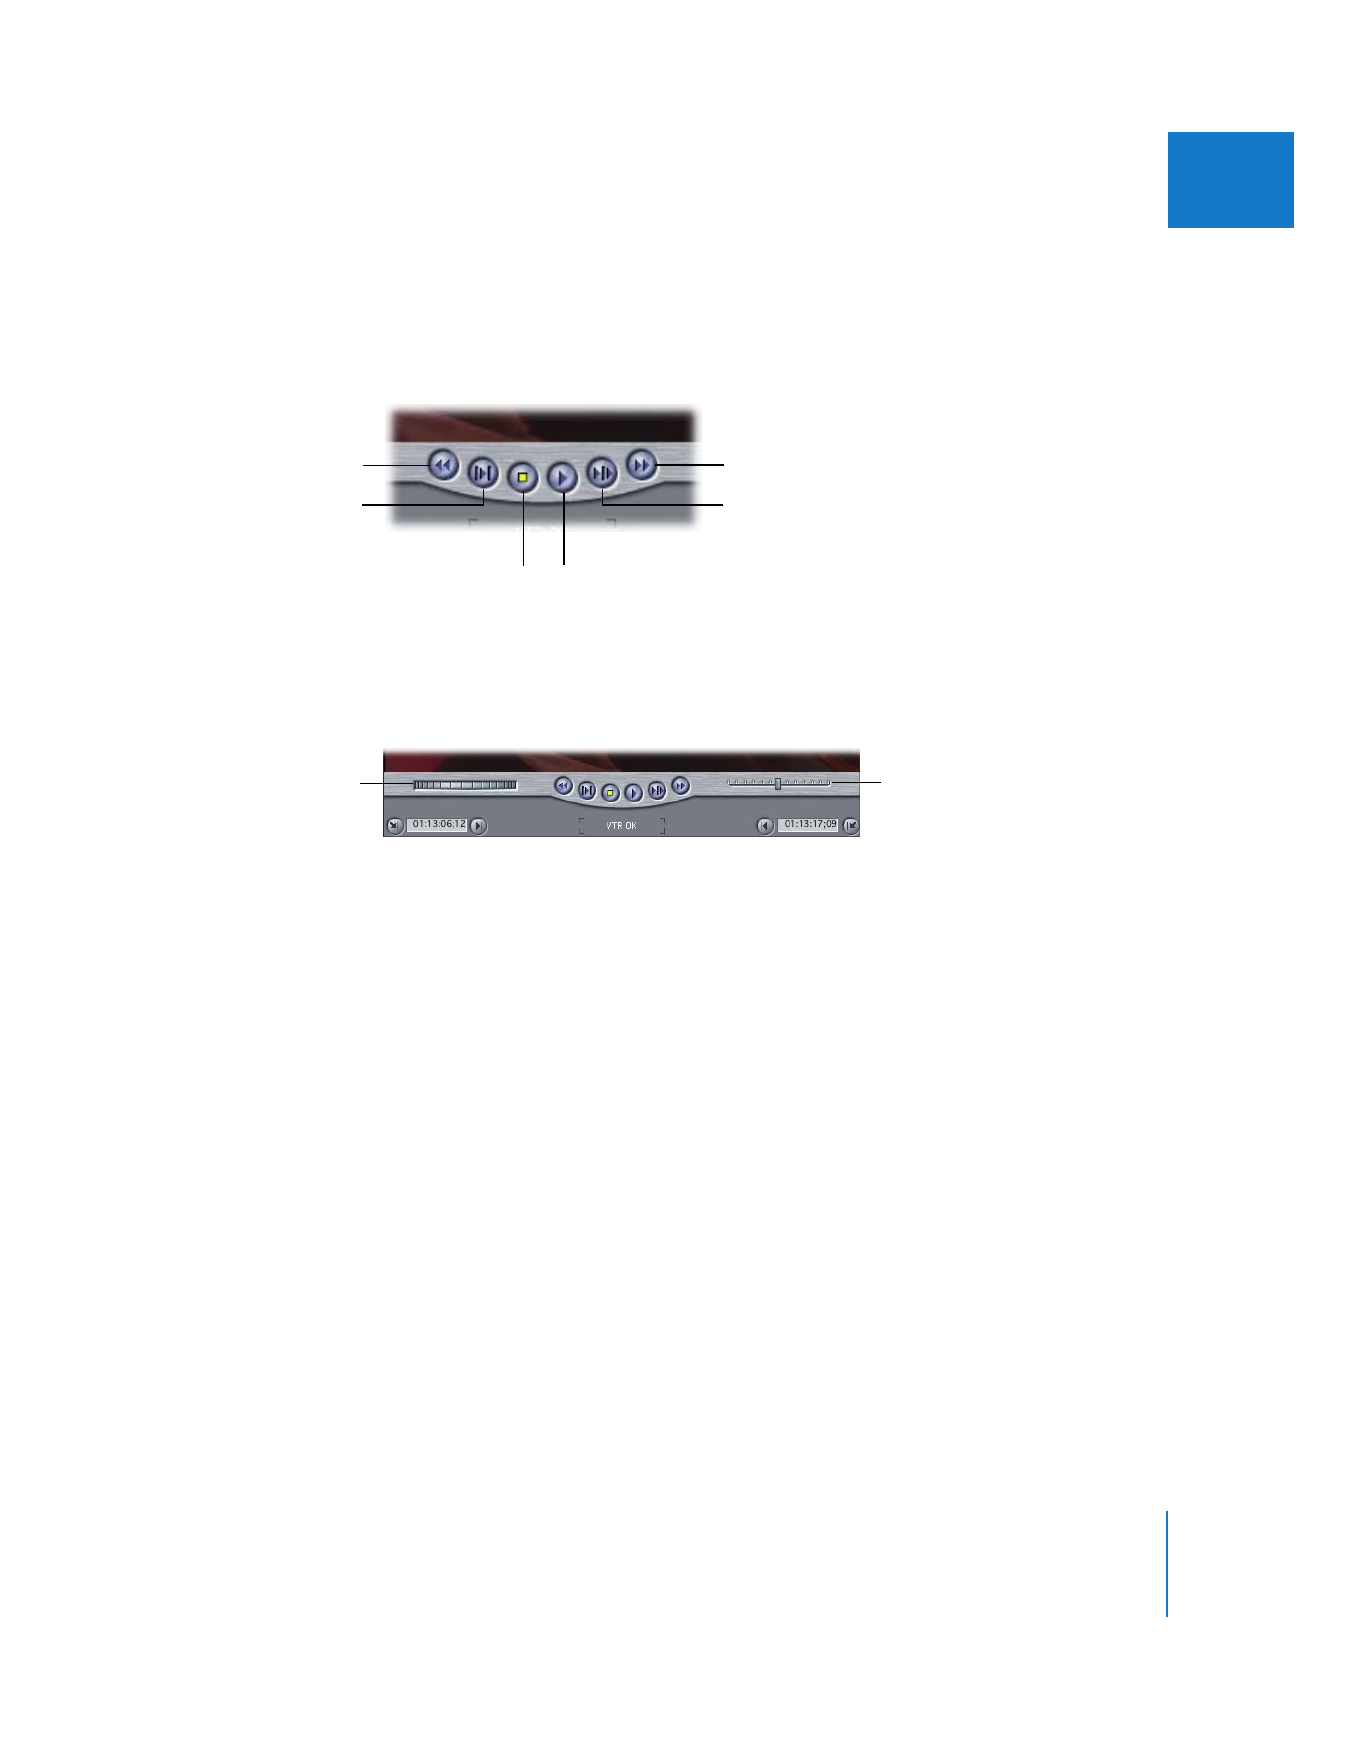
Transport Controls
If you have device control, use these to control your camcorder or deck. These controls
are similar to controls in the Viewer and Canvas, except that they control playback of a
videotape instead of a media file. For more information, see “
Navigating in the Viewer
and Canvas
” on page 99.
Jog and Shuttle Controls
Jog and shuttle controls, similar to those in the Viewer and Canvas, are also available
for navigating through the tape. For more information, see “
Navigating in the Viewer
and Canvas
” on page 99.
In the Log and Capture window, you can use the J, K, and L keys for jogging and
shuttling, just as you can in the Viewer and Canvas. For more information about using
the J, K, and L keys to navigate through your clip, see “
Shuttling Through a Clip or
Sequence
” on page 103 and “
Jogging Through a Clip or Sequence
” on page 104.
Note: Tape playback is not as efficient as playback from media files on your hard disk. It
takes a few seconds for a tape to cue to the proper frames or change playback direction.
Play
Stop
Play Around
Current Frame
Play In to Out
Rewind
Fast Forward
Shuttle control
Jog control
242
Part IV
Logging, Capturing, and Importing
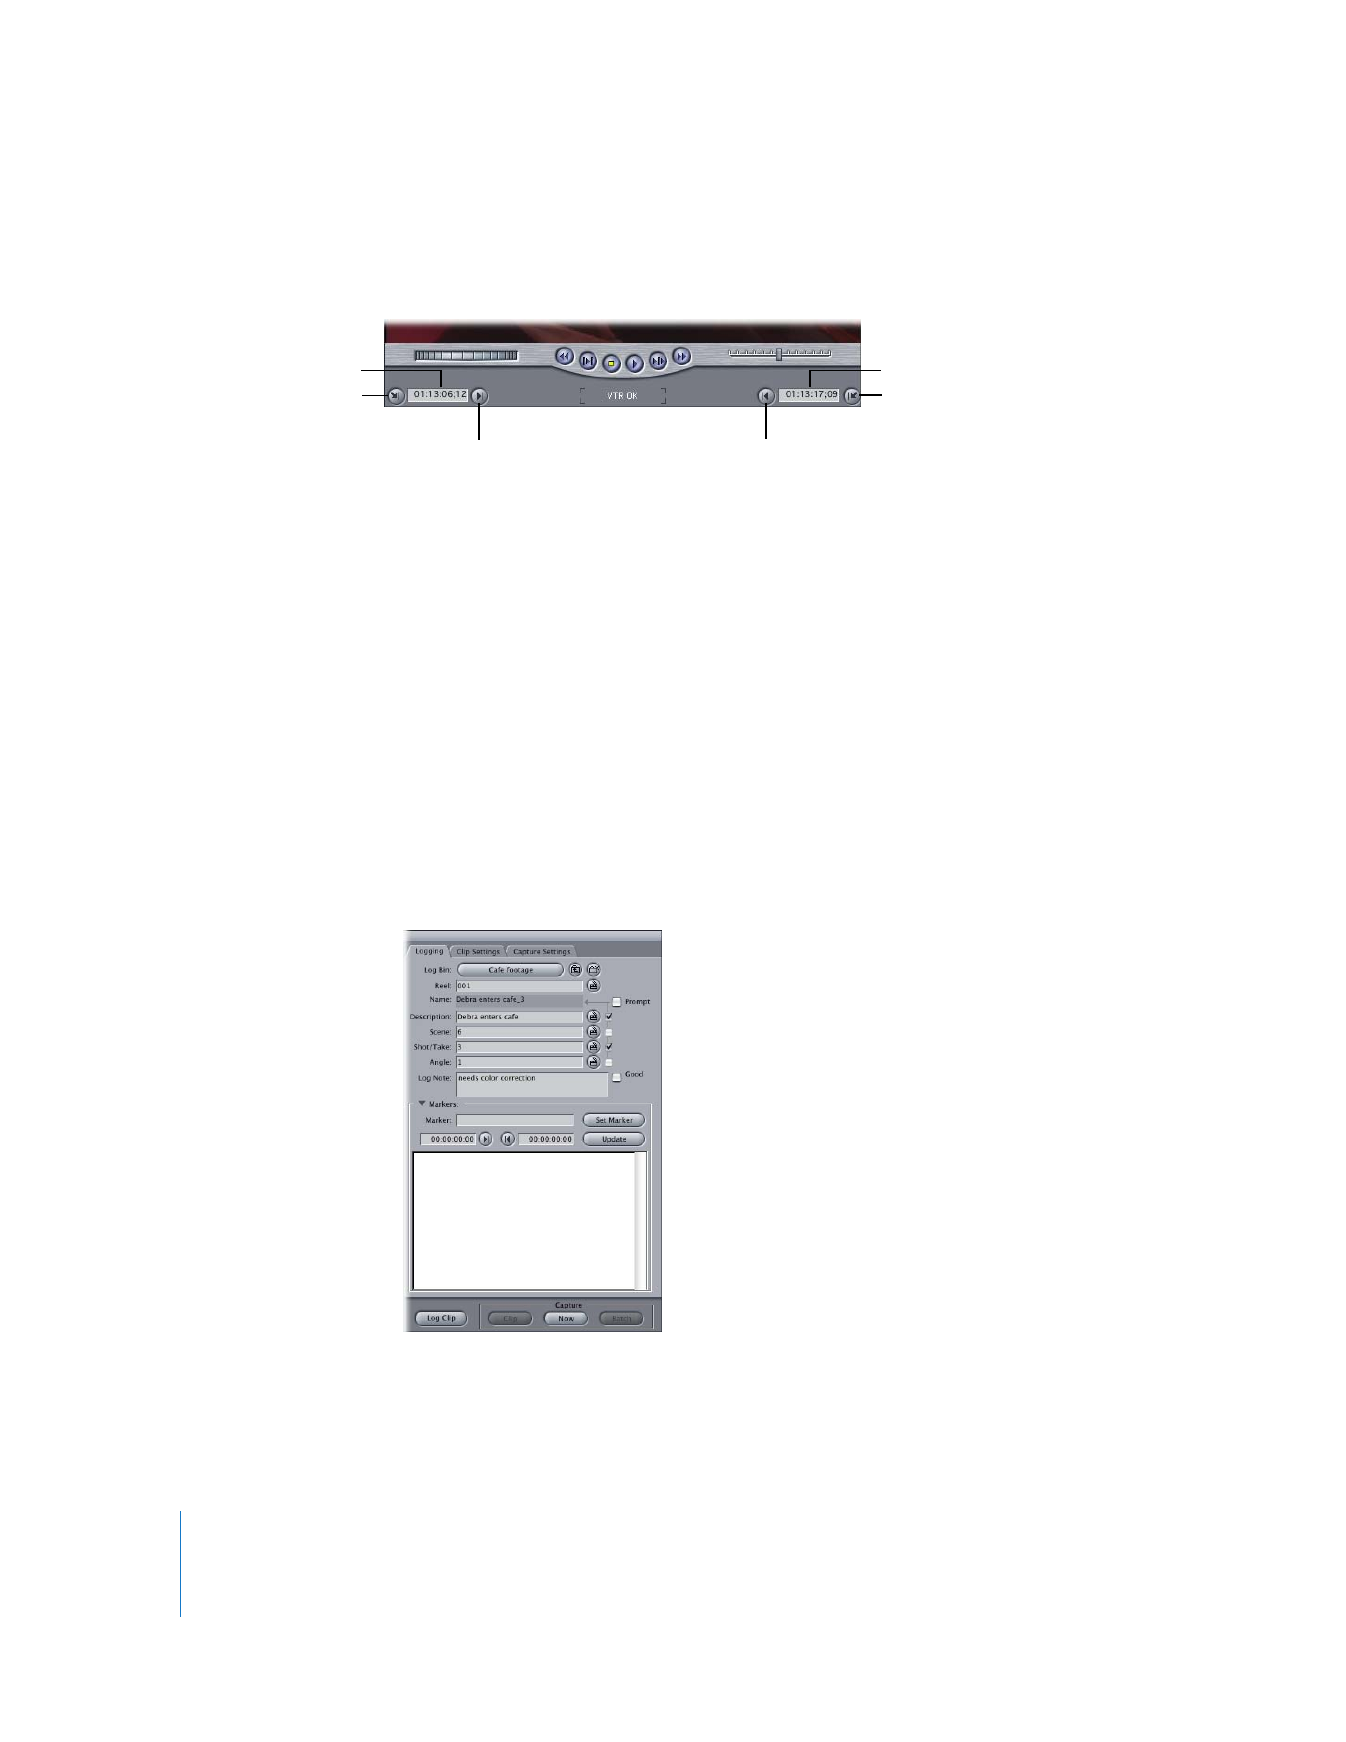
Marking Controls
Use these to set In and Out points for a clip on tape.
 Mark In (I): This sets the In point for a clip on tape.
 Clip In Point Timecode field: Shows the timecode value of the currently set In point.
 Go to In Point: This causes the connected VTR to cue to the currently set In point.
 Mark Out (O): This sets the Out point for a clip on tape.
 Clip Out Point Timecode field: Shows the timecode of the currently set Out point.
 Go to Out Point This causes the connected camcorder or VTR to cue to the currently
set Out point.