Tabs in the Log and Capture Window
The Log and Capture window has several tabs:
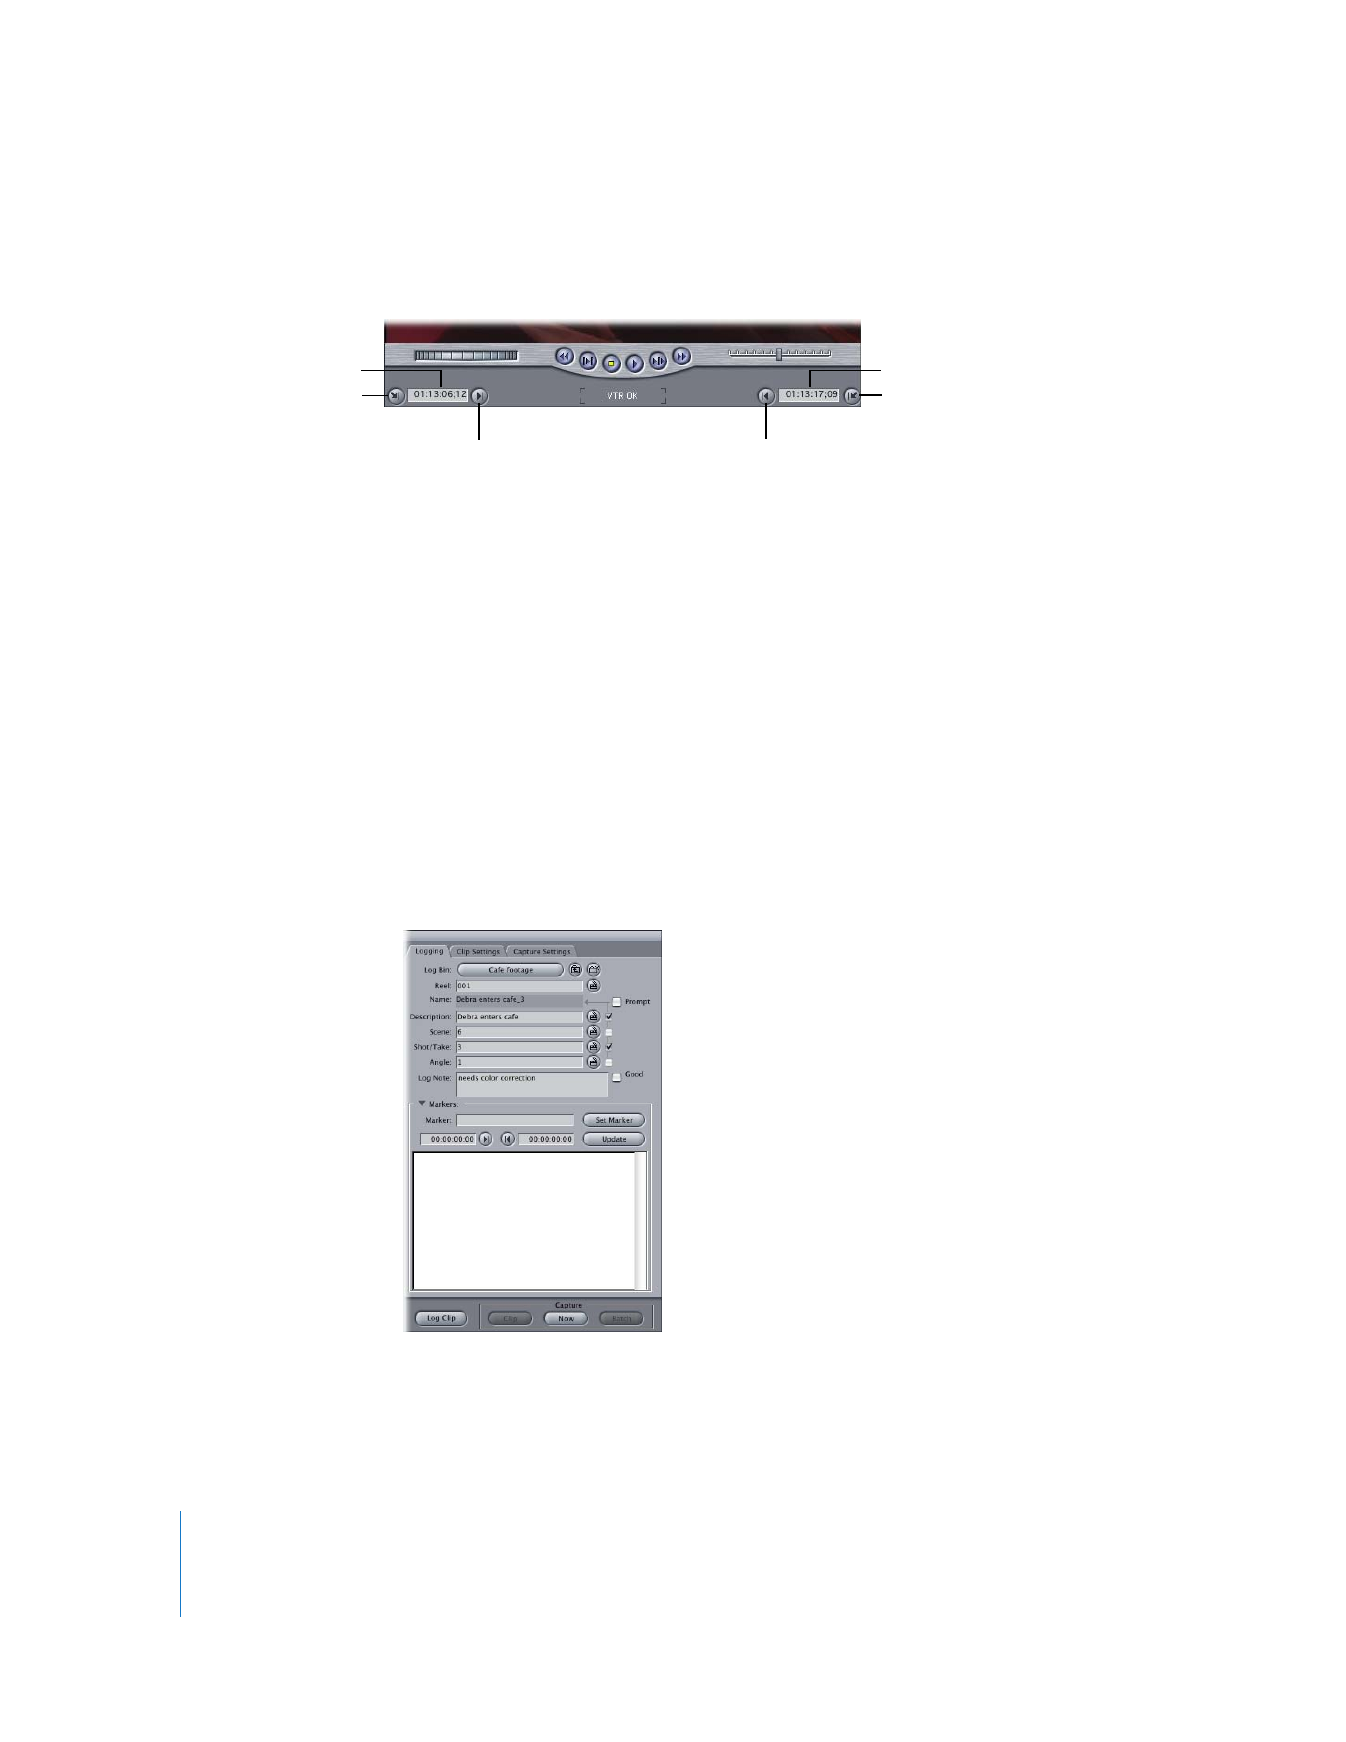
 Logging: Use this tab to add descriptive information to each clip that you log, such
as reel name, In and Out points, scene/take number, markers, and so on. Much of this
information can also be added later in the Browser. For more information, see
“
Logging a Clip
” on page 266.
Mark In
Clip Out Point
Timecode field
Go to Out Point
Go to In Point
Mark Out
Clip In Point
Timecode field

Chapter 15
Overview of Logging and Capturing
243
IV
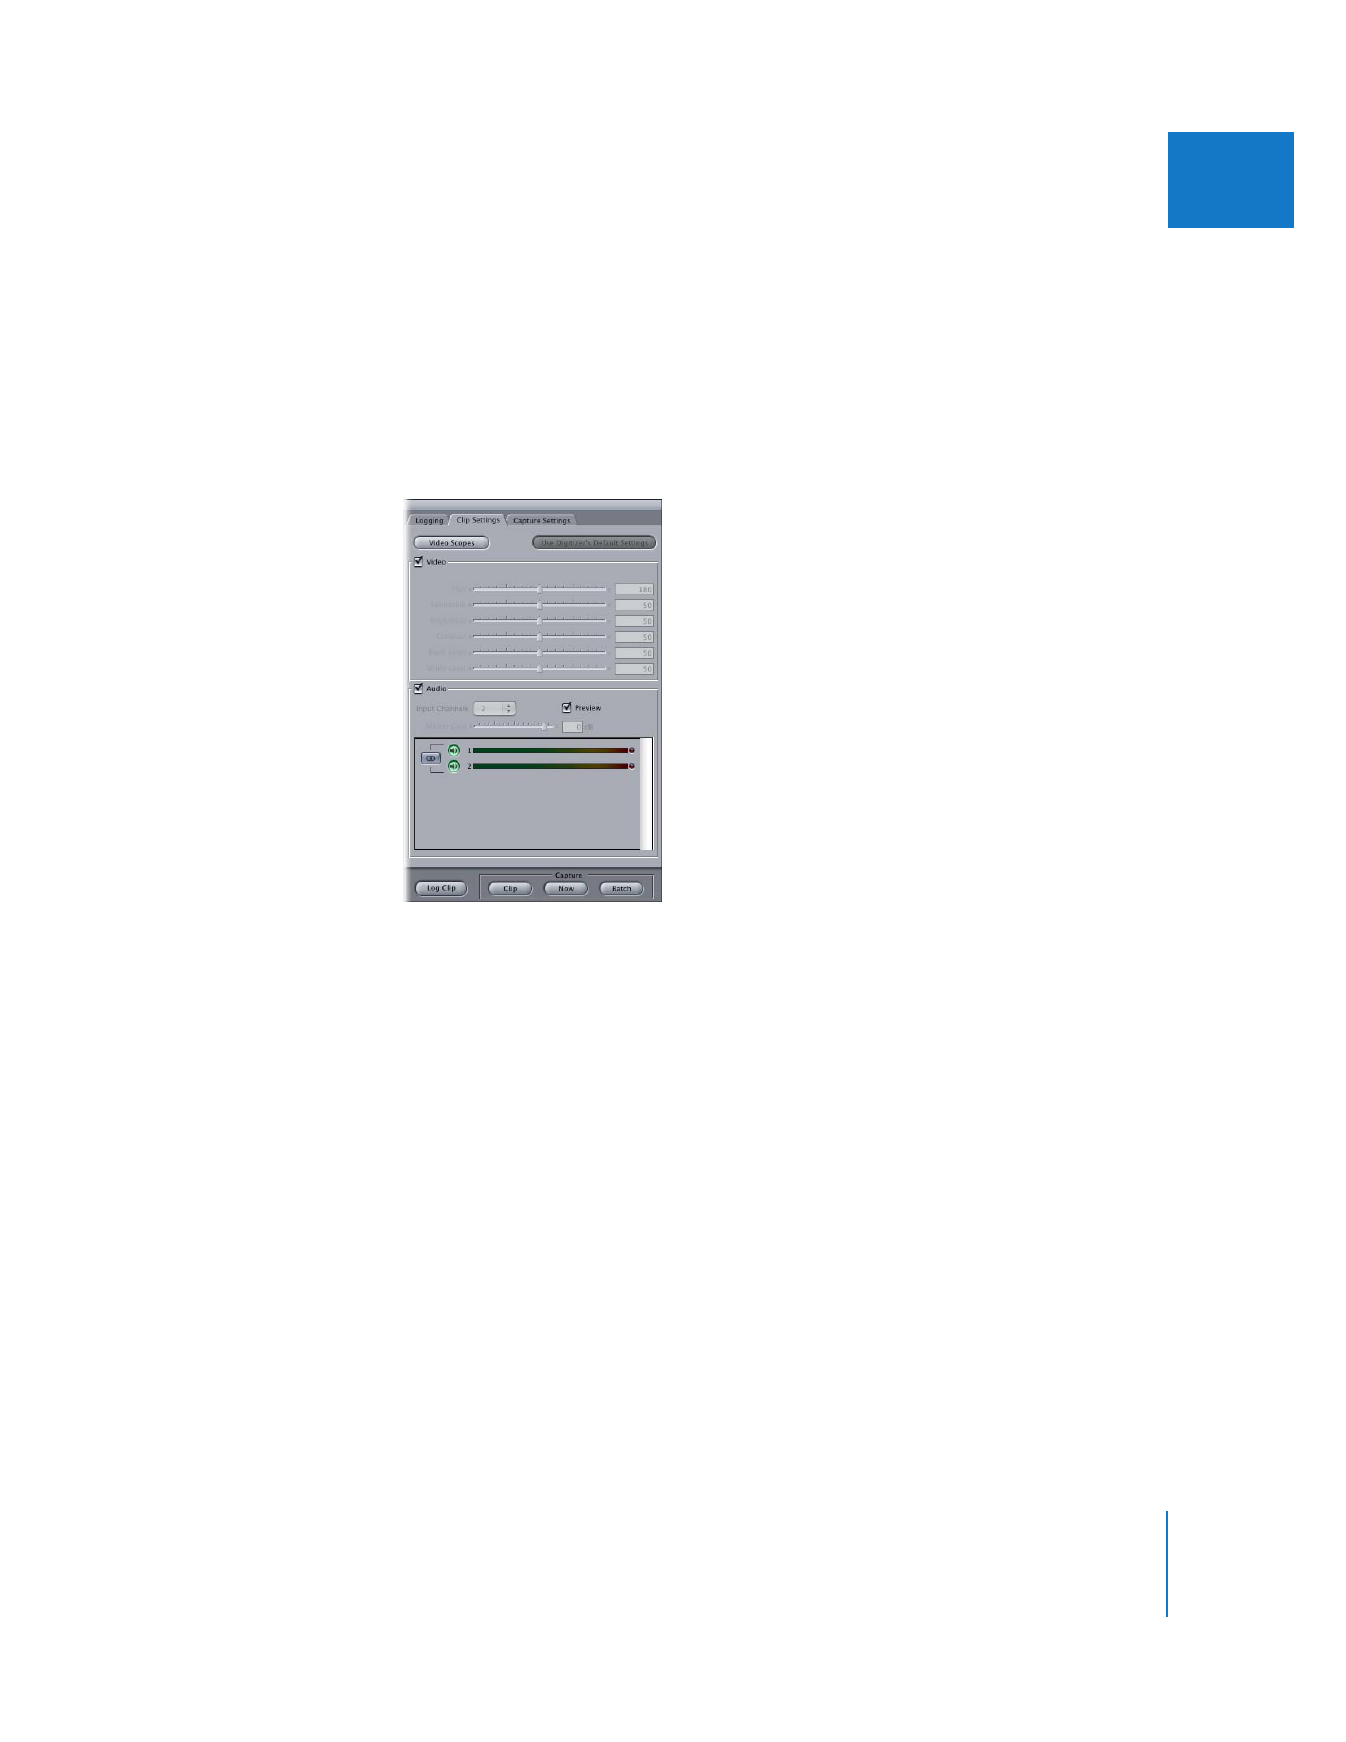
 Clip Settings: Use this tab to choose which video and audio tracks you capture from
tape. You can choose to capture video only, audio only, or both video and audio, and
you can specify which audio channels you capture. You can also adjust video levels
for each clip using the waveform monitor and vectorscope; audio levels can be
monitored using the audio meters. You can also monitor the incoming audio signal
by selecting the Preview option. For more information, see “
Selecting Which Tracks to
Capture
” on page 263.
Note: Video levels can only be adjusted for analog video interfaces.

244
Part IV
Logging, Capturing, and Importing
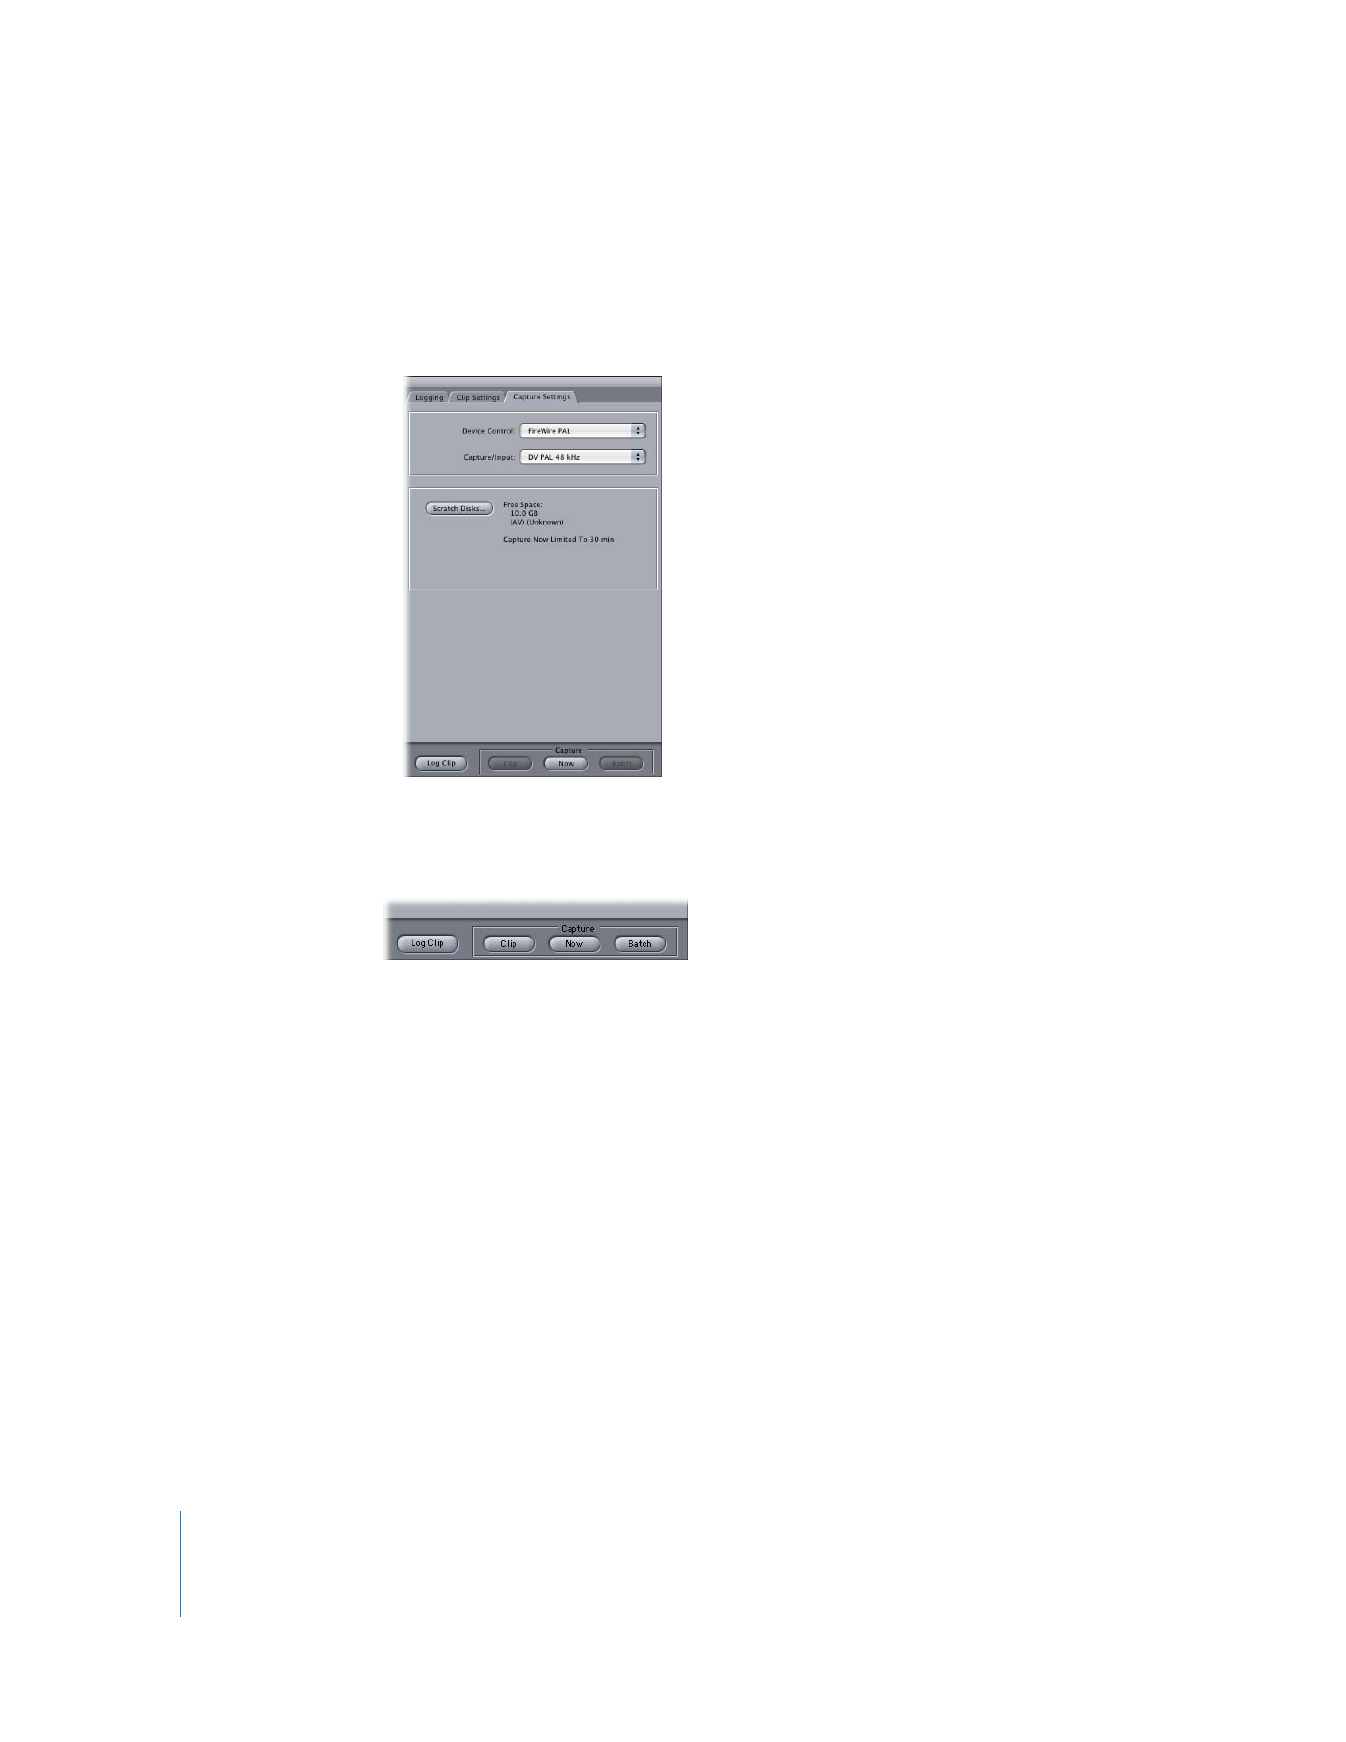
 Capture Settings: Use this tab to select a scratch disk for capture, a capture preset
(video and audio rate, compression settings, and frame size) and a device control
preset to remotely control your video or audio device. For more information, see
“
Changing Capture Settings
” on page 266.