Example: Fixing Awkward Audio Cuts in the Timeline
Once you’ve edited a group of clips into a sequence in the Timeline, you can adjust the
edit points between audio items without affecting their corresponding video items. To
do so, you disable linked selection. For example, suppose you’re cutting between two
people having a conversation. The first person says something, and then the second
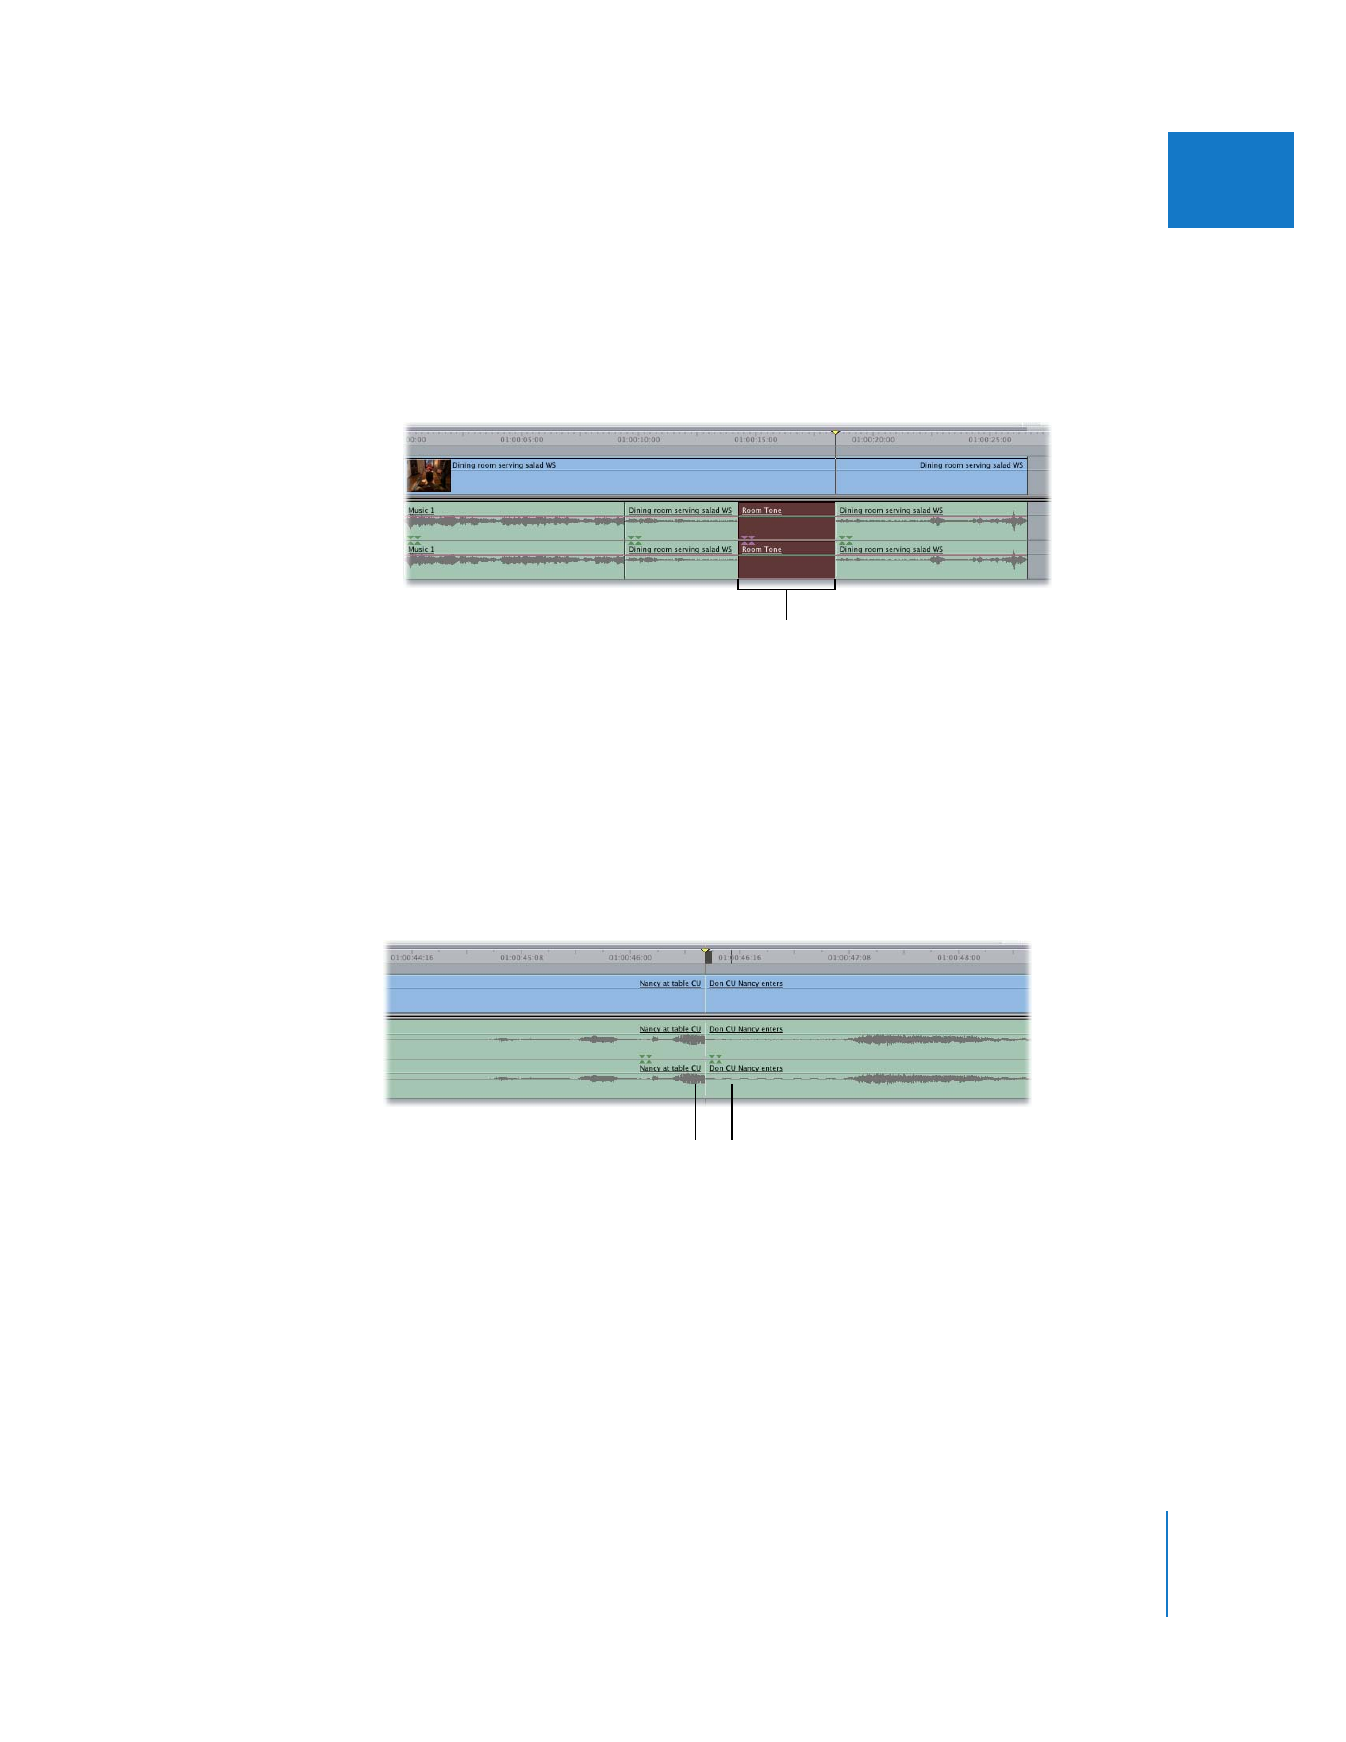
person pauses for a moment and replies. It might look something like this:
The timing of the video is what you wanted, but as the audio waveform shows, the last
syllable of the last word of dialogue in the first shot gets cut off, which sounds
awkward. To fix this, you can create a small split edit in the Timeline. (A split edit has
different video and audio In and Out points. See Chapter 15, “
Split Edits
,” on page 231.)
The section of unwanted
audio is replaced with
room tone.
Second clip
starts quietly.
Audio in first clip
gets cut off.

314
Part II
Rough Editing
1
Disable linked selection by doing one of the following:
 Click the Linked Selection button (or press Shift-L) so that it’s off.
For more information, see “
Linking Video and Audio Clip Items
” on page 218.
 Click the edit point between the two audio items while holding down the
Option key.
2
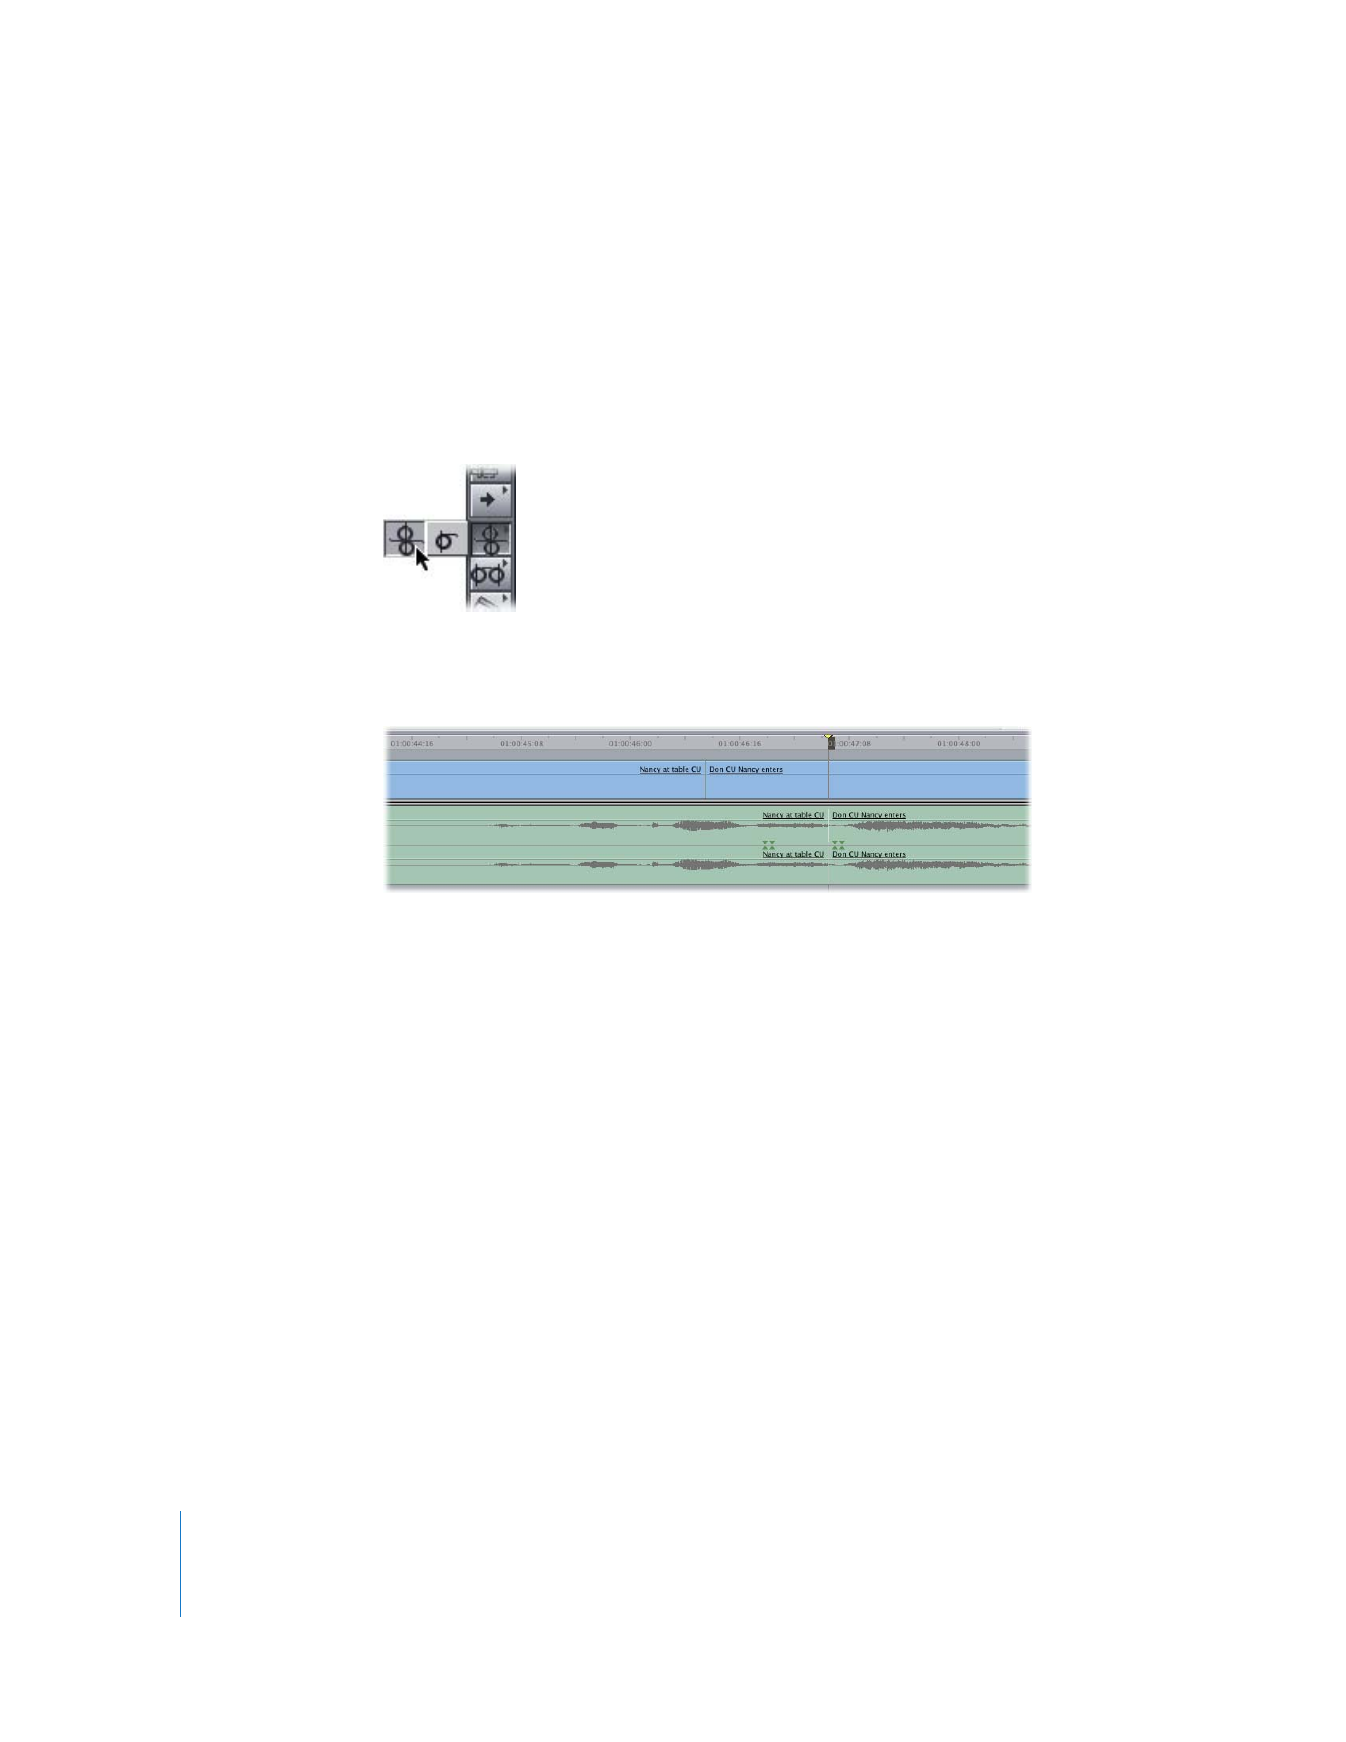
Select the Roll tool from the Tool palette (or press the R key).
3
Drag the audio edit point to the right so that the entire word plays at the end of the
first clip.
Now when you play through this cut, you can hear all of the words the first person is
saying, and then the second person’s reply.

III
Part III: