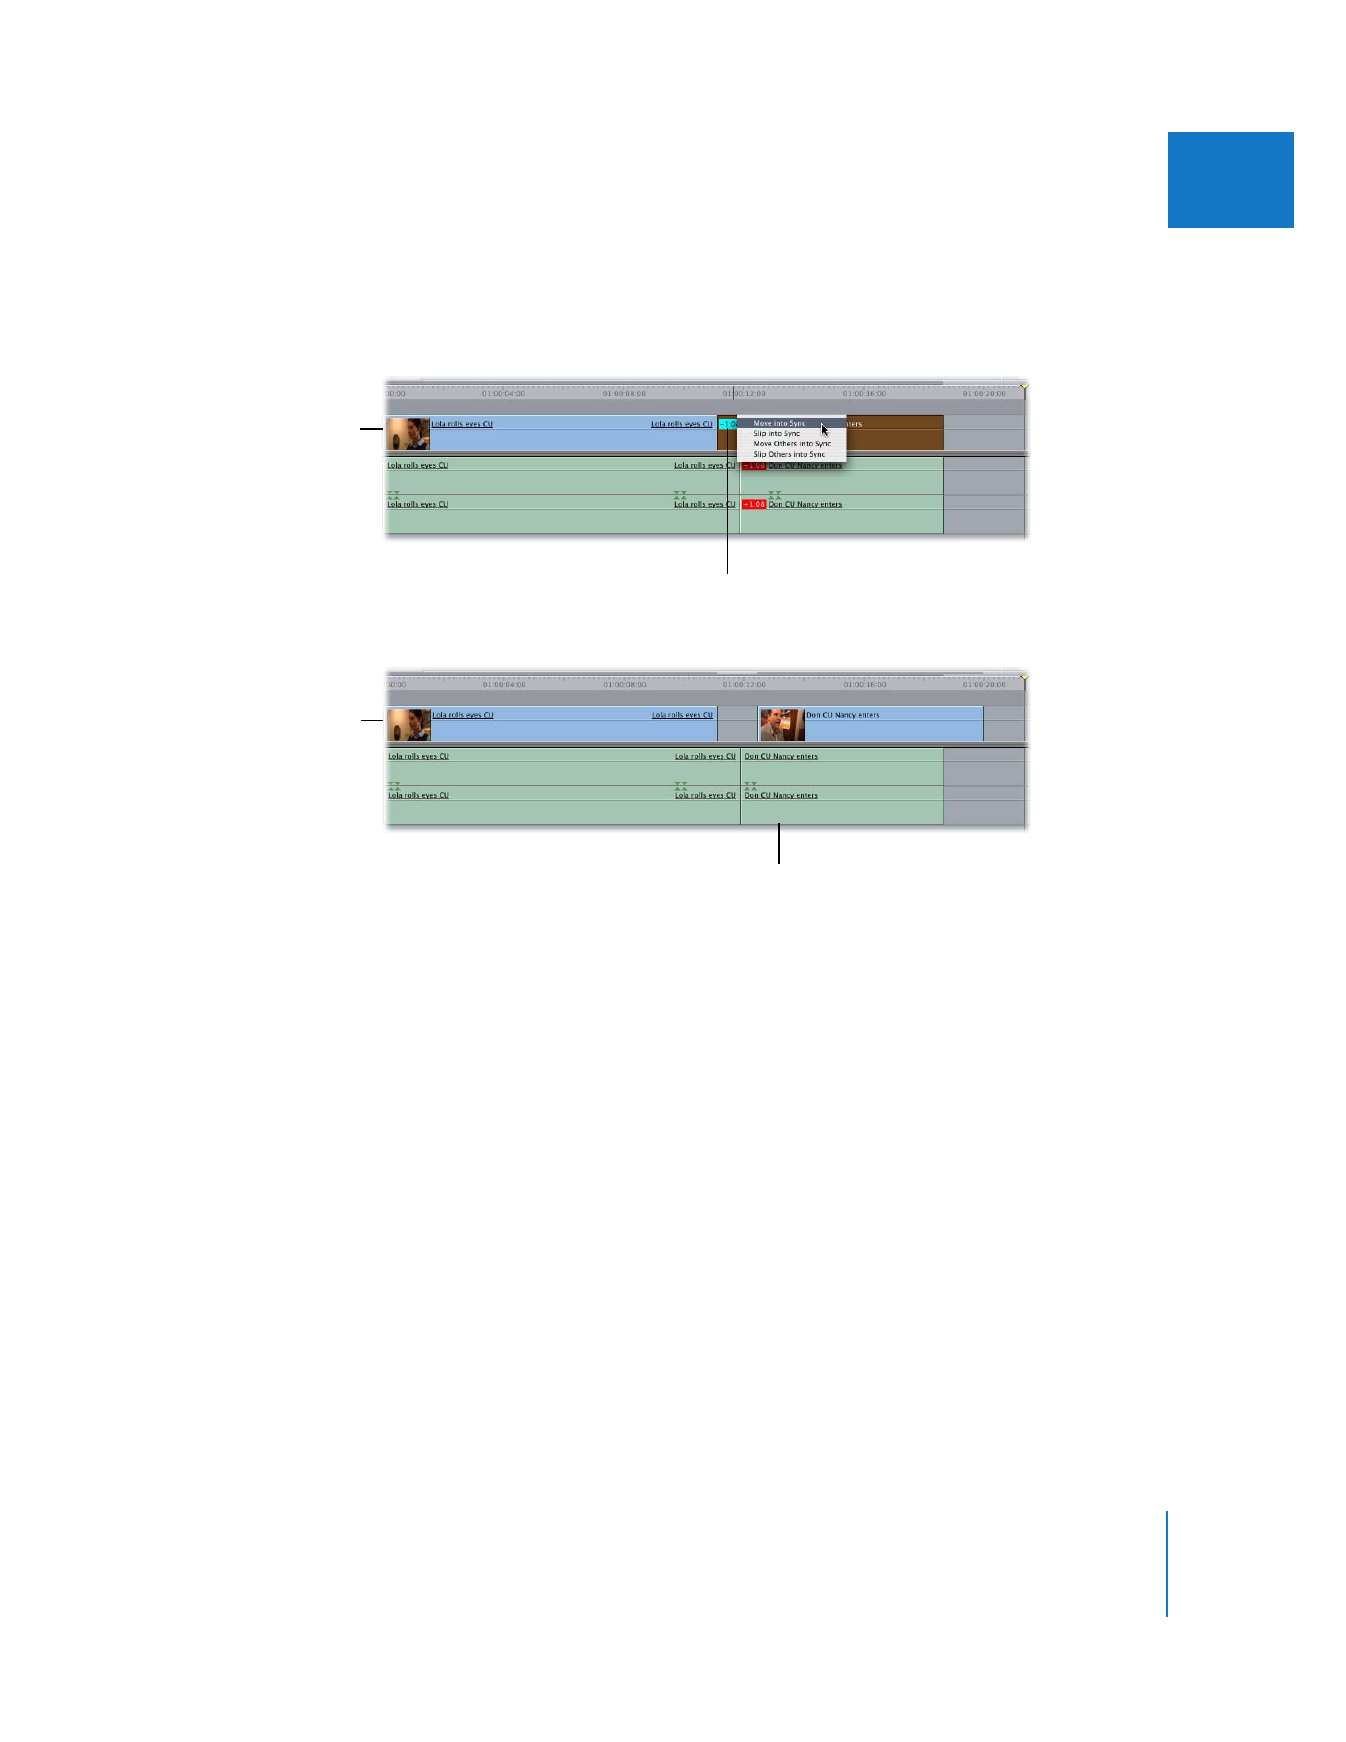
Slipping a Clip Item into Sync
This operation leaves the out-of-sync clip item in the same position in your sequence,
but slips the In and Out points within that item so that the item is in sync with the
corresponding audio or video anchor item to which it’s linked. This works in the same
way as the Slip tool. For more information, see “
Slipping Clips in the Timeline
” on
page 321.
Before syncing
Control-click the out-of-sync
indicator and choose Move
into Sync.
After syncing
The anchor item is moved into
sync with the topmost audio
item to which it’s linked.
224
Part II
Rough Editing
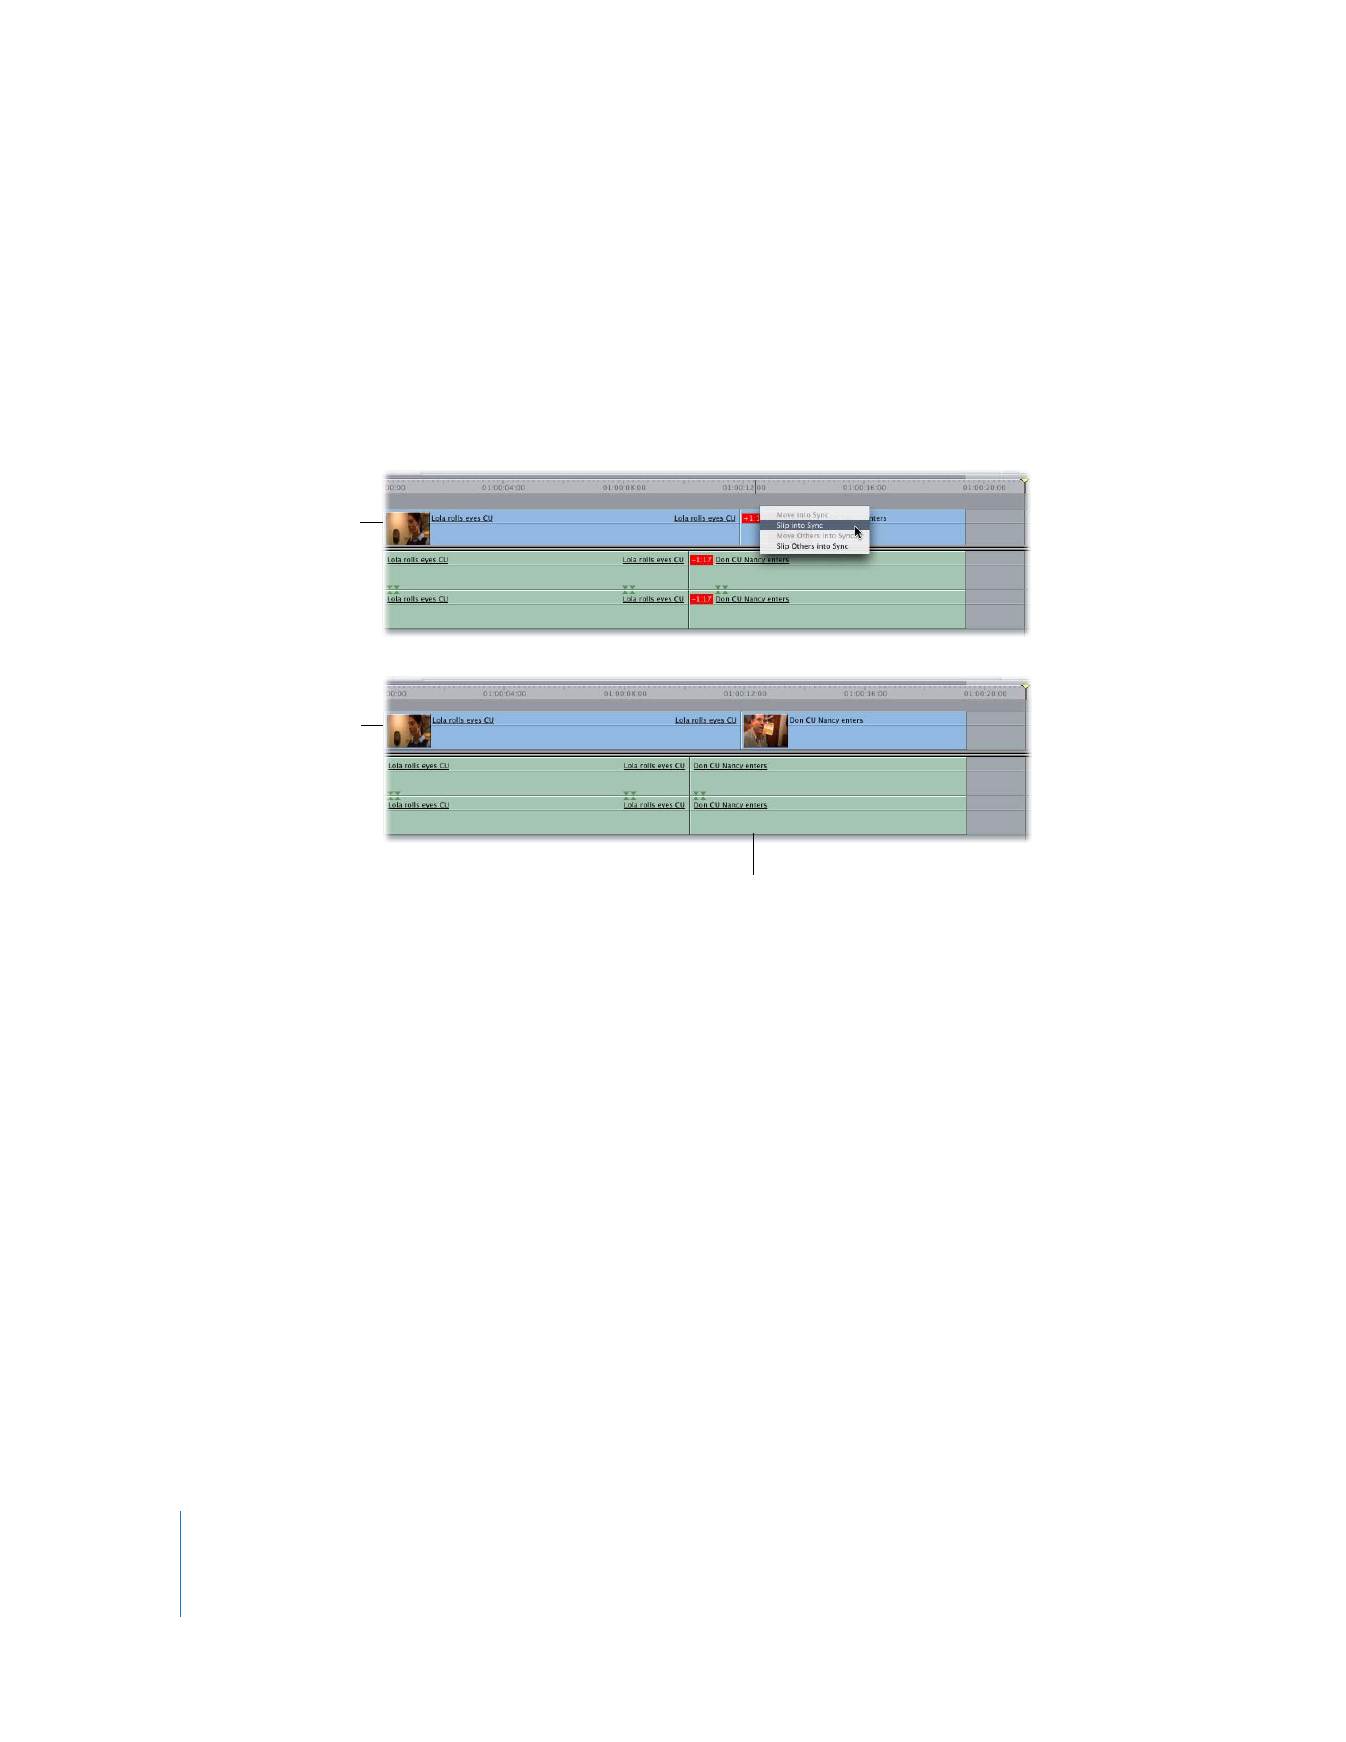
To slip an out-of-sync clip item into sync using the out-of-sync indicator
shortcut menu:
m
In the Timeline, Control-click the out-of-sync indicator on a clip item, then choose Slip
into Sync from the shortcut menu.
If the item is an anchor item, it slips into sync with the topmost out-of-sync audio item
in the group, starting on track A1 and going down. Otherwise, the selected item slips
into sync with the anchor item to which it’s linked.
To slip an out-of-sync clip item into sync using the Slip tool:
1
Select the Slip tool from the Tool palette (or press S).
2
If Linked Selection is on in the Timeline, click the Linked Selection button to turn it off.
3
Select the clip item you want to slip into sync.
You can temporarily turn the Slip tool into the Selection tool by holding down the
Command key.
4
Type the negative timecode offset value that appears in the out-of-sync indicator and
press Return. For example, if a clip item’s out-of-sync indicator displays “4:12”, select the
clip item and enter “–4:12”, then press Return.
If the clip item is an anchor item, the audio item is slipped into sync with it.
Before syncing
After syncing
The anchor item is slipped into
sync with the topmost audio
item to which it’s linked.

Chapter 14
Linking and Editing Video and Audio in Sync
225
II