Things to Keep in Mind When Setting an Out Point
When you want to mark the duration of a clip in a sequence, you need to remember to
set the Out point one frame earlier than you might expect, or you may also include the
first frame of the next clip. This often happens when you have snapping turned on and
you snap to clip start and end points to set In and Out points.
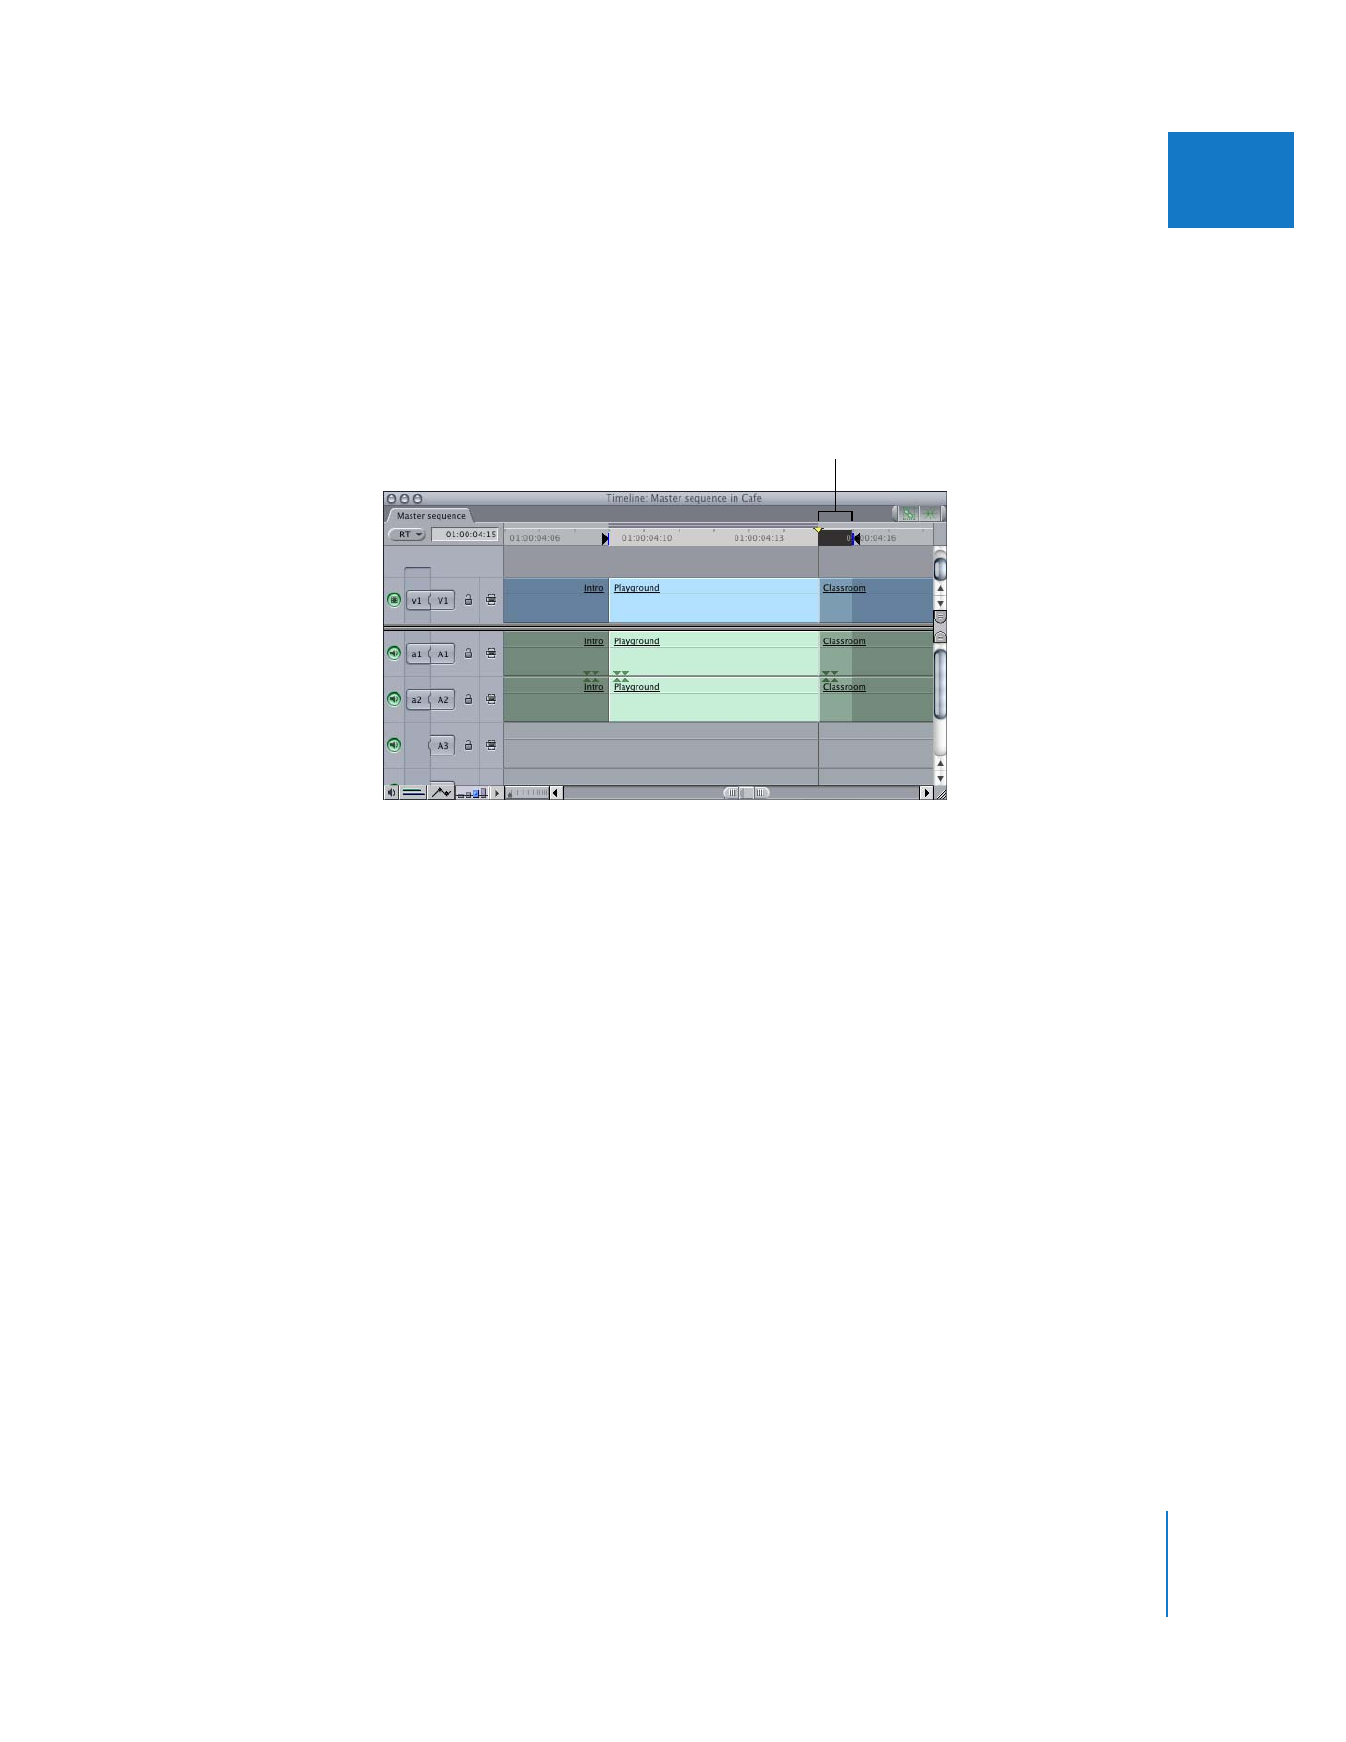
For example, suppose a clip in the Timeline is a shot of a playground and the next clip
is a shot of a classroom. When you move the playhead to snap to the end of the
playground clip, you see the first frame of the classroom clip in the Canvas. If you then
set an Out point and copy and paste the playground clip, you see one classroom frame
at the end of the pasted content. You probably didn’t intend to include the first frame
of the classroom shot, but it was included because of the Out point inclusive rule.
The Out point includes
the first frame of the
adjacent clip.

102
Part II
Rough Editing
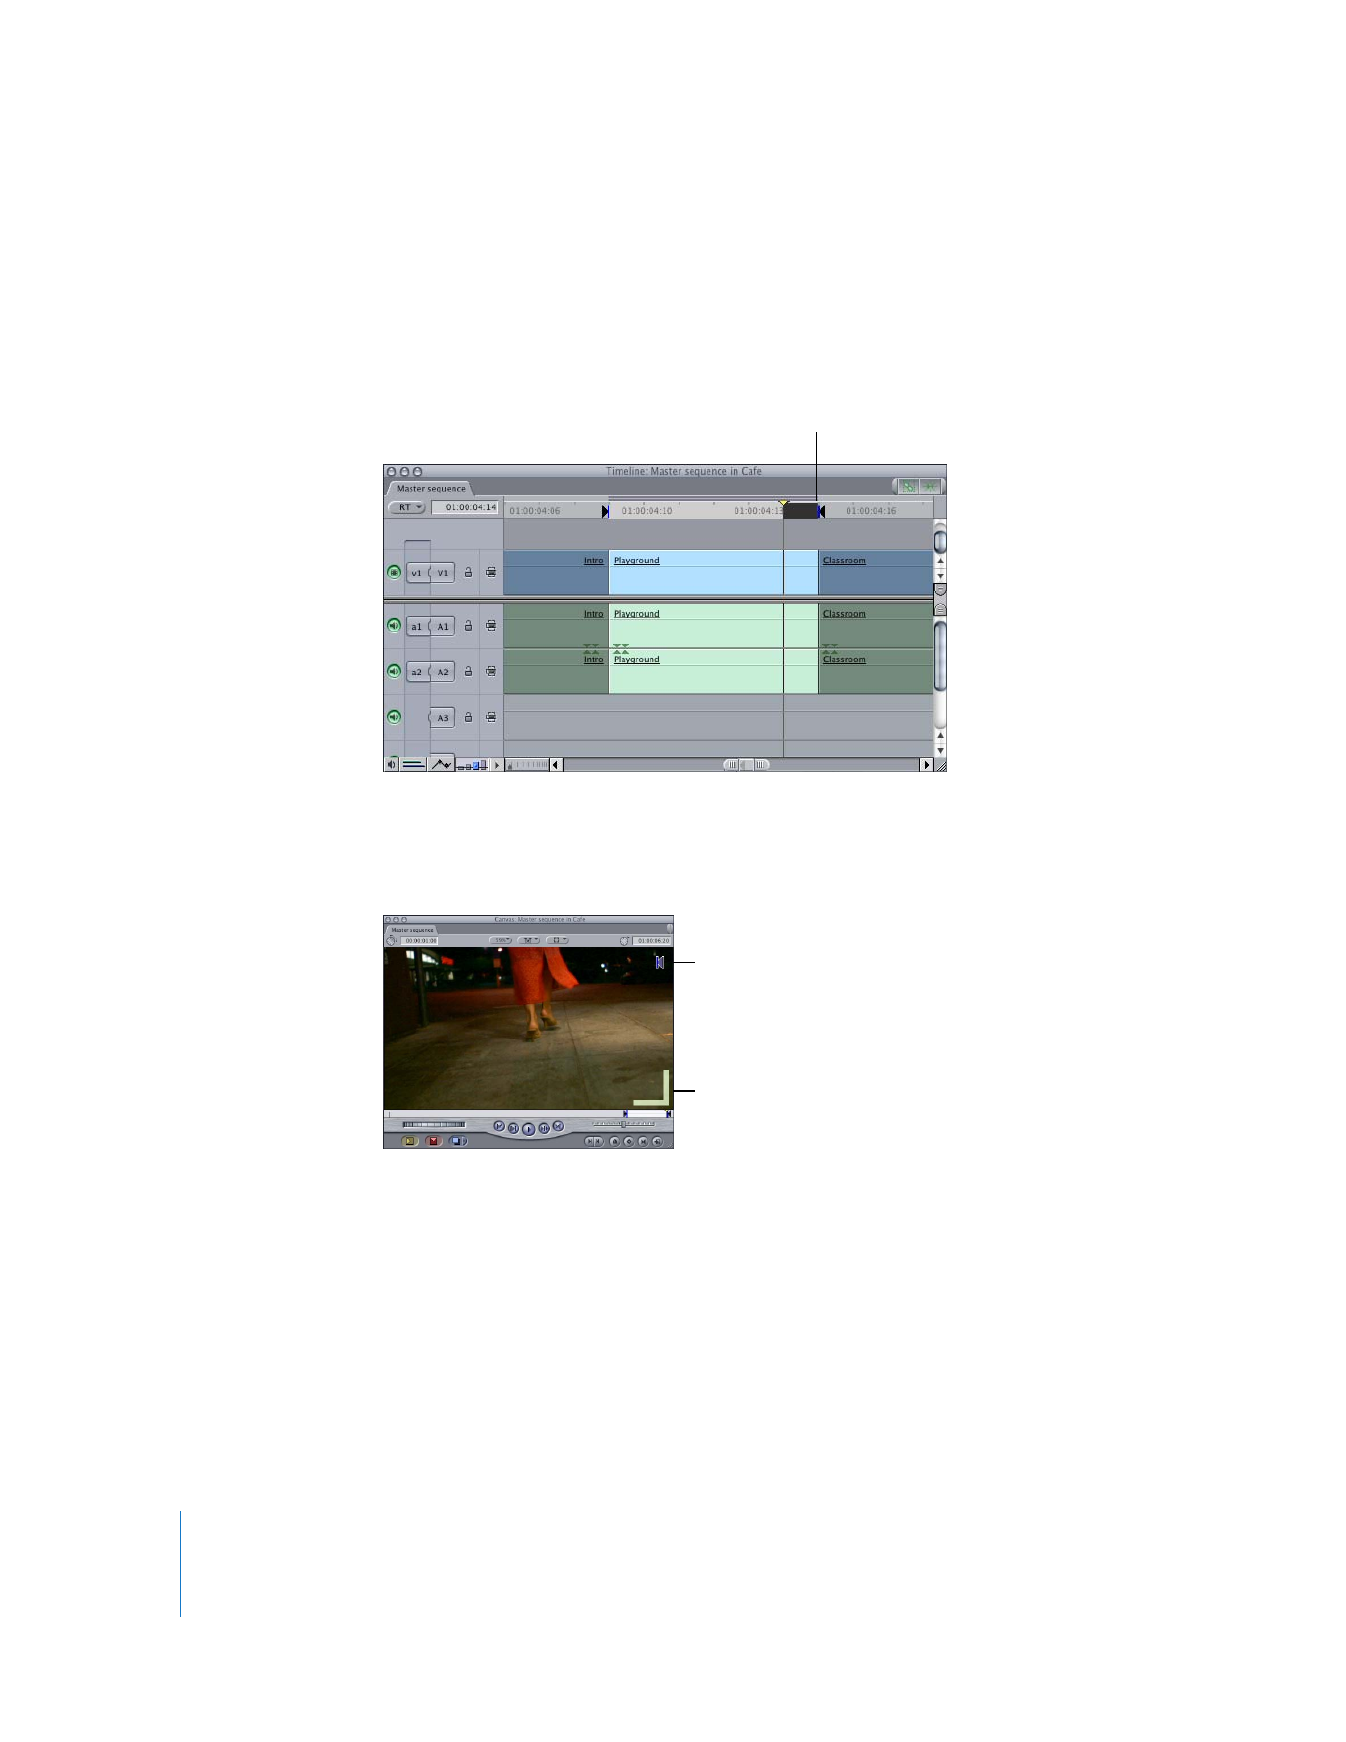
To avoid accidentally selecting the first frame of the next clip, do one of
the following:
m
Press the Back Arrow key once before setting the Out point, so that you set it on the
last frame of the clip you want to select. When you do this, the last frame of that clip is
included with the Out point.
m
Make the Canvas active, then choose View > Show Overlays. Make sure you set an
Out point when you see the overlay that indicates the end of the clip, not the start
of the next clip.
m
Use the Mark > Mark Clip feature (described in “
Setting In and Out Points to Match a
Clip or Gap
” on page 112) to place In and Out points directly on the first and last frames
of the clip.
The Out point ends at
the last frame of the clip.
Clip Out
point overlay
Sequence Out
point overlay

Chapter 7
Setting Edit Points for Clips and Sequences
103
II