Locking Tracks to Prevent Edits or Changes
If you want to set one or more tracks as temporarily “off limits” to edits or changes, you
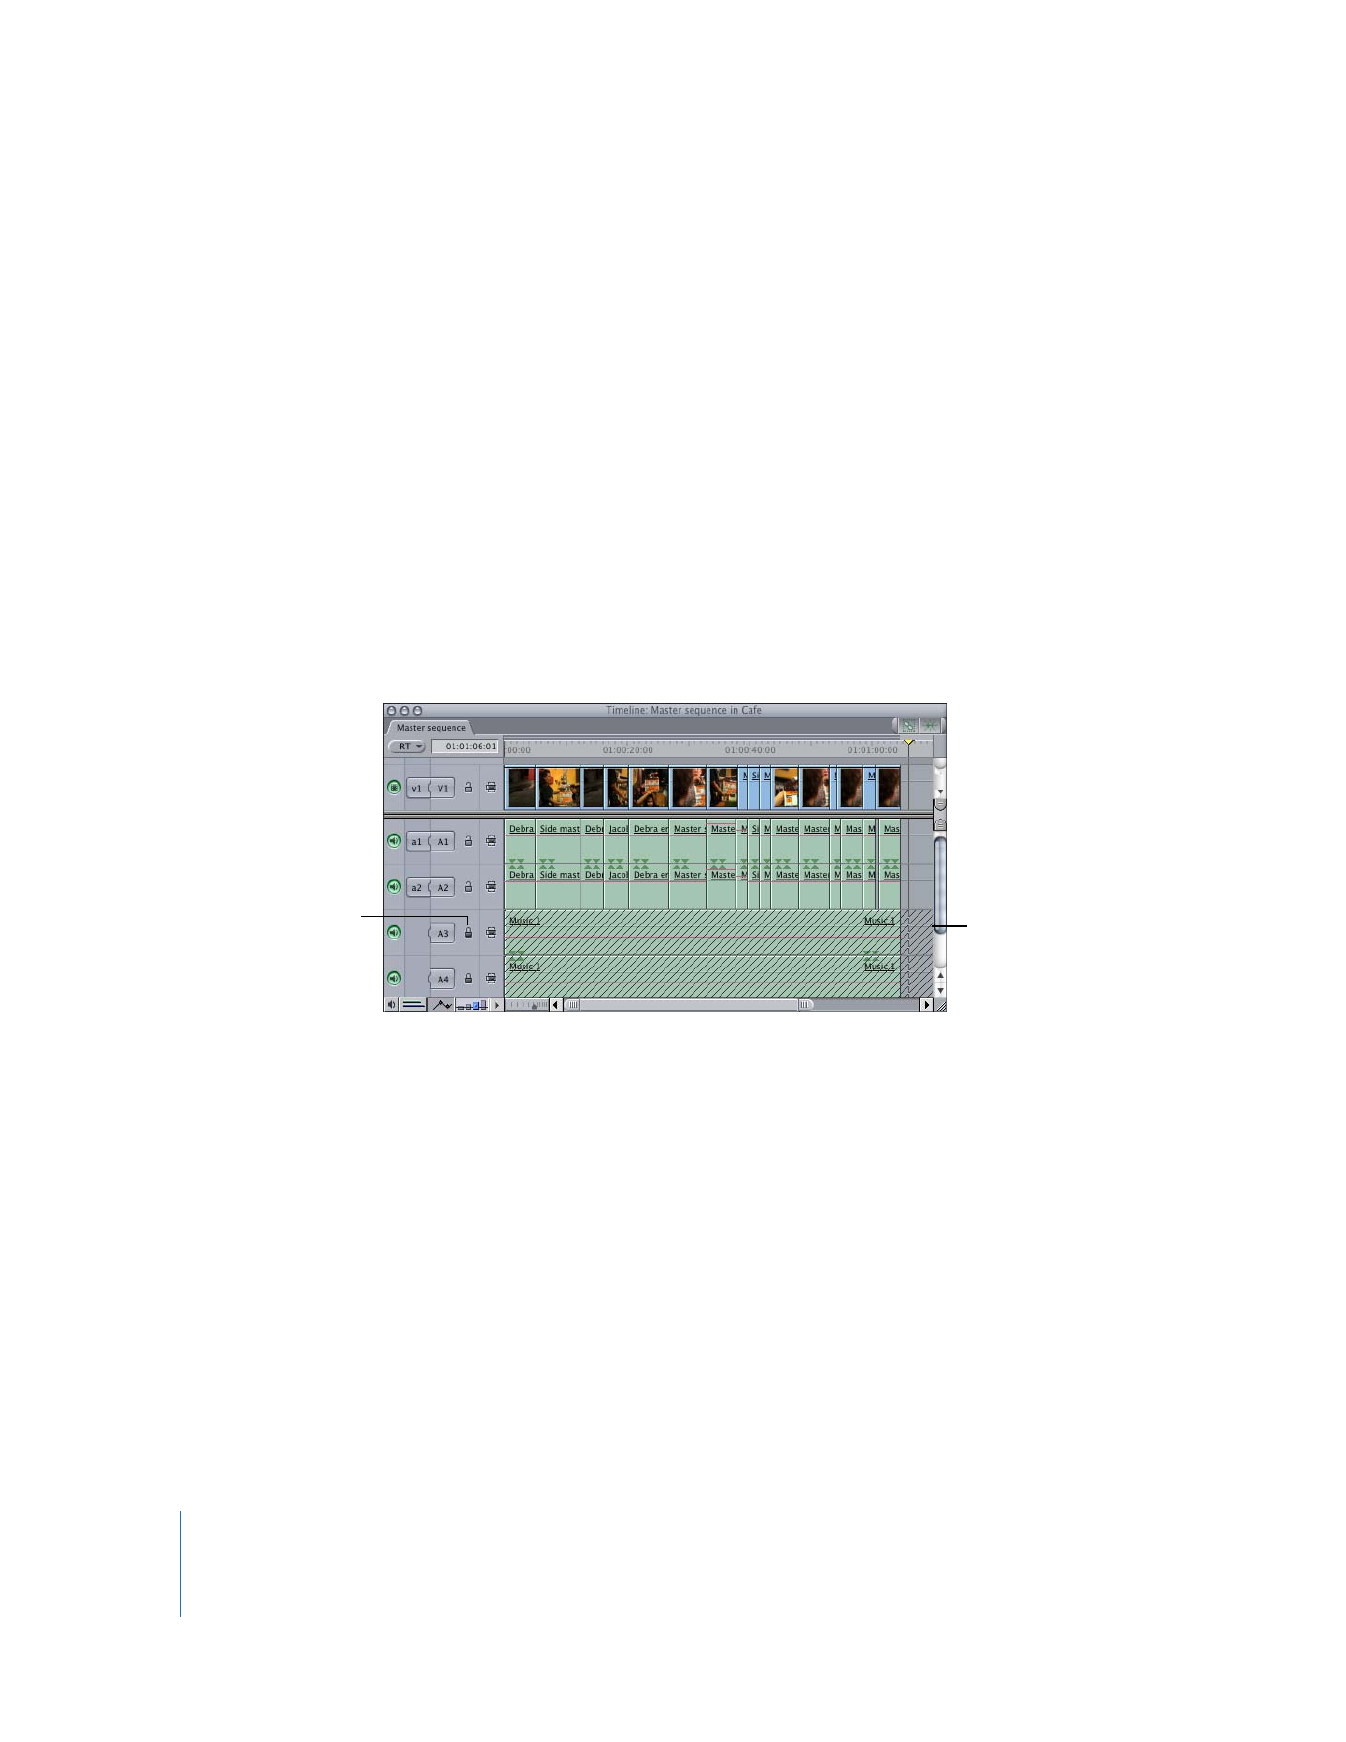
can lock them using the Lock Track control in each track’s header. While a locked track
can be specified as a destination track, no media will be edited into a locked track.
Locked tracks appear cross-hatched in the Timeline.
To lock a single track:
m
Click the Lock Track control to the left of the track.
The icon changes to a closed lock, and a crosshatch pattern is displayed on the track.
No edits will be placed on the locked track until you unlock it.
To lock a video track using keyboard shortcuts:
m
Press F4 and the number of the track you want to lock (for tracks 1 through 9).
To lock an audio track using keyboard shortcuts:
m
Press F5 and the number of the track you want to lock (for tracks 1 through 9).
To lock all video tracks in a sequence:
m
Press Shift-F4.
To lock all audio tracks in a sequence:
m
Press Shift-F5.
To lock all other audio or video tracks except the selected track:
m
Press Option while clicking the Lock Track control for the track you don’t want locked.
The control changes to
the locked position. Click
the control again to
unlock the track.
The track is
cross-hatched to
indicate it’s locked.

Chapter 8
Working with Tracks in the Timeline
129
II
Disabling Tracks to Hide Content During Playback
You can disable entire tracks to hide their contents during playback. The clips on a
disabled track are not visible or audible when you play it, nor will they render or be
output to tape.
You can still edit items on disabled tracks; they just won’t appear in the Canvas during
playback. A track can be enabled or disabled at any time. This does not permanently
affect either your sequence or the clips edited into it.
There are several reasons you may want to disable a track:
 A track contains audio that you want to temporarily turn off, while you focus on
other parts of your audio mix.
 A track contains an alternate edit of clips in your sequence that you haven’t yet
committed to using. By editing this alternate sequence into a spare video track, you
can enable and disable it as necessary, to quickly switch between two different
arrangements of clips.
 A track contains effects that you want to temporarily disable, such as superimposed
subtitles. By disabling this track, you can avoid rendering the effects before playing
back your sequence, yet you can still keep them in the Timeline.
You can also enable a single track by disabling all of the other tracks in the sequence.