Asymmetrical Trimming with the Ripple Tool
Asymmetrical trimming allows you to simultaneously ripple edit points on clip items in
different tracks in opposite directions. For example, suppose you want to extend the
Out point of a video clip item by 2 seconds. If you do this by extending only the video
clip item, a 2-second gap is created on other tracks. If you select the In point of clip
items on other tracks and use asymmetrical trimming, you can simultaneously extend
the In points of the clip items, making them start 2 seconds earlier. The result is that the
video clip item is 2 seconds longer, and the audio clip items fill in the gap because they
are 2 seconds longer.
Asymmetrical trimming is a convenient way to create a split edit between two adjacent
sequence clips, but you can also use this feature with audio-only and video-only
clip items.
Asymmetrical trimming can be done either in the Timeline or in the Trim Edit window.
∏
Tip: If you are doing a lot of asymmetrical trimming, you may find it helpful to turn off
linked selection by pressing Shift-L or clicking the Linked Selection button in the
upper-right corner of the Timeline. For more information about linked selection, see
Chapter 14, “
Linking and Editing Video and Audio in Sync
,” on page 213.
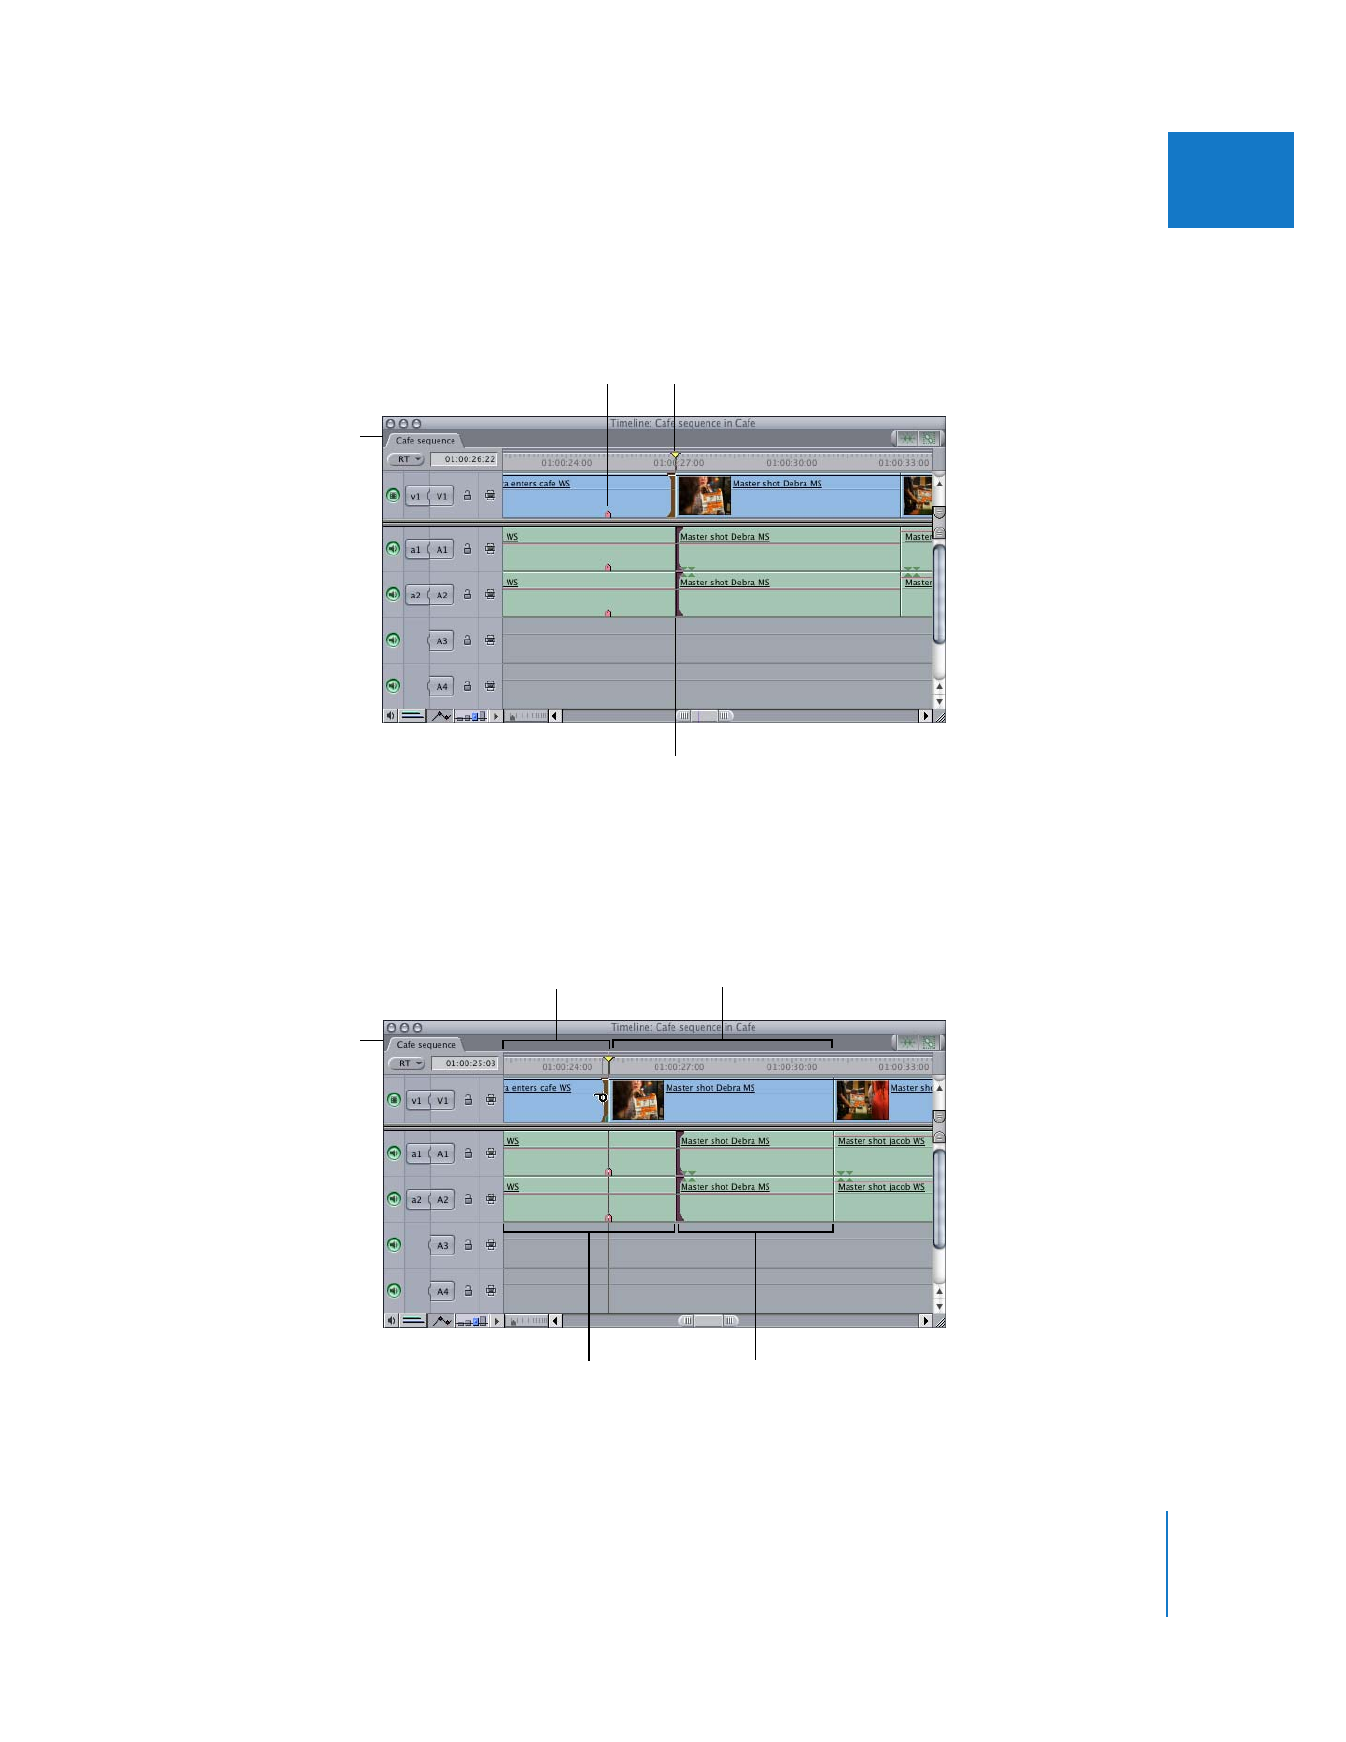
To create a split edit using asymmetrical editing:
1
Select the Ripple tool.
2
Hold down the Option key, then click the Out point of a video clip to select it.
Holding down the Option key while selecting an edit point selects only that point,
ignoring any other items linked to that clip.

Chapter 18
Performing Slip, Slide, Ripple, and Roll Edits
333
III
3
Hold down the Command key, then click the In point of an adjacent audio clip.
Holding down the Command key while selecting an edit point allows you to add edit
points to the current selection without deselecting previously selected edit points.
4
Use the Ripple tool to trim the above selection.
The video and audio edit points move in opposite directions, creating a split edit.
Audio-video synchronization is maintained in both clips.
Current Out point of
outgoing video clip
In point of incoming
audio clips
Intended video
edit point
Before
This clip remains
the same length.
Incoming audio clip
is trimmed shorter
from its In point.
Outgoing video clip
is trimmed shorter
from its Out point.
This clip remains
the same length.
After

334
Part III
Fine-Tuning Your Edit
Note: In this example, Command-clicking the In point of a stereo pair of audio clip items
results in adding both audio items to the selection. You can also Option-Command-click
a single audio item to add it to the selection individually, without including other audio
items linked to it. This can be especially useful for clips in which many audio items are
linked to a single video item in the Timeline.
Using the Roll Tool to Change Where a Cut Occurs
A roll edit adjusts the Out point and In point of two adjacent clips simultaneously. If
you like where two clips are placed in the Timeline, but you want to change when the
cut point happens, you can use the Roll tool. No clips move in the Timeline as a result;
only the edit point between the two clips moves. This is a two-sided edit, meaning that
two clips’ edit points are affected simultaneously; the first clip’s Out point and the next
clip’s In point are both adjusted by a roll edit. However, no other clips in the sequence
are affected.
Note: When you perform a roll edit, the overall duration of the sequence stays the
same, but both clips change duration. One gets longer while the other gets shorter to
compensate. This means that you don’t have to worry about causing sync problems
between linked clip items on different tracks.