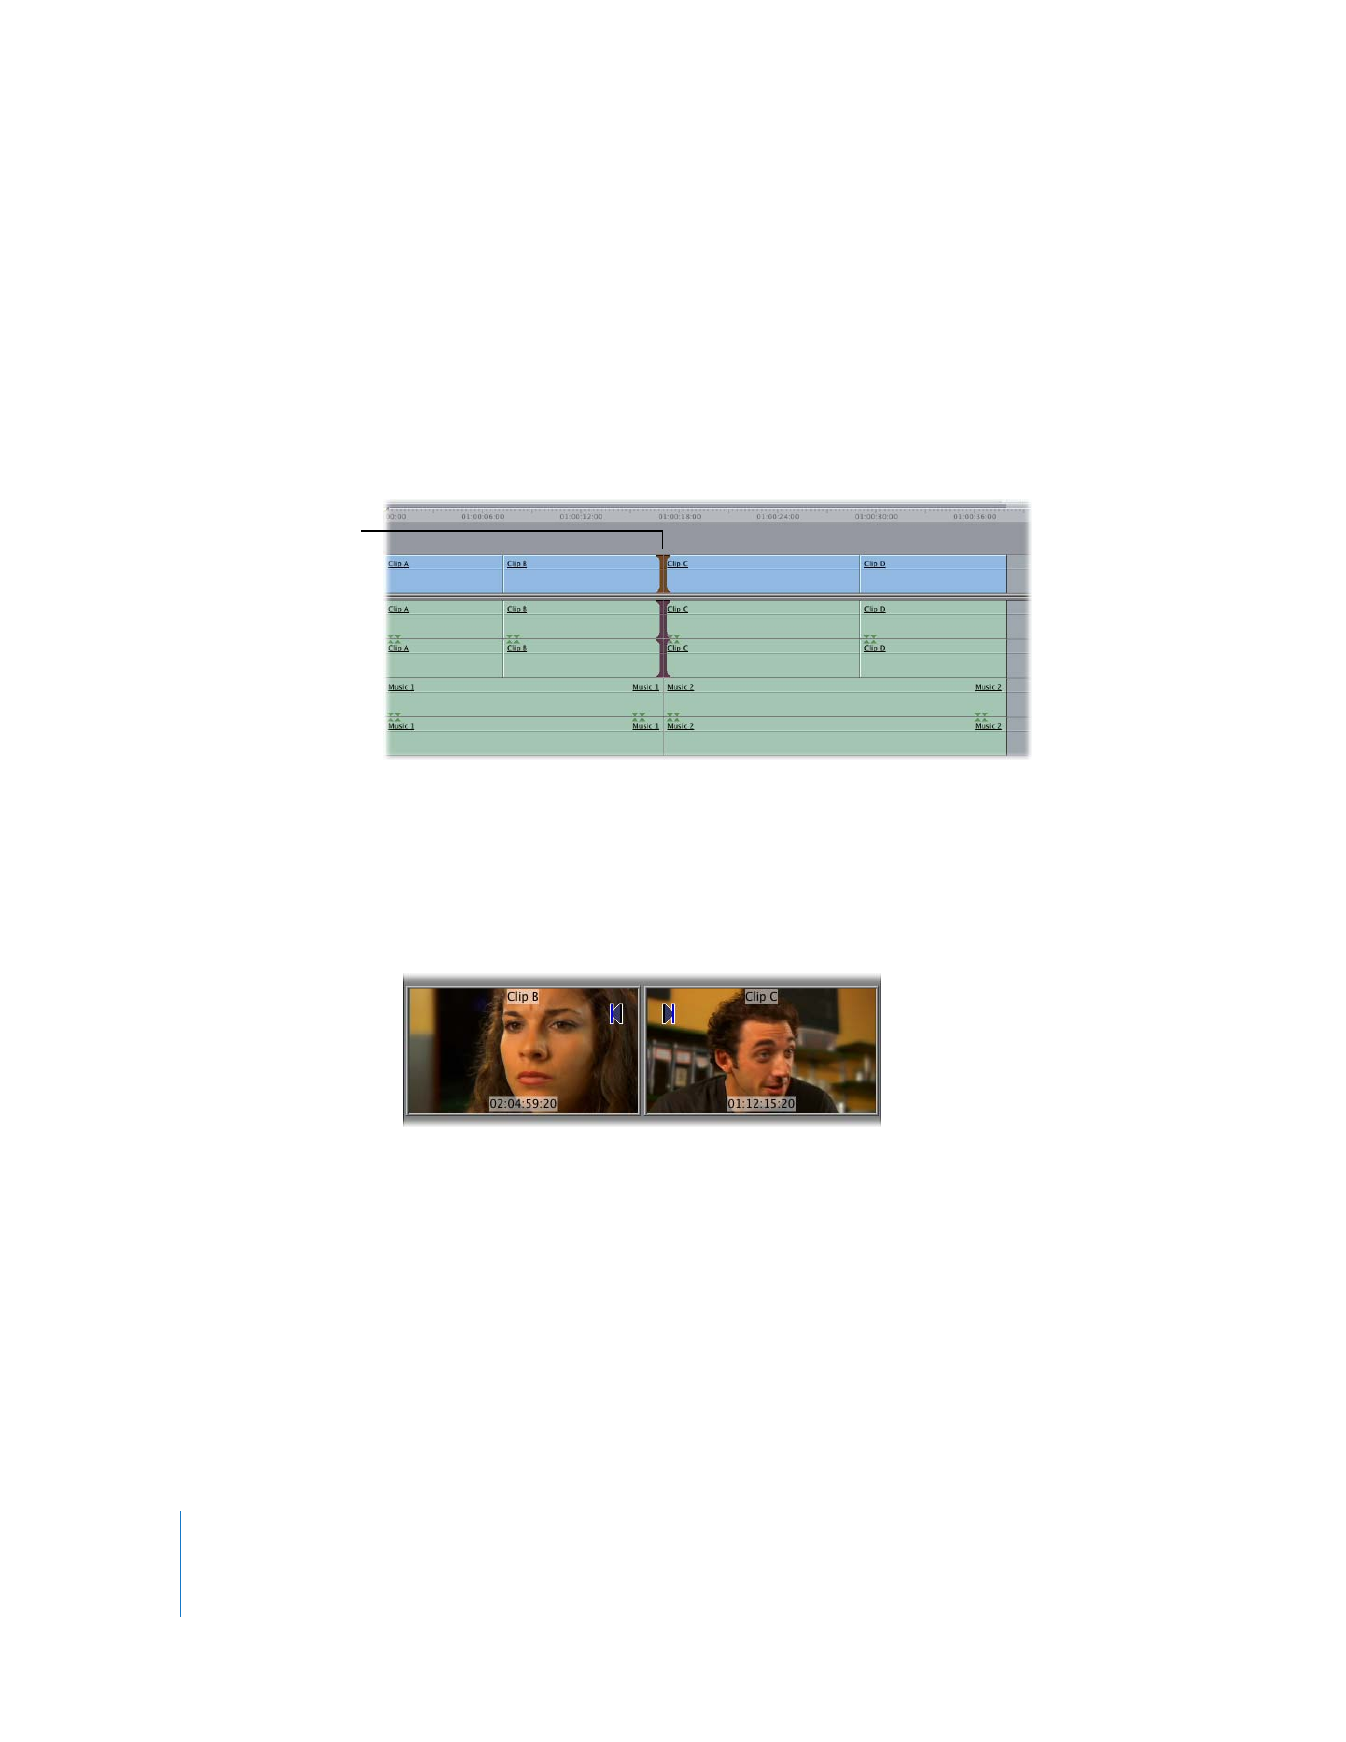
Rolling Edit Points in the Timeline
The easiest place to see how a roll edit affects your clips is the Timeline.
To do a roll edit in the Timeline:
1
Select the Roll tool in the Tool palette (or press the R key).
2
Select an edit point between two clips.
If linked selection is on, the edit points of linked items are also selected. For more
information, see “
Controls That Affect Trim Edits
” on page 343.
3
Do one of the following:
 Drag the edit point left or right.
As you drag, the Canvas shows a two-up display with the Out point of the outgoing
clip on the left and the In point of the incoming clip on the right (see also “
About the
Two-Up Display in the Canvas
” on page 405).
Selected edit point
Chapter 18
Performing Slip, Slide, Ripple, and Roll Edits
337
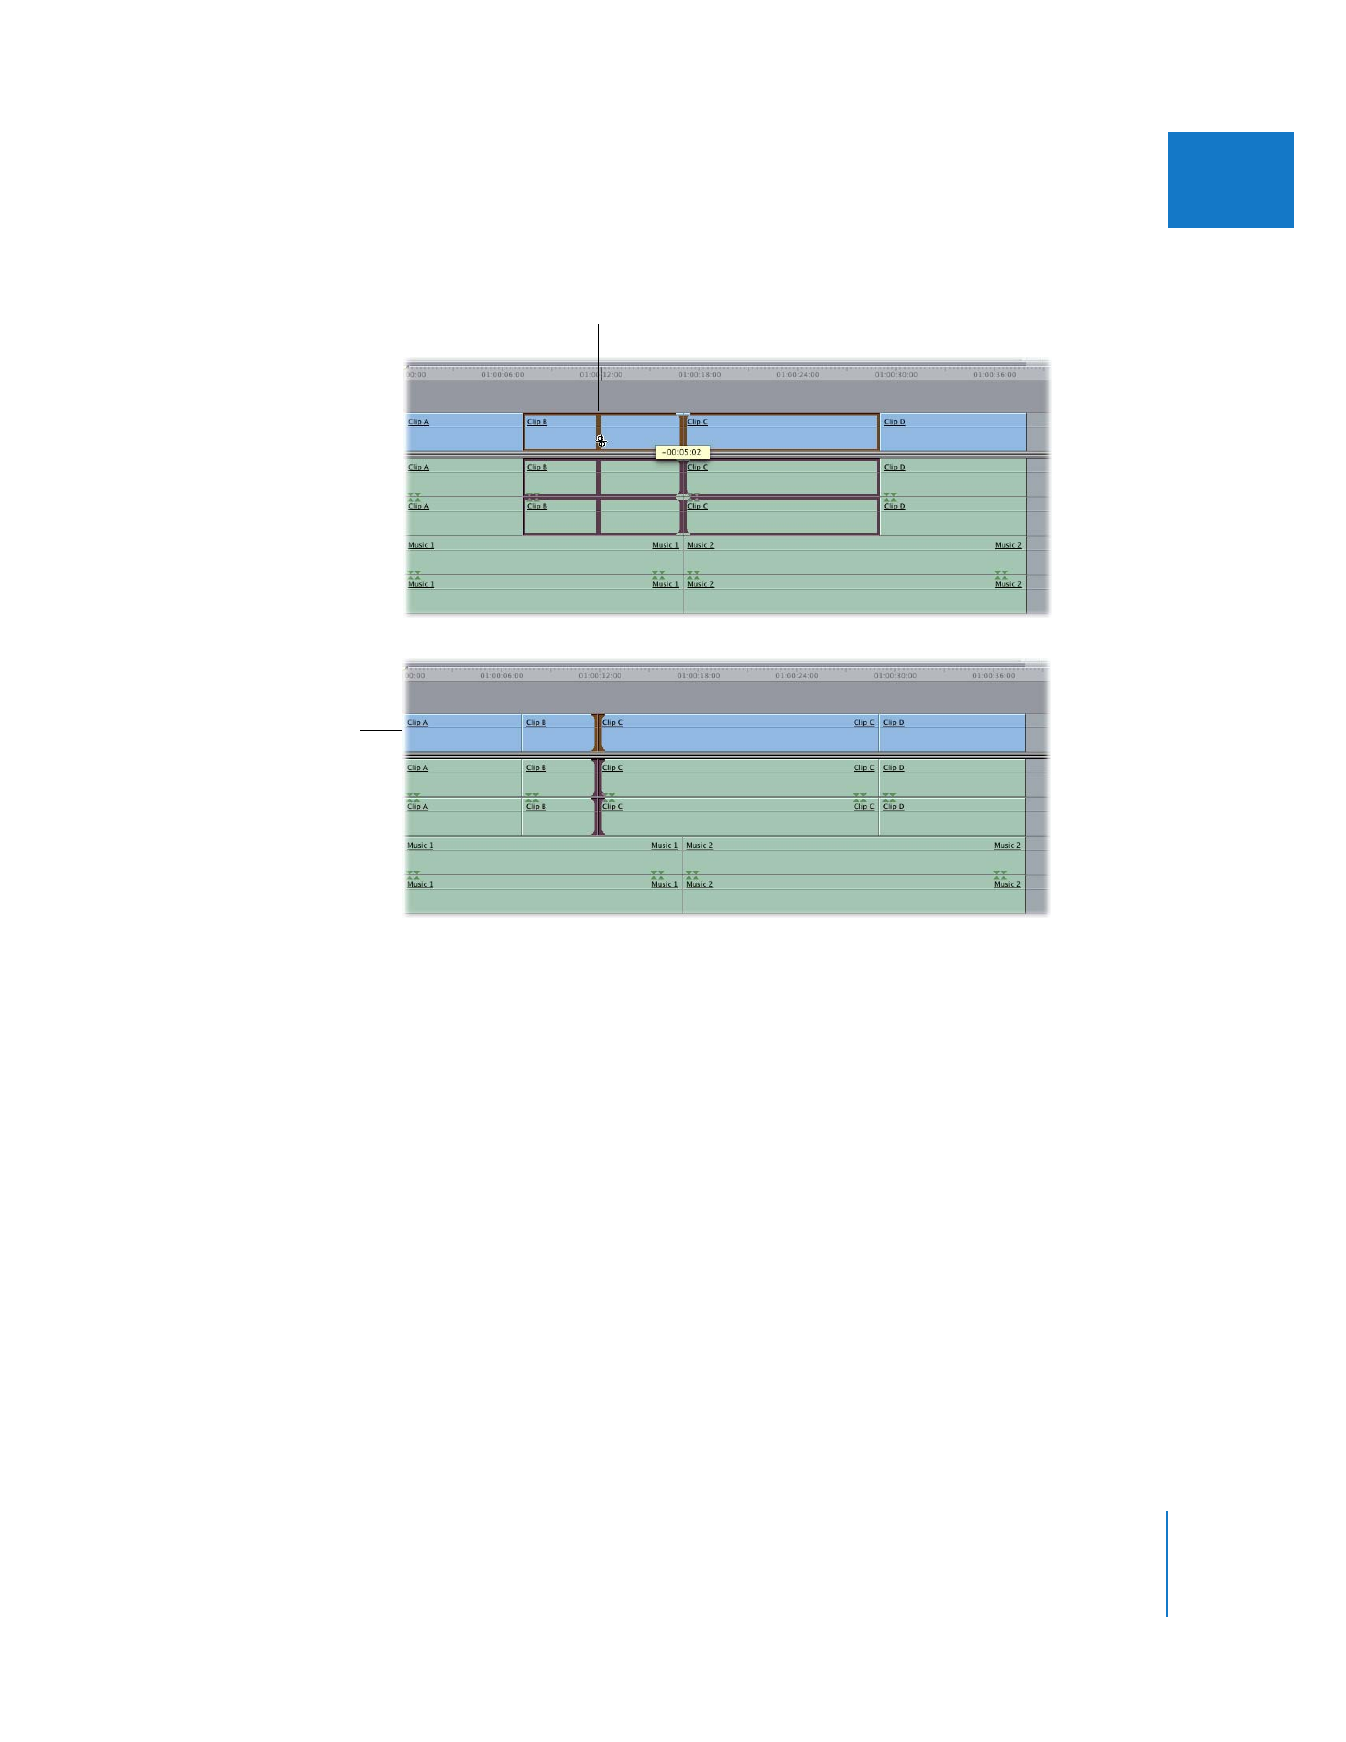
III
 Type + (plus) or – (minus) followed by the number of frames to add or subtract from
the current edit, then press Return.
Edit being rolled
After the roll edit, the
outgoing clip is shorter
and the incoming
clip is longer.
338
Part III
Fine-Tuning Your Edit
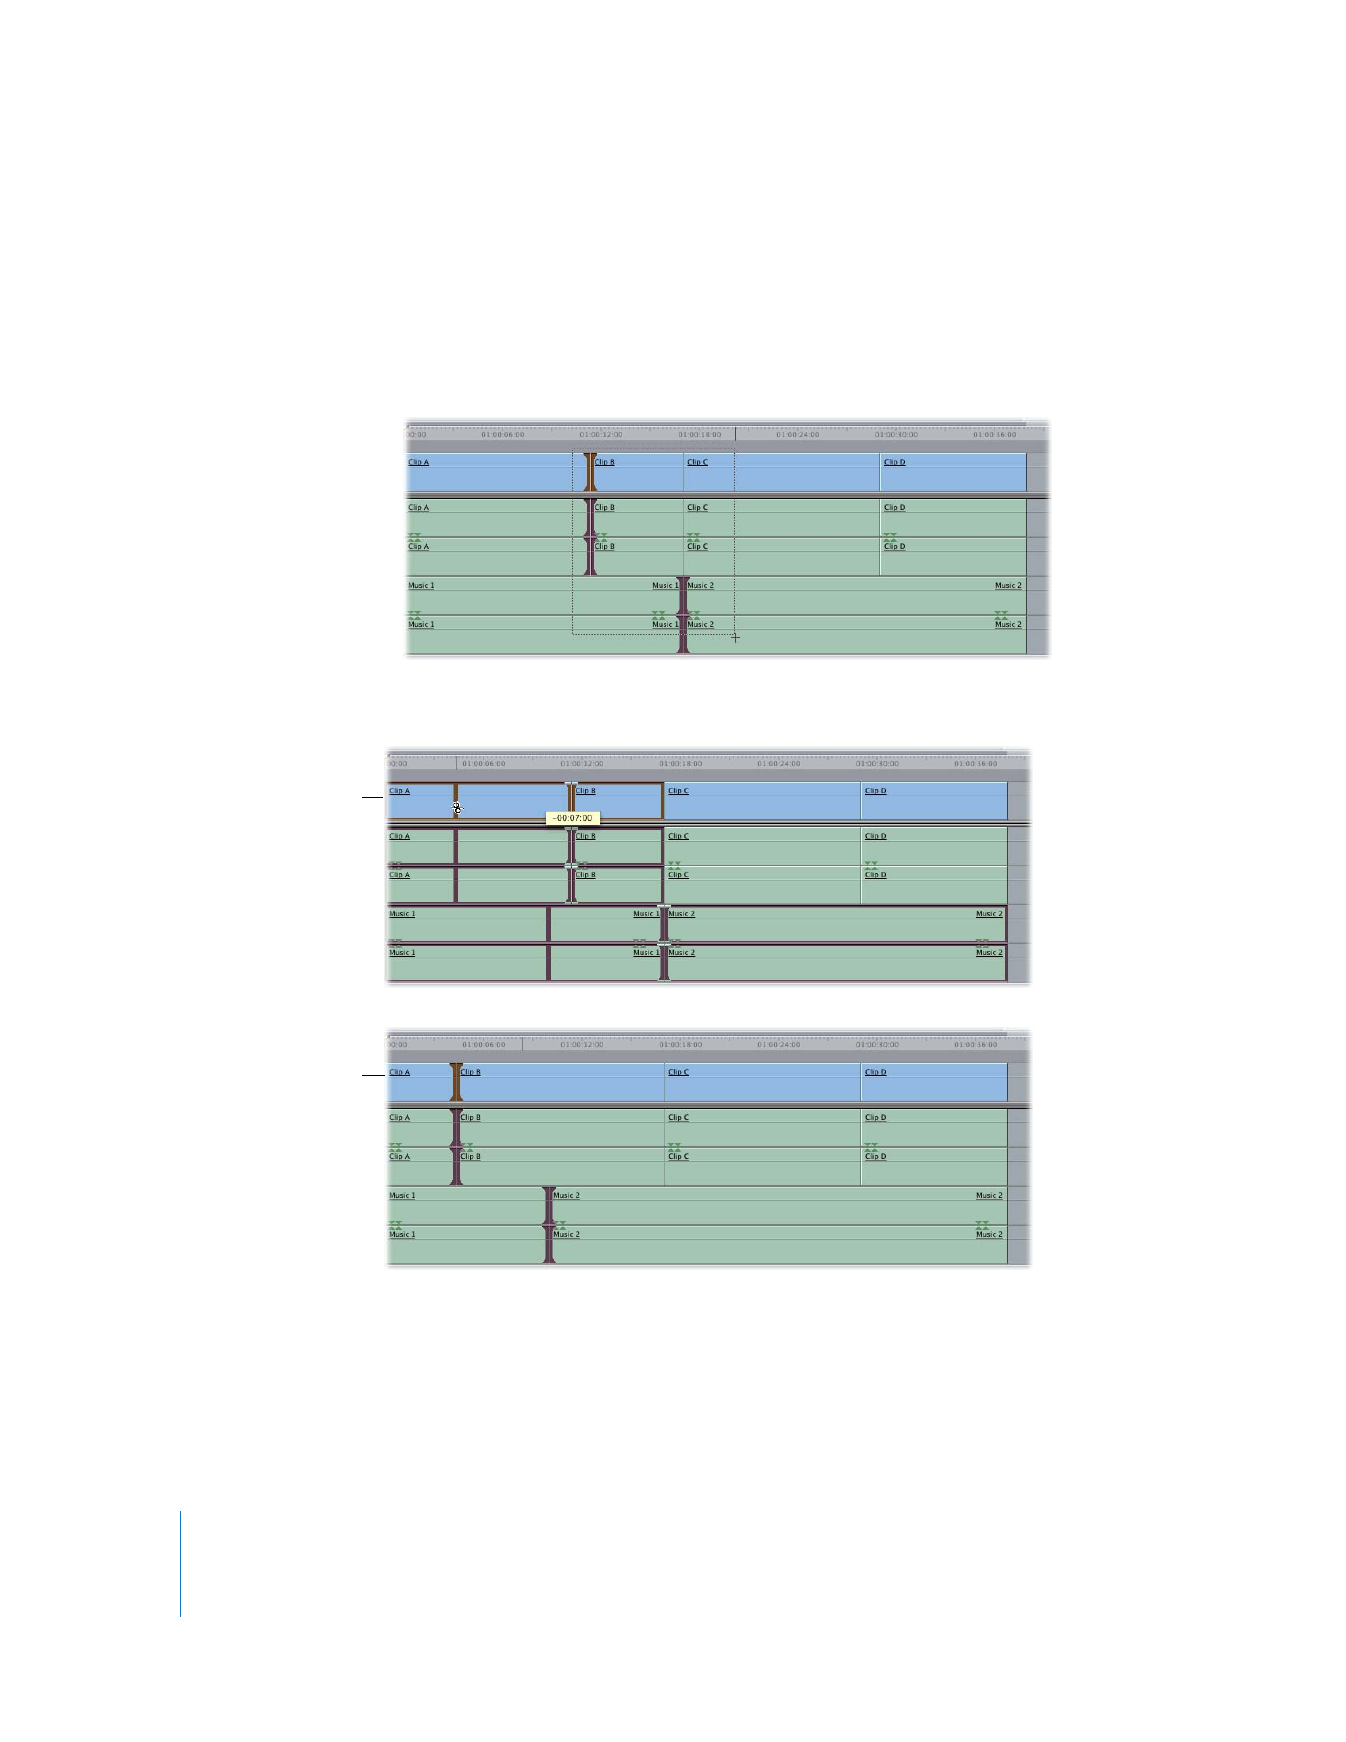
To roll edit points on multiple tracks simultaneously:
1
Do one of the following:
 Press the Command key while clicking to select multiple edit points.
 Select the Edit Selection tool in the Tool palette (or press the G key), then drag to
select the desired edit points.
2
Use the Roll tool to perform the roll edit across all of the tracks.
Before
After

Chapter 18
Performing Slip, Slide, Ripple, and Roll Edits
339
III