Doing a Ripple Edit to Adjust the Length of a Clip in a Transition
Even when a transition is applied between two clips, you can change the duration of
the outgoing or incoming clip using the Ripple tool. Ripple edits do not cause gaps in
your edited sequence.
 Rippling the Out point of the outgoing clip: This moves the transition and the edit
point at the same time so that the outgoing clip is shortened or extended. The rest
of your edited sequence moves forward or back to accommodate this change.
 Rippling the In point of the incoming clip: This has no effect on the location of the edit
point or the transition, but shortens or lengthens the incoming clip. All subsequent
clips are moved to the left or right so that there is no resulting gap.
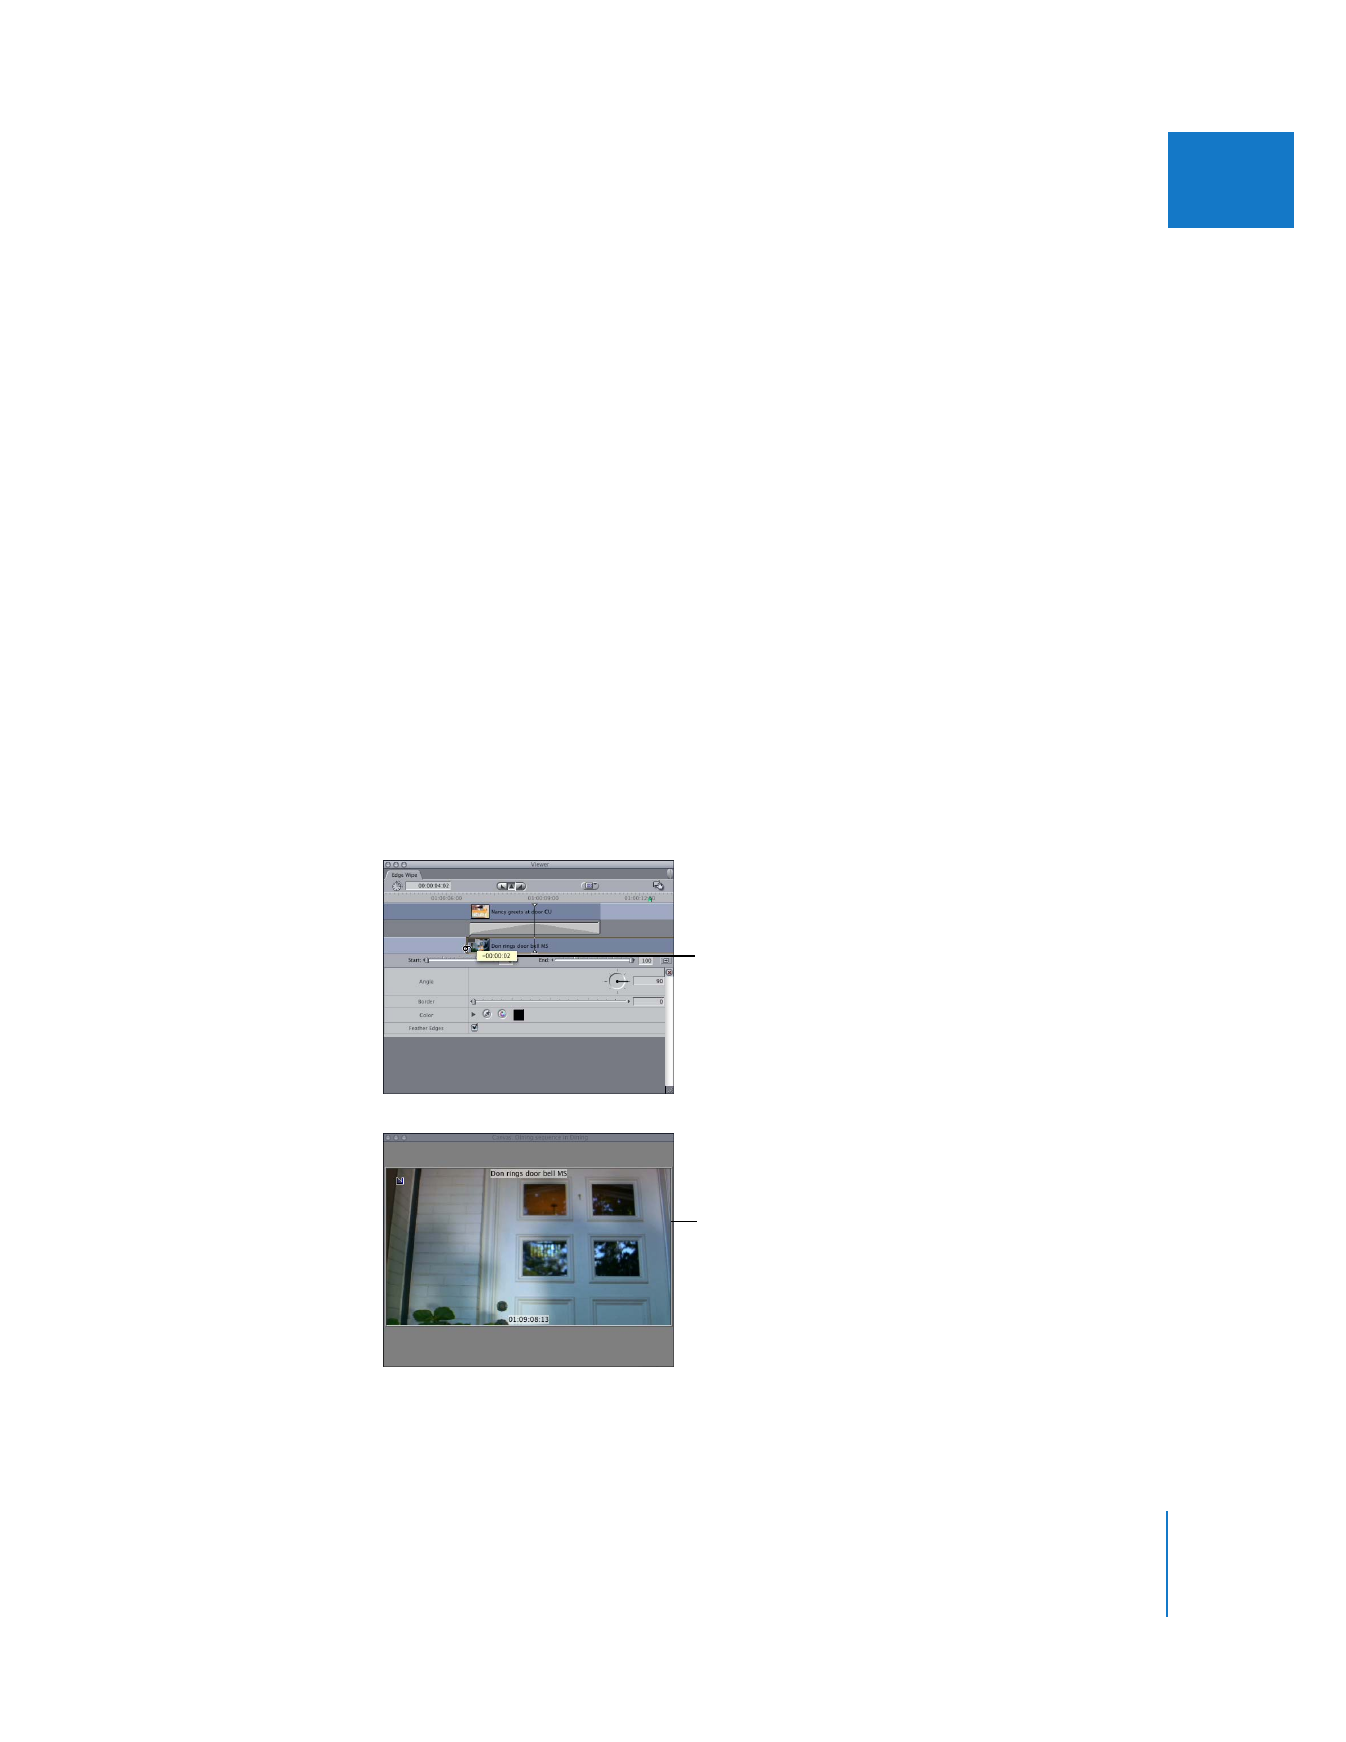
When you trim the outgoing or incoming clip with the Ripple tool, the Canvas shows
the current frame of the edit point you’re dragging, along with the clip’s name and the
current timecode value of the clip in a single frame display. A tooltip is displayed at the
location of the pointer in the Transition Editor to show the offset between the new edit
point you’re selecting and the original edit point.
To do a ripple edit, adjusting the length of the transition:
1
Open the transition in the Transition Editor.
2
Place the pointer at the Out point of the outgoing clip or at the In point of the
incoming clip.
3
When the pointer changes to the Ripple tool, drag the edit point to another frame
in your clip.
When you do a ripple
edit, a tooltip shows the
offset between the new
and old edit points.
In the Canvas, the frame
of the new edit point is
shown.
408
Part III
Fine-Tuning Your Edit