Trimming an Edit in the Trim Edit Window
Depending on how you like to work, you can choose one of several ways to use the
Trim Edit window.
To trim an edit point in the Trim Edit window:
1
Select one or more edit points to trim using the methods described above.
2
If you’re trimming multiple edit points, choose the track you want to view from the
Track pop-up menu.

366
Part III
Fine-Tuning Your Edit
3
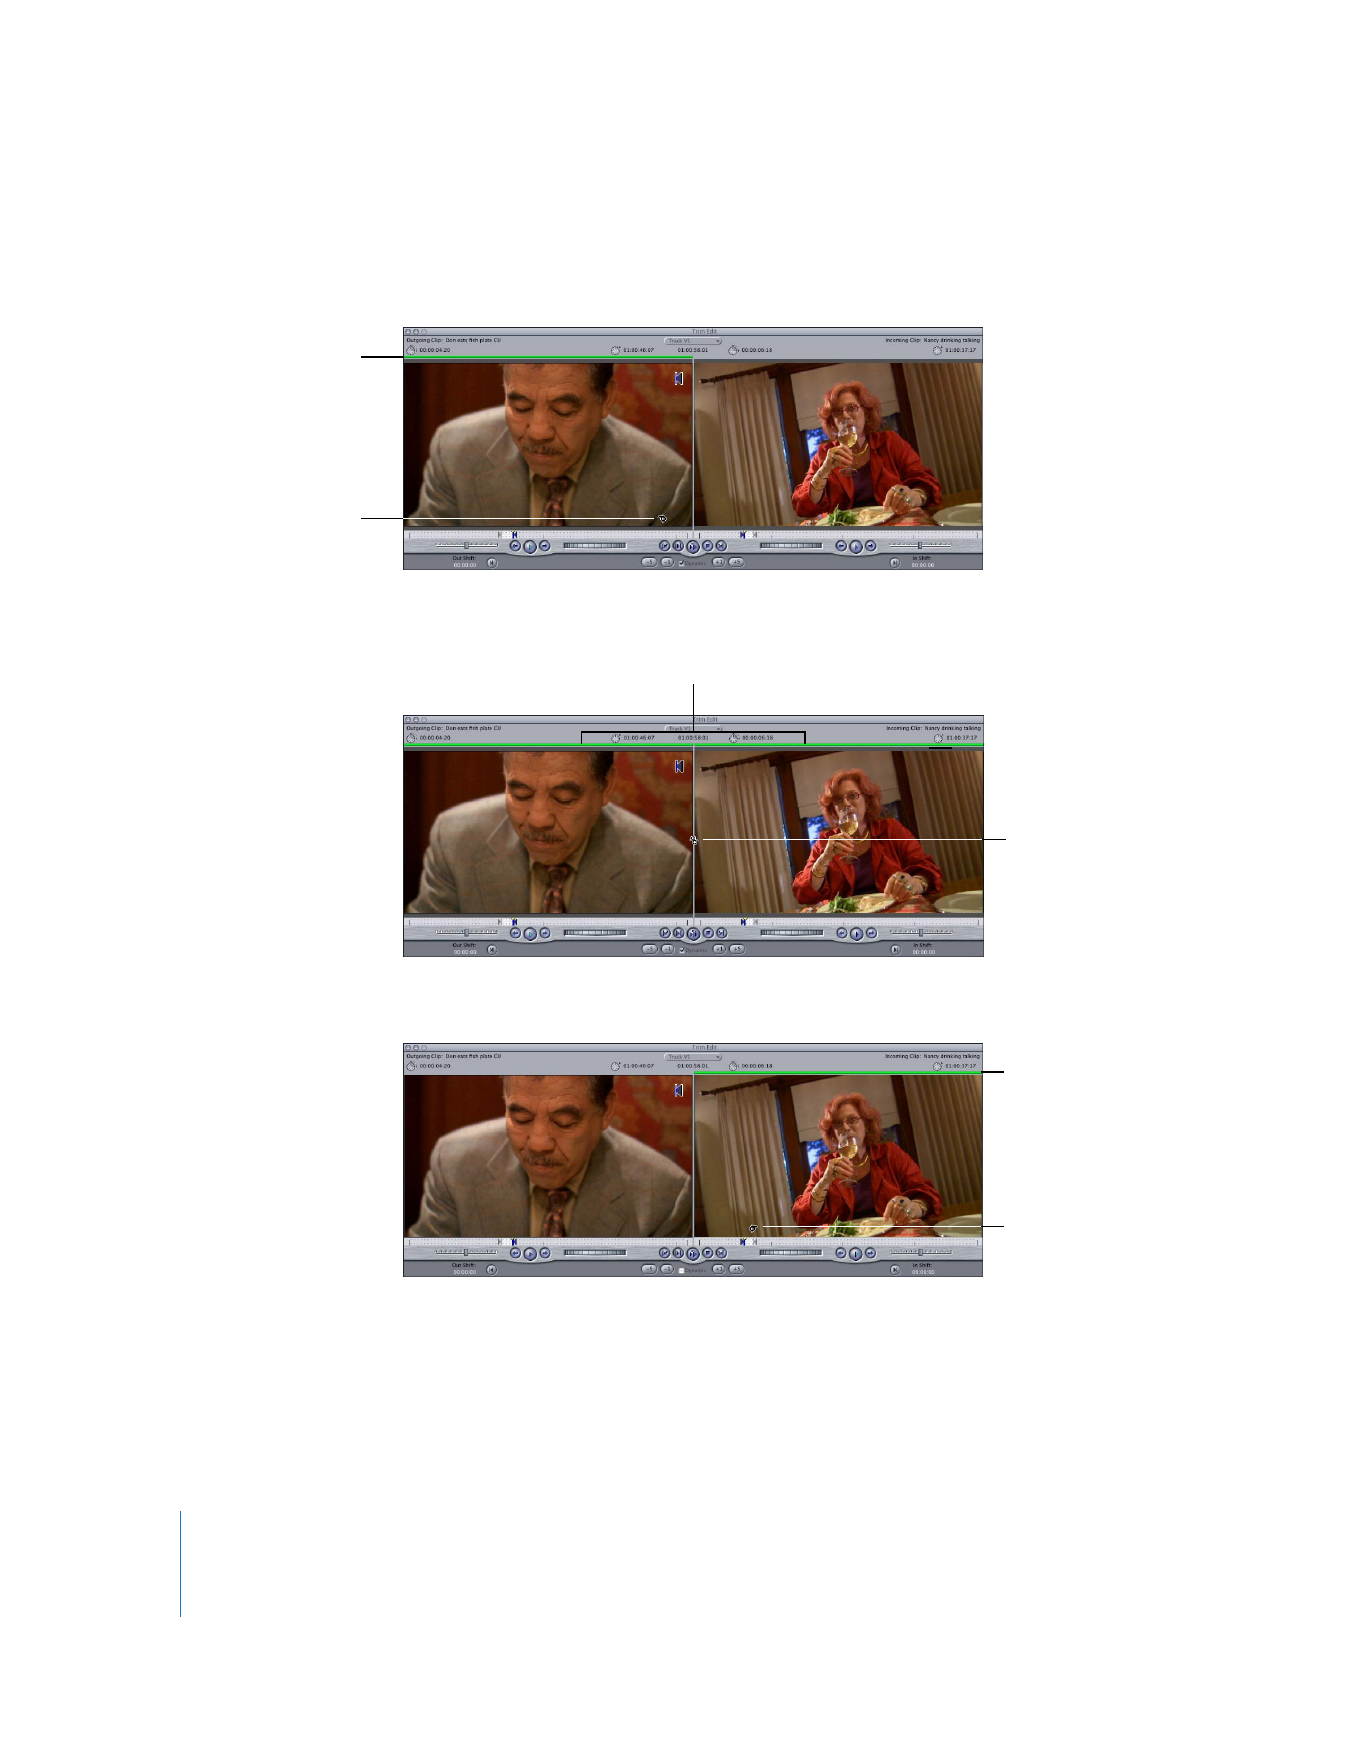
Choose a ripple or roll edit by doing one of the following:
 Click the left image to trim the outgoing clip with a ripple left edit.
 Click the center area between the images to do a roll edit.
 Click the right image to trim the incoming clip with a ripple right edit.
 Press the U key to toggle between the three available trimming modes.
A green bar appears above either or both sides of the edit to show you what kind of
trimming operation you’re performing.
Trimming indicator bar
only appears above
the outgoing clip.
The pointer temporarily
turns into a Ripple tool.
Trimming indicator bar
appears over both clips.
The pointer
temporarily turns
into a Roll tool.
Trimming indicator
bar only appears
above the
incoming clip.
The pointer
temporarily turns
into a Ripple tool.

Chapter 20
Trimming Clips Using the Trim Edit Window
367
III
4
Trim the edit point by doing any of the following:
 Click the trim buttons or use their keyboard equivalents to trim to the left or right
using the displayed frame increments.
 Press [ (left bracket) or ] (right bracket) to trim backward or forward one frame.
 Press Shift-[ or Shift-] to trim backward or forward five frames. The number of
frames to trim can be customized with the Multi-Frame Trim Size setting in the
Editing tab of User Preferences. (For more information, see Volume IV, Chapter 23,
“Choosing Settings and Preferences.”)
 Type + (plus) or – (minus) and the number of frames to add or subtract, then
press Return.
 Drag an edit marker in the scrubber bar to a new point in the outgoing or
incoming clip.
 Use the jog and shuttle controls to move the playhead within the outgoing or the
incoming clip. Then set a new Out point for the outgoing clip by pressing O or a new
In point for the incoming clip by pressing I.
 Use the playback controls to play the clip. Set a new Out point for the outgoing clip
or a new In point for the incoming clip.
 Use the J, K, and L keys to shuttle the playhead on either side of the edit point (you
choose which side by positioning the pointer there). As you move the pointer
between the left and right sides of the Trim Edit window, the left and right Play
buttons become highlighted. Don’t click, or you’ll change the selected
trim operation.
Press L to move forward, press J to reverse playback, and press K to stop. Press J or L
repeatedly to speed up and slow down playback. Press K and either L or J together to
perform slow-motion playback.
If the Dynamic Trimming checkbox is selected, the selected edit point moves to the
new position of the playhead whenever you stop playback.
For all the above trimming methods, the In Shift and Out Shift fields show the total
number of frames that have been modified. The sequence and playhead in the
Timeline automatically update to reflect your changes.
5
Review your edit.
See “
Reviewing and Playing Back Your Edits in the Trim Edit Window
” on page 368.

368
Part III
Fine-Tuning Your Edit
6
To trim another edit point in the same track, use the Go to Previous Edit and Go to Next
Edit buttons to move to another edit point and display it in the Trim Edit window.
You can also select one or more edit points in the Timeline, and then go back to the
Trim Edit window to perform additional trim operations.
7
When you are finished trimming, do one of the following:
 Move the playhead away from the edit point in the Canvas or Timeline.
 Click in the Timeline to deselect all edit points.
 Close the Trim Edit window.