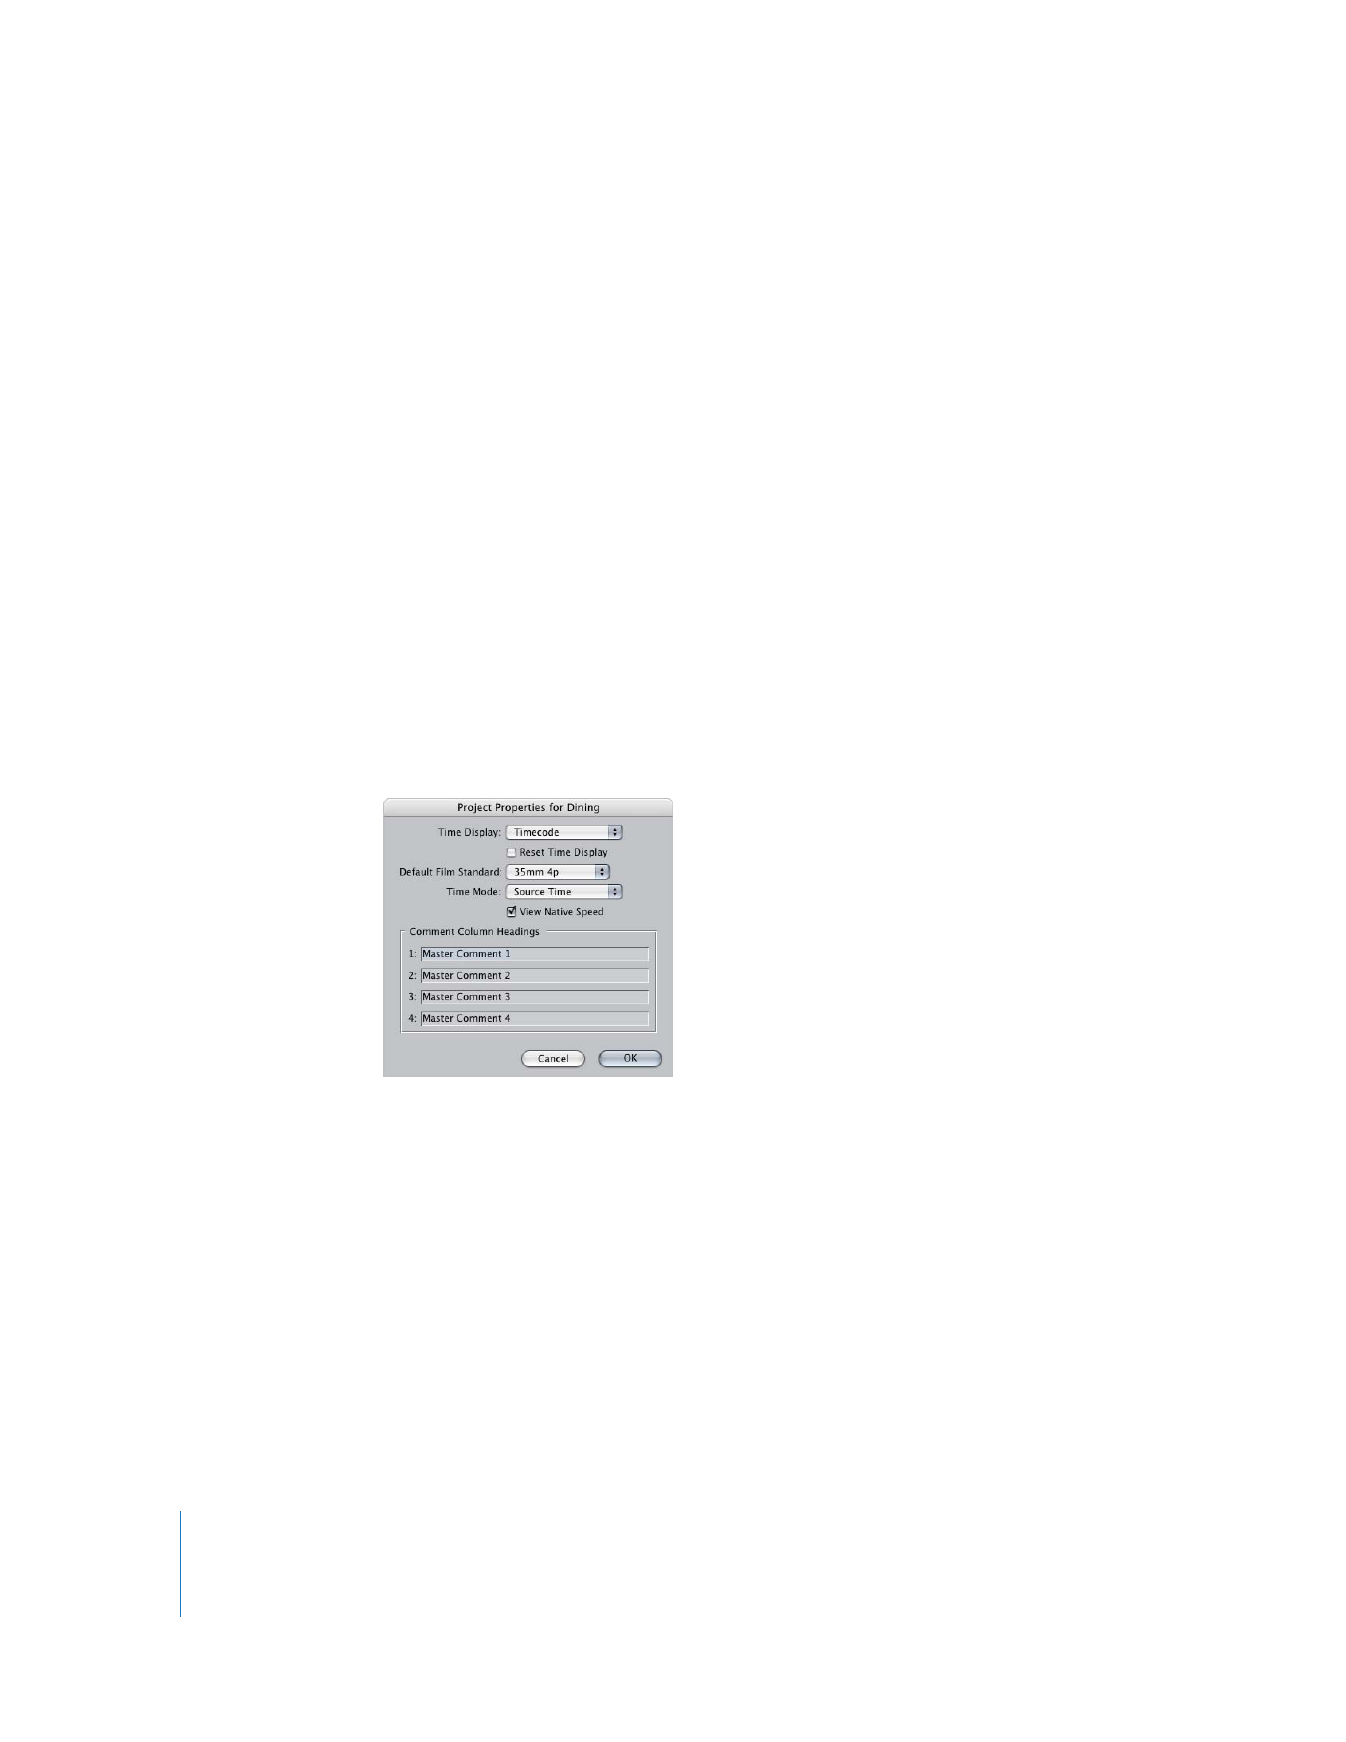
Changing Global Timecode Display Options
Timecode display settings can be globally adjusted for an entire project. For most
situations, it’s best to stick with the Final Cut Pro default settings:
 Timecode: Source Time
 View Native Speed: Enabled
Note: If you customize a particular clip’s timecode display, its display option overrides
the global timecode display option. Affiliate clips are not affected when you change
the timecode display of a master or other affiliate clip.
To choose default timecode display options for the active project:
1
In the Browser, click the tab of the project for which you want to change timecode
display settings.
2
Choose Edit > Project Properties.
3
Choose a new timecode display from the Time Display pop-up menu.
4
Click OK.
To reset the timecode display for all clips in the active project:
1
In the Browser, click the tab of the project for which you want to change timecode
display settings.
2
Choose Edit > Project Properties.
3
Choose a timecode display from the Time Display pop-up menu.
4
Select the Reset Time Display checkbox.
5
Click OK.
Chapter 25
Working with Timecode
445
III
To set all clips in the active project to display source time or clip time:
1
In the Browser, click the tab of the project for which you want to change time
mode settings.
2
Choose Edit > Project Properties.
3
Choose Source Time or Clip Time from the Time Mode pop-up menu.
4
Click OK.
To change the native clip speed display mode for all clips in the active project:
1
In the Browser, click the tab of the project for which you want to change time
mode settings.
2
Choose Edit > Project Properties.
3
Select or deselect the View Native Speed checkbox.
4
Click OK.