Exporting Sequence Audio to an OMF File
When you need to transfer your sequence audio to another audio post-production
application, you can use the Export Audio to OMF command.
To export audio from a sequence to an OMF file:
1
Select a sequence in the Browser or open a sequence in the Timeline.
2
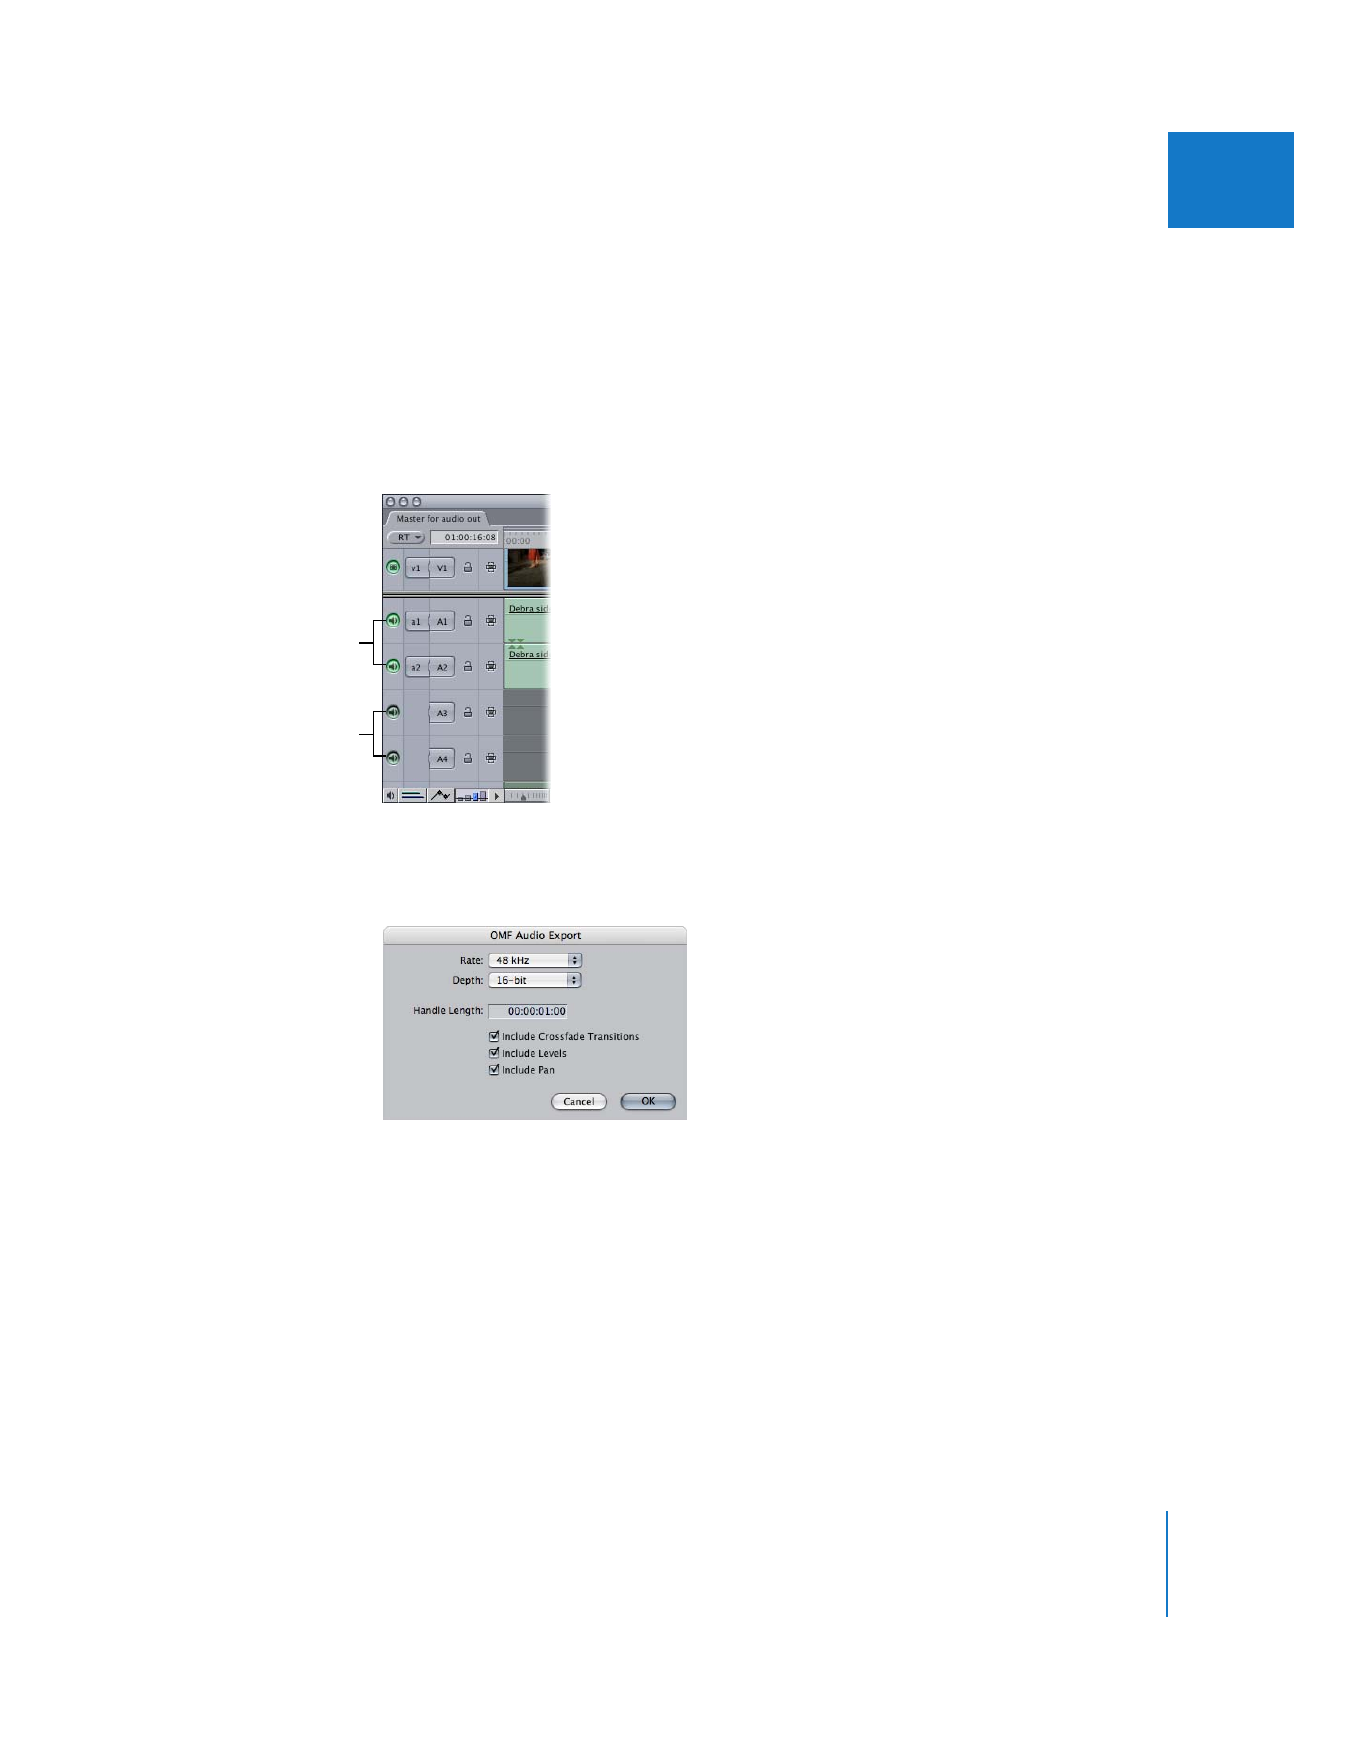
In the Timeline, make sure that each audio track you want to export is enabled (the
Track Visibility control next to the track is green).
3
Choose File > Export > Audio to OMF.
4
In the OMF Audio Export dialog, choose the options you want, then click OK.
Make sure just the audio
tracks you want to export
are enabled (green).
Disabled tracks are
not exported.

198
Part I
Audio Mixing
 Rate: Choose a sample rate that suits what you’re using the audio for. All of the audio
you export has the same sample rate. If you use audio with different sample rates,
it’s converted.
 Depth: Choose 16- or 24-bit. If you choose 24-bit audio, make sure the application
you will use to import the OMF file supports 24-bit audio.
Note: When exporting to OMF, Final Cut Pro uses the highest quality setting regardless
of what you choose from the Audio Playback Quality pop-up menu in the General tab
of the User Preferences window.
 Handle Length: Enter a value in timecode format to add handles to the audio clips.
Handles give your audio editor the flexibility needed to fix edits. Handles of 1 to 3
seconds are typical, but it’s best to check with your audio editor.
Handles are included only when there is additional audio media outside the clip In
and Out points. When there is not enough media to create the full handle duration,
Final Cut Pro includes as much of a handle as possible.
 Include Crossfade Transitions: Because some OMF importing tools do not handle
cross fade transitions correctly, and many sound editors prefer to create cross fades
themselves, you have the option to leave cross fades out when exporting your
sequence as an OMF file. When this checkbox is deselected, extra source media is
substituted for the duration of the cross fade being left out. How much extra source
media will be substituted depends on whether the cross fade was edited before, on,
or after the edit point. Extra source media included as a result of this option will be in
addition to extra source media added by the Handle Length option.
 Include Levels: Audio levels and keyframes are included in the exported OMF file.
Even if no audio level keyframes are set, the current level of each clip is exported.
 Include Pan: Pan settings and keyframes are included in the exported OMF file. Even
if no pan keyframes are set, the current pan setting of each clip is exported.
5
Choose a location and enter a name for the file.
6
When you’re ready to export, click Save.

Chapter 10
Exporting Audio for Mixing in Other Applications
199
I
Exporting Audio Clip Information to an EDL
Some audio post-production software can import Edit Decision Lists (EDLs) in the same
way as video editing applications. Importing an EDL creates audio clips (or regions) in
the audio application’s timeline, which you can then use to recapture your audio from
original source tapes. This is similar to a video online edit session, in which all clips are
recaptured at the highest quality possible. Since the engineers are recapturing all of
the audio directly from the source tapes using workstations with dedicated high-end
audio hardware, you can be assured of the highest-possible quality.
EDLs can only store information for up to four audio channels, and the clips must have
been originally captured using timecode. If some of your audio doesn’t have timecode
(for example, if you imported a track from a CD), you must first transfer your music and
sound effects to a video or audio format with timecode and then edit the timecoded
clips into your sequence. If your program has more than four audio tracks, you need to
export multiple EDLs and have them collated by your audio editor.
For detailed information on exporting EDLs, see Volume IV, Chapter 10, “Importing and
Exporting EDLs.”