
Adjusting Audio Levels in the Timeline and Viewer
You can adjust audio levels directly in the Timeline or in the Viewer, or you can change
audio levels by adjusting faders in the Audio Mixer window. For more information
about the Audio Mixer, see Chapter 4, “
Overview of the Audio Mixer
,” on page 69 and
Chapter 5, “
Using the Audio Mixer
,” on page 81.
Adjusting Audio Levels in the Timeline
Changing audio levels directly in the Timeline is fast and is especially useful when you
need to mix the levels of clips relative to other clips playing at the same time. For
example, if you want to raise and lower the volume of a music clip to correspond with
a voiceover recording, you can see how the narrator’s dialogue lines up with the music
clips if you turn on audio waveforms in the Timeline. That way, you can easily see
exactly where you need to set your keyframes to achieve the desired levels.
To use all the commands and tools described in this section, you need to turn on clip
overlays in the Timeline to display the audio level and pan overlays. Displaying audio
waveforms is also useful for audio mixing in the Timeline.
112
Part I
Audio Mixing
To display clip overlays in the Timeline:
1
Open a sequence in the Timeline, then choose Sequence > Settings.
2
Click the Timeline Options tab, then select the Show Keyframe Overlays checkbox.
You can also select the Clip Overlays control in the Timeline.
To display audio waveforms in the Timeline:
1
Open a sequence in the Timeline, then choose Sequence > Settings.
2
Click the Timeline Options tab, then select the Show Audio Waveforms checkbox.
∏
Tip: To avoid opening the Sequence Settings window, you can also press
Command-Option-W while the Timeline is active.
To adjust the audio level of a single clip with no keyframes:
1
Select the Clip Overlays control at the bottom of the Timeline to display overlays.
2
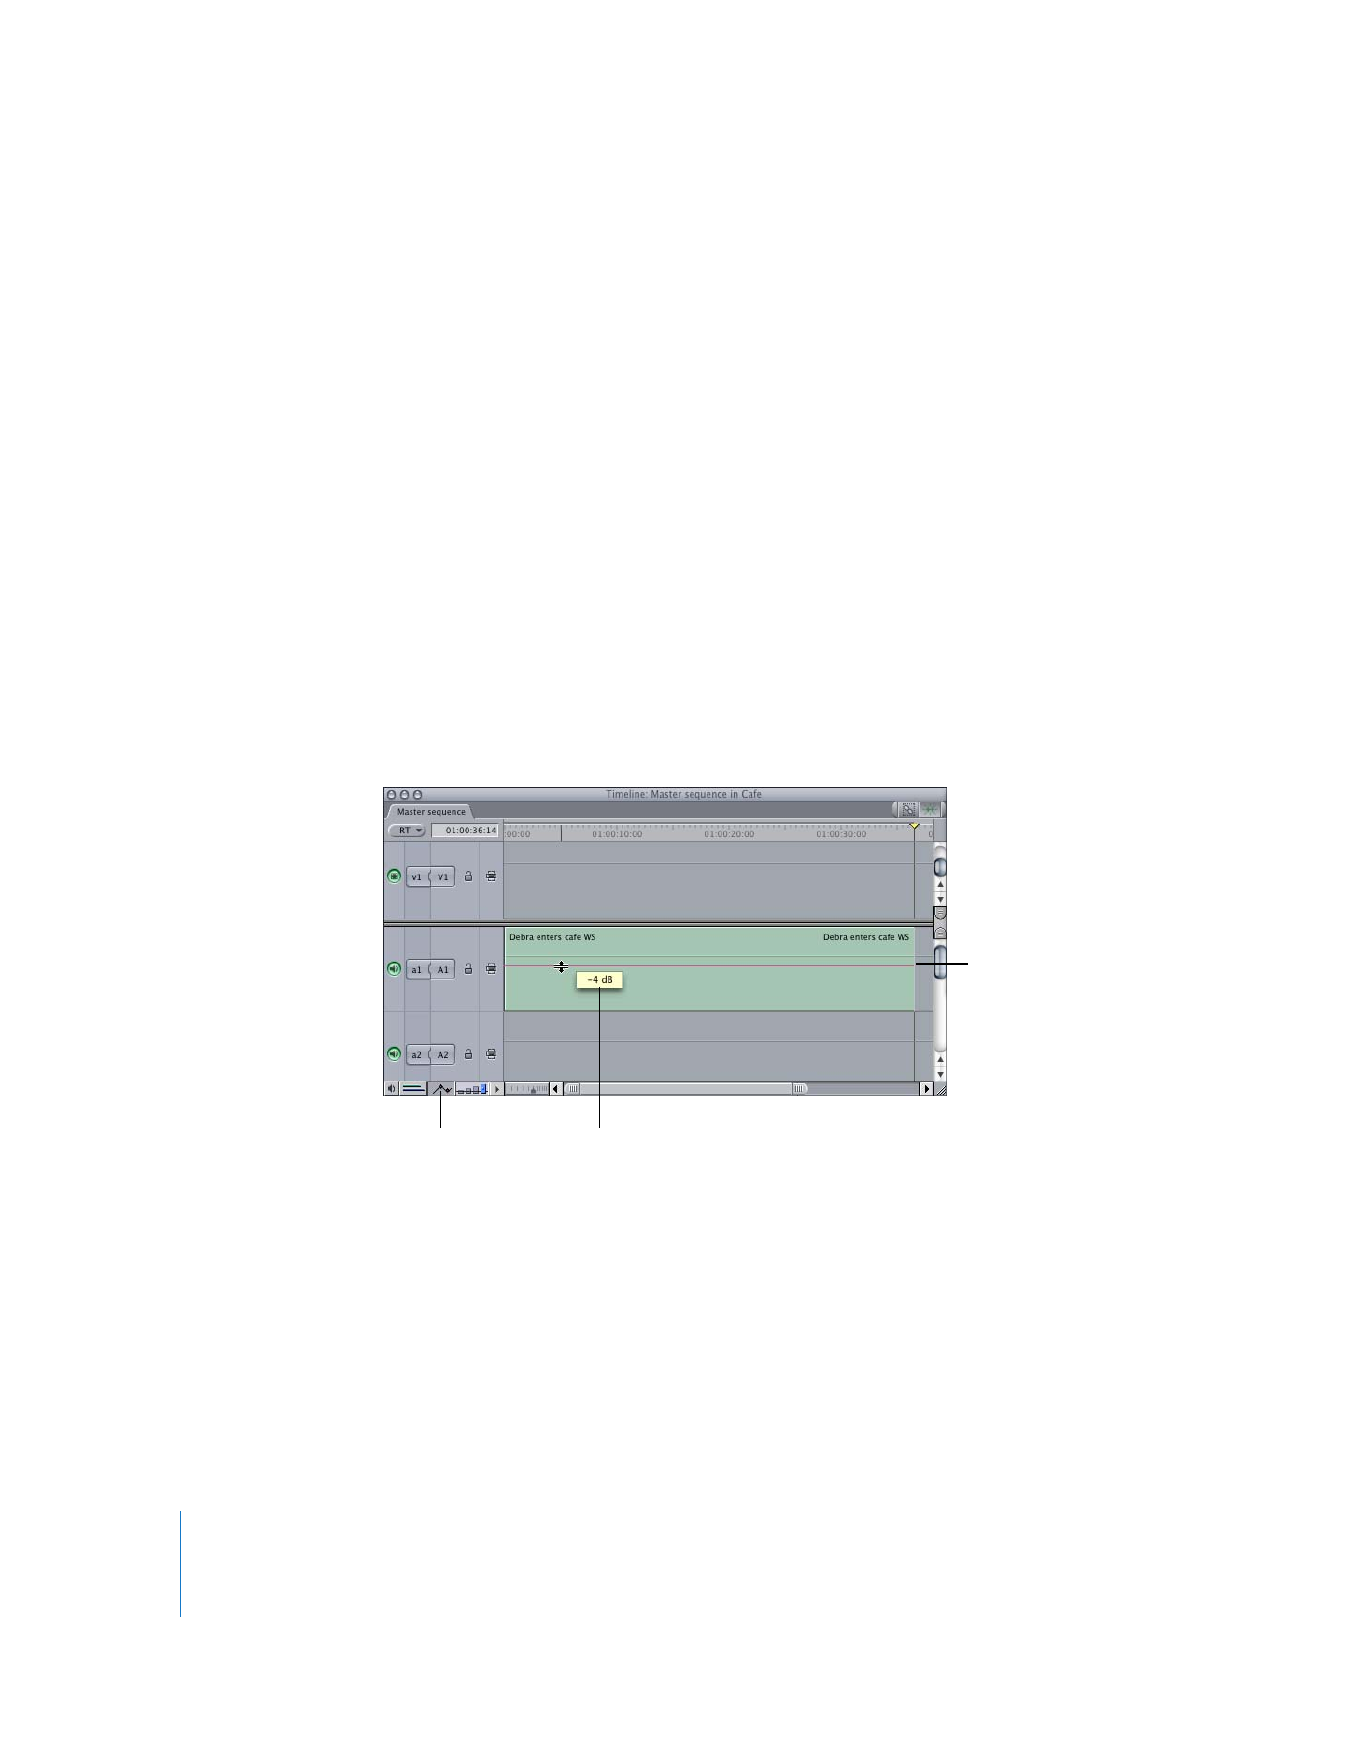
Drag the audio level overlay up or down to adjust the audio level. The overlay is a pink
line if the clip is not selected, and a green line if it is.
The pointer changes to an Adjust Line Segment pointer when it’s directly over the
audio level overlay, and a box displays the change in levels as you drag.
Audio level overlay
Change in audio level
Clip Overlays
control
Chapter 6
Mixing Audio in the Timeline and Viewer
113
I
To add a keyframe to the audio level overlay of a clip in the Timeline:
1
Do one of the following:
 Select the Pen tool in the Tool palette (or press the P key).
 If you’re using the Selection tool, press and hold down the Option key.
2
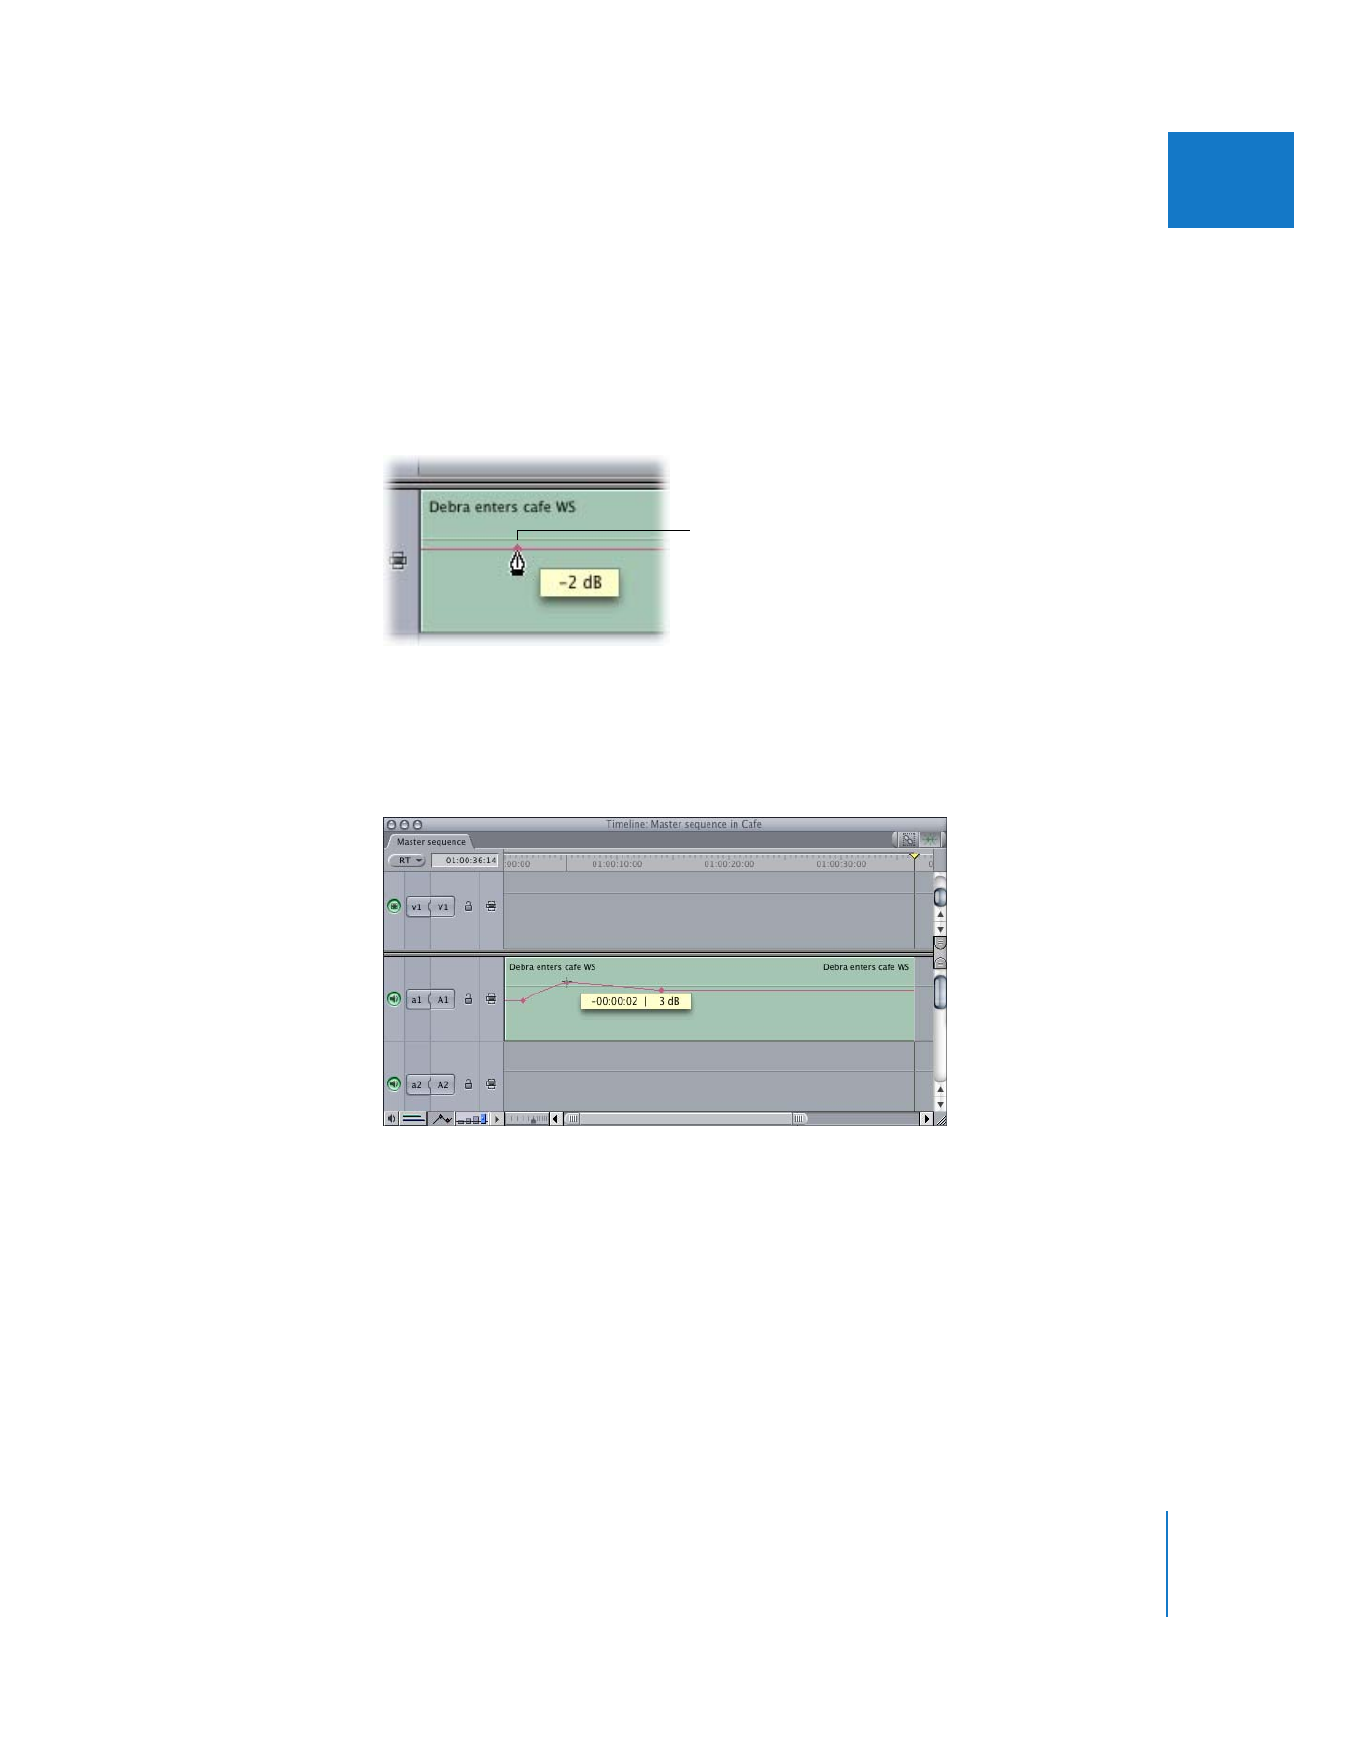
Move the Pen tool to the point in your sequence where you want to set a keyframe,
then click the overlay to set the keyframe.
To adjust keyframes in the Timeline:
m
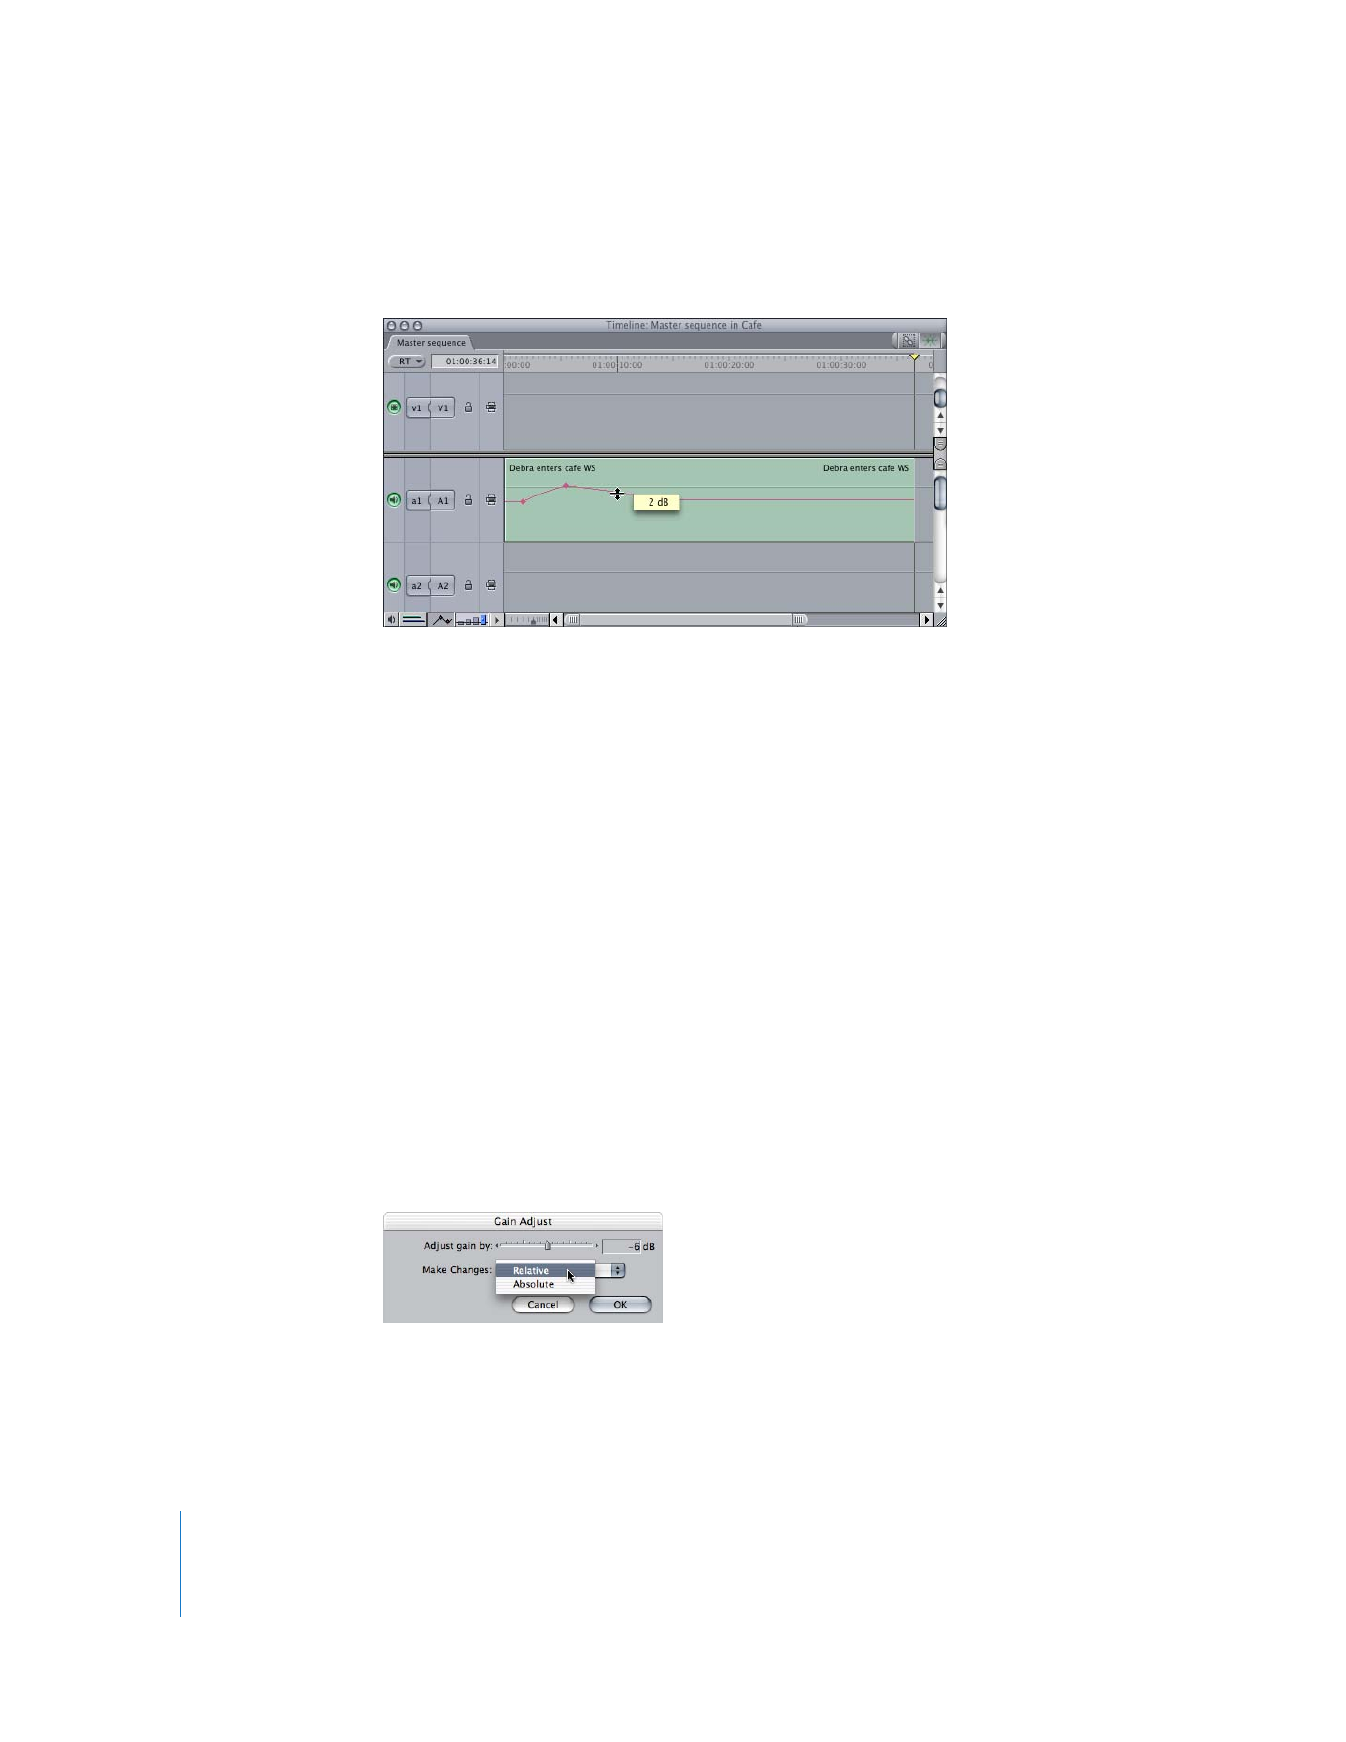
Place the Selection tool directly over a keyframe, so that it turns into a crosshair pointer.
You can now adjust a single keyframe by dragging it up or down to change its level, or
from side to side to move it forward and backward in time.
The keyframe appears as
a small diamond at the
point where you clicked.
114
Part I
Audio Mixing
To adjust a section of a clip’s overlay in the middle of four keyframes:
m
Drag just that section up or down, as if you were dragging the entire overlay.
To delete audio level keyframes in the Timeline, do one of the following:
m
Control-click the keyframe you want to delete, then choose Clear from the
shortcut menu.
m
Select the Delete Point tool in the Tool palette (or press the P key twice). Place the Delete
Point tool on the keyframe you want to delete, then click to delete the keyframe.
m
With the Selection tool selected, press and hold down the Option key, then move the
pointer to the keyframe you want to delete. When the pointer turns into the Delete
Point tool, click to delete the keyframe.
To select a range of keyframes to modify:
m
Use the Range Selection tool to select a group of keyframes. You can now move, delete,
or change the level of just those keyframes.
To adjust the audio level of a group of clips simultaneously:
1
In the Timeline, select a group of audio clips whose levels you want to adjust.
2
Choose Modify > Levels.
3
Use the slider to adjust the audio level and choose Relative or Absolute from the
pop-up menu, then click OK.
 Relative: Adjusts each track’s audio level relative to the current level.
 Absolute: Changes all selected tracks to the value indicated in the number field next
to the slider.
Chapter 6
Mixing Audio in the Timeline and Viewer
115
I
Changing Audio Levels in the Viewer
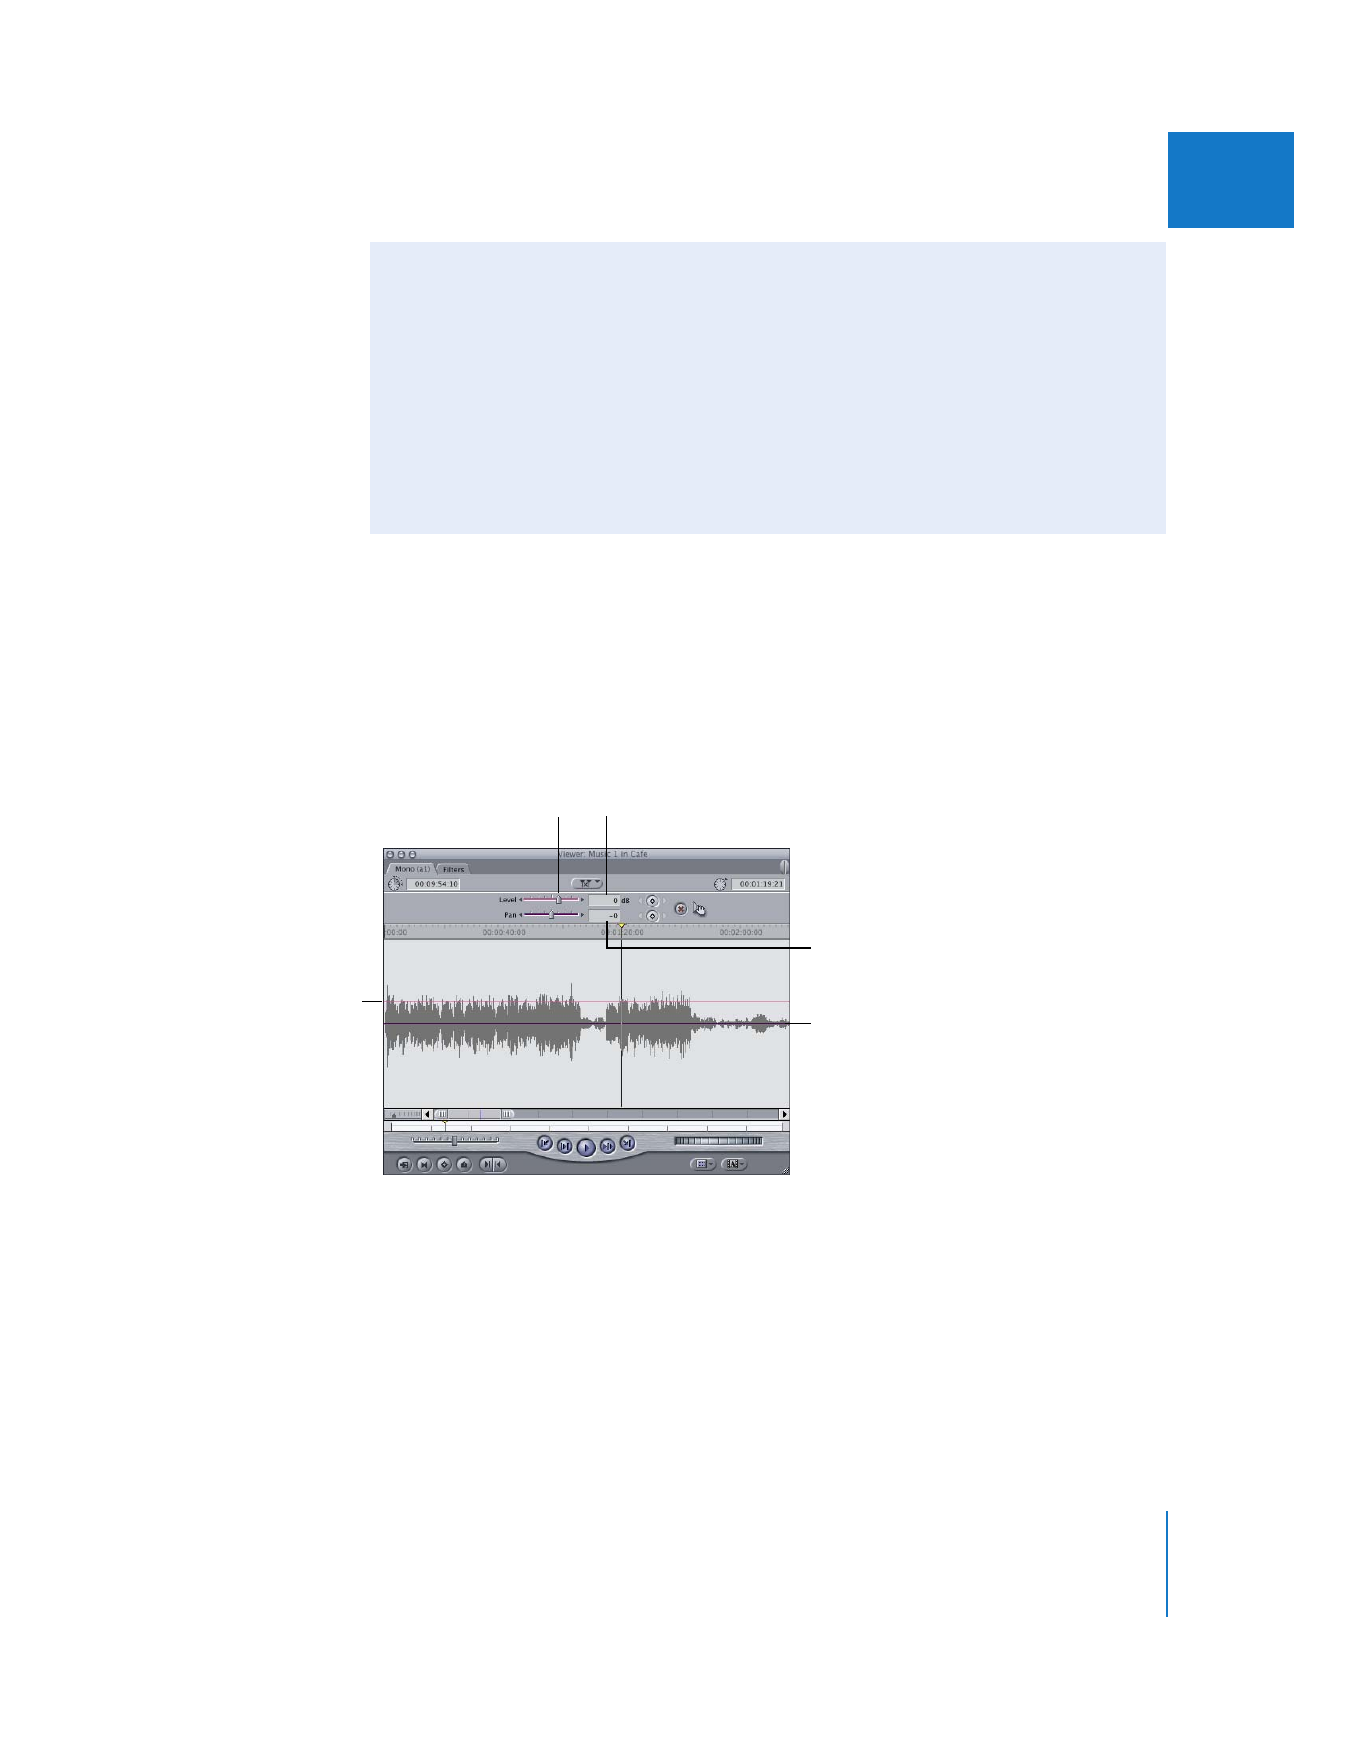
You can control the audio levels and placement of sound (pan) in a clip in the Viewer
using the sliders at the top of the Audio tab, the number fields next to the sliders, or
the overlays in the middle of the waveform display area. The detail displayed in the
audio tabs of the Viewer is good for modifying keyframes recorded using the
Audio Mixer.