
Creating, Modifying, and Deleting Keyframes in the Viewer
The keyframe controls are located next to the slider controls in the Viewer.
 Level Keyframe button: The keyframe button to the right of the Level field places a
keyframe on the audio level overlay at the current playhead location. You place
keyframes on the audio level overlay in preparation for creating a dynamic change in
the level when you’re mixing.
 Level keyframe navigation buttons: These buttons, to the left and right of the Level
Keyframe button, allow you to move the playhead forward or backward from one
keyframe on the audio level overlay to the next.
Level Keyframe
button
Pan Keyframe button
Reset button
124
Part I
Audio Mixing
 Pan Keyframe button: This button, to the right of the Pan slider, places a pan
keyframe at the current playhead location on the pan overlay. These keyframe
markers can be used in preparation for dynamically panning an audio clip’s output
from one stereo channel to another.
 Pan keyframe navigation buttons: These buttons, to the left and right of the Pan
Keyframe button, allow you to move the playhead forward or backward from one
keyframe on the pan overlay to the next.
 Reset button: This button deletes all marked keyframes on both the audio level
overlay and the pan overlay of the currently selected audio track and resets both to
their original values (0 dB for the audio level, and –1 for the pan level).
Until you create at least one audio level or pan keyframe in your audio clip, changes
you make affect the level or stereo placement of your entire clip. Although you need
two keyframes to do anything useful, once you set the first audio level or pan keyframe,
any changes you make to the keyframed levels anywhere else in the clip generate
additional keyframes.
To set a keyframe, do one of the following:
m
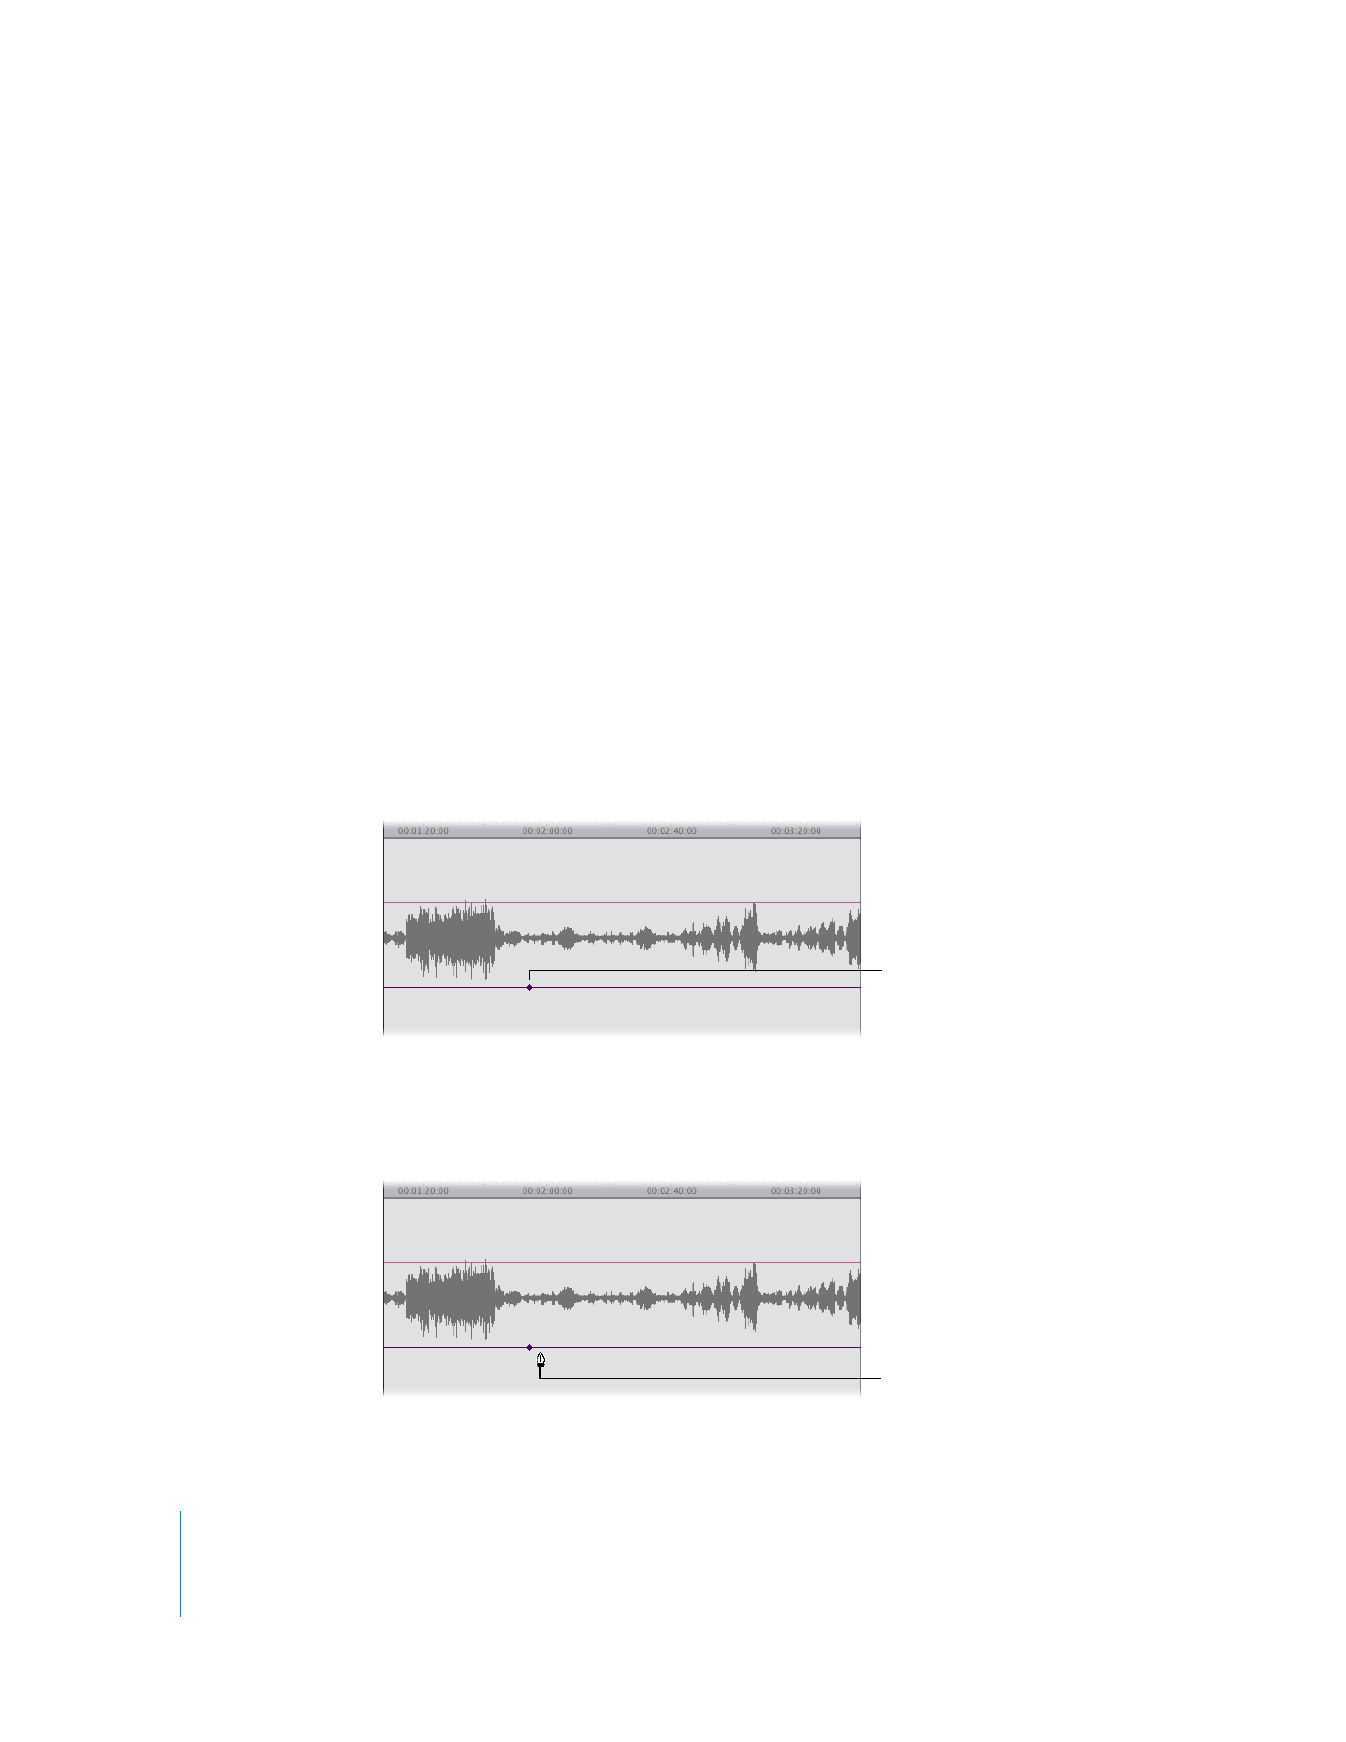
Move the playhead in the Viewer to the place where you want to set a keyframe, then
click the Level or Pan Keyframe button.
m
Select the Selection tool (or press A), then hold down the Option key and position the
pointer over the level overlay. The pointer turns into the Pen tool. Click a level overlay
with the Pen tool to add a keyframe at that point.
The keyframe appears as a small diamond on the overlay.
A keyframe appears at the
location of the playhead.
Pen tool

Chapter 6
Mixing Audio in the Timeline and Viewer
125
I
To set additional keyframes:
1
Move the playhead to another point in the clip where you want to set a keyframe.
2
Do one of the following:
 Drag the Level or Pan slider to set a new keyframe at that level or value.
 Type a number in the appropriate field to set a new keyframe at that level or value.
 Click a keyframe button to add a keyframe to the audio level or pan overlay at the
overlay’s current level.
 Hold down the Option key and click an overlay with the Pen tool to add a keyframe
at that point without changing the level of the overlay. You can add as many
keyframes as you want by clicking repeatedly with the Option key held down.
The keyframe appears as a small diamond on the overlay you added it to.
To move the Viewer playhead from one keyframe to another, do one of
the following:
m
Click the left or right Level or Pan keyframe navigation button to move the playhead to
the next keyframe to the left or right of the playhead.
m
Press Option-K to move the playhead to the next keyframe to the left of the playhead.
m
Press Shift-K to move the playhead to the next keyframe to the right of the playhead.
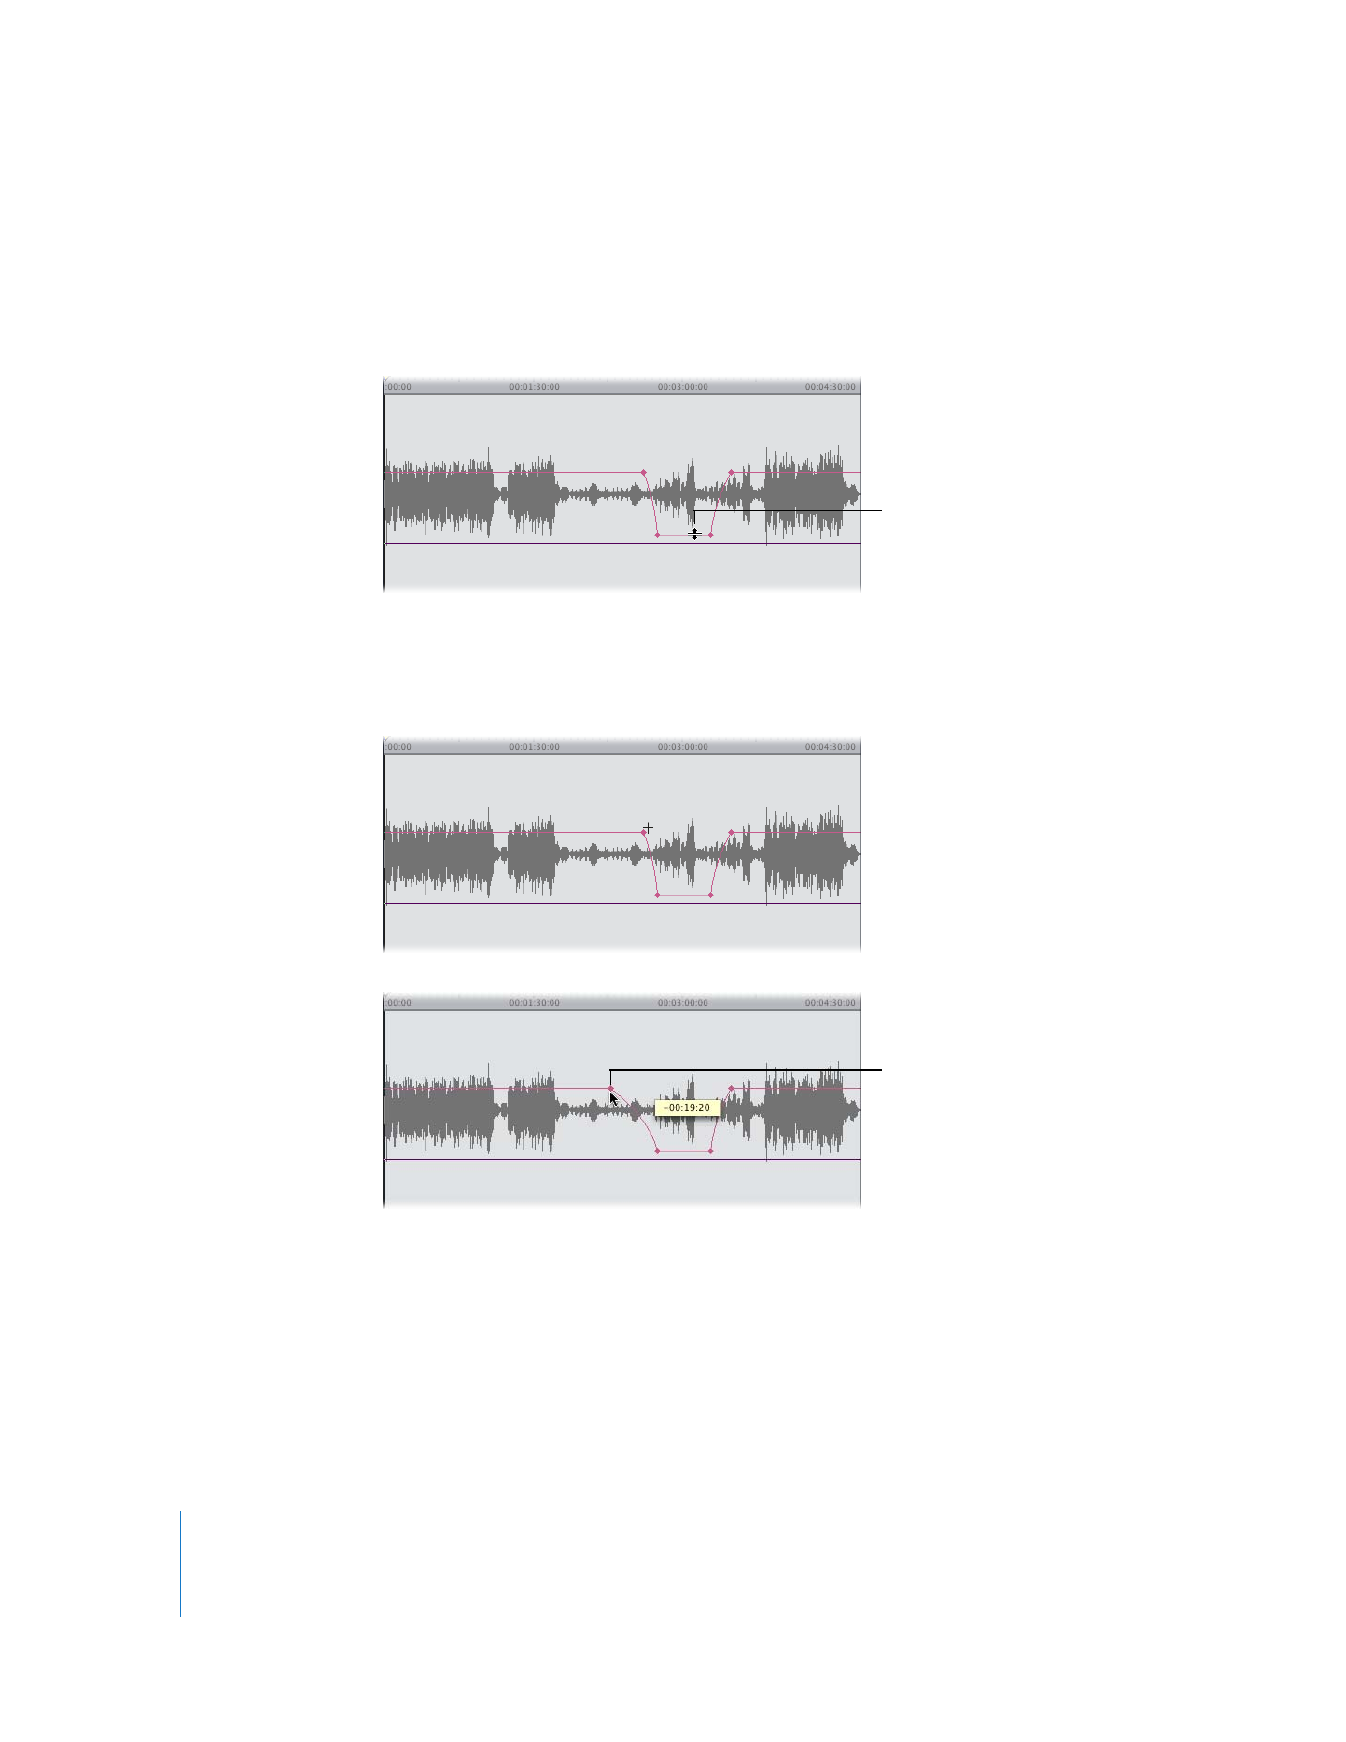
To adjust the level or pan value of a single keyframe, do one of the following:
m
Move the playhead to the keyframe you want to adjust, then drag the appropriate
slider to a new value.
m
Move the playhead to the keyframe you want to adjust, type a new value in the
appropriate field, and press the Return key.
m
Move the pointer over the keyframe you want to modify. When the pointer becomes a
crosshair pointer, drag the keyframe you want to modify.
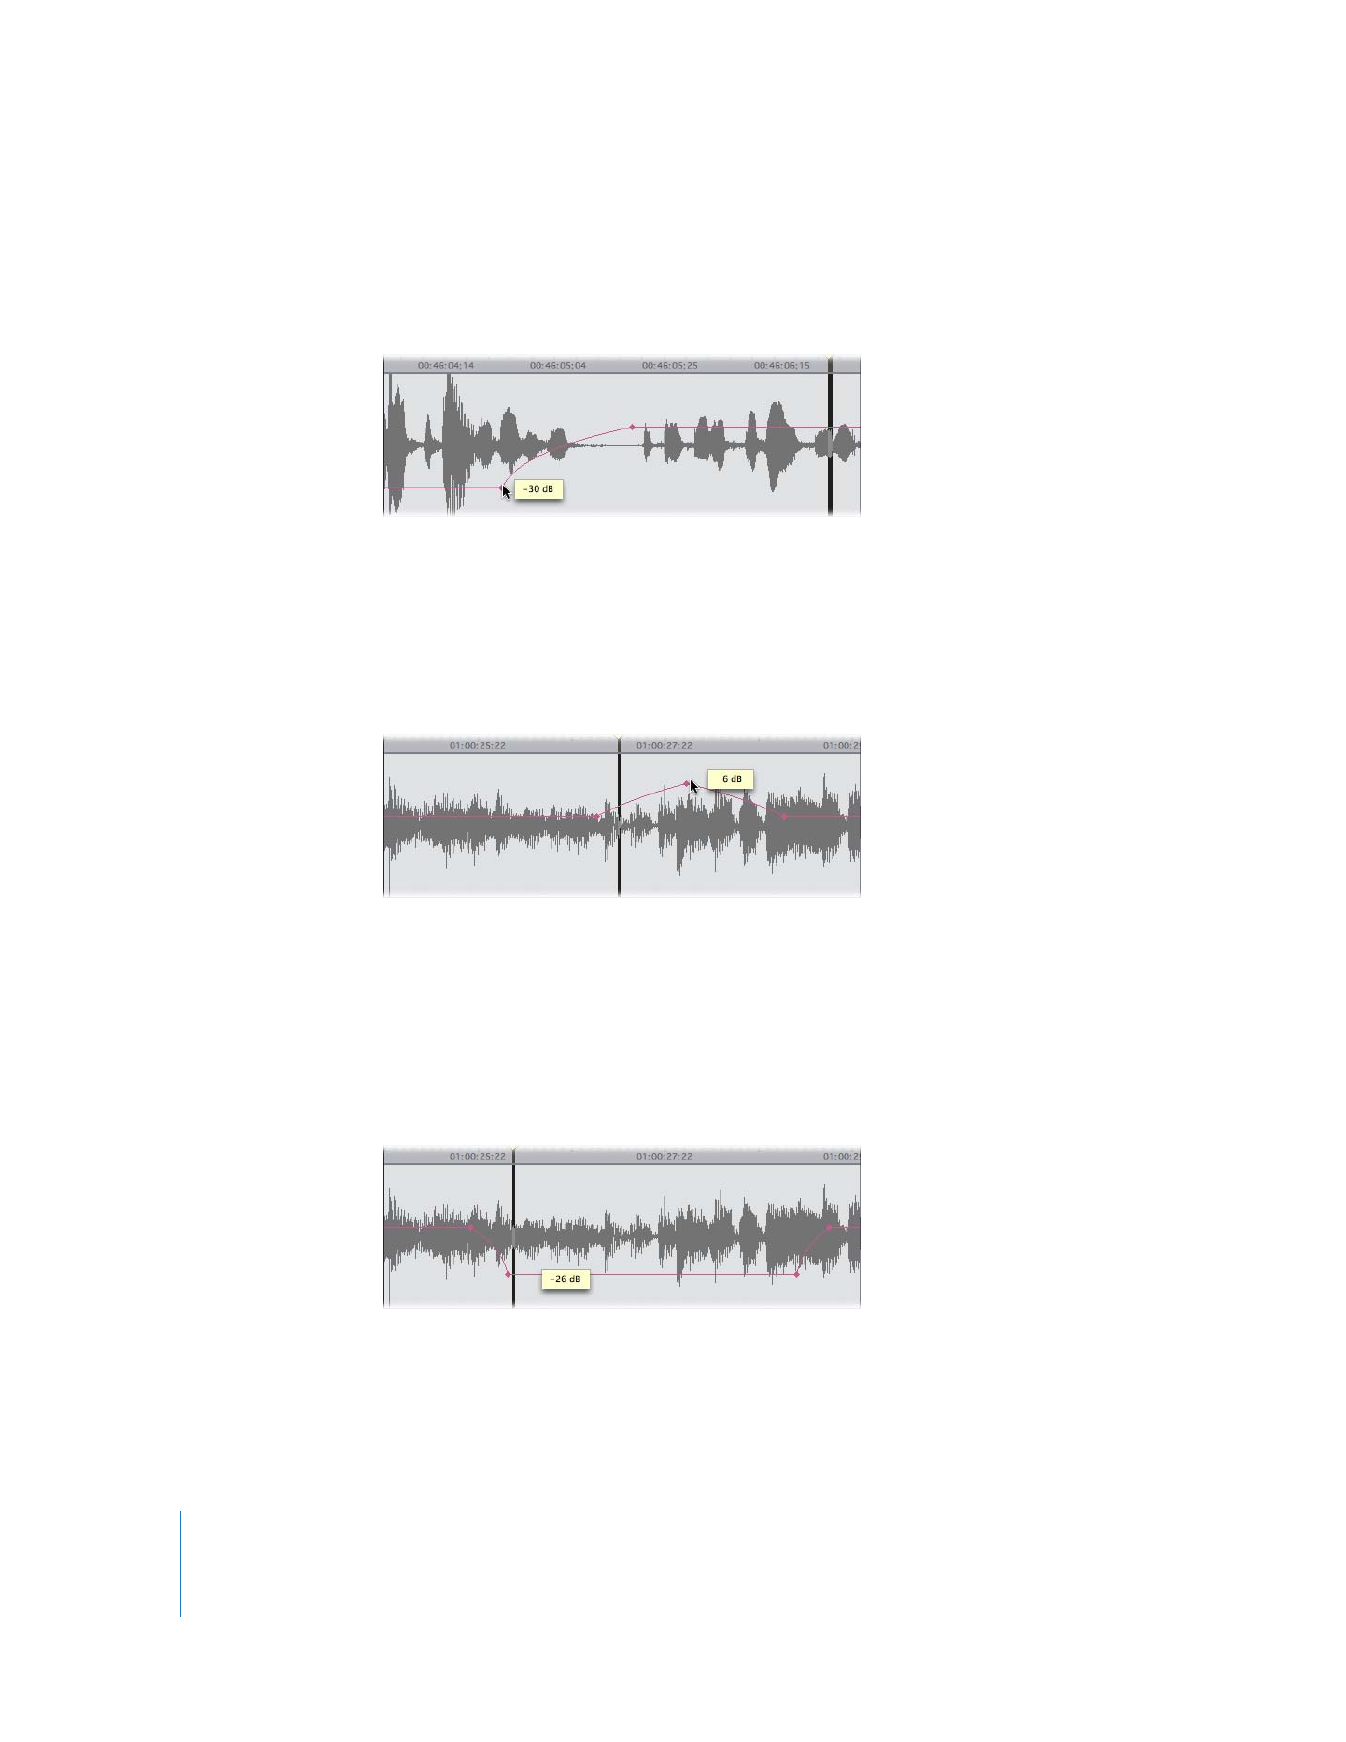
 Dragging an audio level keyframe up raises the audio level; dragging down lowers it.
As you drag, a box shows you the current level of the keyframe.
 Dragging a pan keyframe up moves the audio toward the left stereo output channel;
dragging down moves it to the right stereo output channel. As you drag, a box
shows you the pan setting of the keyframe.
 Dragging a pan keyframe for a stereo pair vertically in the waveform display area
transposes the left and right channels of a stereo pair.
126
Part I
Audio Mixing
To adjust a section of an overlay in the middle of four keyframes:
m
Move the pointer over the section you want to adjust. When the pointer turns into the
Adjust Line Segment pointer, drag the section up or down to modify it. The rest of the
overlay before and after the four keyframes remains untouched.
To move a keyframe forward or backward in time:
m
Place the pointer over the keyframe you want to modify. When the pointer becomes a
crosshair pointer, drag the keyframe forward or backward along the overlay.
As you drag, a box displays the timecode duration of the change you’re making.
Adjust Line Segment
pointer
Keyframe being moved
Chapter 6
Mixing Audio in the Timeline and Viewer
127
I
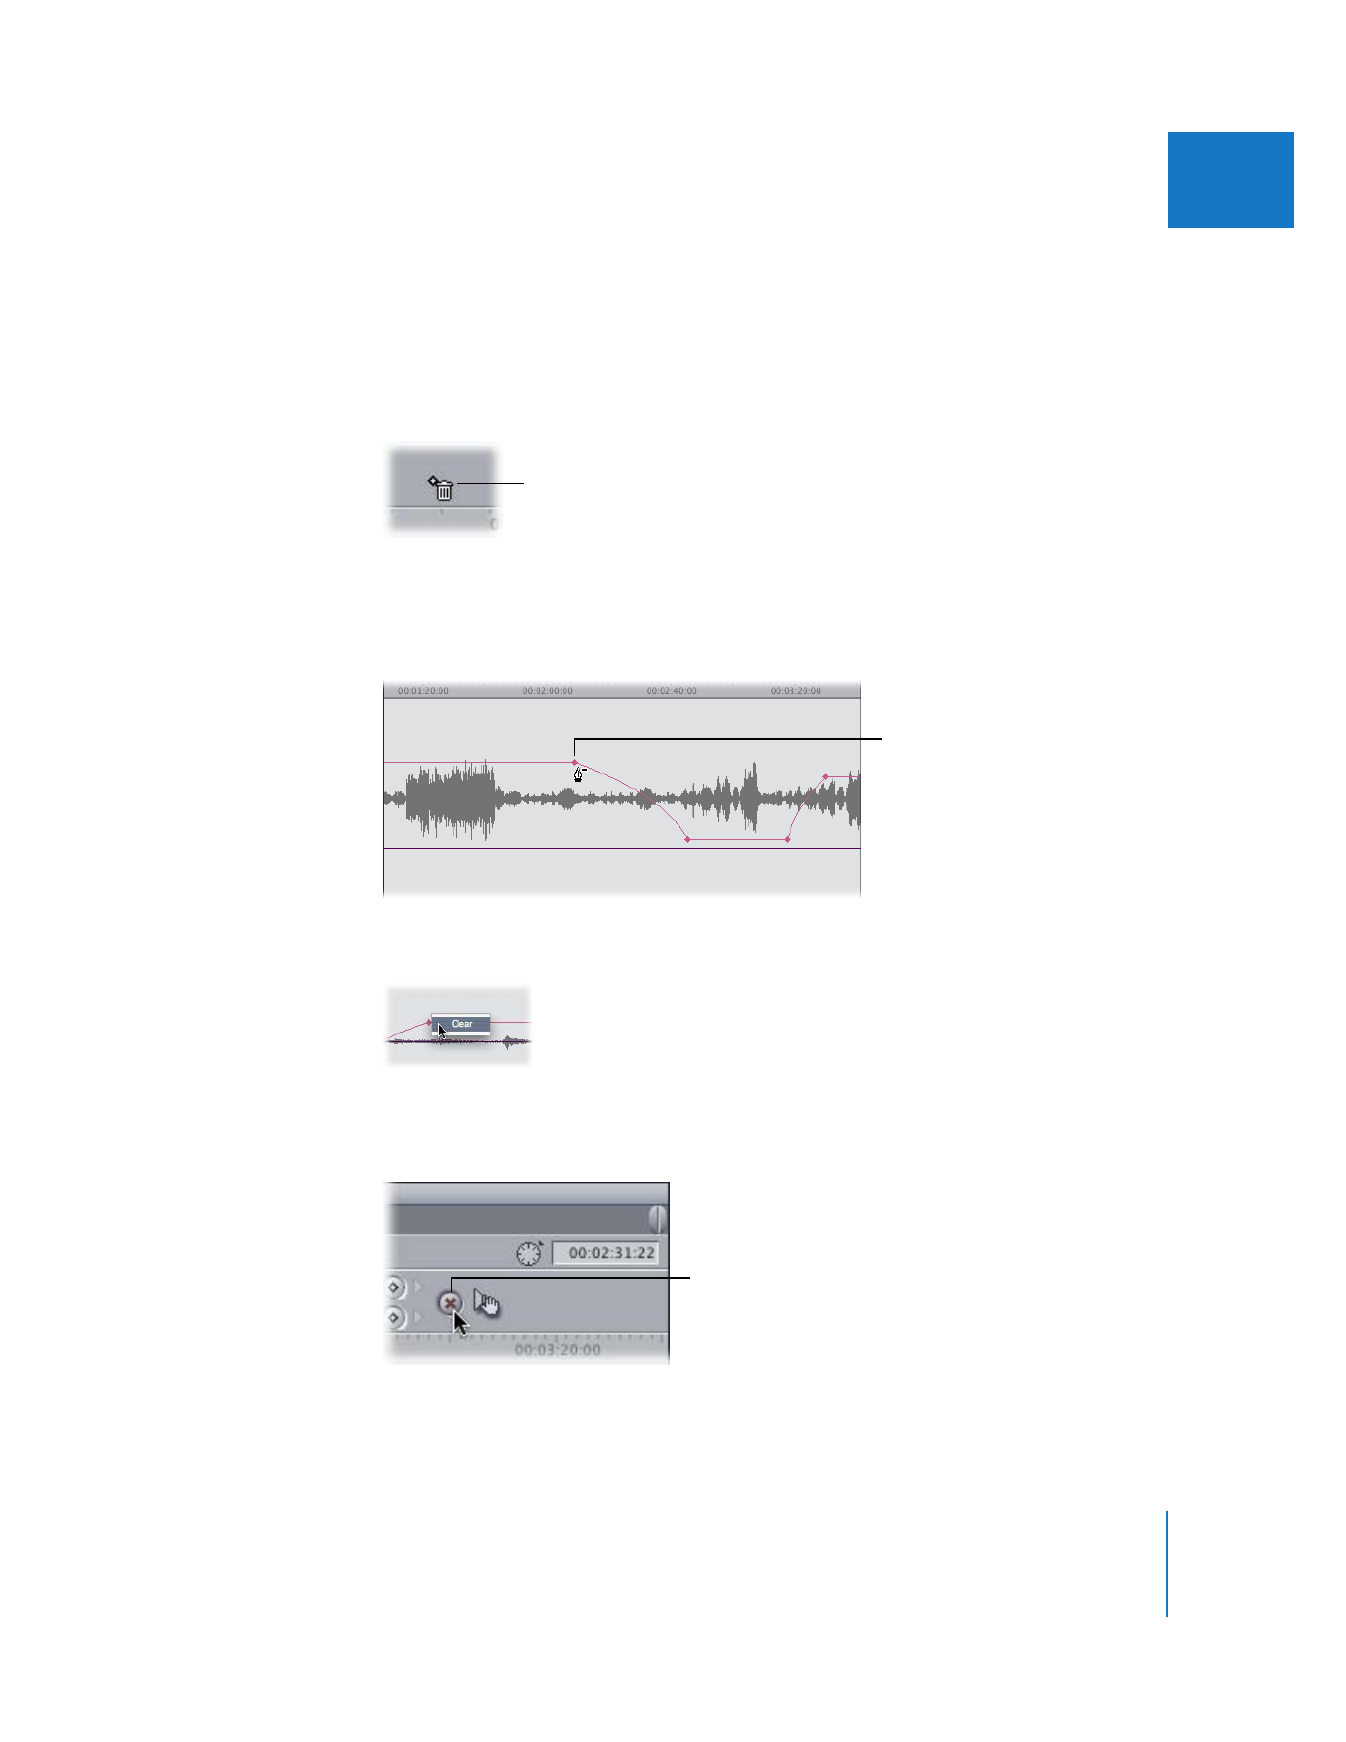
To delete a keyframe, do one of the following:
m
Move the playhead to the position of the keyframe you want to delete, then click the
Level or Pan Keyframe button to delete the keyframe.
m
Place the pointer over the keyframe you want to delete. When it becomes a crosshair
pointer, drag the keyframe up or down out of the waveform display area. When the
pointer turns into a small trash can, release the mouse button.
m
Hold down the Option key and position the pointer over an existing keyframe. The
pointer turns into the Delete Point tool. Click an existing keyframe with the Delete
Point tool to delete that keyframe.
m
Control-click the keyframe you want to delete, then choose Clear from the shortcut menu.
To delete all keyframes:
m
Click the Reset button.
All keyframes (both audio level and pan) are deleted, and the audio level of your clip is
reset to 0 dB.
Release the mouse
button when the pointer
becomes a trash can.
With the Delete Point
tool, click the keyframe
you want to delete.
Reset button
128
Part I
Audio Mixing