Example: Setting Subframe Audio Level Keyframes
to Eliminate Clicks
Sometimes, when you find the perfect edit point for cutting a clip into your sequence,
you’ll notice a pop or click in the audio. This happens when you make a cut on an
awkward sample that just happens to occur at a frame boundary.
You can eliminate pops and clicks by setting keyframes for your audio levels to within
1/100 of a frame. Usually, changing an audio edit point by just a few hundredths of a
frame eliminates the clicking.
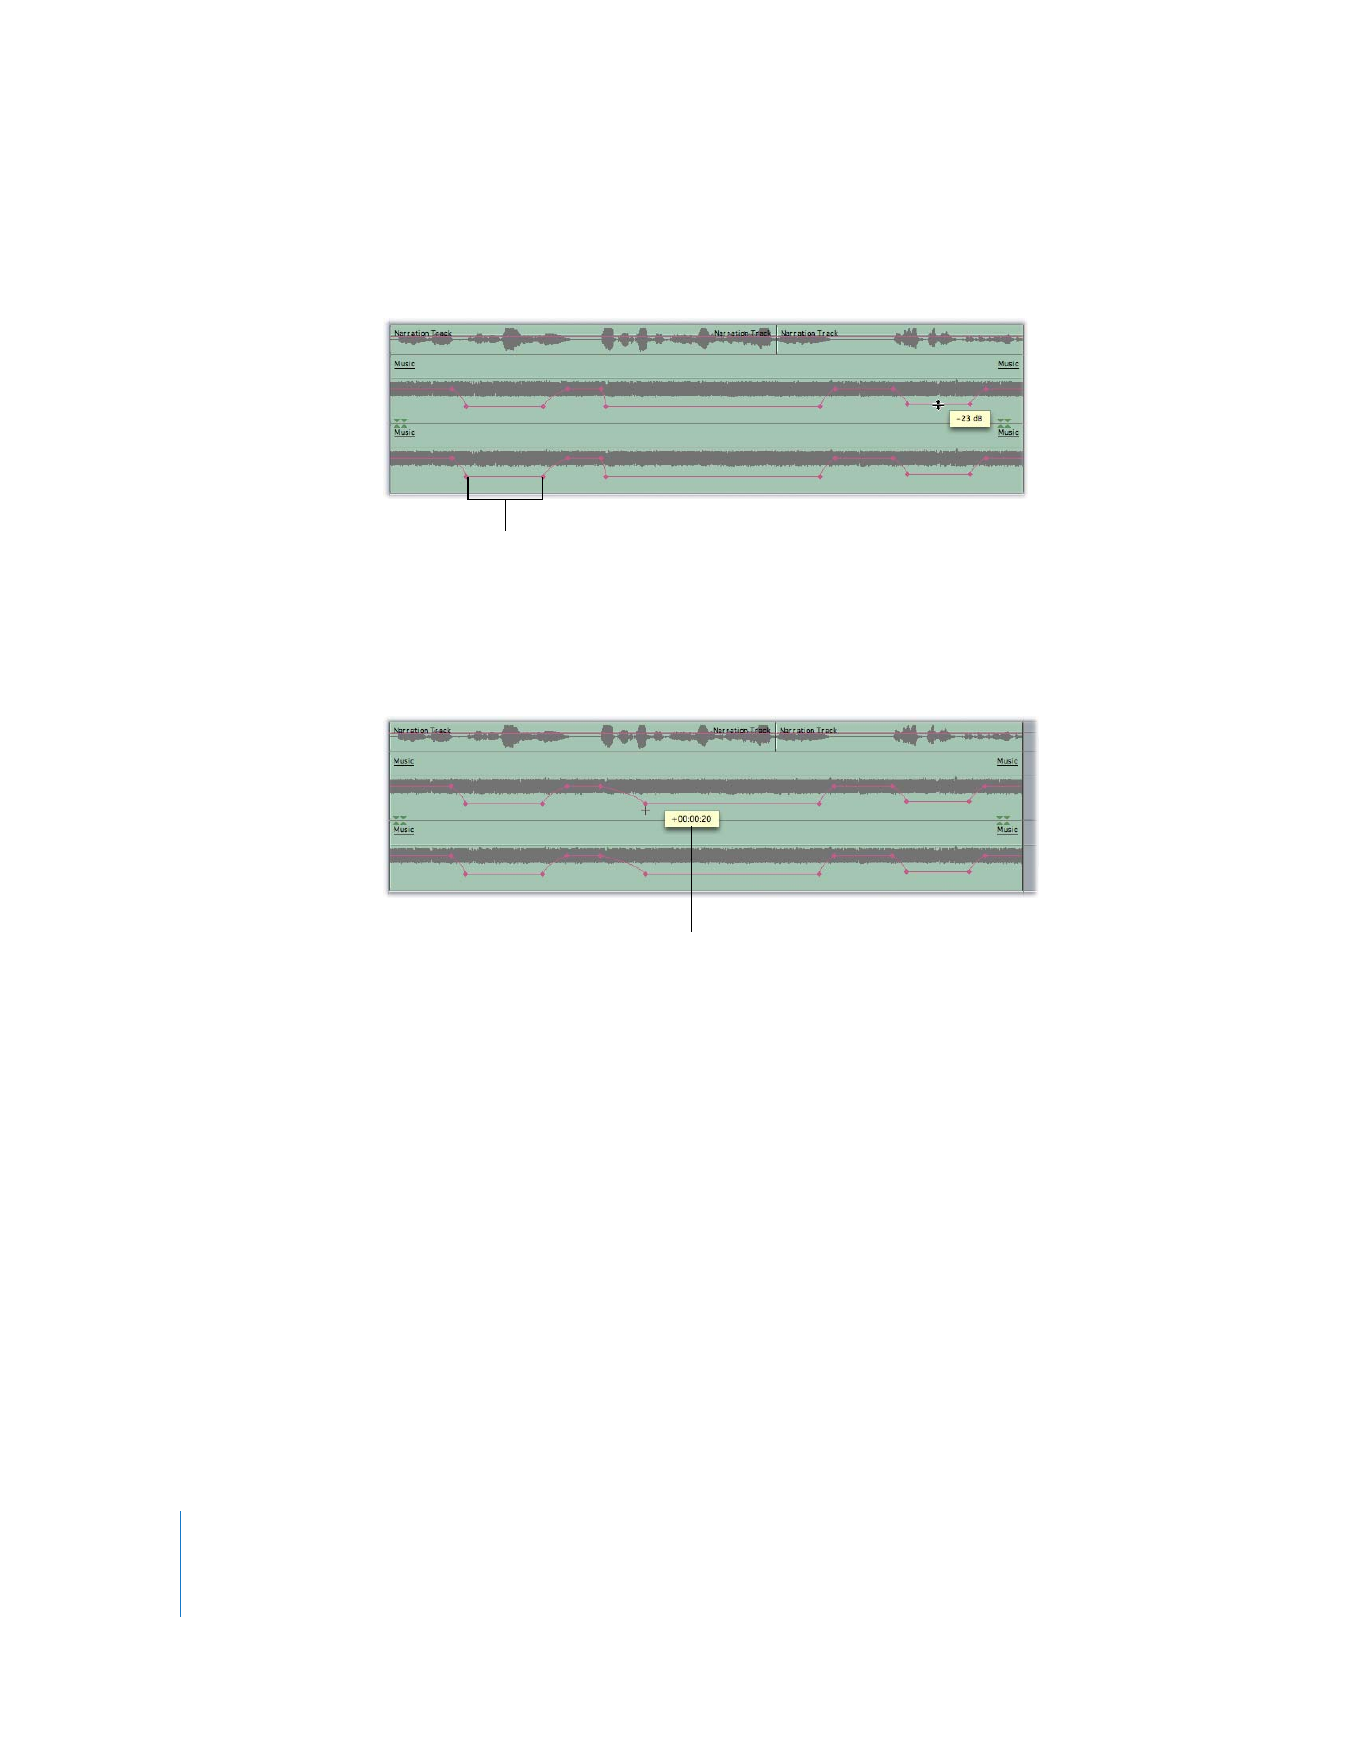
Lowered level
Adjust the slope of
the level change.

Chapter 6
Mixing Audio in the Timeline and Viewer
131
I
To set and adjust subframe audio level keyframes:
1
Open the clip in the Viewer and click the Audio tab.
2
Move the playhead to the edit point that’s causing the click by pressing Shift-I or
Shift-O, or by using the Up and Down Arrow keys to move from one sequence edit
point to the next.
3
Zoom in to the clip as far as possible.
4
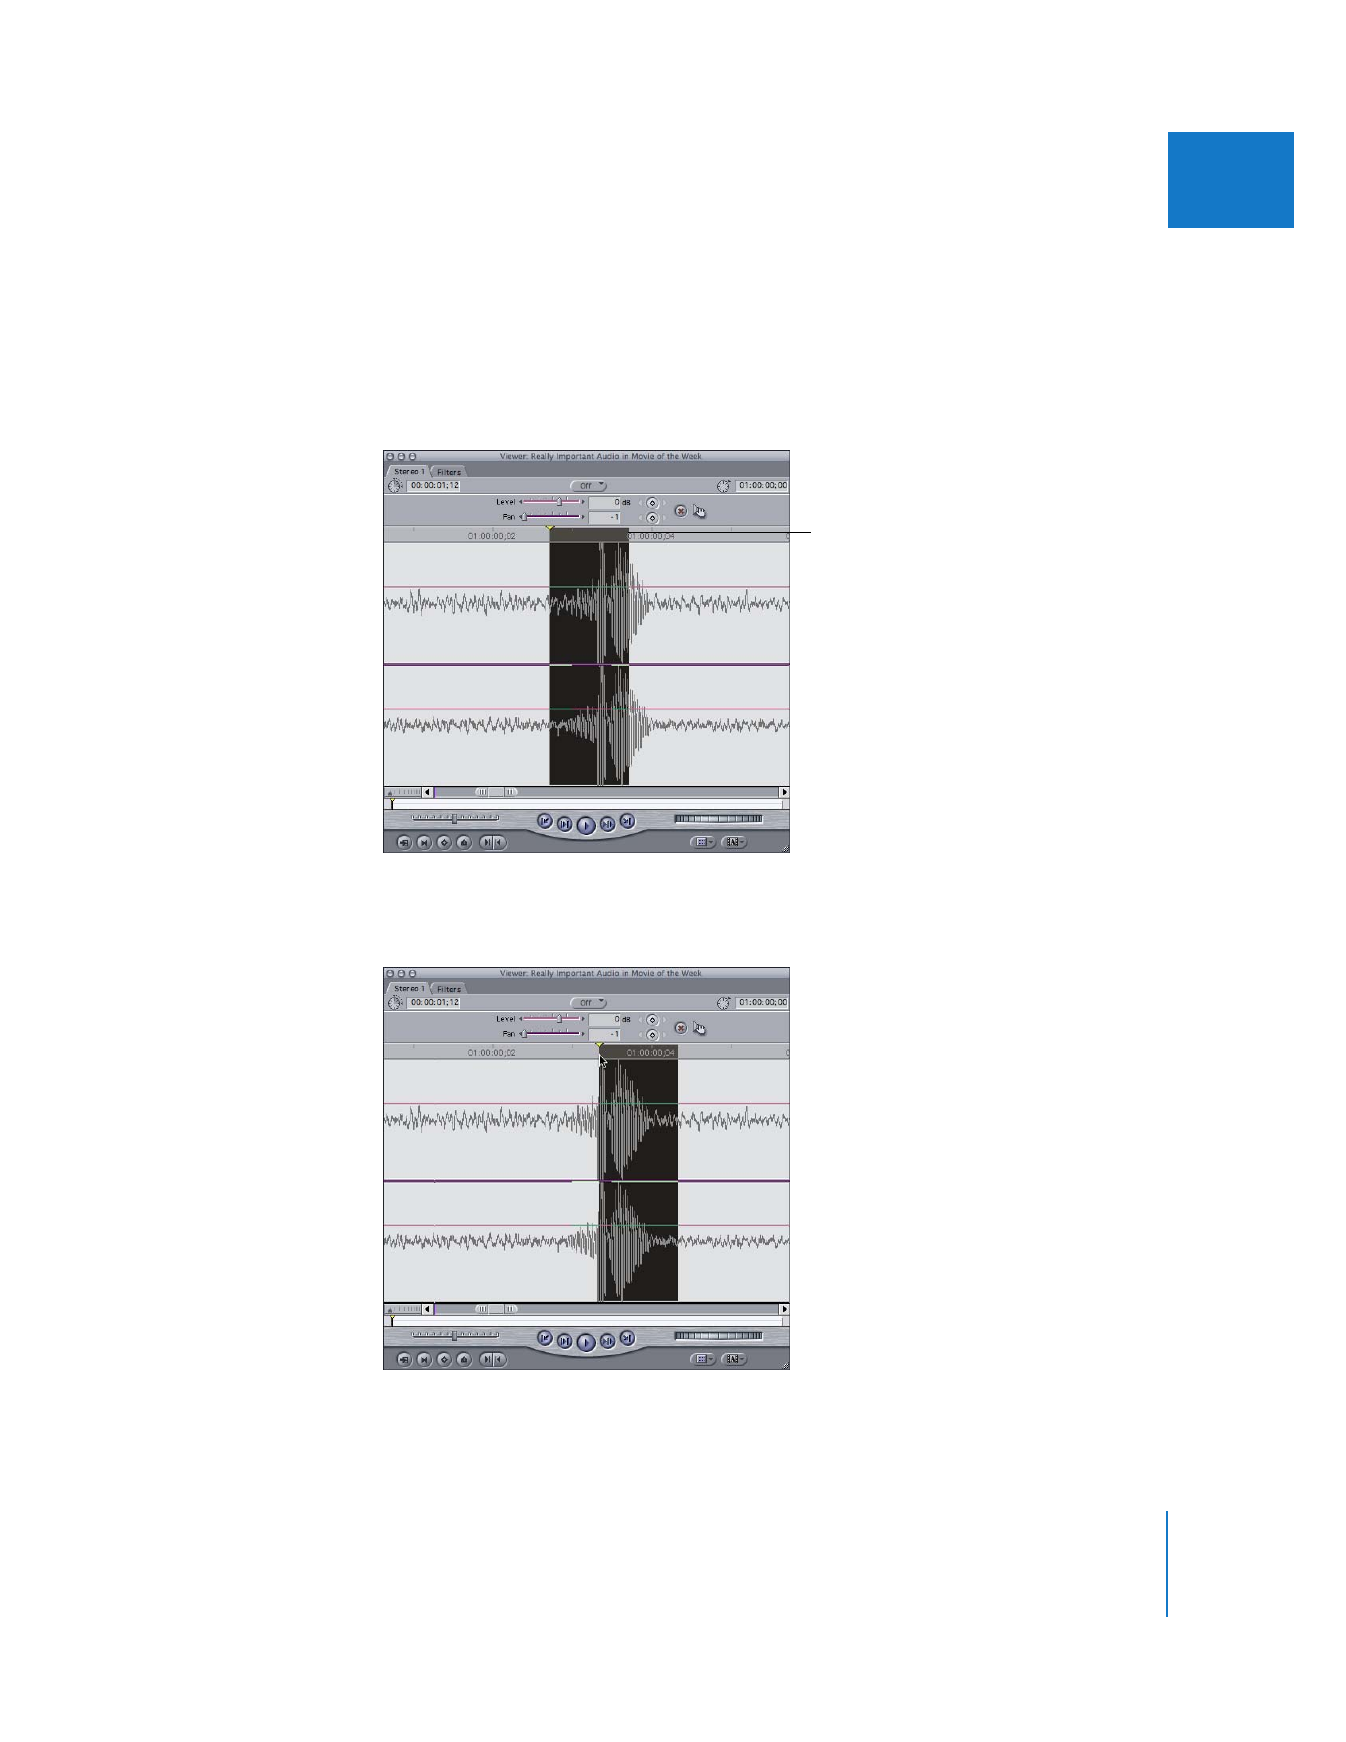
Hold down the Shift key as you drag the playhead to the exact place where the
click occurs.
When you’ve zoomed
in all the way, the
playhead in the Viewer
is the width of one
video frame.

132
Part I
Audio Mixing
5
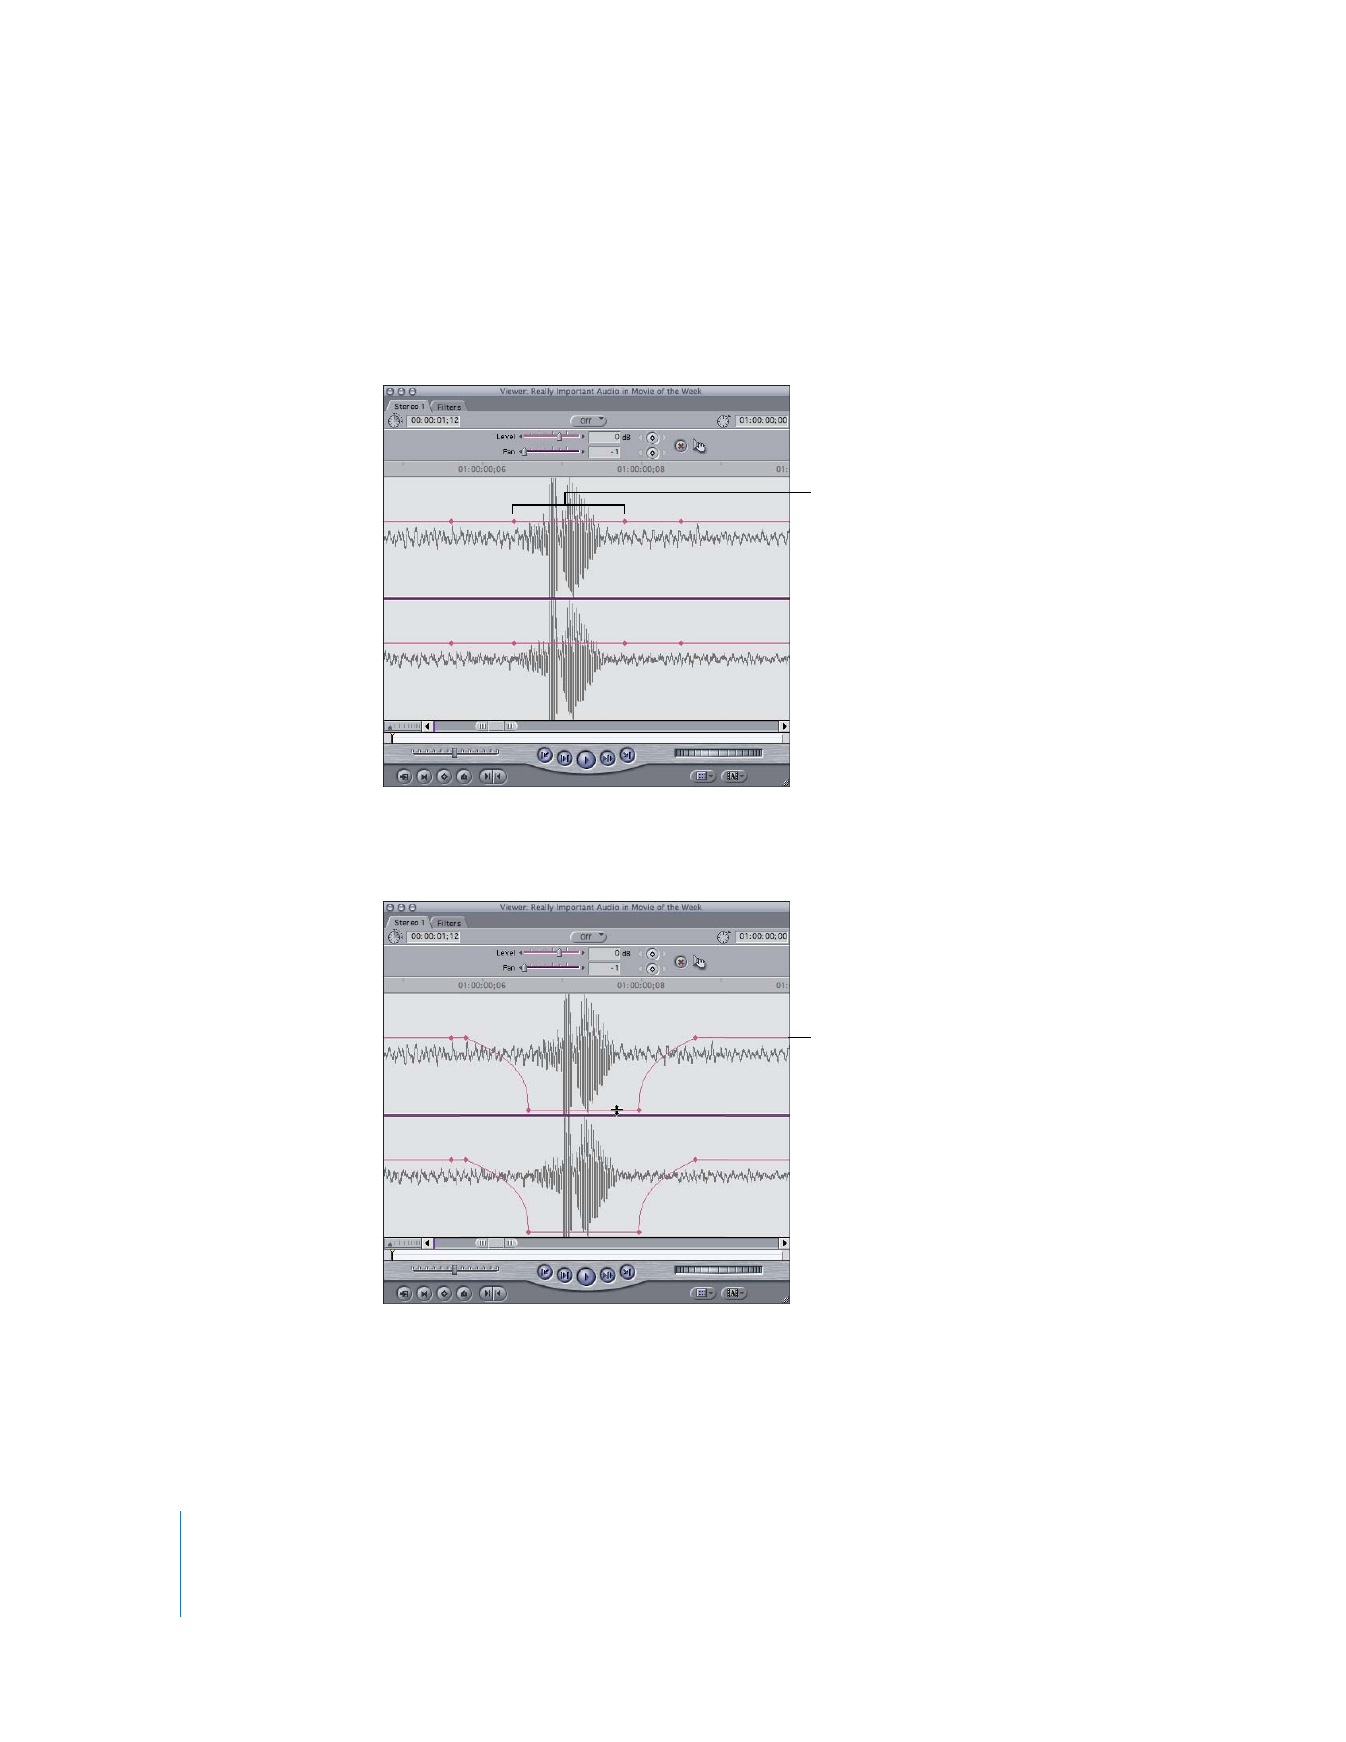
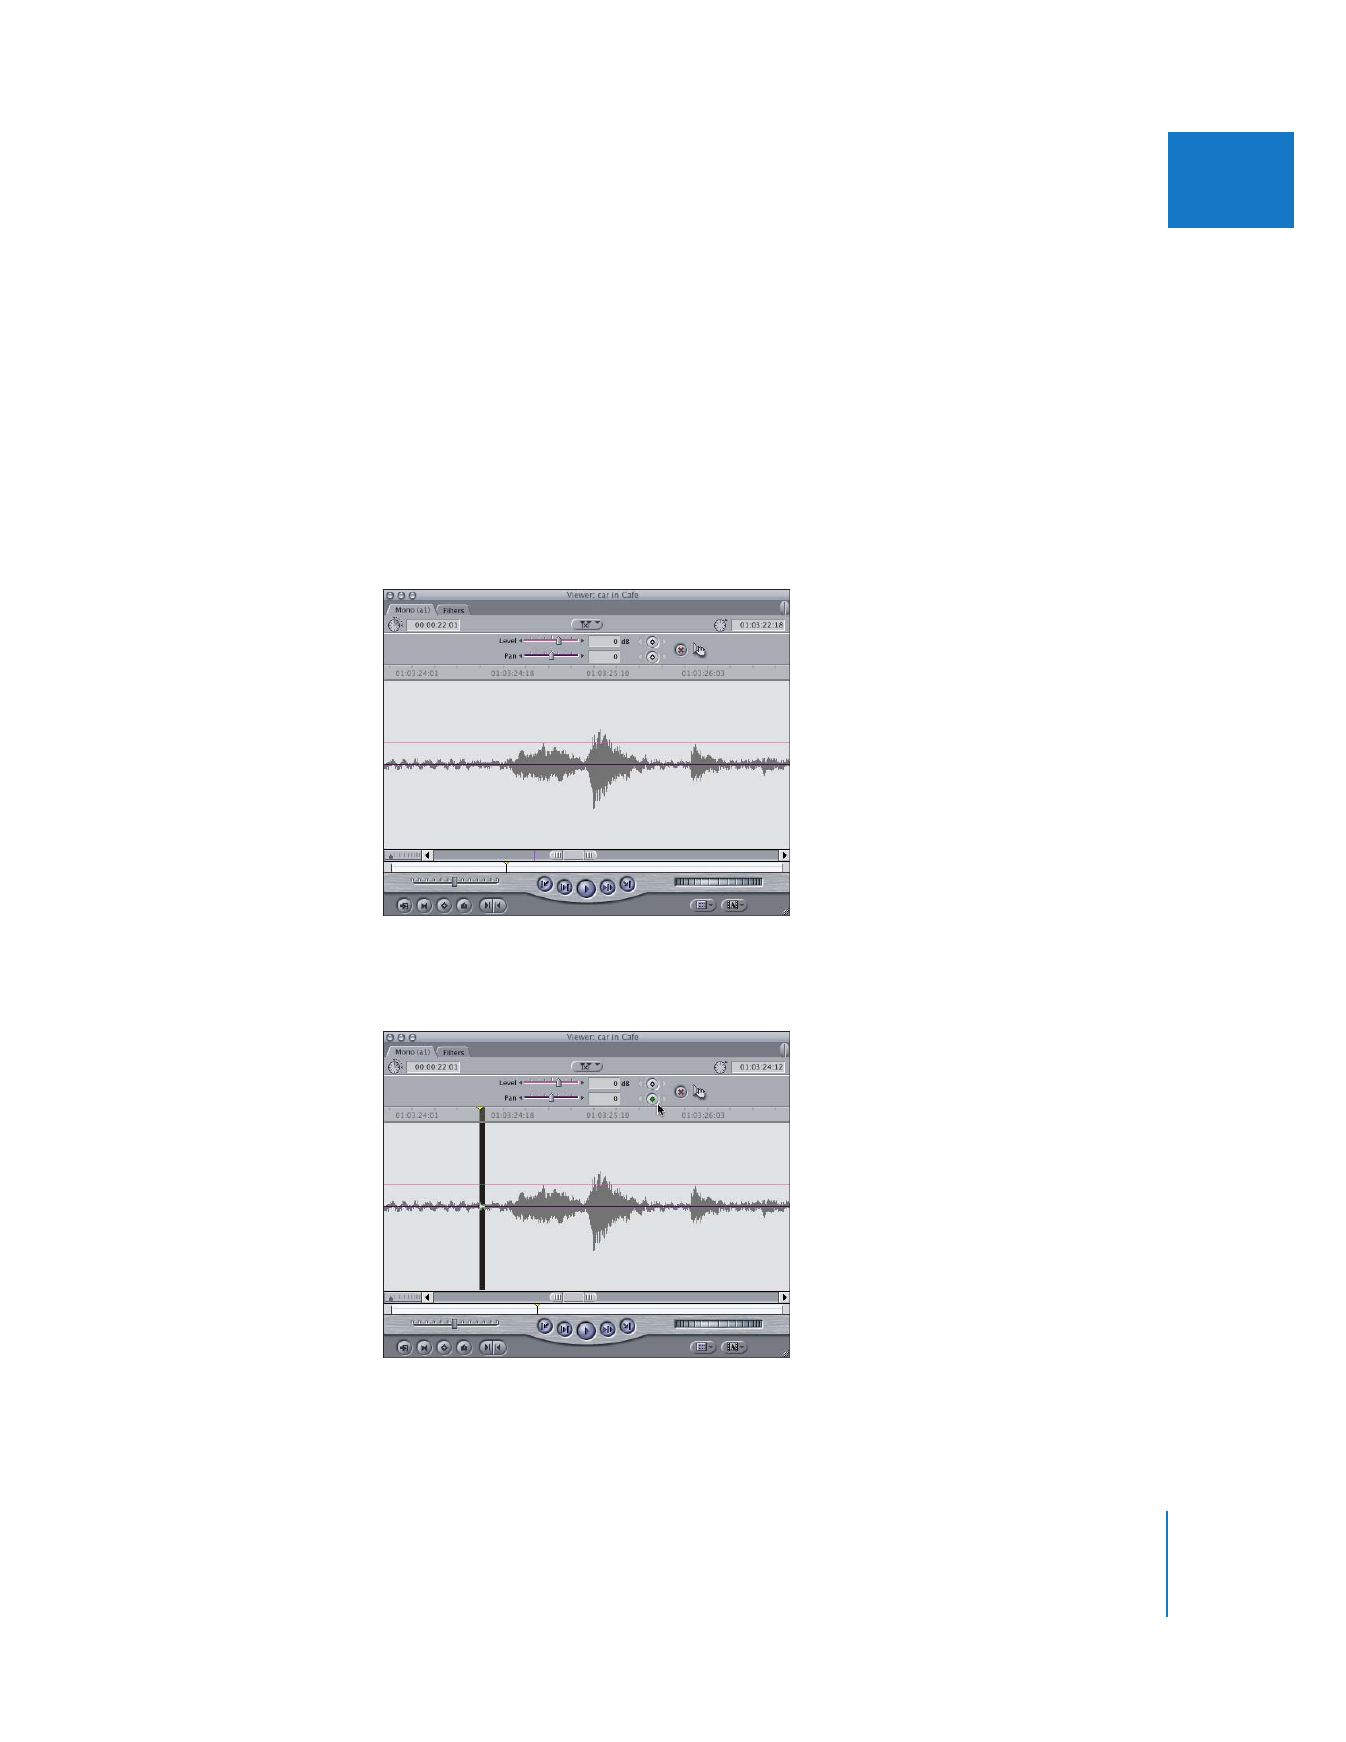
Click the Level Keyframe button and reposition the playhead to place two keyframes at
the beginning of the click and two keyframes at the end of the click.
The two inner keyframes surround the problem samples, while the two outer
keyframes are placed a few hundredths of a frame outside of these.
6
Drag the part of the audio level overlay between the two inner keyframes down until
the box indicates –60 dB.
The unwanted noise should be gone, and the rest of your clip’s audio is not affected.
The problem samples
The overlay looks
something like this.

Chapter 6
Mixing Audio in the Timeline and Viewer
133
I