Example: Using Keyframes in the Timeline
to Automate Audio Levels
Suppose you’ve edited a music clip and a clip with voice narration together in
your sequence.
There are long pauses between the narrator’s lines, during which you want the music
to be the dominant audio track. So you set the overall level of your music to –4 dB,
because that’s the level at which the audio sounds best between the narrator’s lines.
When the narrator speaks, however, you want the level of the music to drop so it
doesn’t compete with the narrator for attention.
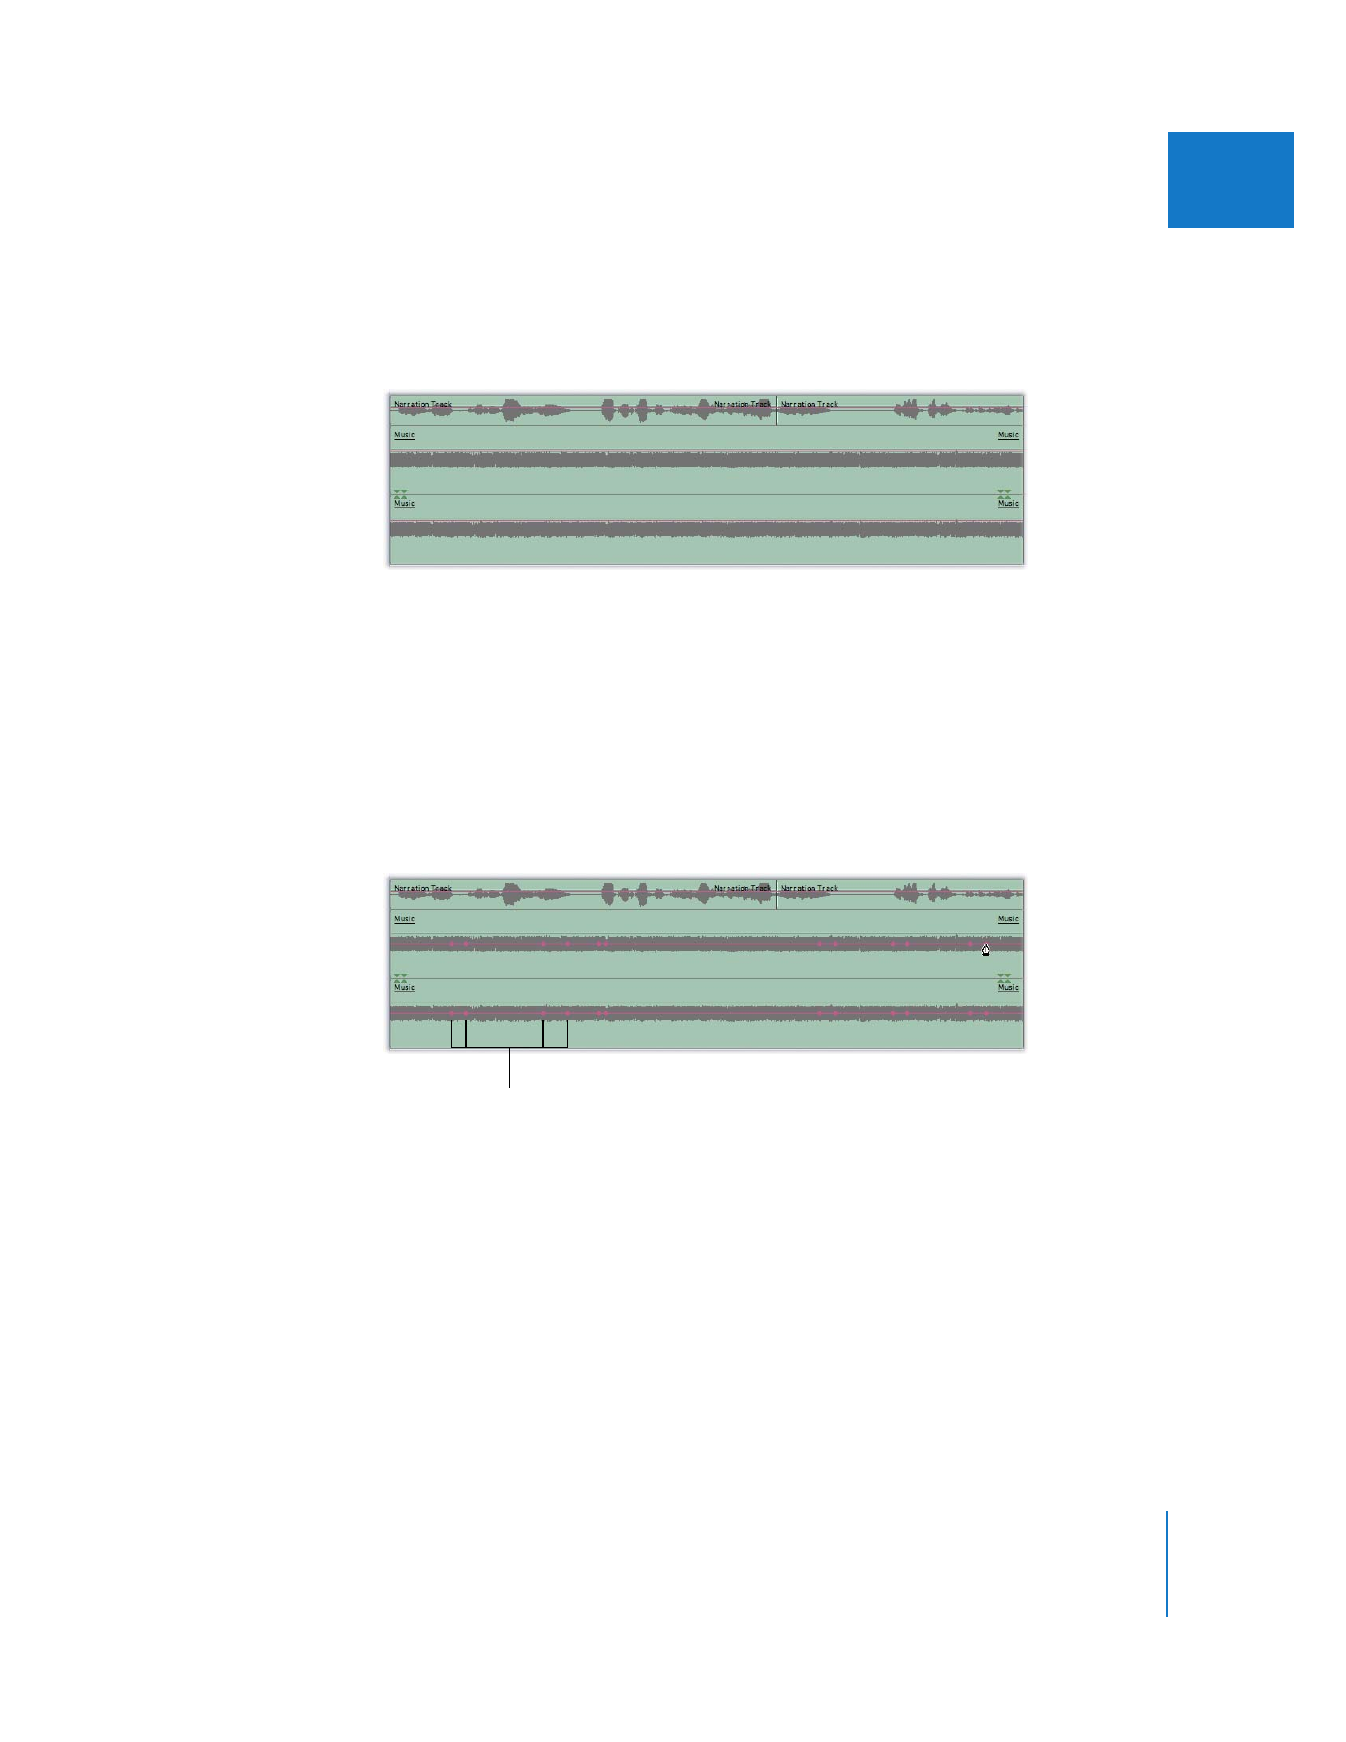
If you hold down the Option key (while the Selection tool is selected) and click the
audio level overlay of the music clip with the Pen tool, you can place groups of four
keyframes at each place where a line is spoken by the narrator.
Keyframes set
130
Part I
Audio Mixing
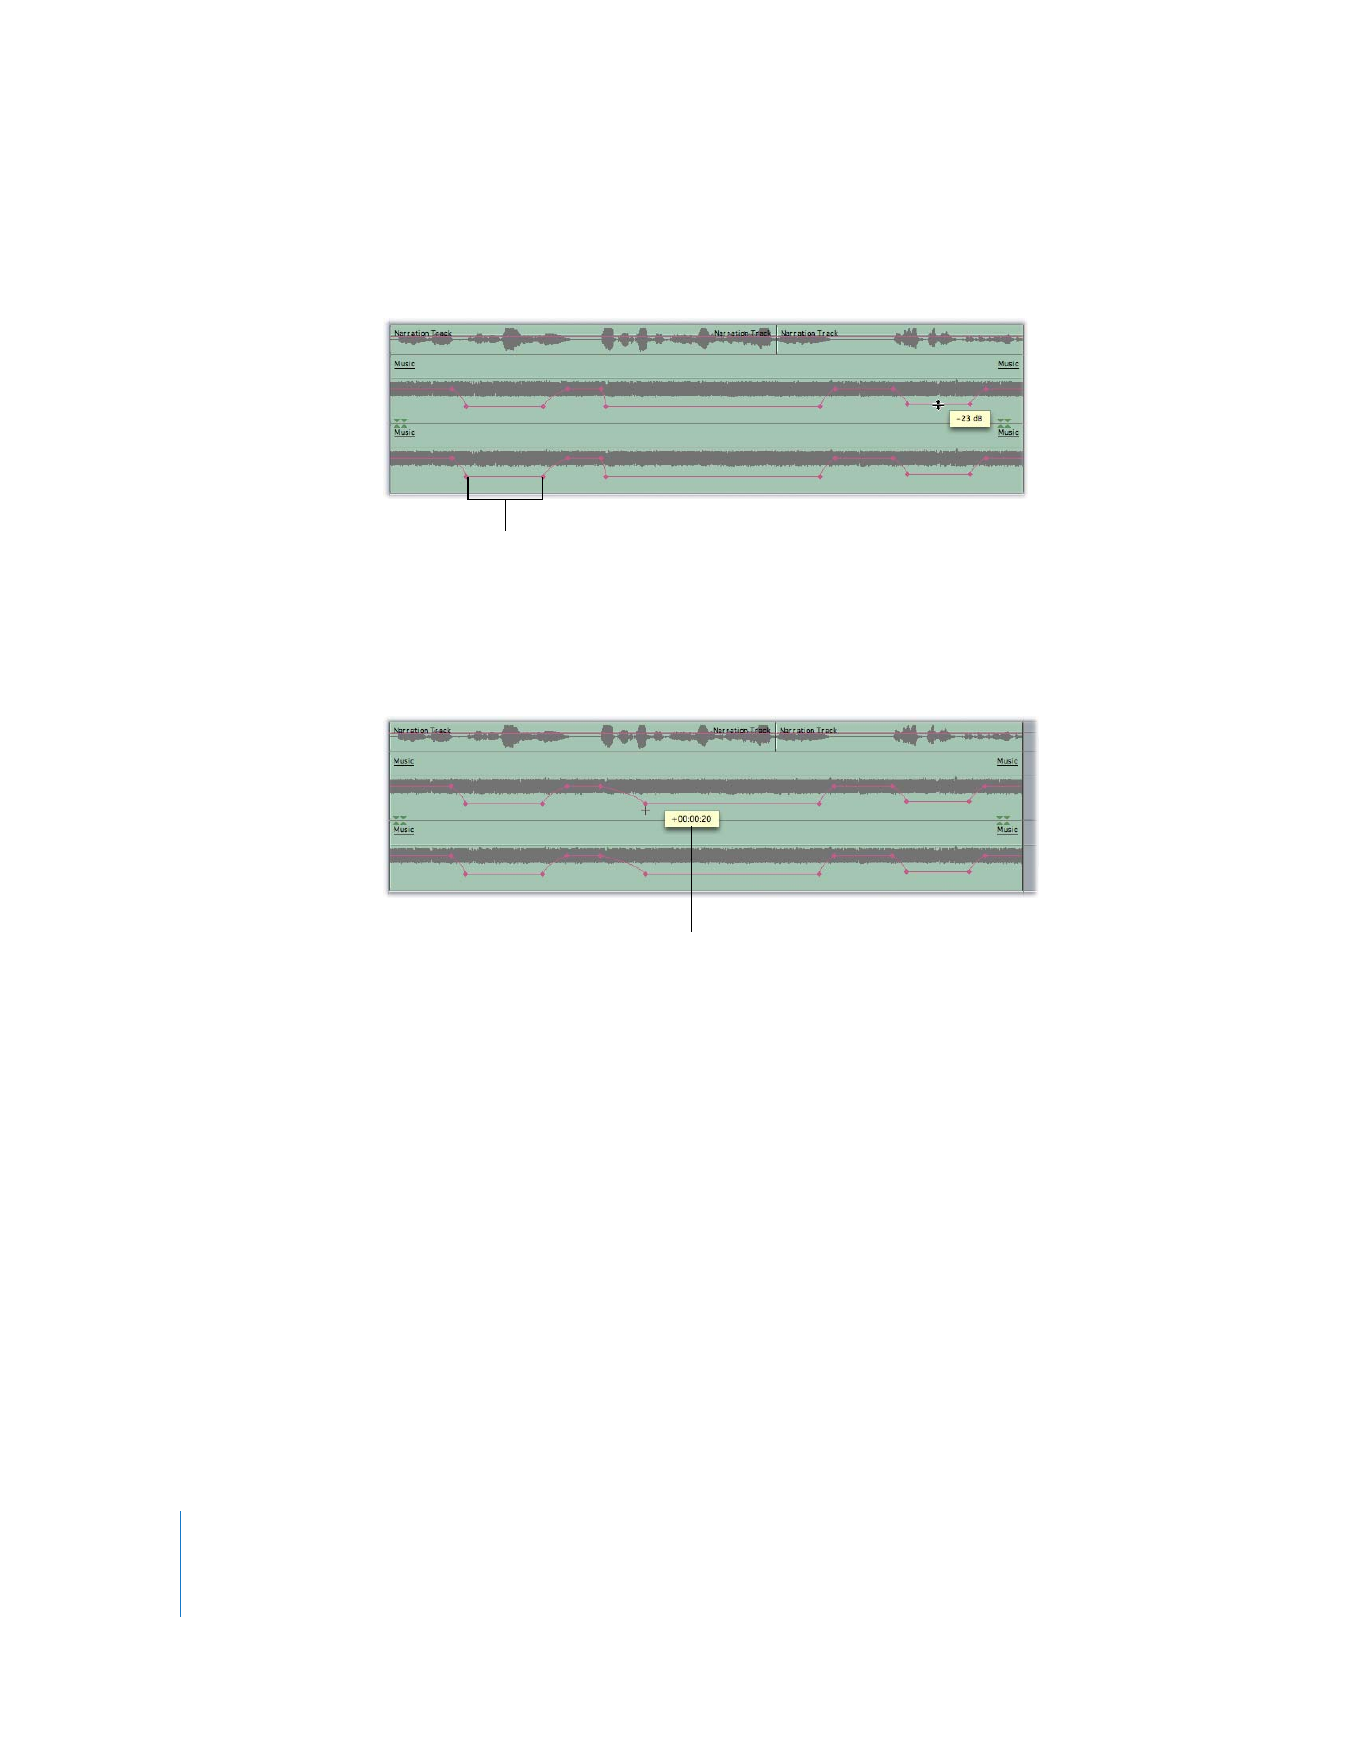
Then, releasing the Option key, you can drag the area in the middle of each group of
four keyframes down, to lower the level of the music while the narrator speaks.
Finally, you’ll want to move the outside pair of each group of four keyframes outward a
bit, so the volume of the music doesn’t change too abruptly and startle the audience.
Less steep slopes between keyframes result in more gradual fades from one audio level
to the next.