Master Area
Using the controls in the Master area, you can mute, downmix, and adjust the audio levels
of all audio tracks at once. The controls in the Master area cannot be automated, but the
current state of all controls in the Master area is stored in each clip in your project.
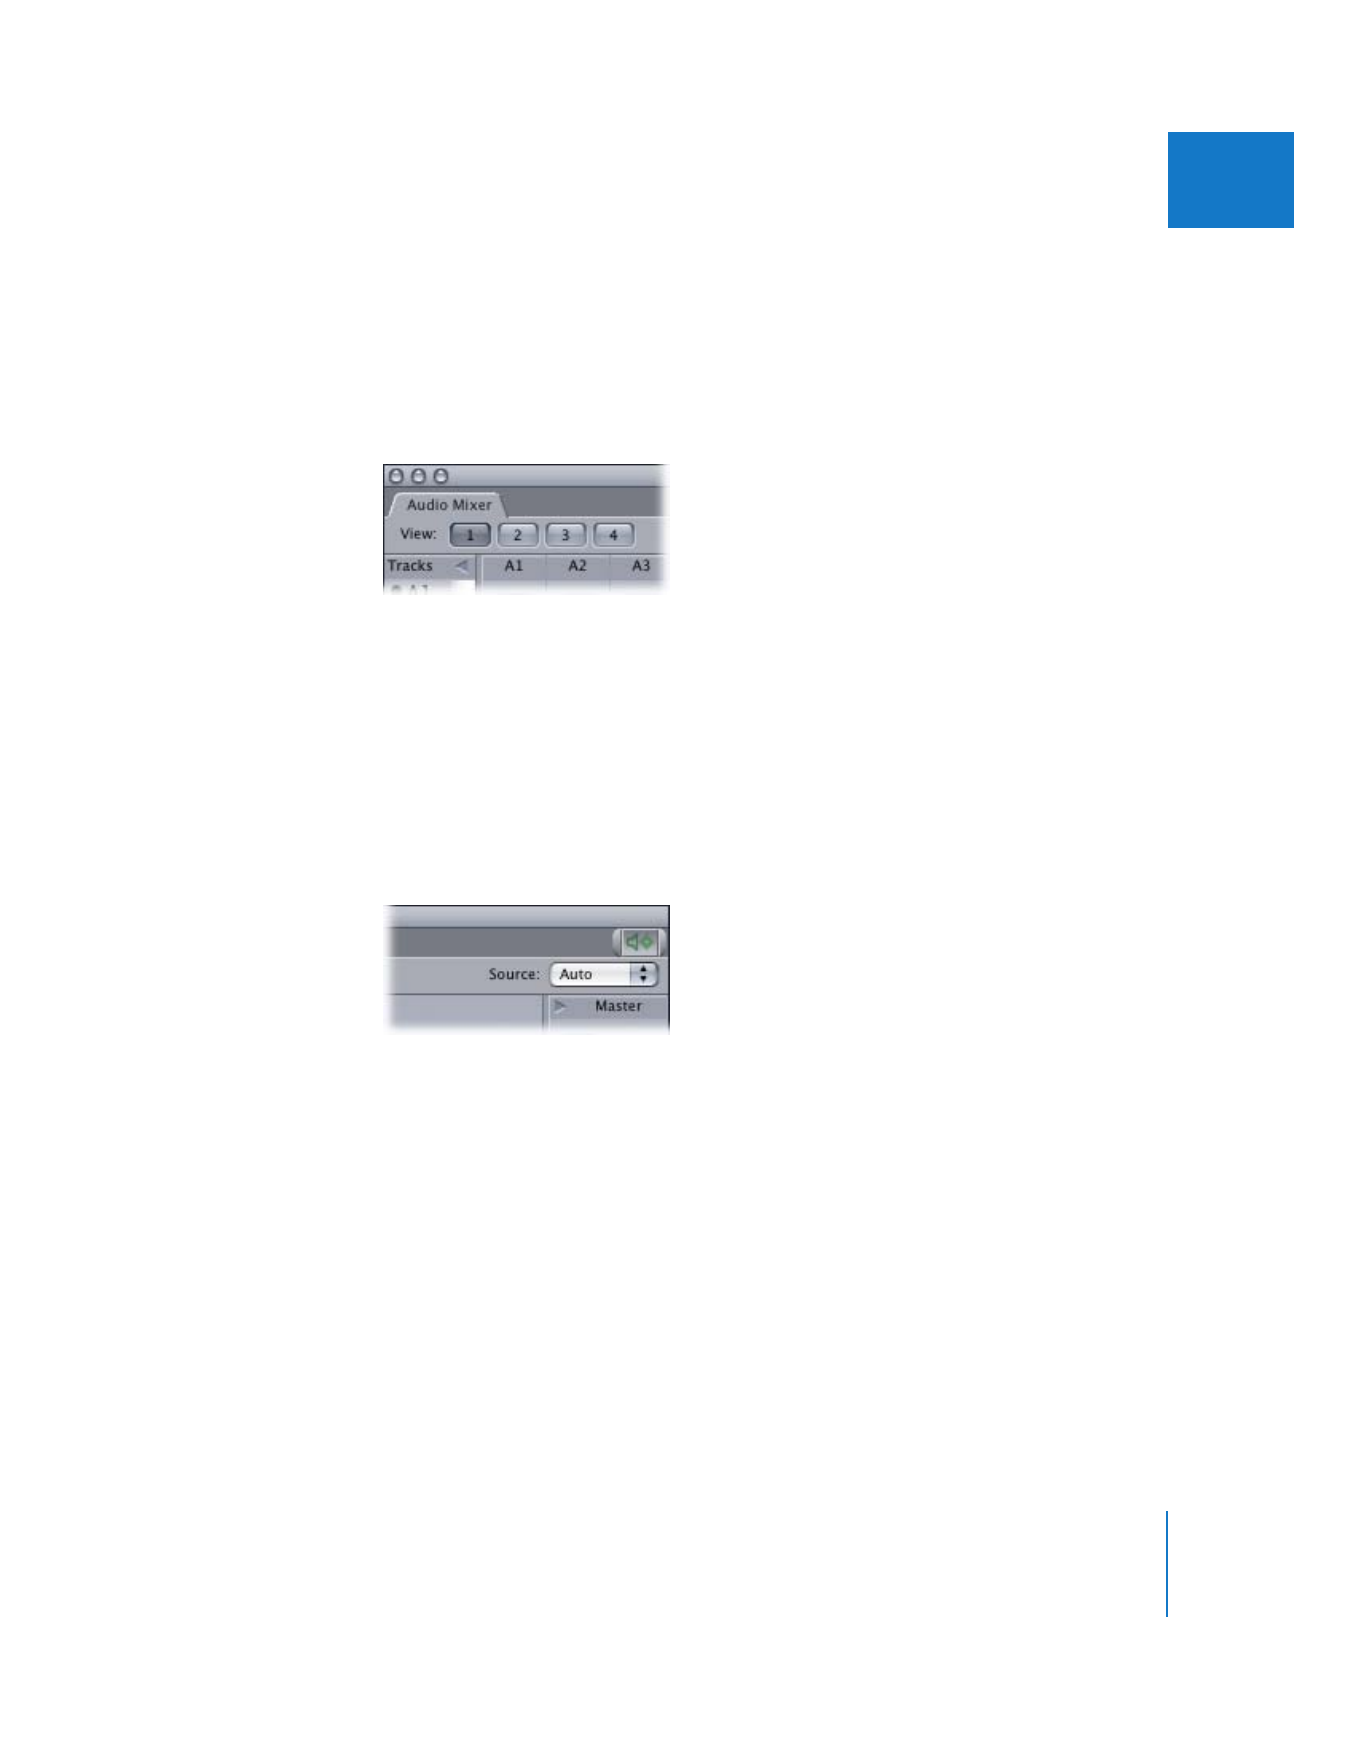
To show or hide the Master area:
m
Click the disclosure triangle in the upper-right corner of the Audio Mixer tab.
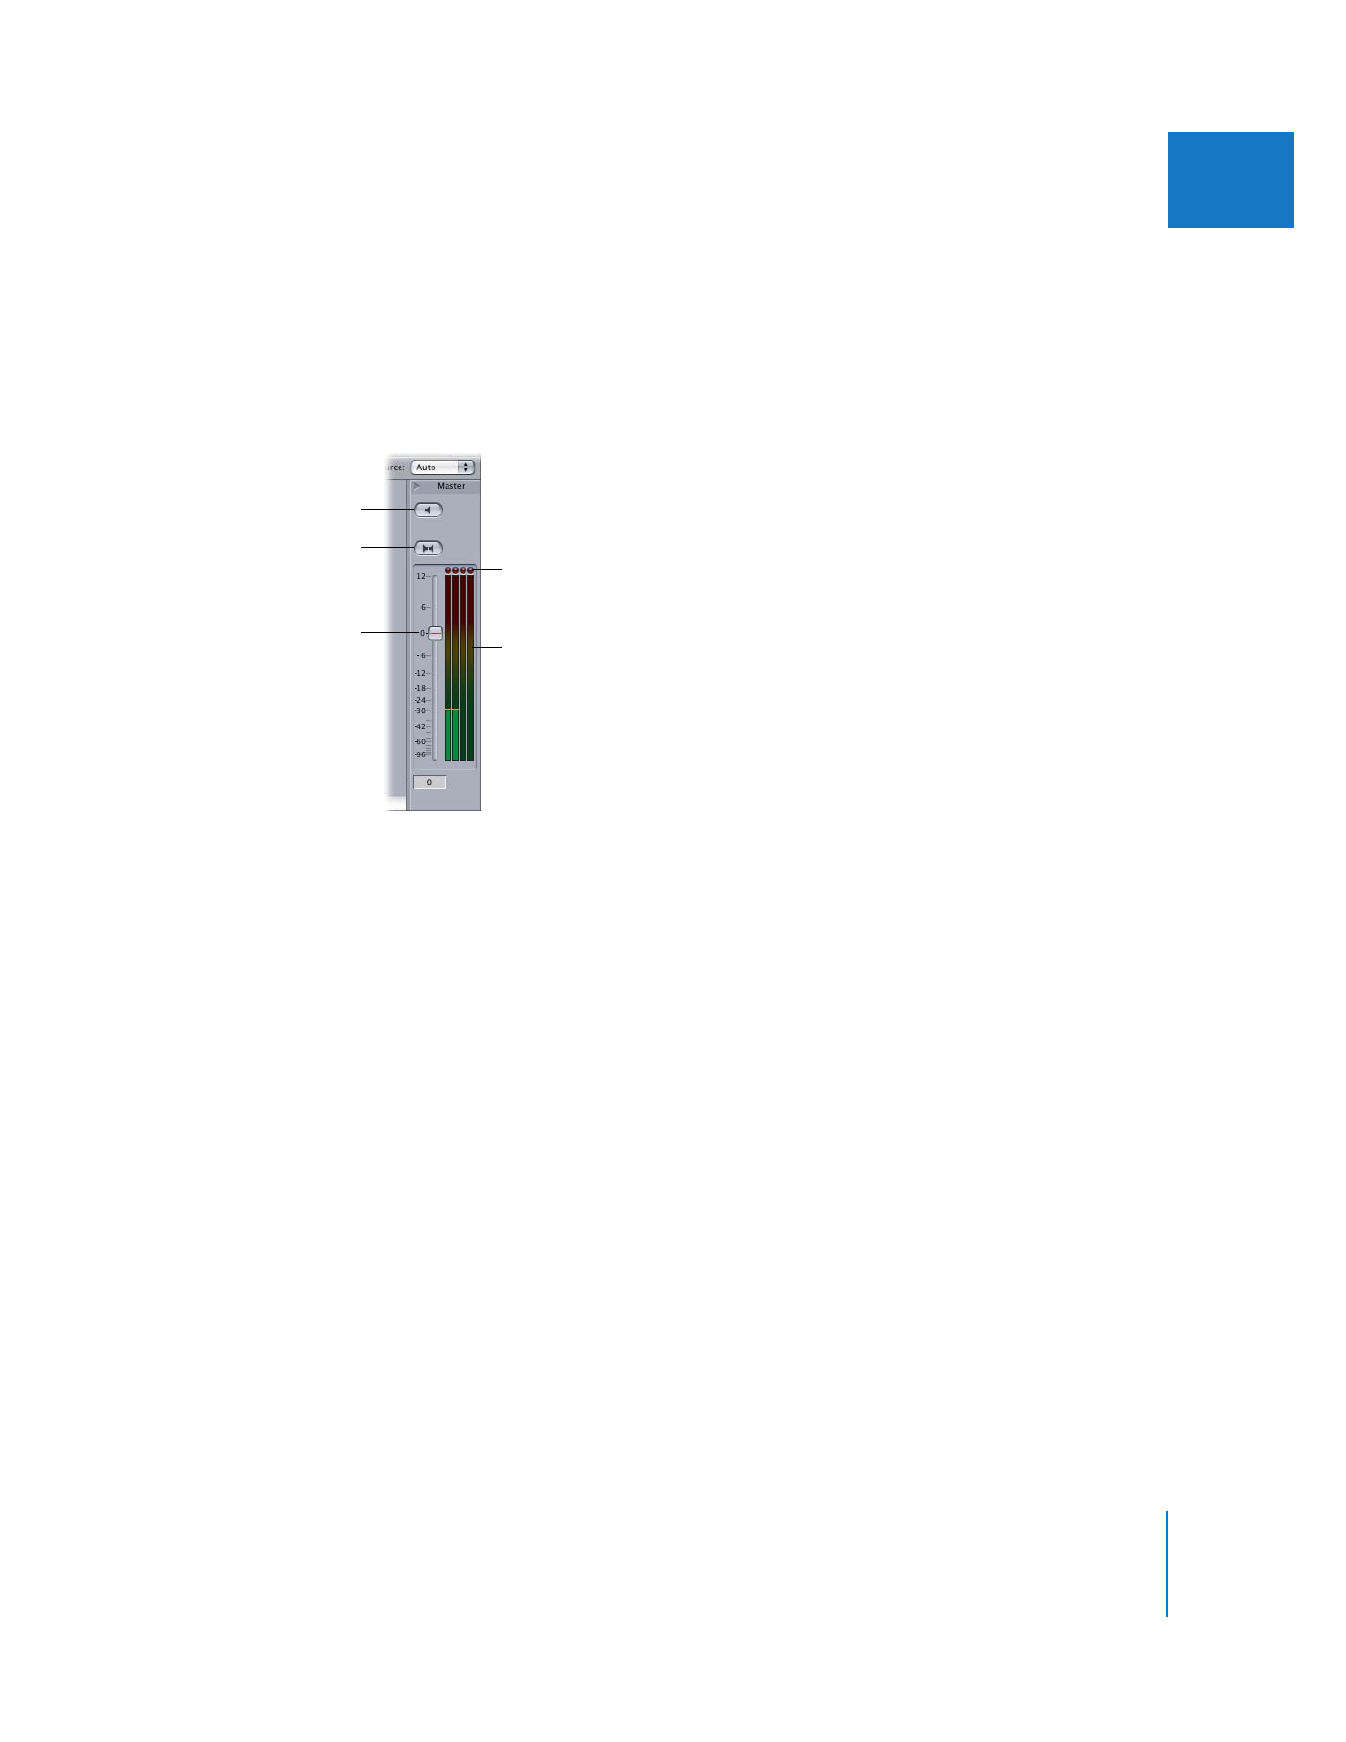
The Master area includes the following controls:
 Master mute button: Click this button to mute the entire sequence output. Like the
individual track mute buttons, the Master mute button only affects playback, not
output during Print to Video and Edit to Tape operations, or during export to audio
or movie files.
 Downmix control: When this control is selected, all output channels are mixed down
to a single stereo pair of outputs. This is useful if you need to monitor a multichannel
mix in stereo. With Downmix selected, all audio outputs in your sequence are mixed
down to stereo during playback, output to tape, or export to audio or movie files. For
more information about downmixing, see “
Downmixing Multiple Audio Channels to
a Stereo Mix
” on page 47.
Master mute button
Master fader
Master audio meters
Clipping indicators
Downmix control

76
Part I
Audio Mixing
 Master fader: A Master fader controls the level of an output bus or hardware output
after the individual track faders are applied. It has no effect on the audio level
overlays of clips in your sequence. Unlike individual track faders, the Master fader
cannot be automated.
The Master fader affects output levels during playback, output to tape, or export to
a movie file.
 Master audio meters: There is a Master audio meter for each output channel specified
in the current sequence’s Audio Outputs tab (in the Sequence Settings window). For
example, if your sequence has an audio preset that has six output channels, there are
six Master audio meters in the Audio Mixer. Each meter has a scale from +12 dBFS to
–∞ dBFS (silence). Because the Master audio meters show the final level that will be
output to your audio interface, you should make sure that no level goes above 0 dBFS.
Each Master audio meter is fed by all the tracks in the current sequence that are
assigned to a particular output channel. For example, if tracks 1, 3, 5, 7, and 9 are all
assigned to audio output channel 1, Master audio meter 1 displays the combination
of all those tracks’ audio levels mixed together.
Note: Even though 0 dBFS is the highest audio level that you can output from
Final Cut Pro, an additional +12 dB appears at the top of the scale of the Master
audio meters. This “clipping area” allows you to see how far you’re clipping over
0 dBFS, so you know how much you need to lower the level of your mix to
avoid distortion.
∏
Tip: You can also use the track audio meters and Master audio meters for individual
clips in the Viewer. Each clip retains both individual track levels and master levels.
Master levels for a clip can only be adjusted in the Audio Mixer, not in the Viewer itself.
 Clipping indicators: At the top of each meter is a clipping indicator that lights up
when that output channel reaches 0 dBFS. Once the clipping indicator lights up, it
remains lit until playback is stopped and restarted. Since audio clipping usually
causes noticeable digital audio distortion, this indicator lets you know which audio
output clipped even after you have stopped playback. This way, you can go back to
the clips on that track to reduce their levels.
Note: Unlike hardware audio meters that light up only when an audio signal is
playing, the Final Cut Pro audio meters display and hold the current level whenever
the playhead in the Viewer, Timeline, or Canvas appears over an audio clip, whether
playing or paused.
Chapter 4
Overview of the Audio Mixer
77
I