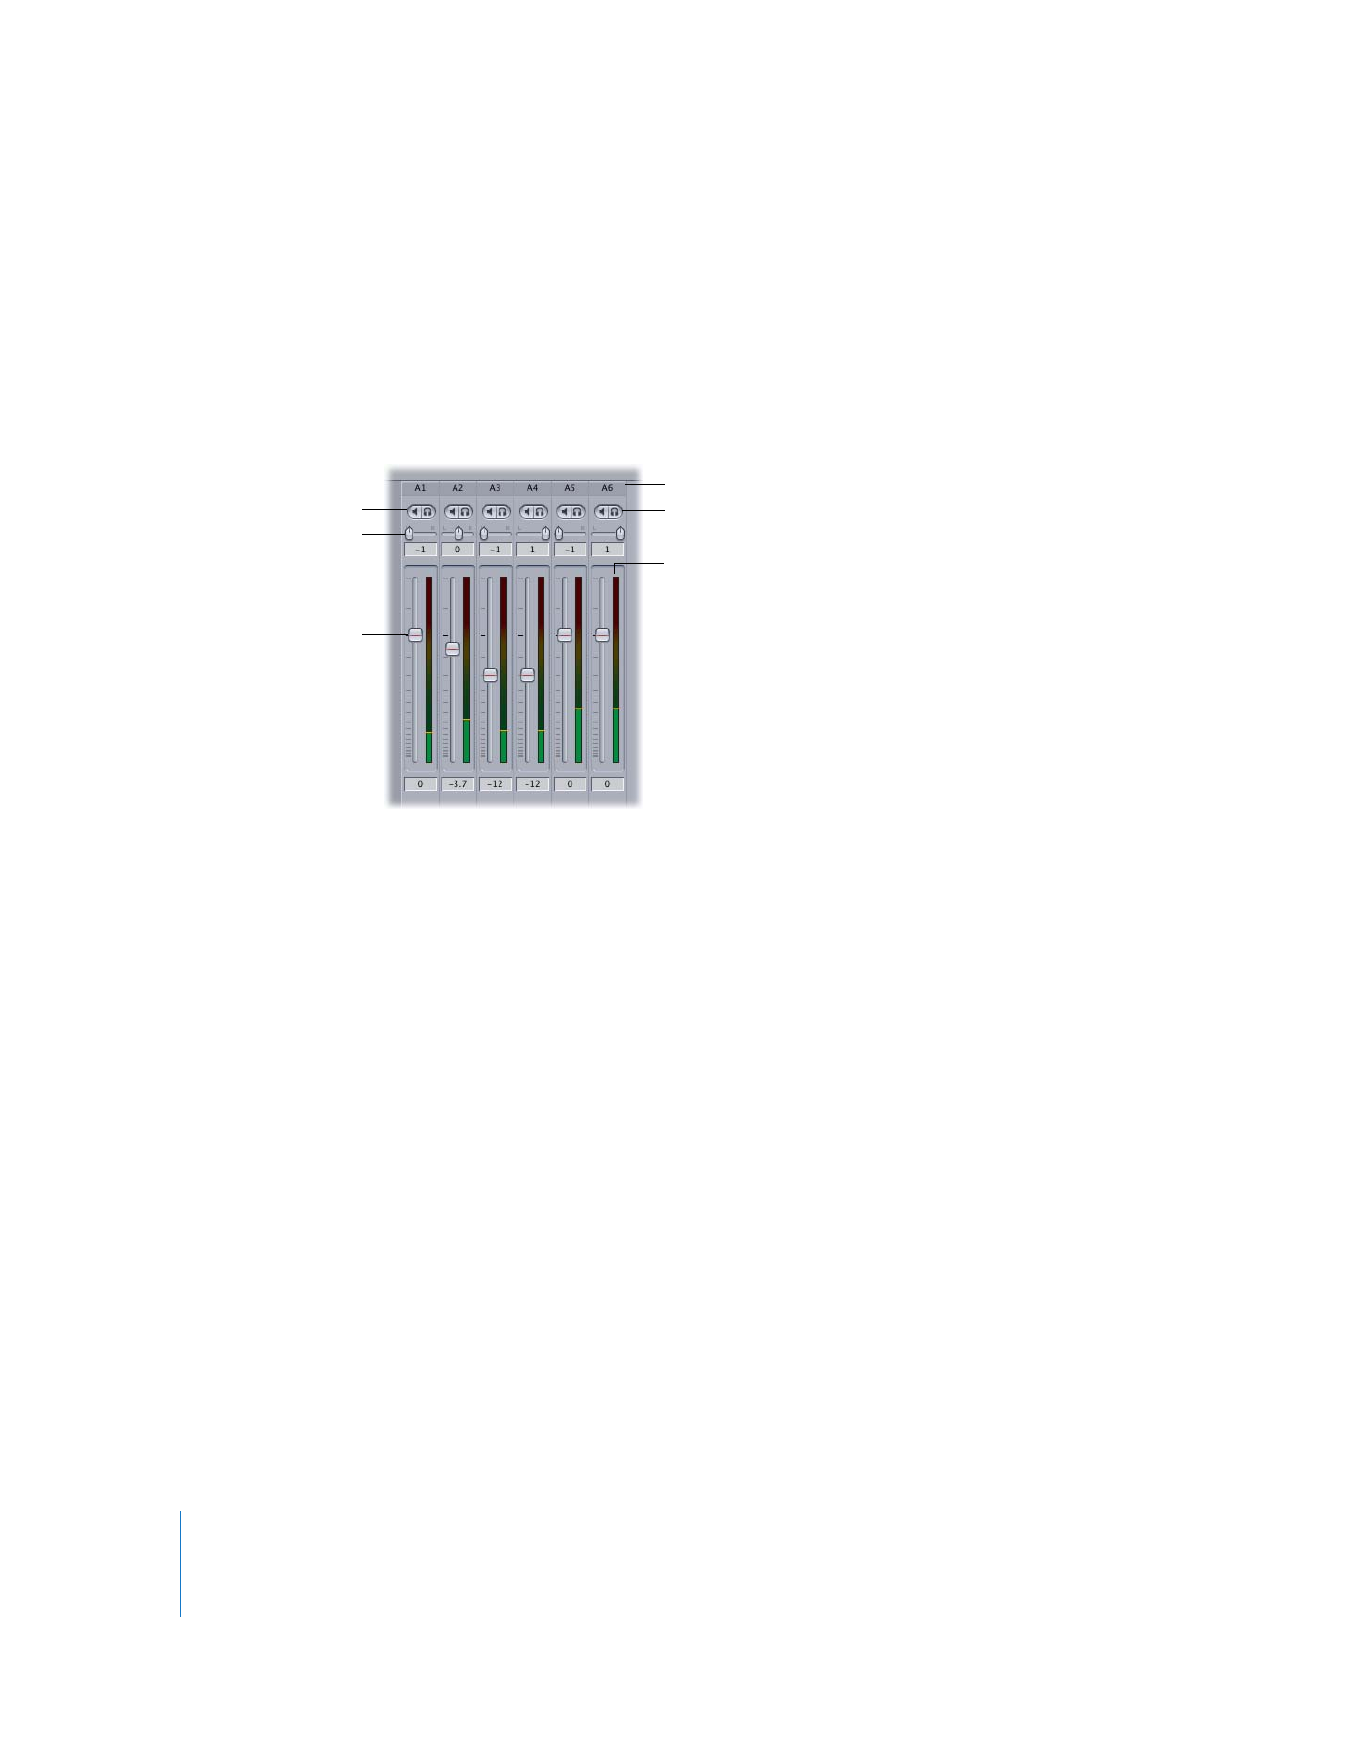
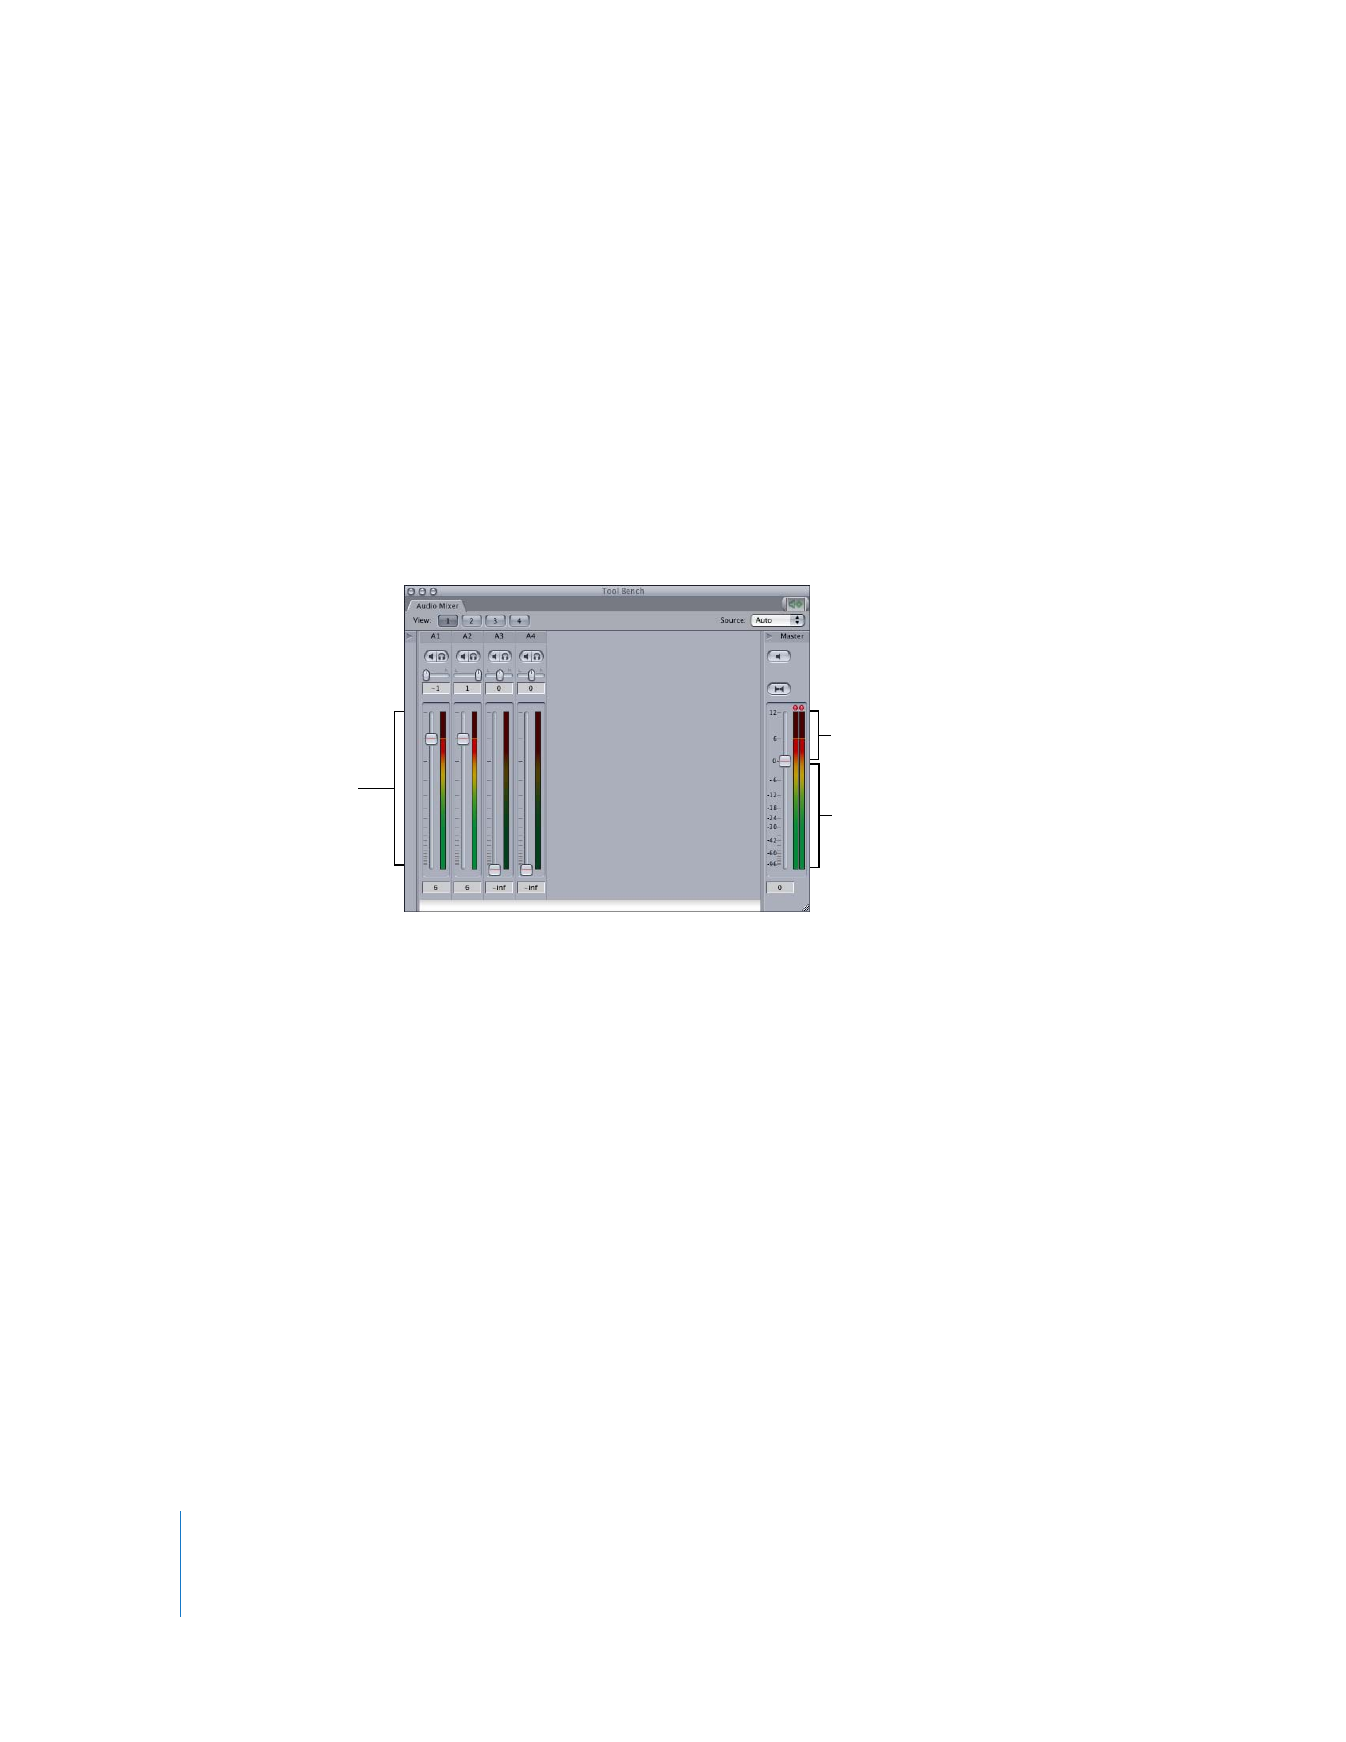
Track Strips Area
In a typical audio mixer, each channel has a corresponding channel strip with level
and pan controls. In the Final Cut Pro Audio Mixer, each track in your sequence has a
corresponding track strip with mute, solo, pan, and audio level controls. If a track’s Track
Visibility control is deselected in the Track Visibility area, its track strip does not appear
here. If an audio track is disabled in the Timeline, that track’s track strip controls
are dimmed.
The Track Strips area includes the following controls:
 Track name: Corresponds to the audio track in the current sequence (or in the Viewer).
 Mute button: Click to turn off audio playback for that track. The same mute button is
available in the Timeline. Use the mute button to quickly mute or unmute a track
while your sequence plays. For example, if you want to briefly compare what your
audio mix sounds like with and without the track, you can use the mute button while
the sequence plays.
Muting a track does not delete pan or audio level keyframes, nor does it prevent
fader automation. Muting tracks only affects playback; muted tracks are still output
during Print to Video and Edit to Tape operations, and during export to audio or
movie files.
Note: To prevent a track from being output or exported, you need to disable the
track in the Timeline. For more information, see Volume II, Chapter 8, “Working with
Tracks in the Timeline.”
Solo button
Mute button
Track name
Panning slider
Fader
Track audio level meter

Chapter 4
Overview of the Audio Mixer
73
I
 Solo button: Click to mute all tracks that don’t have solo enabled. Use the solo button
to listen to a track isolated from the others. For example, if you click the solo button
on track A1, all other audio tracks are muted. If you enable solo on A1 and A2, both
A1 and A2 play back, while all other tracks are muted.
∏
Tip: Option-clicking a track’s solo button will solo all of the tracks. Option-clicking a
solo button that is already selected will deselect all of the tracks’ solo buttons.
Soloing tracks only affects playback; soloed tracks are still output during Print to
Video and Edit to Tape operations, and during export to audio or movie files.
 Panning slider: Use to change a clip’s stereo pan. The panning slider in the Audio
Mixer works the same way as the Pan sliders in the Viewer’s audio tabs. Changes
made to the panning slider can be recorded as keyframes in the clip currently
beneath the playhead. Upon playback, the panning slider is automated by the
keyframes and animates to display the changing pan values in your program.
When you adjust the pan of a stereo audio clip from the Audio Mixer, the panning
sliders of both tracks on which the stereo pair clip appears are locked together. Any
adjustments made to one panning slider affect the other panning slider inversely.
Below the panning slider is a field that displays the exact pan value assigned to the
audio track. To adjust the panning slider numerically, enter a value in this field.
Note: If a clip is on a track that is assigned to a mono (discrete) output, the panning
slider for that track is disabled.
 Fader: Faders are vertical sliders used to adjust the audio levels of clips at the
position of the playhead. Using the fader, you can adjust the audio level of a clip
from +12 dB to –∞ dB (silence).
If the Record Audio Keyframes button is selected, changes made to a fader are recorded
as keyframes in the current clip or clips beneath the playhead. Upon playback, faders are
automated by keyframes and animate to display the changing levels.
Each fader has tick marks that indicate the current strength of the signal in
decibels (dBFS).
Below each fader is a field that displays the exact audio level setting of the fader. To
adjust the fader numerically, enter a value in this field.
∏
Tip: The height of the Tool Bench window affects the displayed resolution of the faders
in the Audio Mixer. For example, if you compare the length of faders in taller and
shorter Tool Bench windows, an identical movement results in a greater level change
with the shorter fader, and a smaller level change with the longer fader. This means
that you can achieve more subtle control of a clip’s levels, if necessary, by making the
Tool Bench window taller.
74
Part I
Audio Mixing
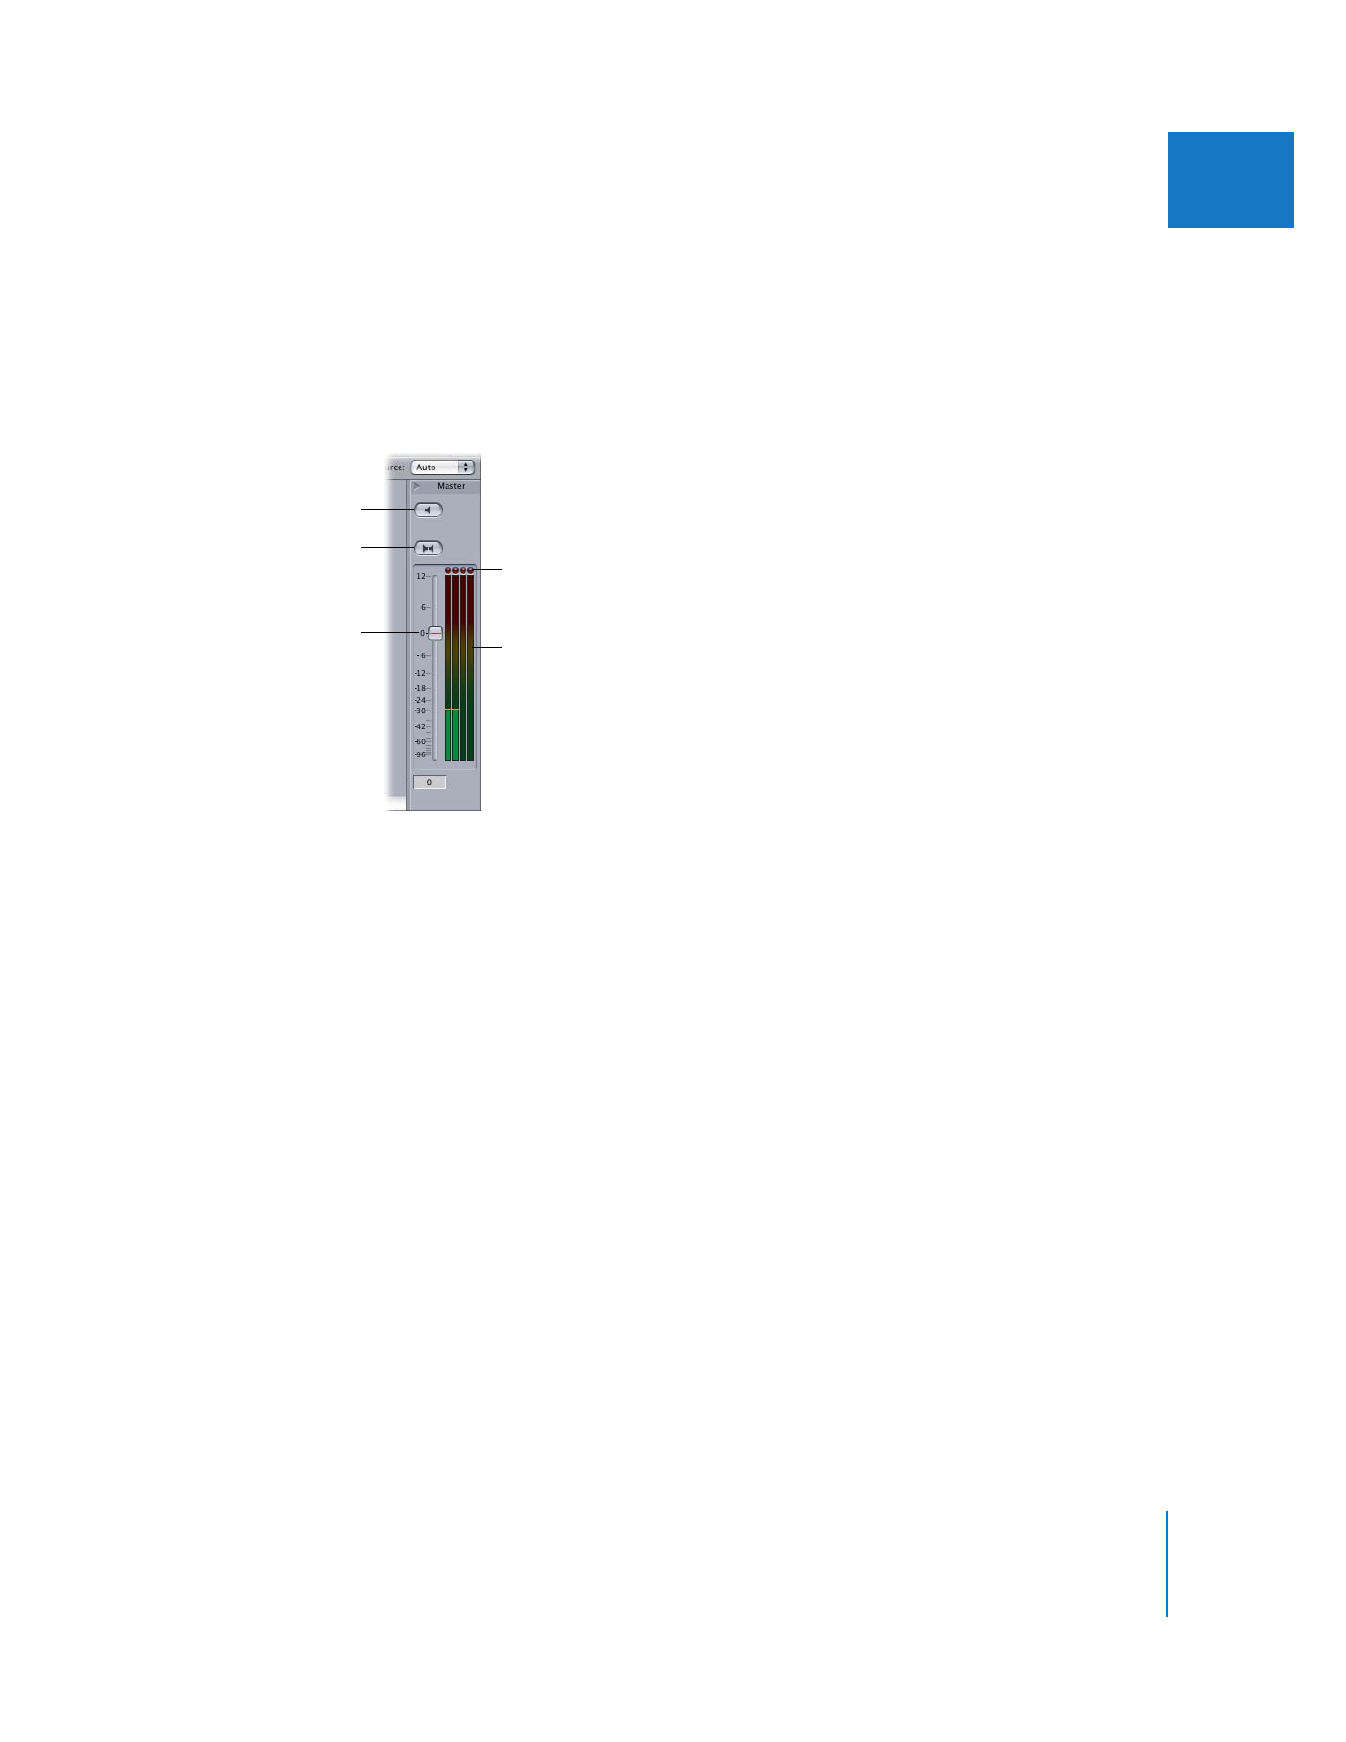
 Track audio level meter: Each track in the Audio Mixer tab corresponds to a track in
your sequence (or in the Viewer) and has an individual meter with a scale from +12
dBFS to –∞ dBFS (silence). A track audio meter shows the levels of the current audio
clip item in a track. Use these meters to make sure the average level of each clip is
consistent with similar audio material and that peaks are not above 0 dBFS.
Note: The meters in the Audio Mixer can actually display levels above 0 dBFS
because Final Cut Pro mixes audio internally at 32-bit floating-point resolution—
much higher than the 16- or 24-bit audio in typical media files. The high mixing
resolution provides enormous headroom to prevent clipping when multiple audio
tracks are mixed together. However, you should never output a signal that exceeds
0 dBFS on the Master audio meters.
Acceptable range
Clipping range
Acceptable range
Chapter 4
Overview of the Audio Mixer
75
I