
Tips for Cutting Dialogue
Here are some tips and tricks for taking care of routine dialogue editing problems.
Use cross fades to smooth out problem edits.
If you’re having trouble finding an edit point between two audio clips that sounds
smooth, try using a transition instead of a straight cut. More information on audio
transitions can be found in Volume II, Chapter 21, “Adding Transitions.”
Use subframe audio level keyframes to eliminate pops and clicks at edit points.
If there is a popping or clicking sound that you can’t get rid of at an edit point, you can
eliminate it by opening the clip in the Viewer, setting audio level keyframes within the
frame with the clicking, and fading those few audio samples all the way down to –60
dB. See “
Example: Setting Subframe Audio Level Keyframes to Eliminate Clicks
” on
page 130 for instructions.
Use keyframes to eliminate microphone pops in a voiceover recording.
Although you can use the Vocal DePopper filter in extreme problem cases, if you just
have one or two pops in your audio resulting from words with the letter P, you can get
rid of them by opening the clip in the Viewer, zooming in on the P sound, and setting
four keyframes to lower the audio level and soften the sound.
Use room tone to fill in audio gaps in a scene.
When you edit dialogue, any part of a scene that doesn’t have dialogue or clean source
audio should be replaced with room tone from that scene, as described in Volume II,
Chapter 17, “Audio Editing Basics.” This includes the beginning and the end of a scene,
even if nobody’s talking. If room tone only happens while people are speaking, it will
sound odd. The entire scene should have the same background noise.
Chapter 9
Tips for Better Audio
179
I
If someone mumbles a single word, salvage the rest of the take.
If someone messes up part or all of a word, either by mumbling or swallowing part of it,
you can sometimes take part or all of another instance of that word, or of another word
that has the sound you need, and use it to replace part or all of the misspoken word.
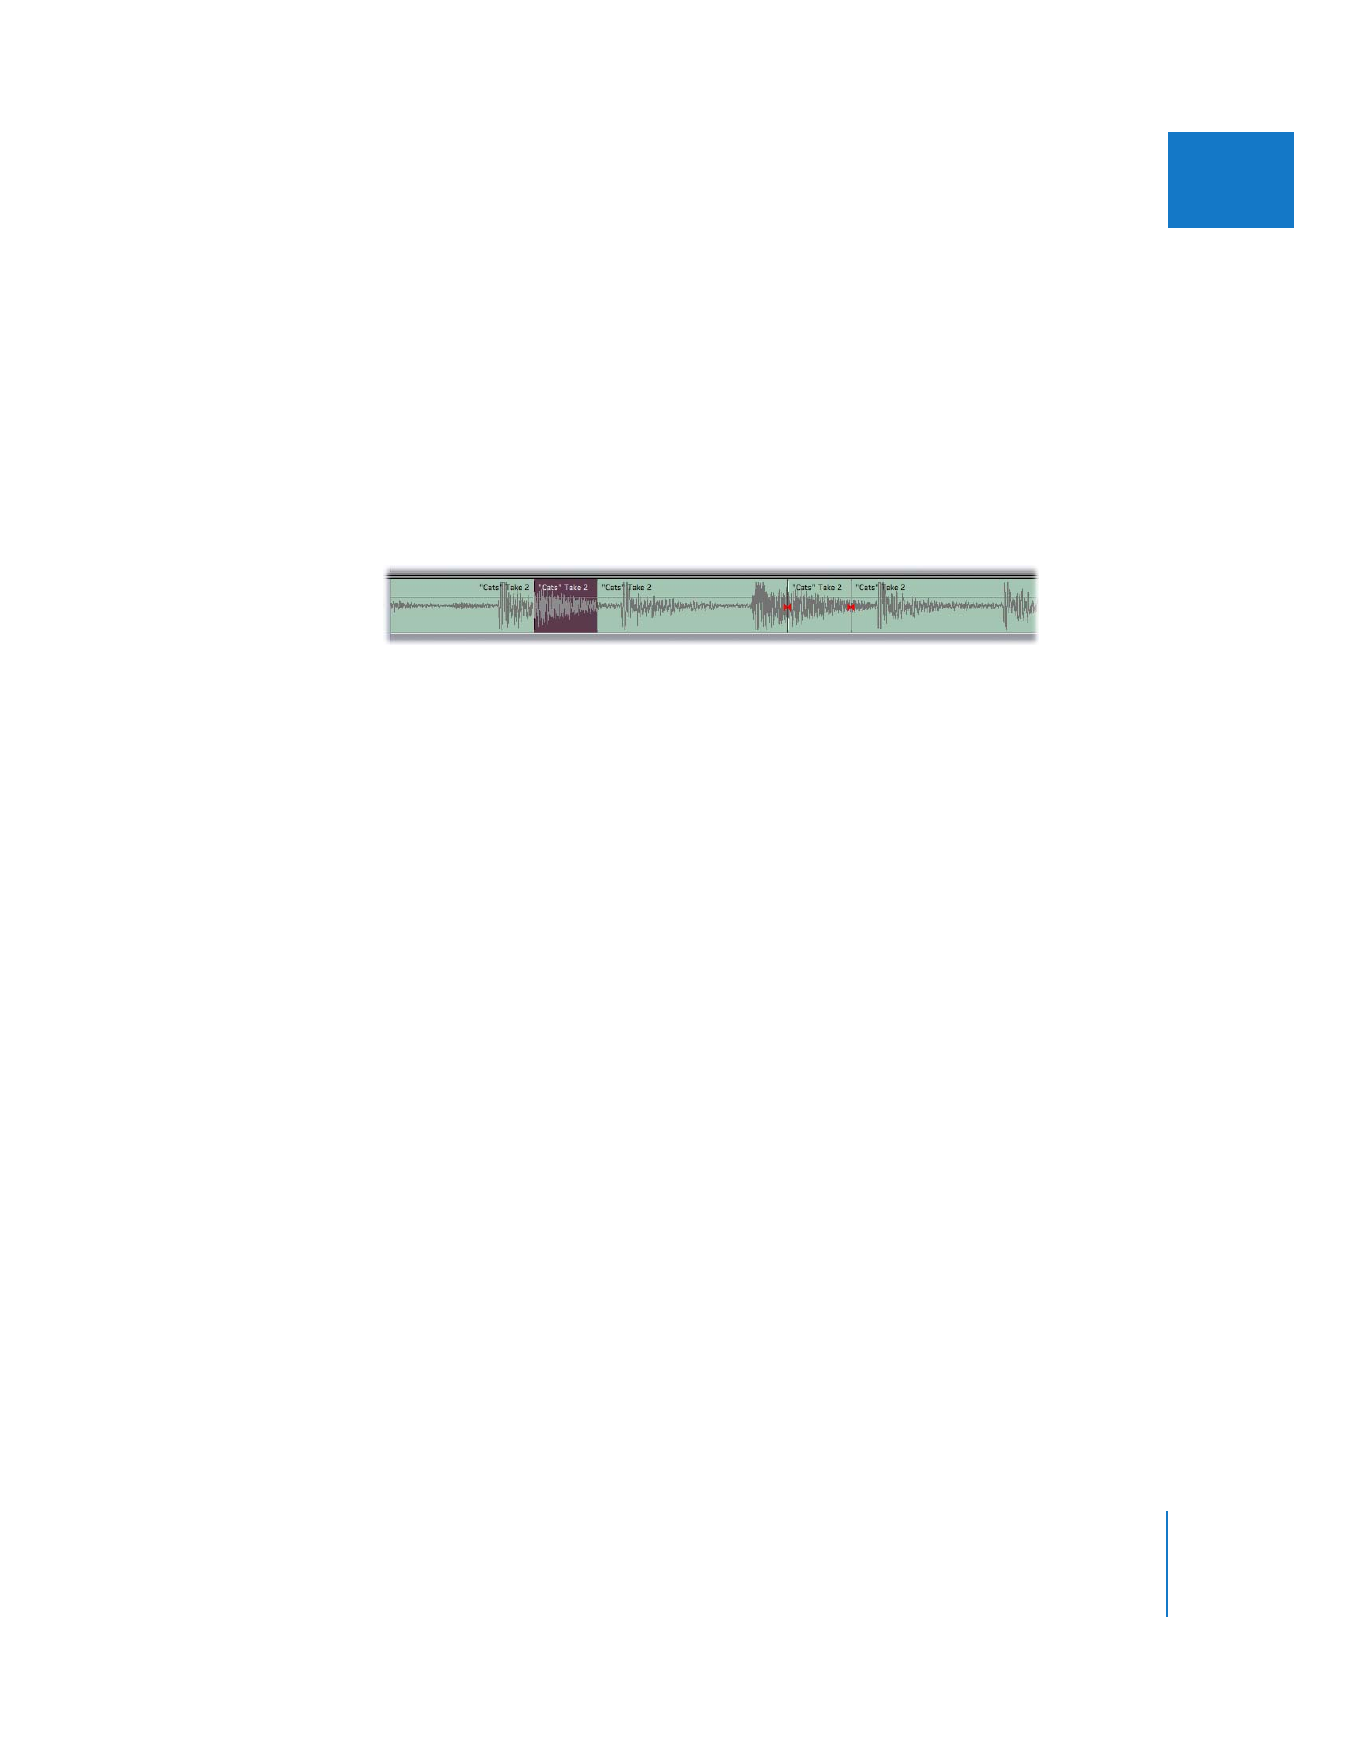
For example, suppose an actor was supposed to say, “Get those cats out of that tree,”
and instead said, “Get dose cats out of that tree,” accidentally swallowing the “th” sound
in the word those. If you need to use that take, you could copy the “th” sound from the
word that and paste it over the botched beginning of the word “dose.” The change is so
small that nobody will notice the difference. The result in your sequence would look
something like this:
When you do this kind of edit, watch out for the beginnings and endings of words.
Sometimes people run words together if they speak quickly. If you’re replacing a word
in clip 1 with the same word from clip 2, make sure the sound that comes before the
new word in clip 2 is the same as the sound that comes before the word it’s replacing
in clip 1.
Cut away to another image to smooth cuts in dialogue.
If you need to remove a word or phrase from someone’s speech, you can use a cutaway
shot or B-roll footage at the same point. This allows you to change the audio without
viewers noticing an obvious jump cut.
One reason shots of the interviewer are included in documentary-style programs is to
give the editor the freedom to edit the speaker’s dialogue without introducing a jump
cut in the picture. That way, if the person on camera says the same thing twice, you can
cut it out without the audience’s knowing and make the subject sound better.
You can also do this in narrative programs. If you decide to rearrange an actor’s lines by
adding or removing dialogue, you can cut to a reaction shot of the person who’s
listening to smooth your changes to the speaker’s audio.
180
Part I
Audio Mixing
Change the pace of off-camera dialogue.
As long as the speaker is off camera, you can make other dialogue changes as well. For
example, you can easily change the pacing of what’s being said, making the sentence
sound more or less dramatic. The key is to have footage you can cut away to that will
seem plausible. An audience shot or another actor listening are two examples of
plausible cutaway shots.
Remember, if you create any gaps as a result of editing your audio, fill them in with
room tone.
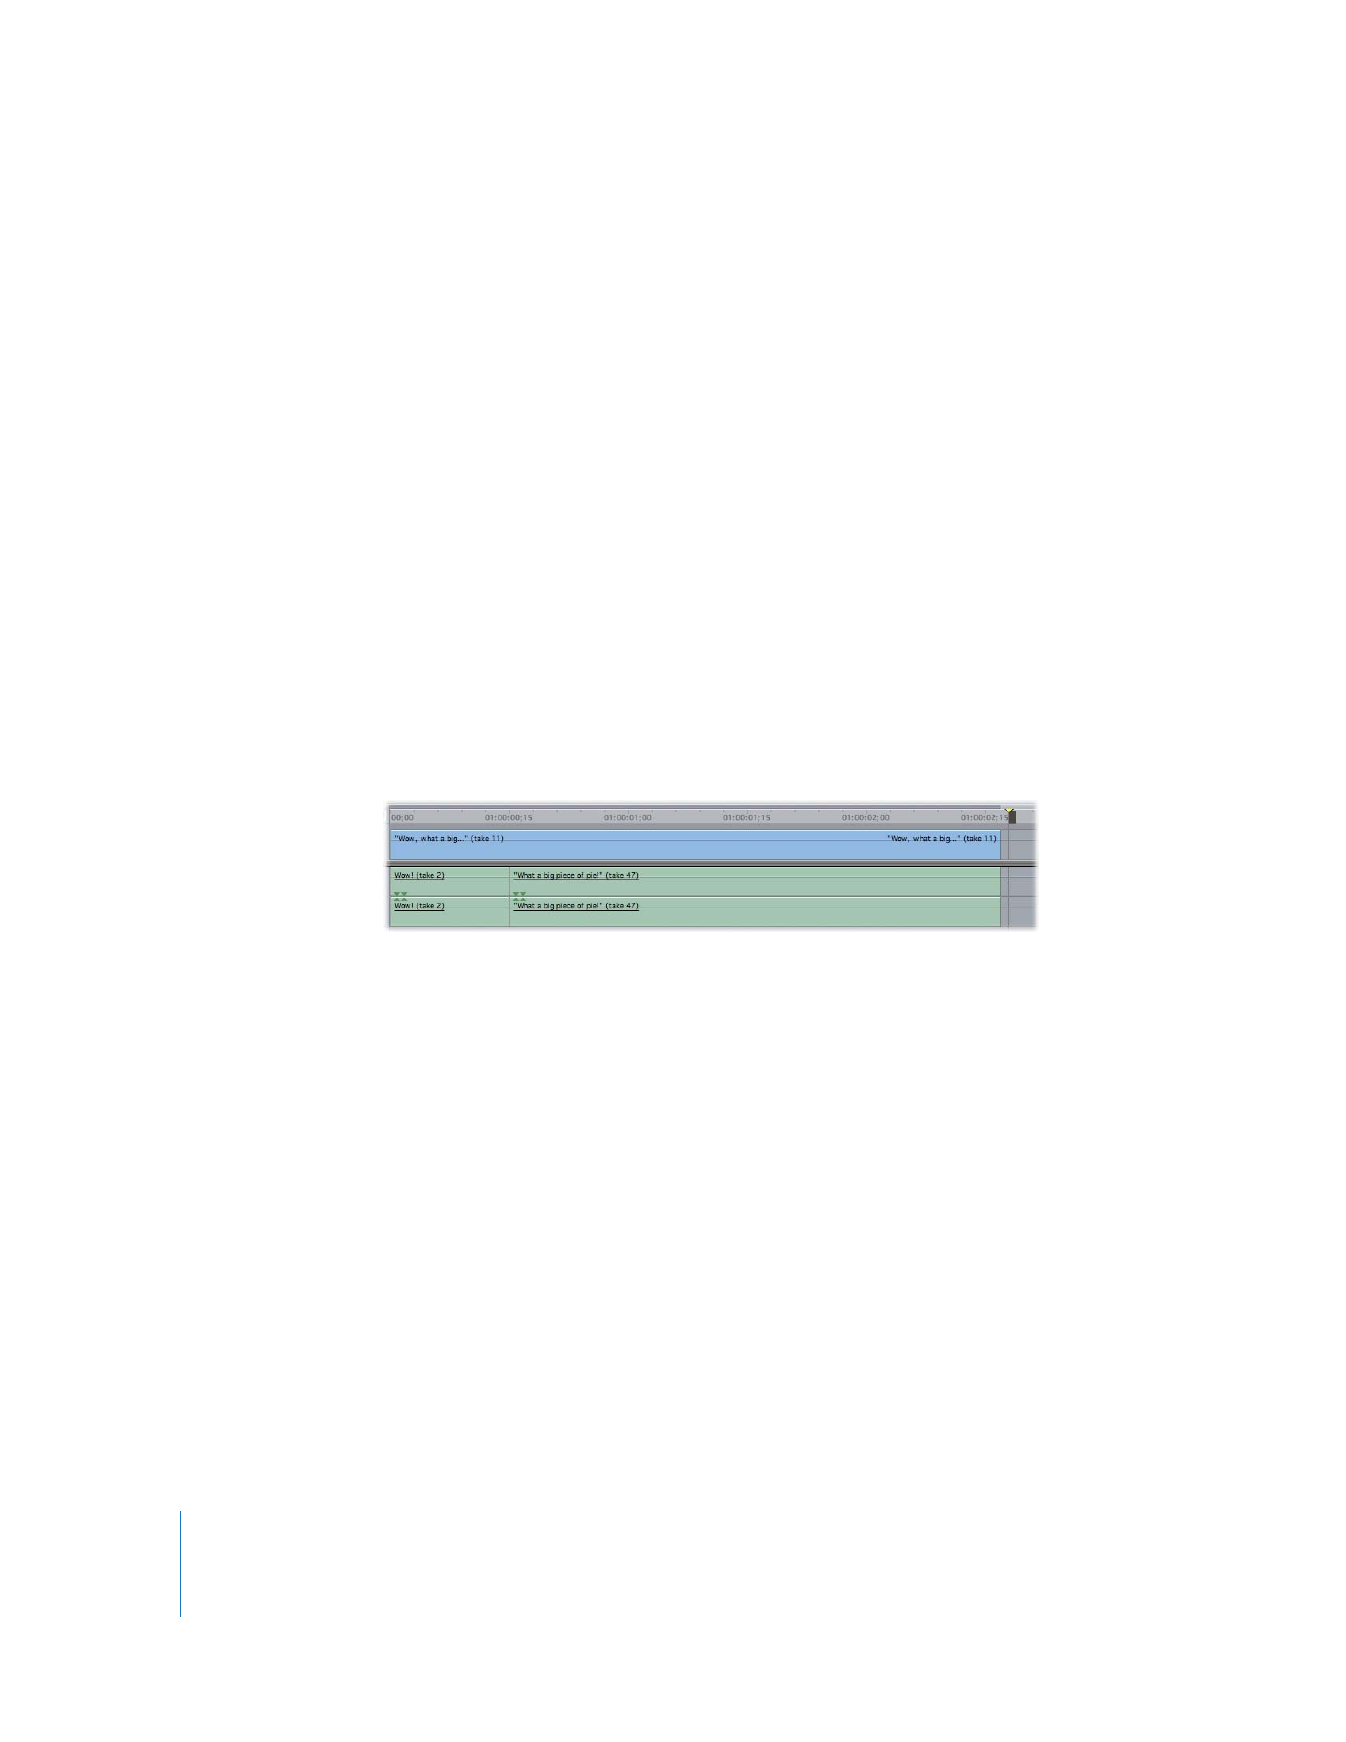
Use the video from one take with the audio from another.
Sometimes you’ll have multiple takes of a particular shot, each with something good in
it. For example, suppose you have a series of takes of an actor saying, “Wow! That’s a
big piece of pie!”
Each take is shot from a slightly different angle, and there’s one visual take that you like
more than the others, even though the dialogue in it isn’t that great. In another take,
the actor said the word “wow” really well. A third take has the best version of the line
“That’s a big piece of pie!” If the actor was good and the pacing of each of these takes
is roughly the same, it’s fairly easy to combine all three clips into one good take.
Be careful when combining dialogue from different takes.
People use different intonations as they speak a sentence, and it’s important to listen
for this. Sometimes, you’ll be unable to combine two sentences because they won’t
sound right together.
For example, suppose you have two clips of someone talking. In one clip the actor says,
“I’m going to throw that suitcase out the window!” In a second clip, he says, “Should I
put the box in the closet?” You want to cut from the actor to a shot of the closet when
he says “that suitcase” so you can combine the line “I’m going to throw that suitcase”
with “in the closet.” Unfortunately, the second sentence is a question, so the two pieces
of dialogue don’t really sound right together. Because the difference is jarring, you’ll
have to try something else.

Chapter 9
Tips for Better Audio
181
I
Edit in sound to handle a loud background noise at an edit point.
If you’re cutting from one clip to another, but there’s a loud sound right at the edit
point, such as a car or a plane passing, you can edit in sound to mask the cut. You won’t
be able to eliminate the noise, but if you take another car or plane sound effect that
sounds similar to the noise at your edit point, you can edit in just enough of the sound
effect in an adjacent audio track to complete the noise of the car or plane passing that
was cut off by your edit. You’ll need to play with the levels, mixing up the sound effect
prior to the edit point and mixing it down afterward, but you’ll be able to mask the cut
so that it sounds completely natural.
Swap onscreen sound effects with new ones using a replace edit.
If you want to replace the sound of a door slamming in your source audio track with a
more dramatic door-slam sound effect, you can easily and quickly line up the new sound
effect waveform with the old one by doing a replace edit, so that the new sound is
perfectly in sync. For more information, see Volume II, Chapter 10, “Three-Point Editing.”