Applying Filters to an Audio Clip
Applying audio filters to clips in Final Cut Pro is easy.
To apply an audio filter to a clip in a sequence, do one of the following:
m
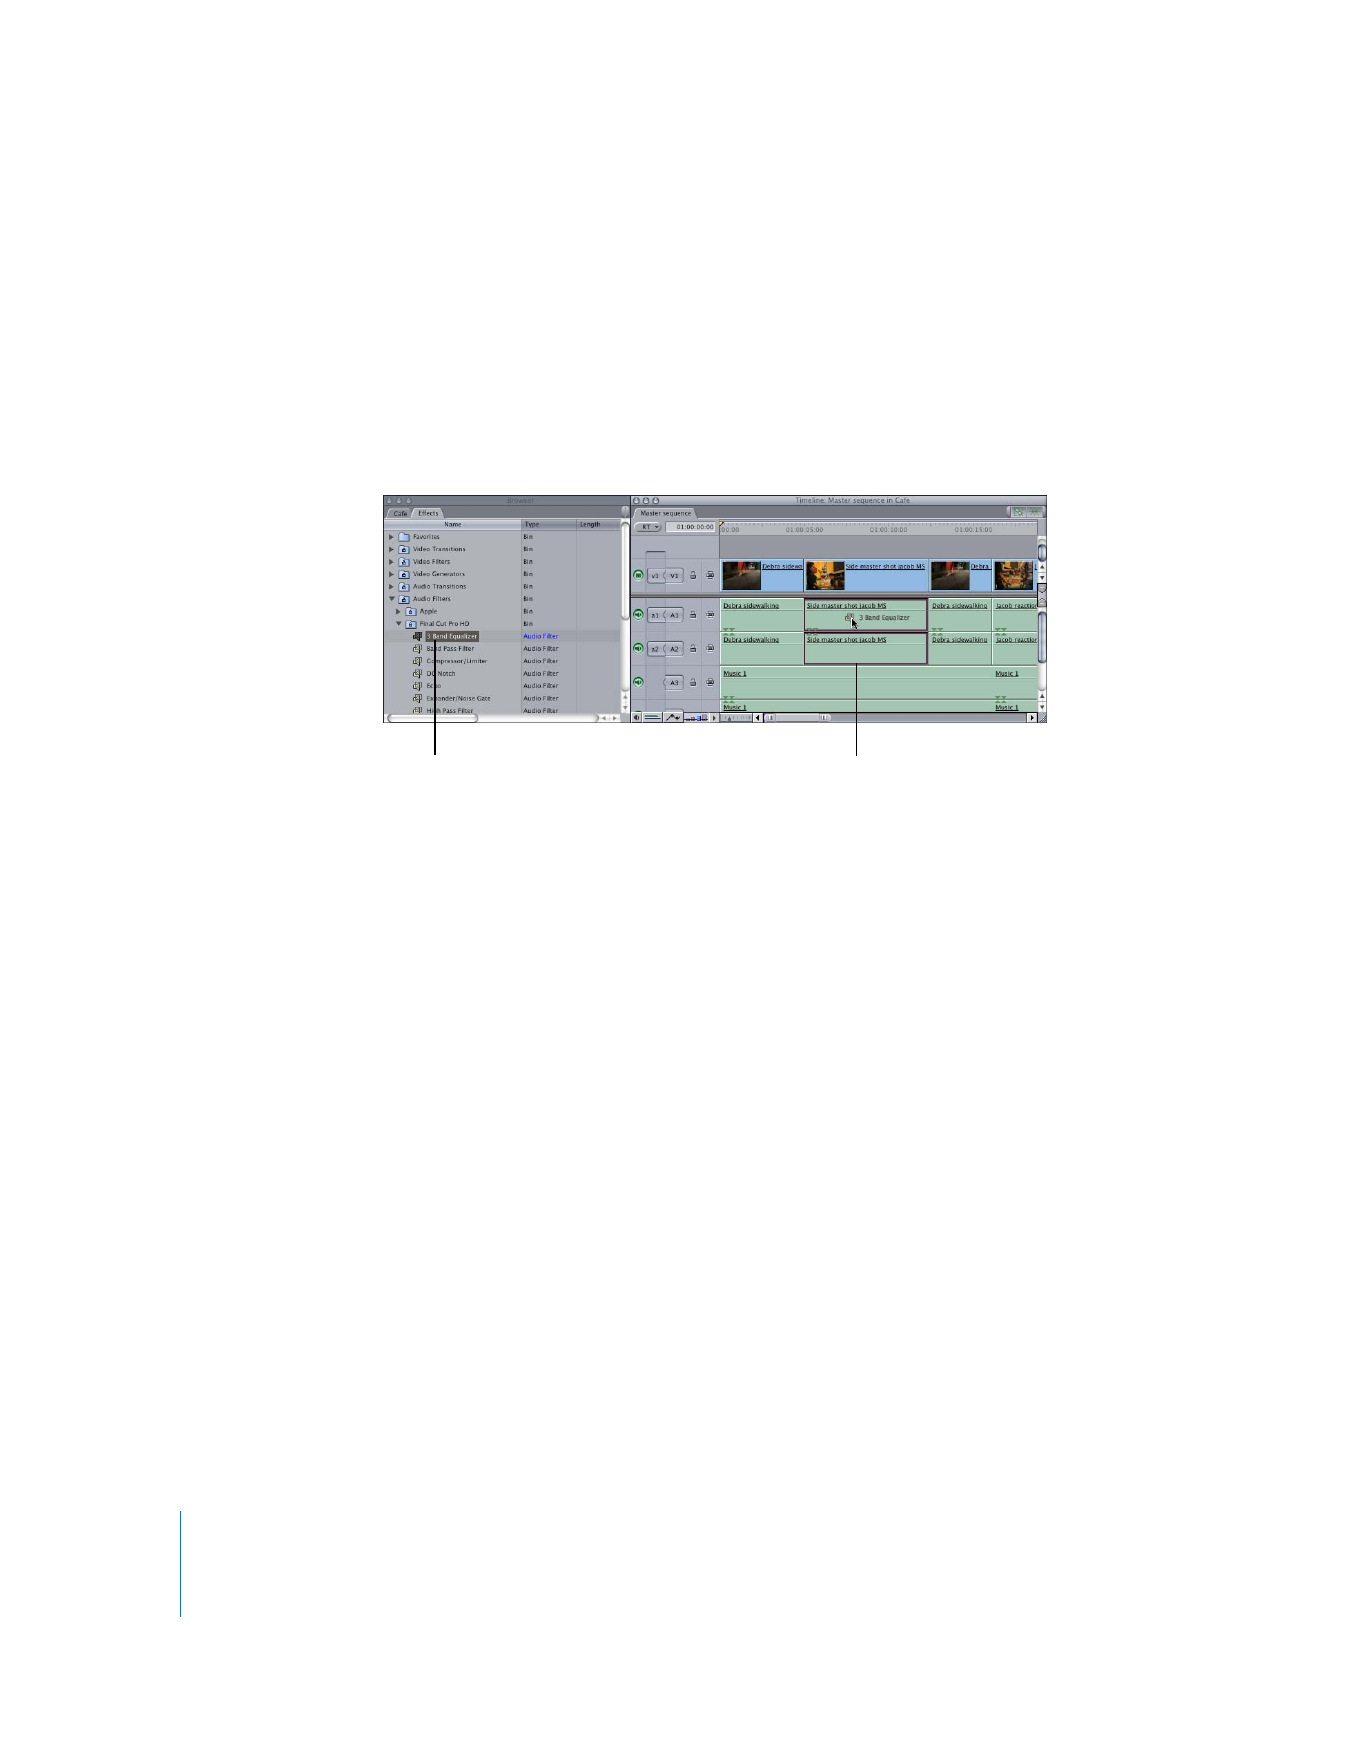
Drag an audio filter from the Effects tab in the Browser to a clip in a sequence in
the Timeline.
If you drag the audio filter to a video clip, the filter is applied to any audio items linked
to that clip.
m
Select one or more clips in a sequence in the Timeline, choose Effects > Audio Filters,
then choose a filter from the submenu.
The filter is applied to all the clips you selected. If you selected video clips, the filter is
applied to any audio items linked to those clips.
m
If a sequence clip is open in the Viewer, you can:
 Drag a filter from the Effects tab of the Browser directly to the Viewer.
 Choose a filter from the Audio Filters submenu of the Effects menu. The filter is
applied to the clip in the Viewer.
If you apply more than one filter to an audio clip, the filters are applied serially. In other
words, the first audio filter is applied, and then the resulting audio signal is fed through
the next audio filter, and so on.
If you apply multiple filters to a clip, the order in which they appear in the Filters tab for
that clip in the Viewer determines how the clip sounds. Although the initial order of filters
in the tab depends on when they were applied, you can change the order at any time.
Drag a filter from
the Browser...
...to the Timeline.

Chapter 8
Using Audio Filters
165
I
To apply multiple filters to a clip in a sequence, do one of the following:
m
Continue to apply more filters to the clip, one at a time, using any of the methods
described previously.
m
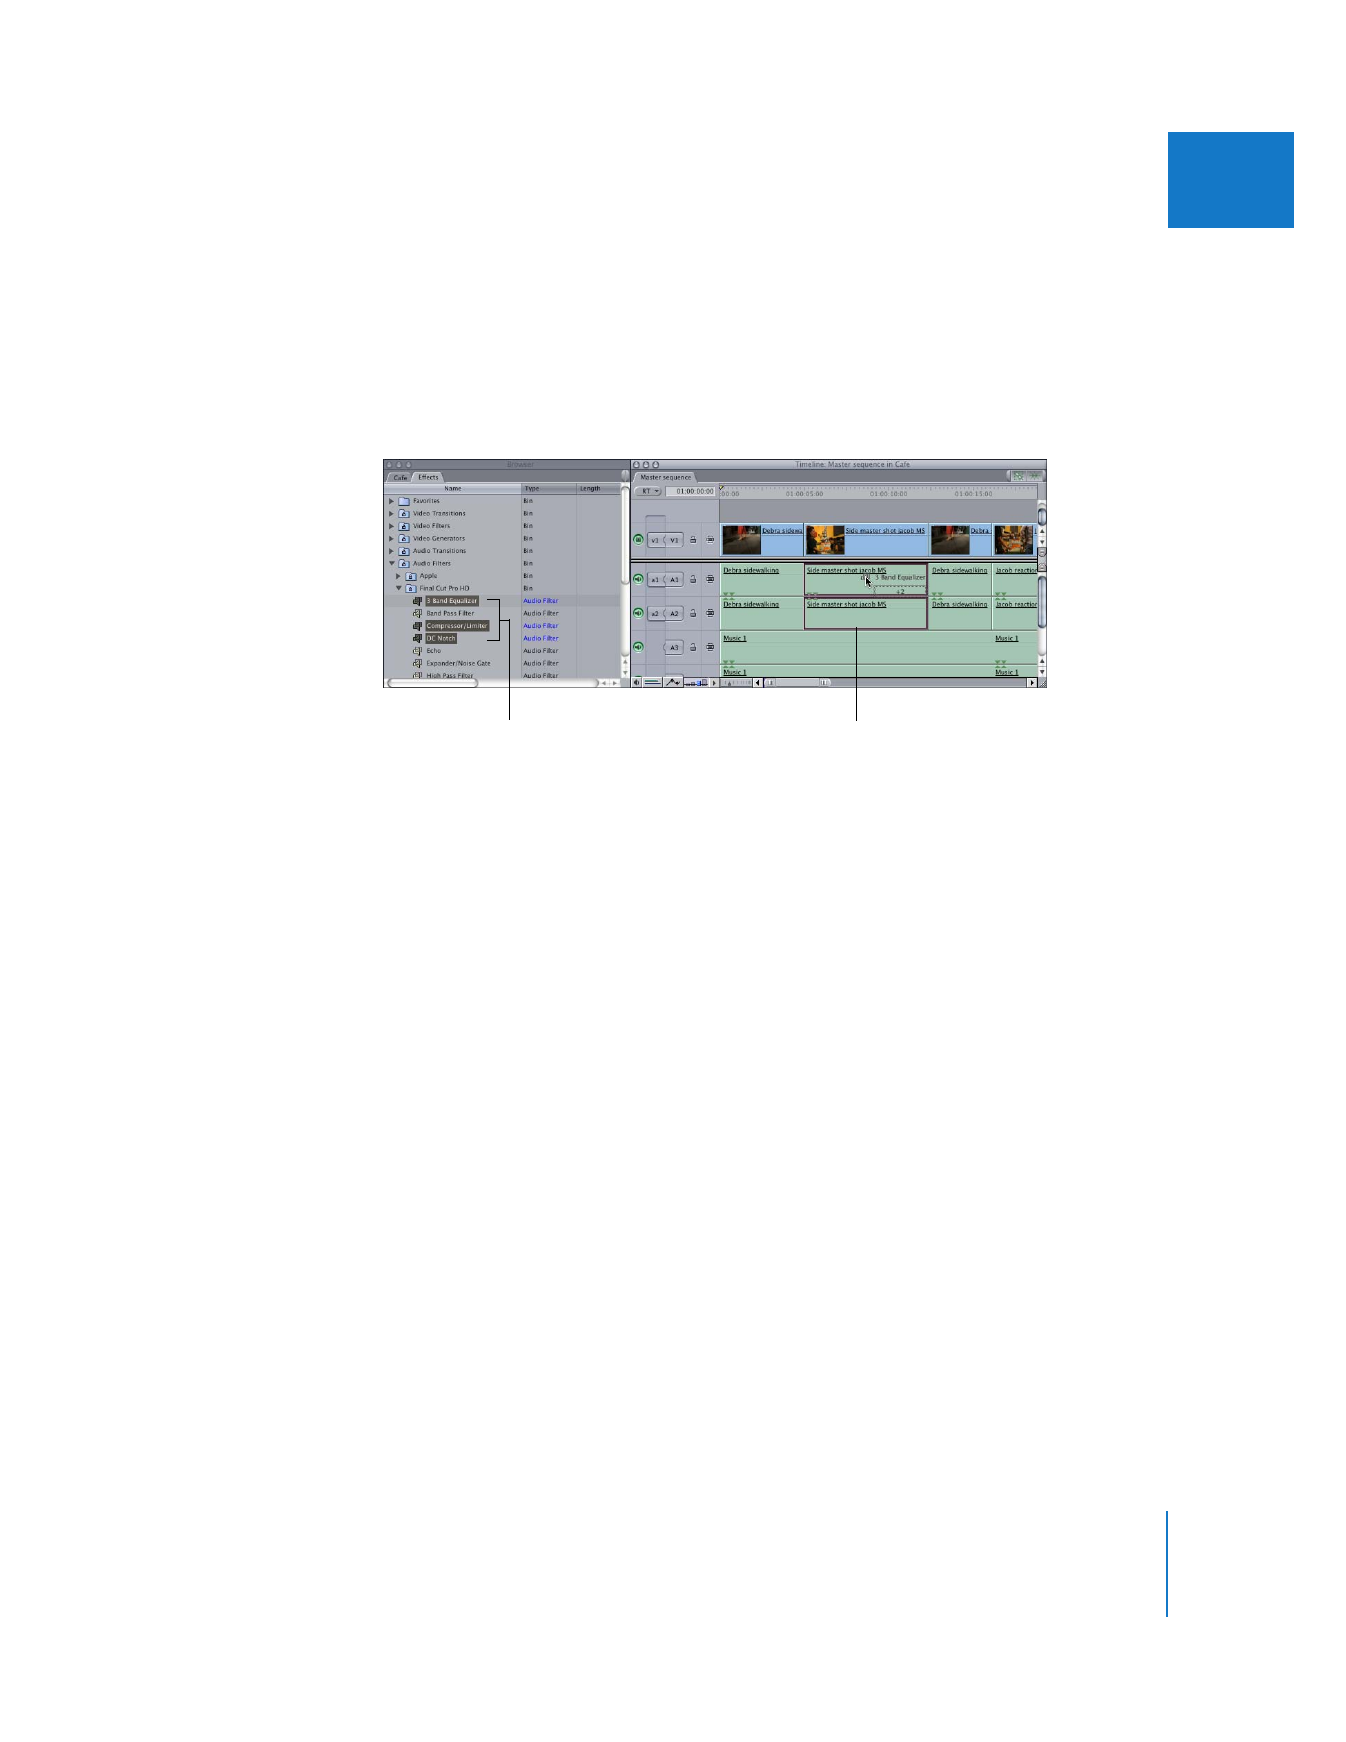
Shift-click or Command-click to select multiple filters in the Effects tab of the Browser,
then drag them all to one or more selected clips in a sequence in the Timeline.
Filters are applied to clips in the order they appear in the Effects tab.
Filters can also be copied, along with all of their settings, and pasted into one or more
clips in the same sequence or in another sequence.
When you copy a clip in the Timeline, you also copy all of that clip’s settings. These
settings include filters that have been applied to the clip. Instead of pasting the clip,
you can paste only that clip’s filters into other clips that you’ve selected. To do this, you
use the Paste Attributes command.
Select several filters
in the Browser...
...then drag them
to the Timeline.

166
Part I
Audio Mixing
To copy filters from one clip and paste them into another:
1
Select a clip in the Timeline with a filter applied to it.
2
Copy the clip.
3
Select one or more clips in the Timeline to apply the filter to.
4
Choose Edit > Paste Attributes (or press Option-V).
5
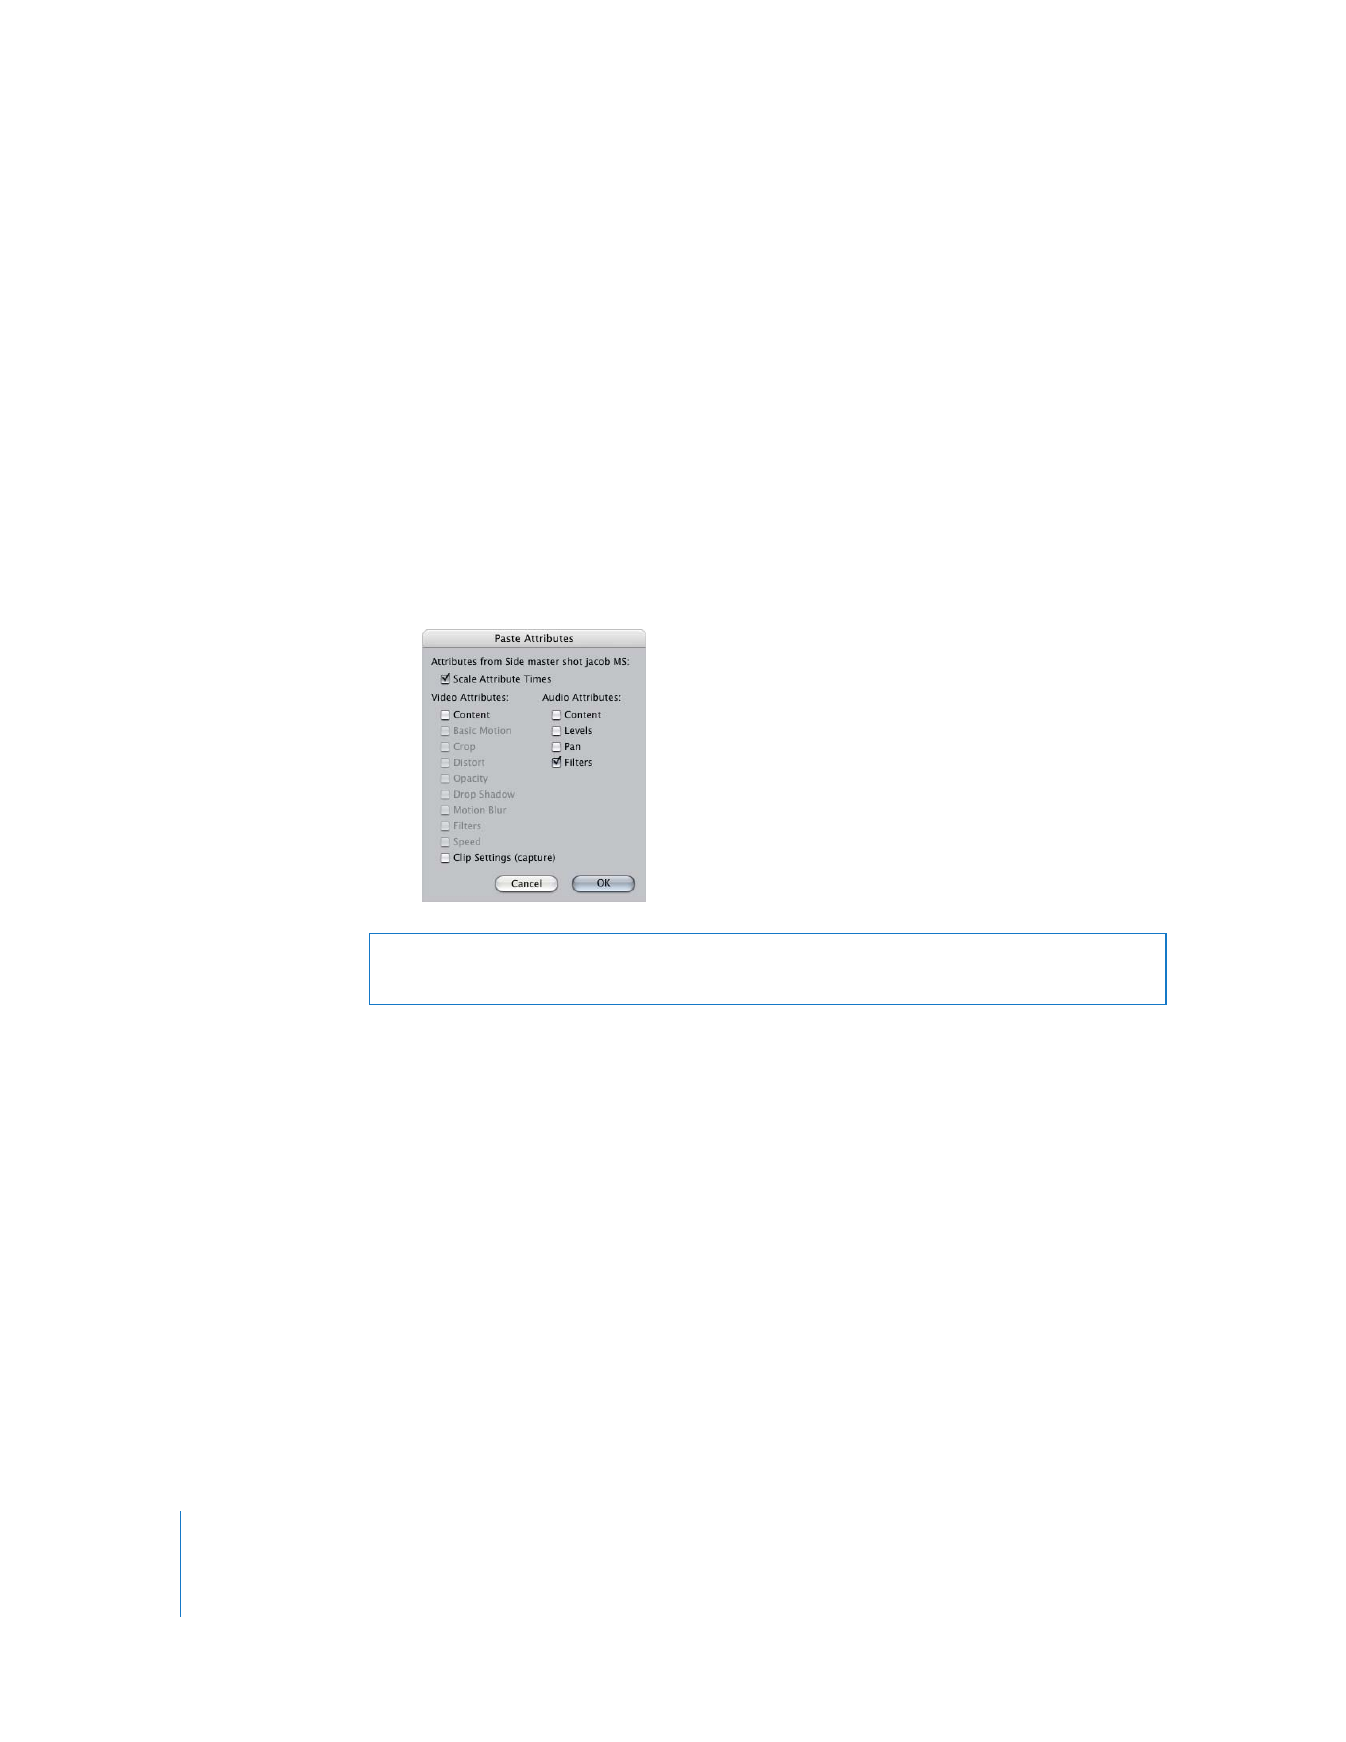
In the Paste Attributes dialog, select these options:
 Scale Attribute Times: Shrinks or stretches the keyframes of your copied clip attributes
to fit the duration of longer clips you may paste them into.
 Audio Attributes: Determines which attributes of the audio clip are pasted.
 Filters: Applies the parameter values and keyframes you have set for all filters in
the clip you copied.
6
Click OK.
The filters are pasted into the clips you selected.
Warning:
Pasting attributes into clips that have different frame rates will produce
erratic results.

Chapter 8
Using Audio Filters
167
I