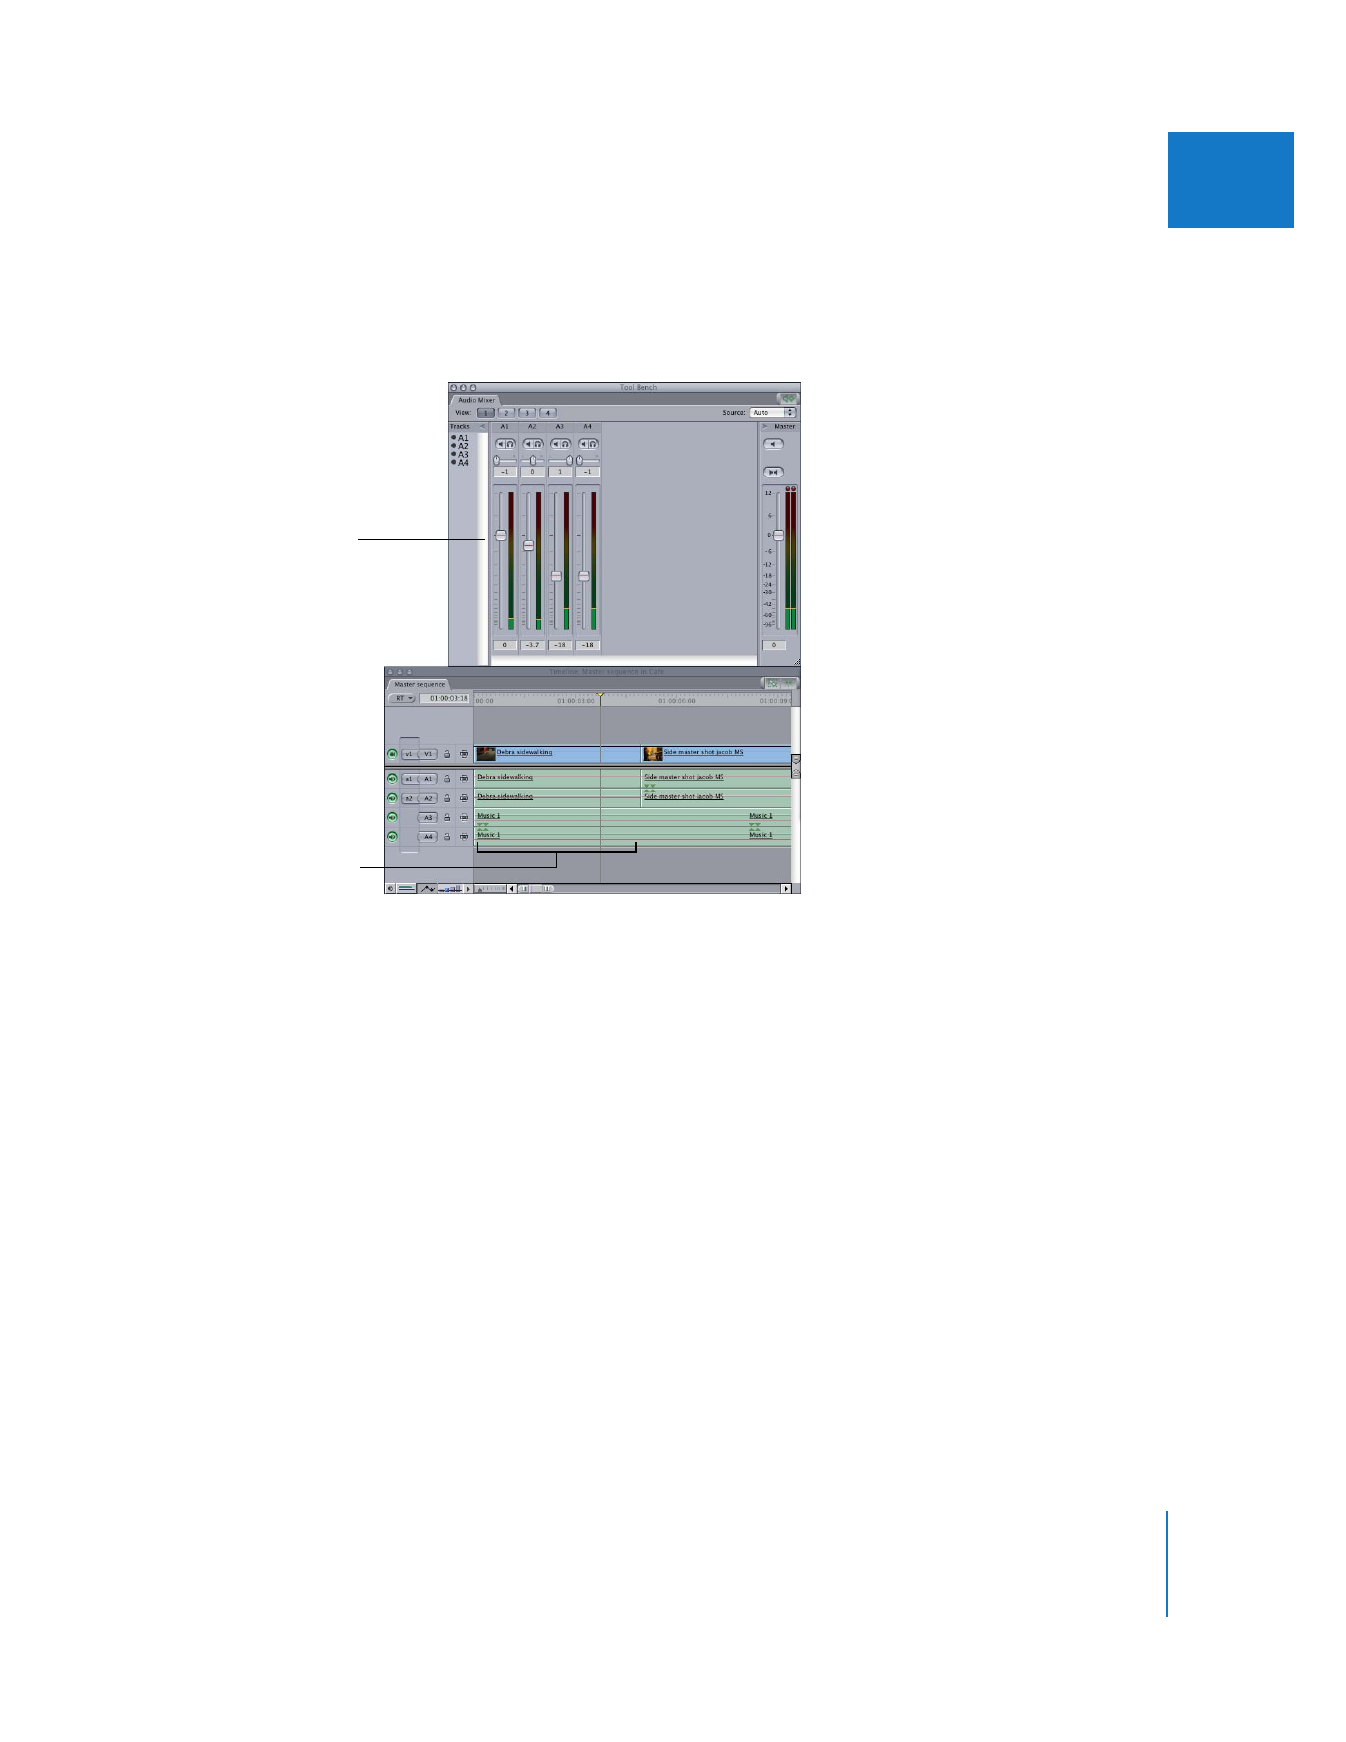
Using Faders to Adjust Audio Levels
Final Cut Pro stores audio level information in clips, not in tracks. When you adjust
faders in the Audio Mixer, you affect only the clips currently beneath the playhead. This
is the same as adjusting a clip’s audio level directly in the Timeline or Viewer.
If an audio track at the position of the playhead does not contain a clip, the fader
corresponding to that track is automatically set to –∞ dB (total silence), and you are
unable to move the fader slider.
You can change the audio levels of clips in the Timeline while the sequence is playing
or while it is paused. If the Record Audio Keyframes button is unselected, adjusting a
fader level does not add keyframes, but instead adjusts the audio level for the clip’s
entire duration. If the clip already has keyframes, the level is adjusted between the
previous and subsequent keyframes.
You can also select the Record Audio Keyframes checkbox in the Editing tab of the User
Preferences window.
Changes made to faders
in the Audio Mixer...
...affect only the audio
clip items below the
playhead in the Timeline.
86
Part I
Audio Mixing
To change the overall audio level of a clip using a fader:
1
Make sure the clip doesn’t have any audio level keyframes already applied.
2
Make sure that the Record Audio Keyframes button in the button bar at the top of the
Audio Mixer is not selected.
3
In the Timeline, position the playhead so that it’s directly over the clip whose audio
level you want to change.
4
In the Audio Mixer, drag the track’s fader up or down to adjust the level.