Defining the Destination Track
Audio that you record using the Voice Over tool is placed in the audio track connected
to the audio channel 2 (a2) Source control.
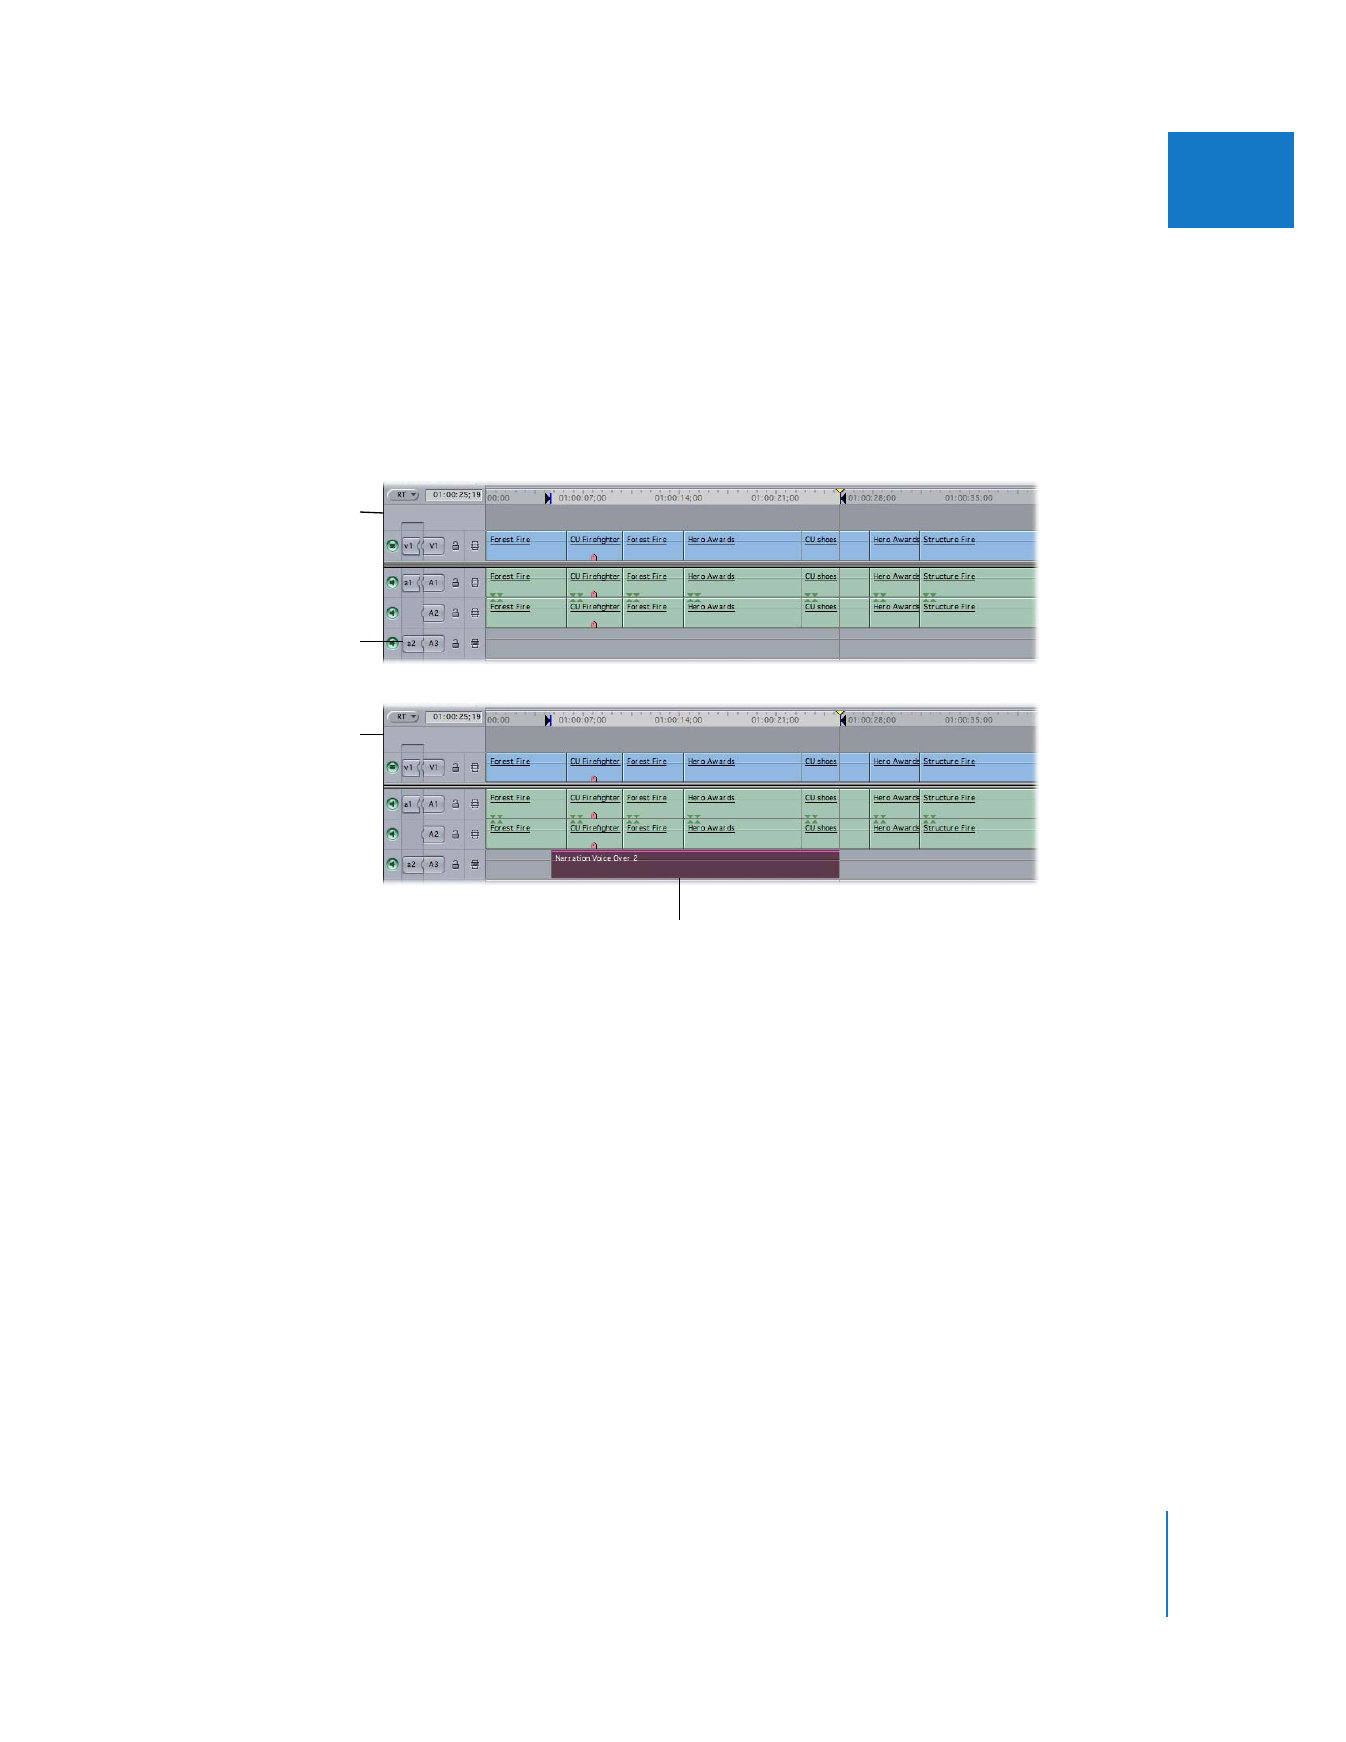
The following example shows a sequence with one video track and three audio tracks.
A video montage is edited onto track V1, with accompanying music edited onto tracks
A1 and A2. To record on track A3, you need to connect the a2 Source control to the
track A3 Destination control.
If the track connected to the a2 Source control already contains audio, audio recorded
with the Voice Over tool is placed in the audio track directly below. If no audio track
currently exists below the track connected to the a2 Source control, one is created.
Before
Connect the a2 Source
control to the A3
Destination control.
The newly recorded audio clip
is placed on track A3.
After

148
Part I
Audio Mixing
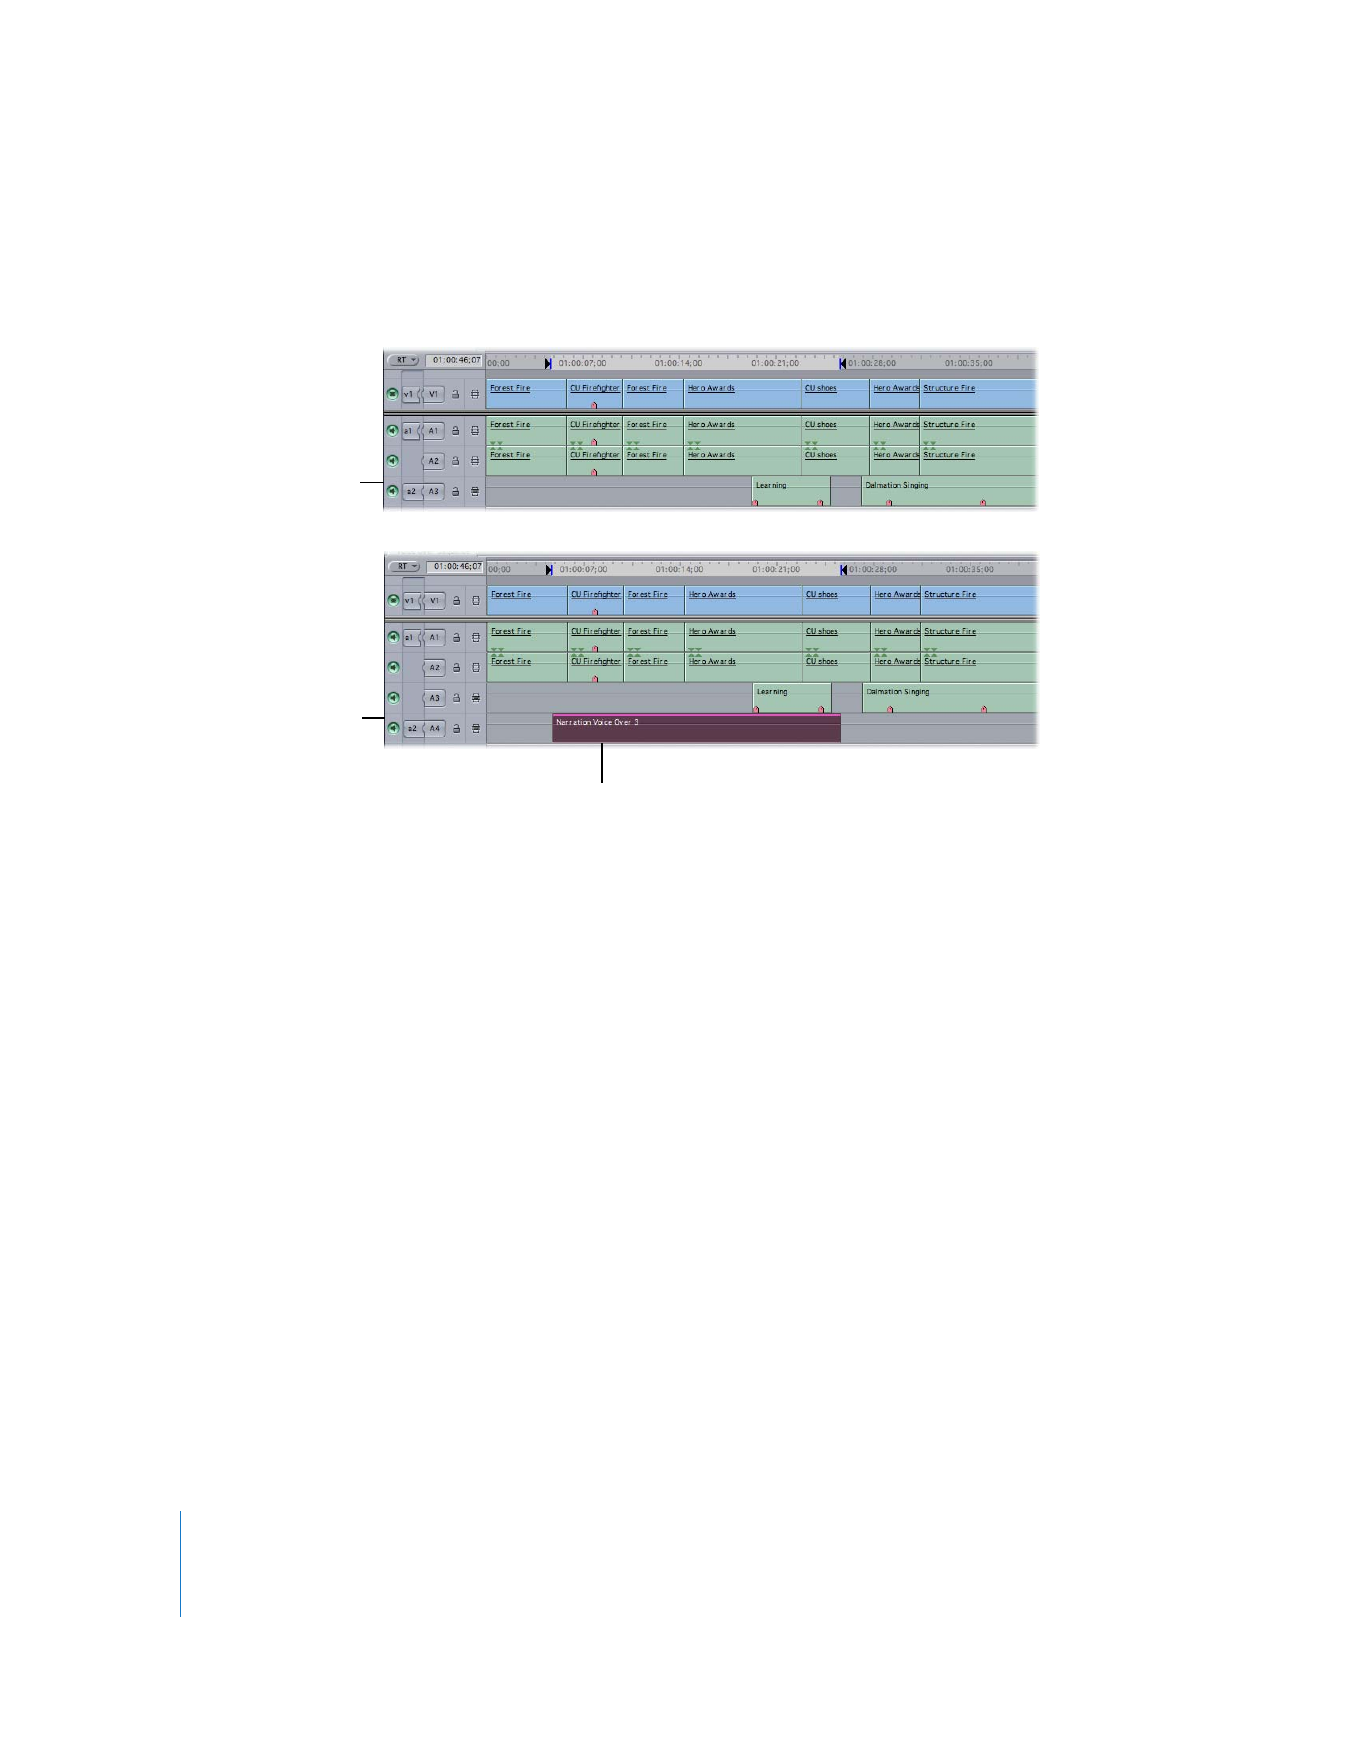
In the next example, all three audio tracks already have audio edited onto them, and
the a2 Source control is connected to track A3. After using the Voice Over tool, a new
track A4 is created, and the new audio clip is placed there.
If another audio clip is already present in the audio track below the track connected to
the a2 Source control, a new audio track is inserted below this track. All previously
existing audio tracks below this are moved down to accommodate the new audio track.
Before
The newly recorded
audio clip
After

Chapter 7
Using the Voice Over Tool
149
I
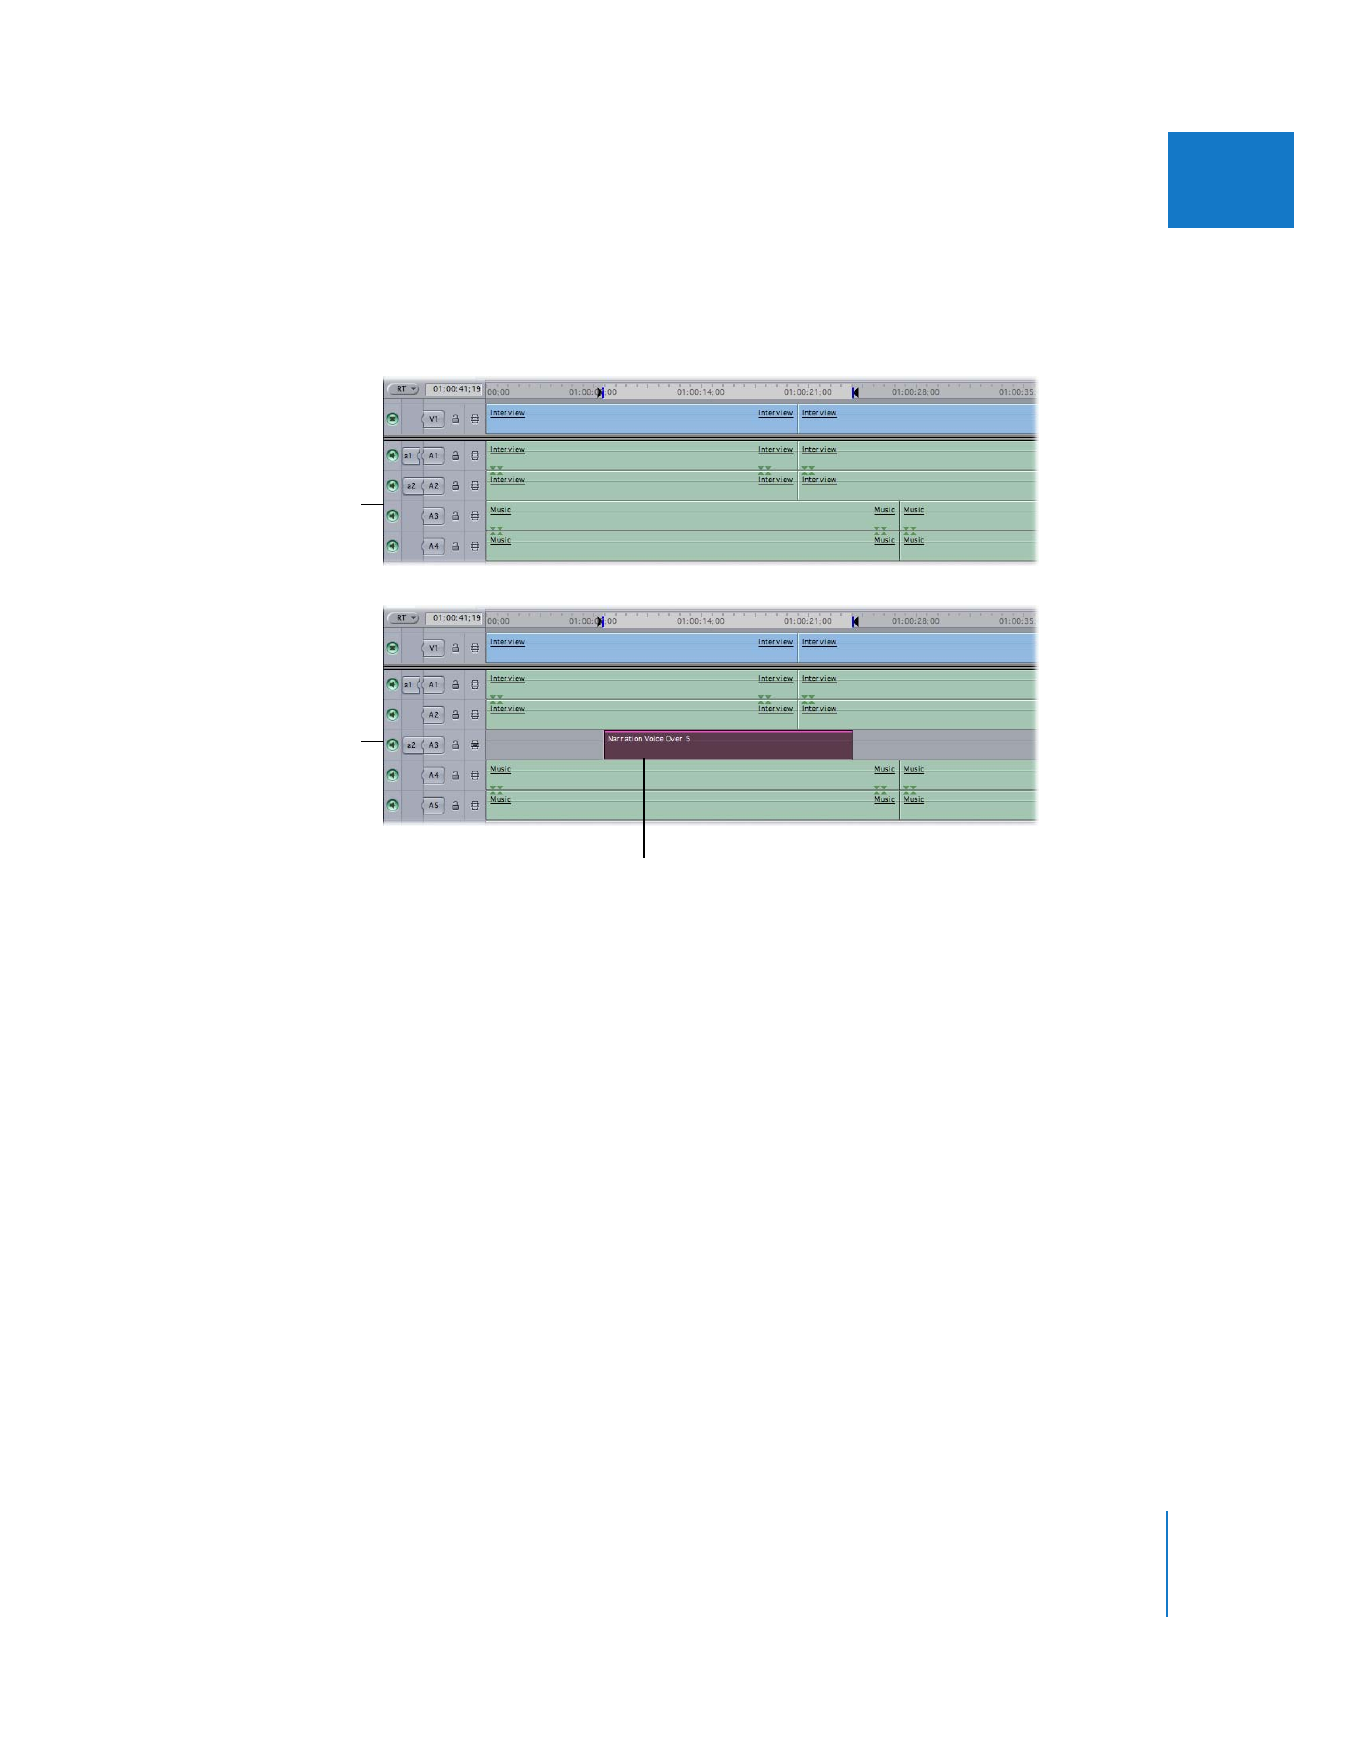
In the example below, tracks V1, A1, and A2 contain the video and audio for an
interview clip. Tracks A3 and A4 contain a stereo music clip. Suppose you connect the
a2 Source control to track A2. After using the Voice Over tool, a new audio clip is
created and placed on track A3, and the music clip is moved to tracks A4 and A5.
Recording a Voiceover
After you’ve set up your microphone and audio interface, and the recording duration
and destination audio track are defined, you can record your voiceover. If you aren’t
satisfied with your first voiceover clip, you can record multiple takes.