About Microphones and Room Noise
The quality of your sound recording is dependent on the quality of the microphone and
preamplifier used. A microphone converts (or transduces) sound to electricity, and the
preamplifier (or preamp) boosts the tiny microphone level to line level for recording.
Condenser microphones are much more sensitive than dynamic microphones and are
usually best for voice recordings. Condenser microphones require power to operate,
whereas dynamic microphones do not. Some condenser microphones can use
batteries to provide the necessary power, and most preamplifiers can also provide
“phantom power” to the microphone via an XLR connector and cable.
Preamps are often selected because of the way they “color” the sound of the
microphone, emphasizing some frequencies over others. Analog tube preamplifiers
are often used for their warm, full sound.
Condenser microphones are usually more expensive than dynamic microphones, but
they make a big difference in vocal recordings.
A good voiceover recording requires an extremely quiet acoustic environment. Air
conditioning, noise from outside, and room reverberation can all be potential
problems. Most voiceovers are recorded in a professional studio or voiceover booth
to minimize noise.
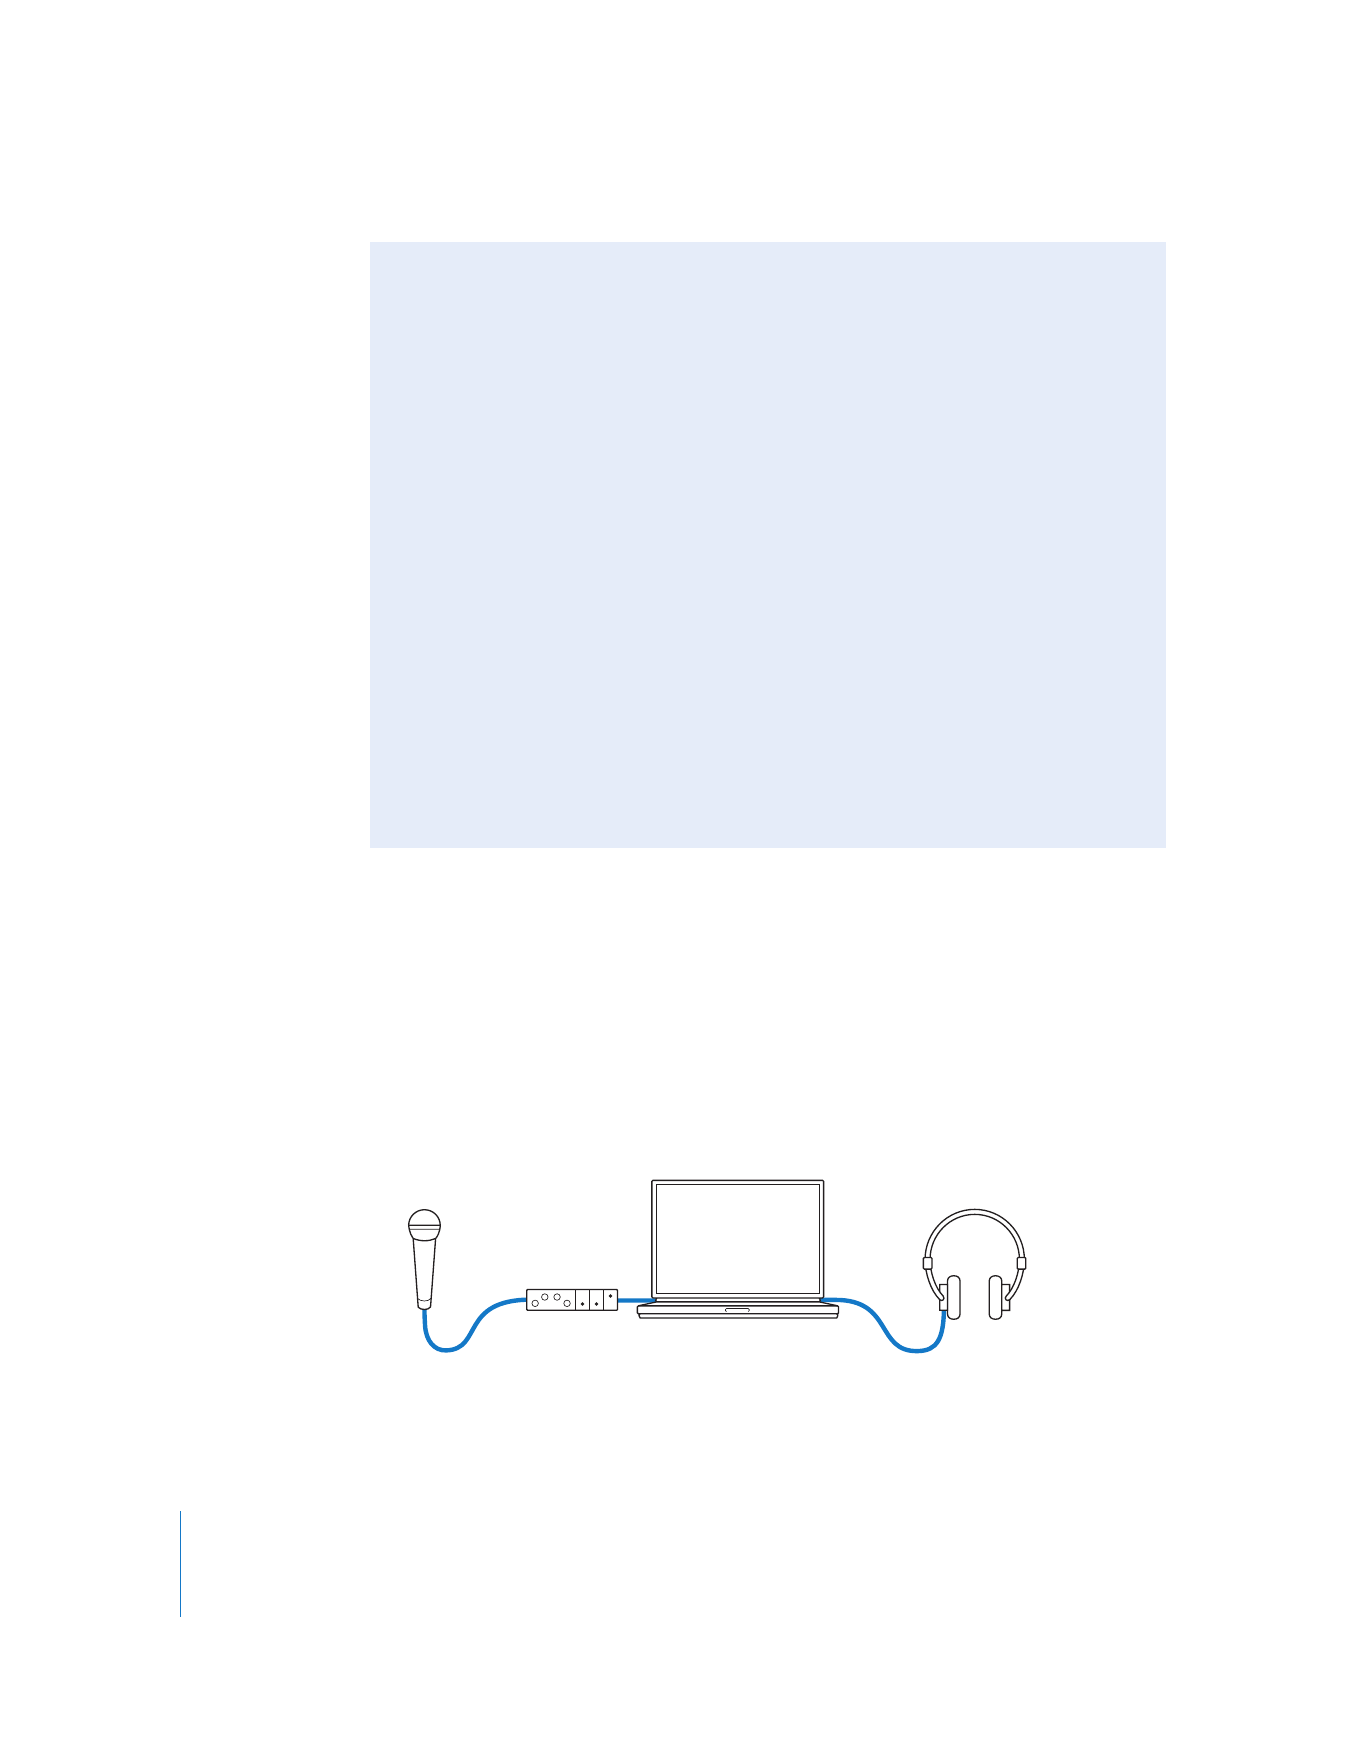
Microphone
Microphone
input
USB audio
interface
USB
Portable computer
Headphones
Headphone
out

Chapter 7
Using the Voice Over Tool
139
I
Important:
If you select a DV camcorder as your recording device and External Video is
enabled in the View menu, a message appears saying that you cannot record using
DV audio. Before you can record, choose View > External Video > Off.
Step 2:
Connect a microphone to a microphone preamplifier, and connect the
preamplifier to your audio interface
Some audio interfaces have microphone preamplifiers built in. For more information,
see the documentation that came with the audio interface.
Step 3:
Open the Voice Over tool and choose audio input settings
You need to set up the Voice Over tool to correspond to the audio equipment
you’ve connected.
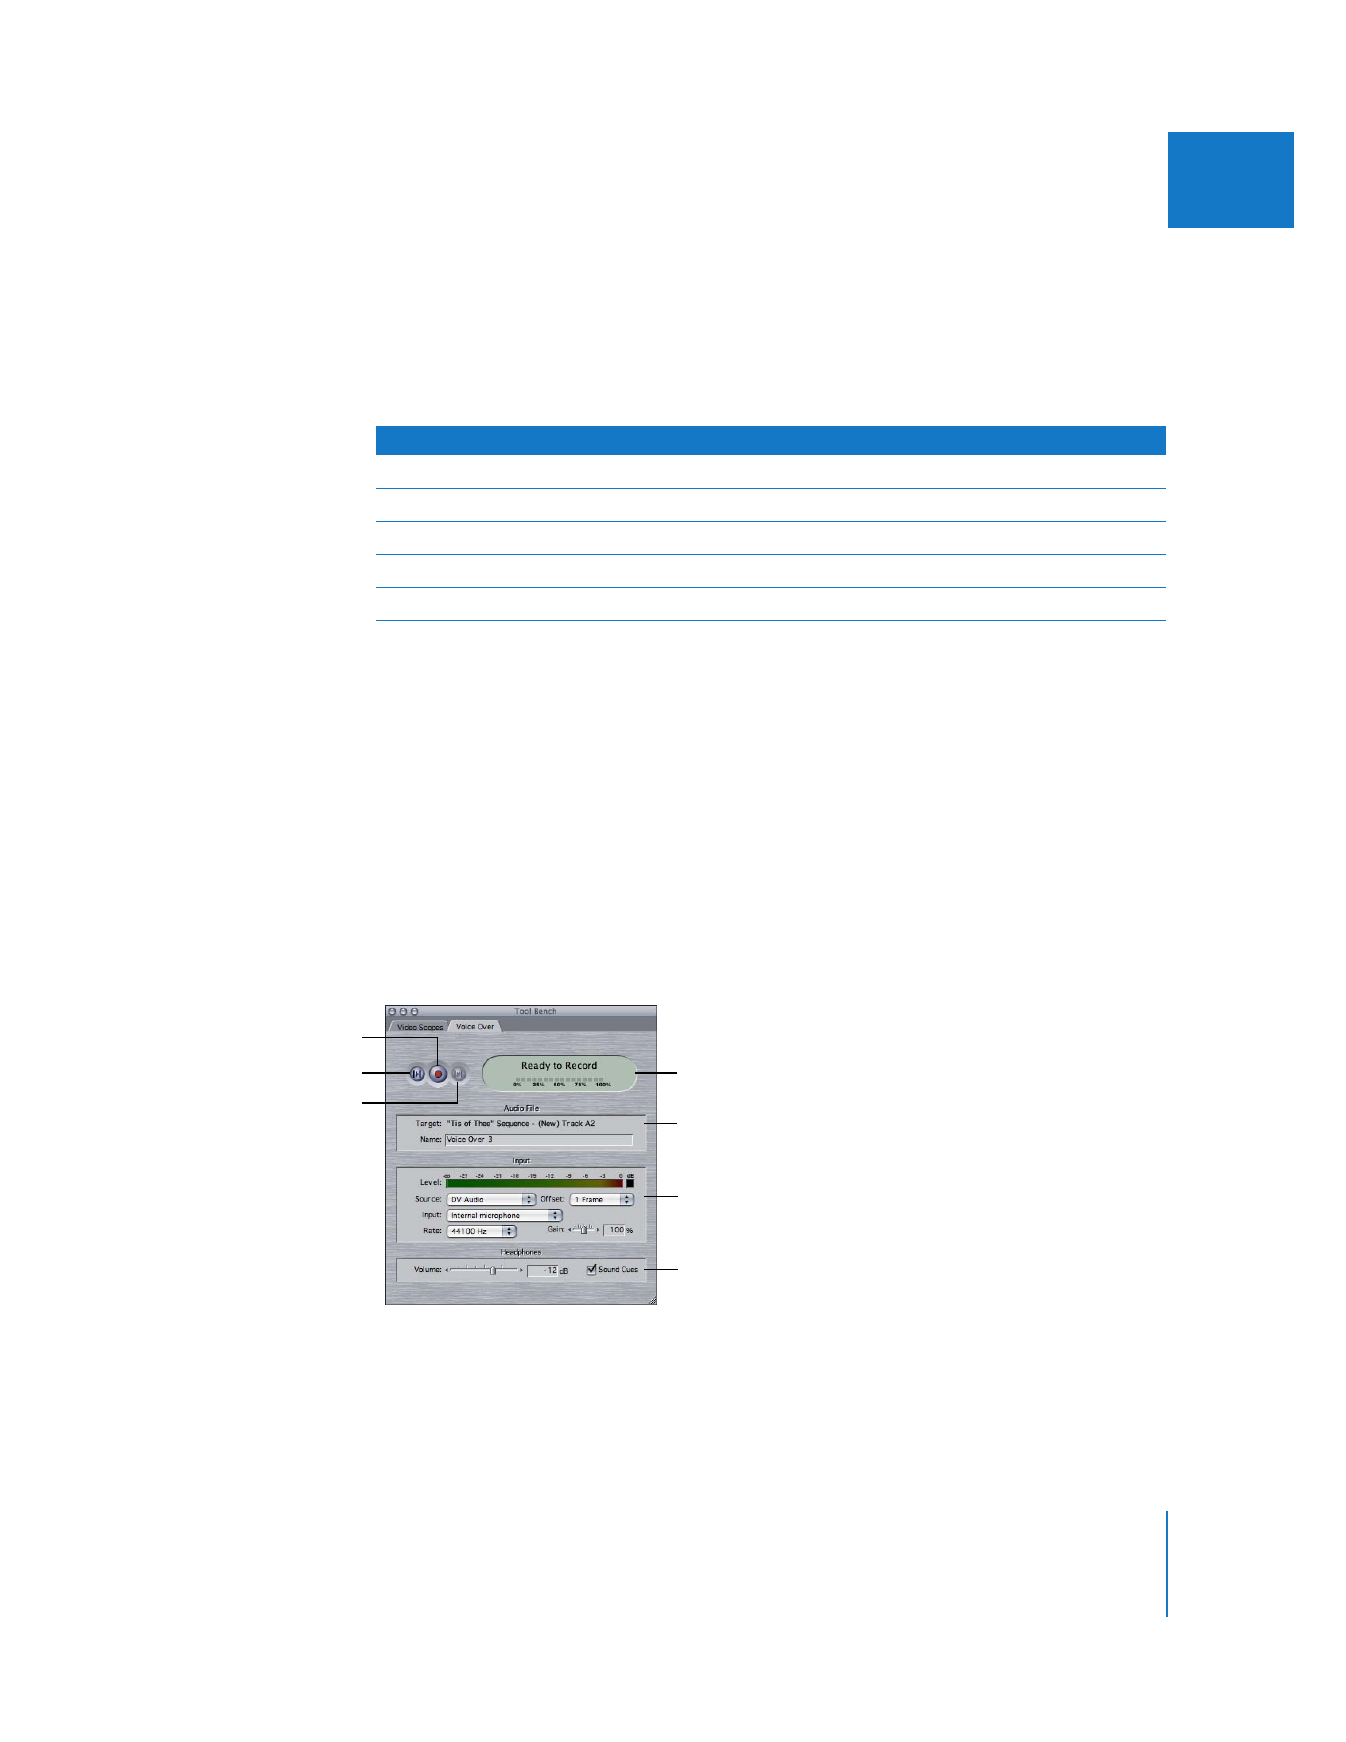
To select an audio input in the Voice Over tool:
1
Choose Tools > Voice Over.
2
Choose your audio interface from the Source pop-up menu.
3
Choose the audio interface input your microphone is connected to from the Input
pop-up menu. For example, if you connected your microphone to input 2 on your
audio interface, choose input 2 here.
4
Choose a sample rate that matches your sequence sample rate.
To determine the audio sample rate of your sequence, see Volume IV, Chapter 27,
“Sequence Settings and Presets.”
Step 4:
Choose an audio track and duration for your voiceover
In the Browser, select and open the sequence to which you want to add a voiceover,
then set In and Out points where you want the voiceover to begin and end.
Step 5:
Determine the offset of your audio interface
Every digital recording device has some latency from the time audio enters the
microphone to the time it’s processed. This latency can cause your narration to be
offset by a few frames from your video. You can adjust this offset in the Voice Over tool
so that your audio is recorded exactly in sync with your sequence. In general, USB
audio interfaces have an offset of one frame and DV camcorders have an offset of three
frames. Other interfaces may have different offsets.
140
Part I
Audio Mixing
To determine the offset of your audio recording device:
1
In the Timeline, set the In point of your sequence at 10 seconds, then set the Out point
at 20 seconds.
2
Hold the microphone that’s connected to your audio recording device to the speaker of
your computer.
3
Choose Tools > Voice Over, then click the Record button.
(What you’re doing is recording the audio cue beeps that your computer plays back.)
Recording stops automatically and this new audio clip is placed in the Timeline.
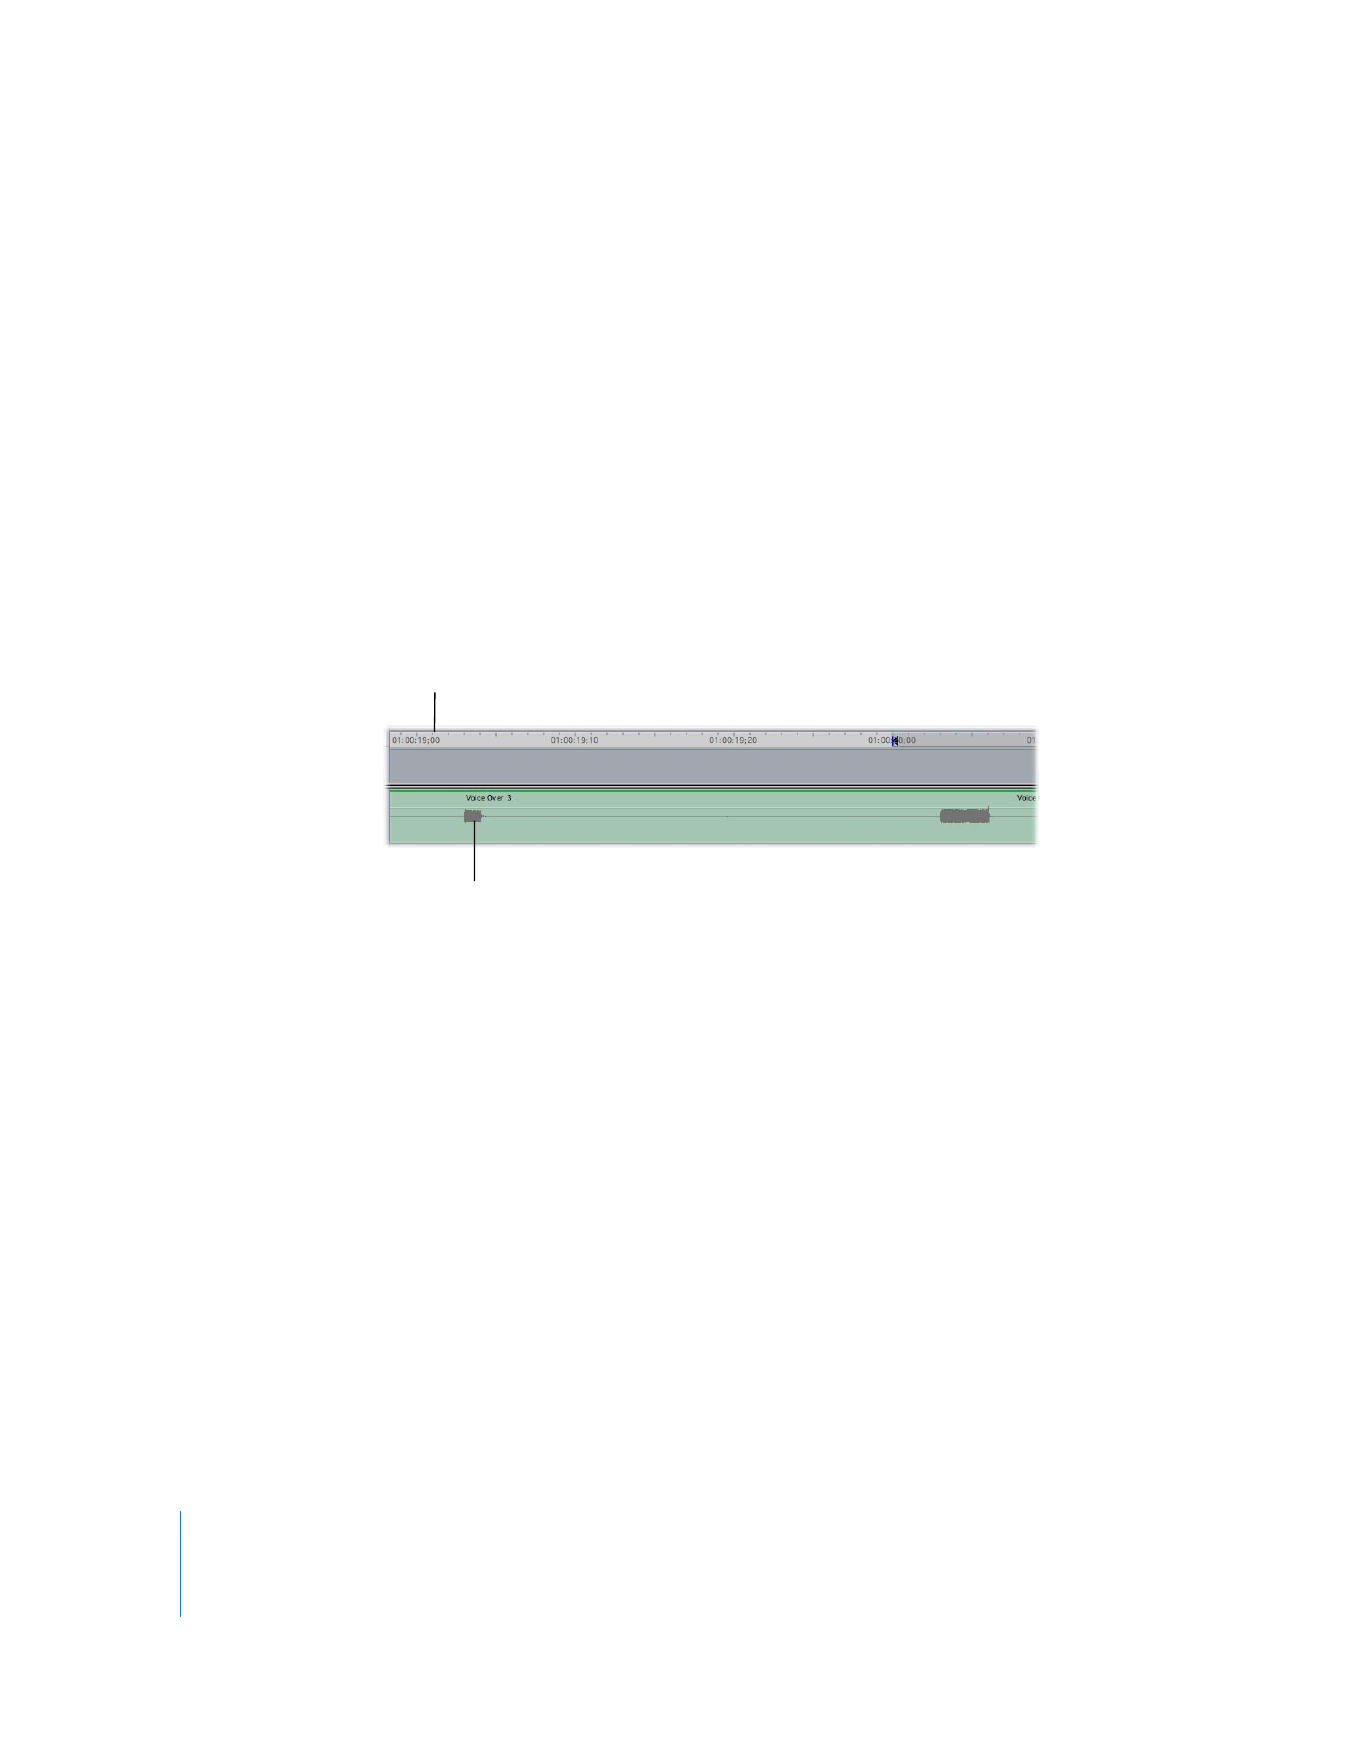
4
In the Timeline, drag the end of the newly recorded audio clip to the right to show the
last 2 seconds of the audio recorded after the Out point.
5
Compare the position of the first frame of the final cue beep’s waveform to the position
of the Out point in the Timeline.
To show or hide the audio clip’s waveform in the Timeline, press Command-Option-W.
6
If there’s a difference, add this number of frames to the offset already selected, then
choose this new number from the Offset pop-up menu.
Alternatively, you can move the clip after recording it to compensate for latency.
Step 6:
Plug in your headphones
Connect your headphones to the headphone port of your computer, and you’re ready
to start recording.
20-second point
First frame of the ending beep
that occurs two frames later
Chapter 7
Using the Voice Over Tool
141
I