Keyframing Controls in the Viewer
You can use various controls for keyframing motion effects. While motion effects, filters,
and generator clips have their own individual settings and controls, they use the same
controls for keyframing.
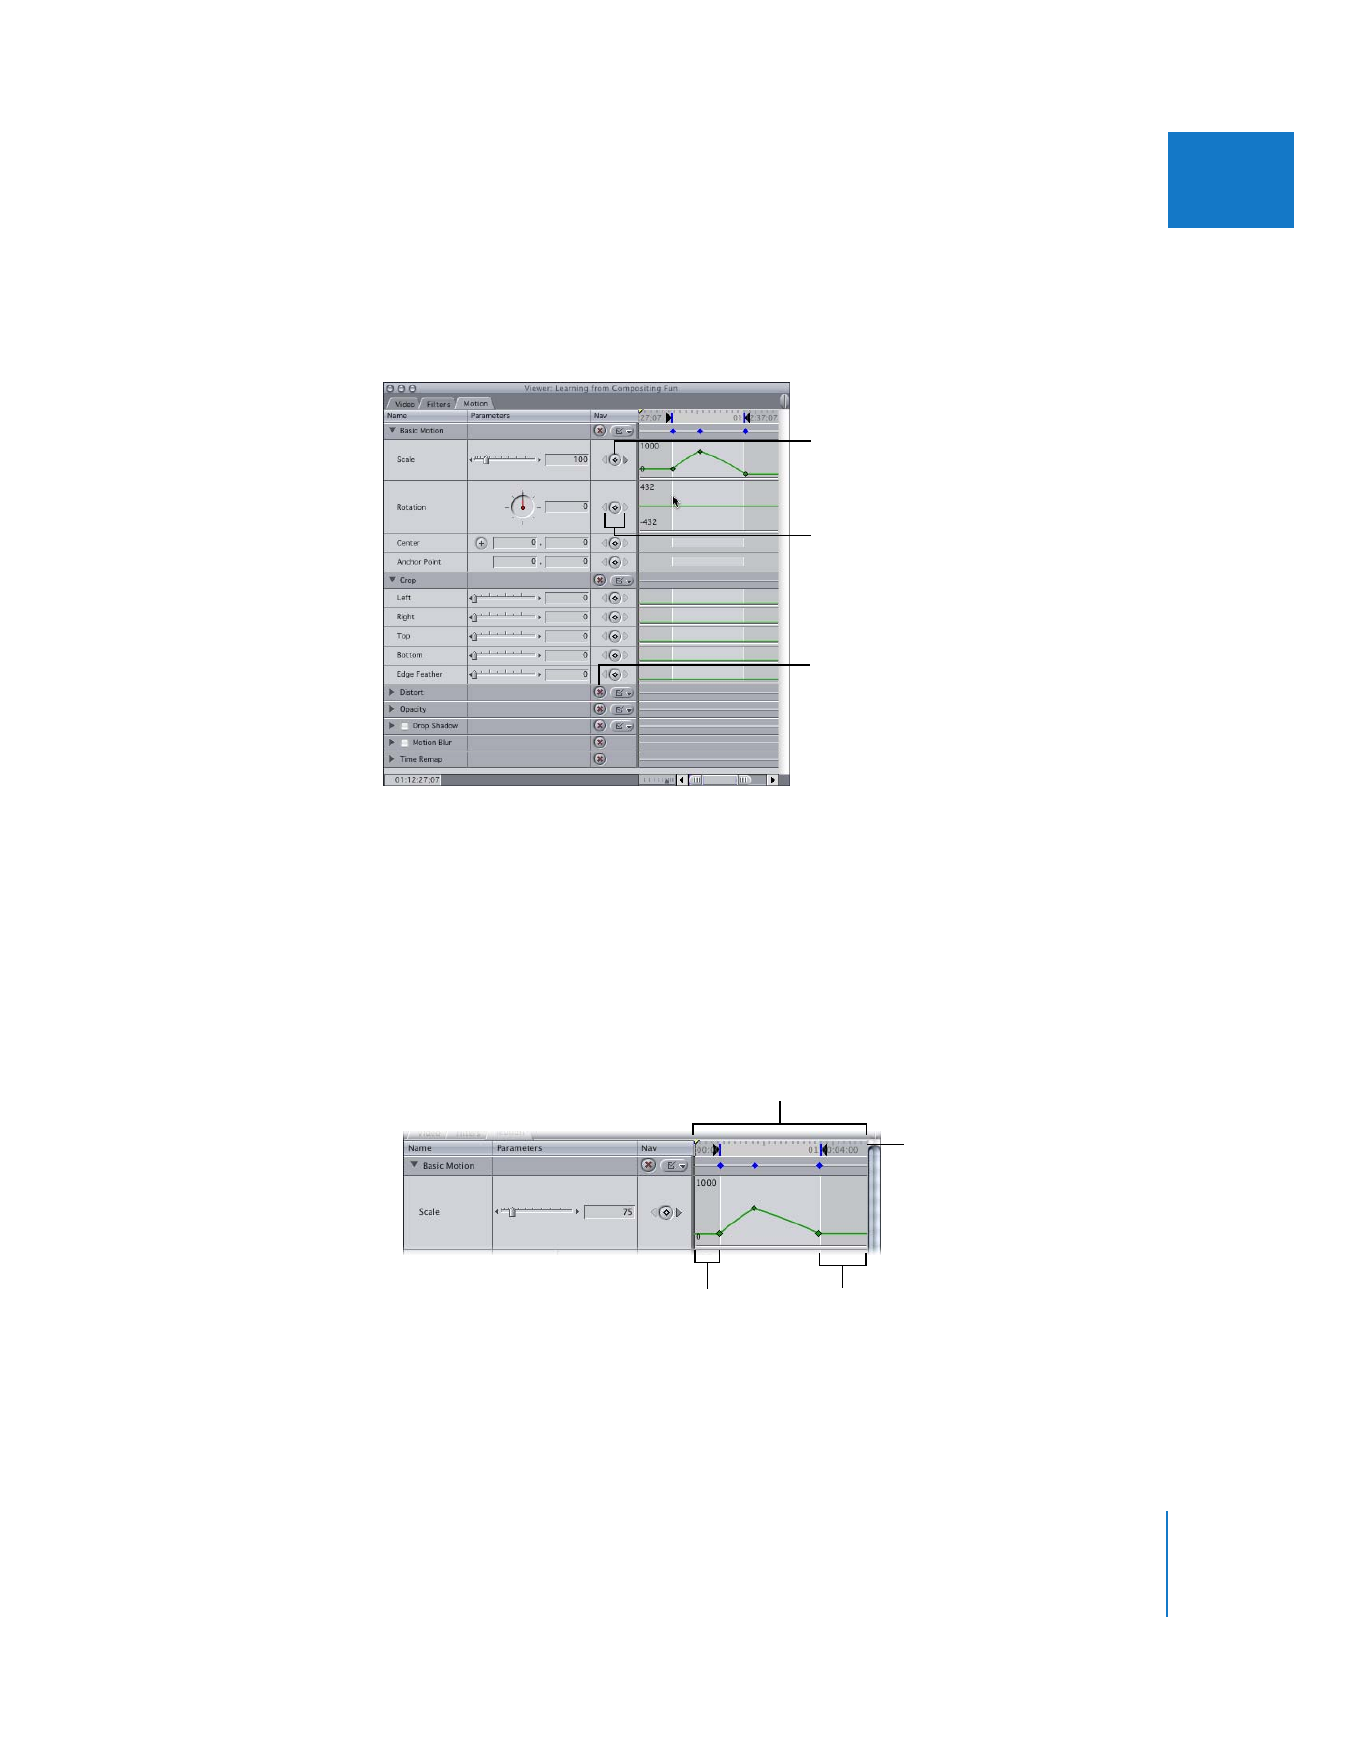
 Keyframe button: Click to place a keyframe for the corresponding parameter in the
keyframe graph area at the current playhead location.
Note: When the playhead in the keyframe graph area is directly on a keyframe, the
keyframe button for that setting becomes a green diamond.
 Keyframe navigation buttons: Click these buttons, to the left and the right of the
keyframe button, to move the playhead from one keyframe to another.
 Reset button: Click to delete all marked keyframes and reset the parameter to its
default value.
Keyframe button
Keyframe navigation
buttons
Reset button
Section of clip
not used
Section of clip
not used
Keyframe graph area
Keyframe graph ruler

292
Part II
Effects
 Keyframe graph area: Shows all the values and keyframes associated with parameters
currently displayed in the Viewer.
 Keyframe graph ruler: Corresponds to the duration of the clip or the location of a clip
in a sequence:
 If a clip is opened from the Browser: The keyframe graph ruler shows the duration of
the clip itself. The playhead in the Viewer moves independently of the playhead in
the Timeline or Canvas.
 If a clip is opened from a sequence in the Timeline: The keyframe graph ruler shows
the section of the Timeline that the clip is edited into. The playhead in the Viewer
is locked to the playhead in the Timeline and the Canvas.
 Section of clip currently used: The frames of a clip in the Viewer that are outside the
duration specified by its In and Out points are dimmed so that you know where to
apply your keyframes.
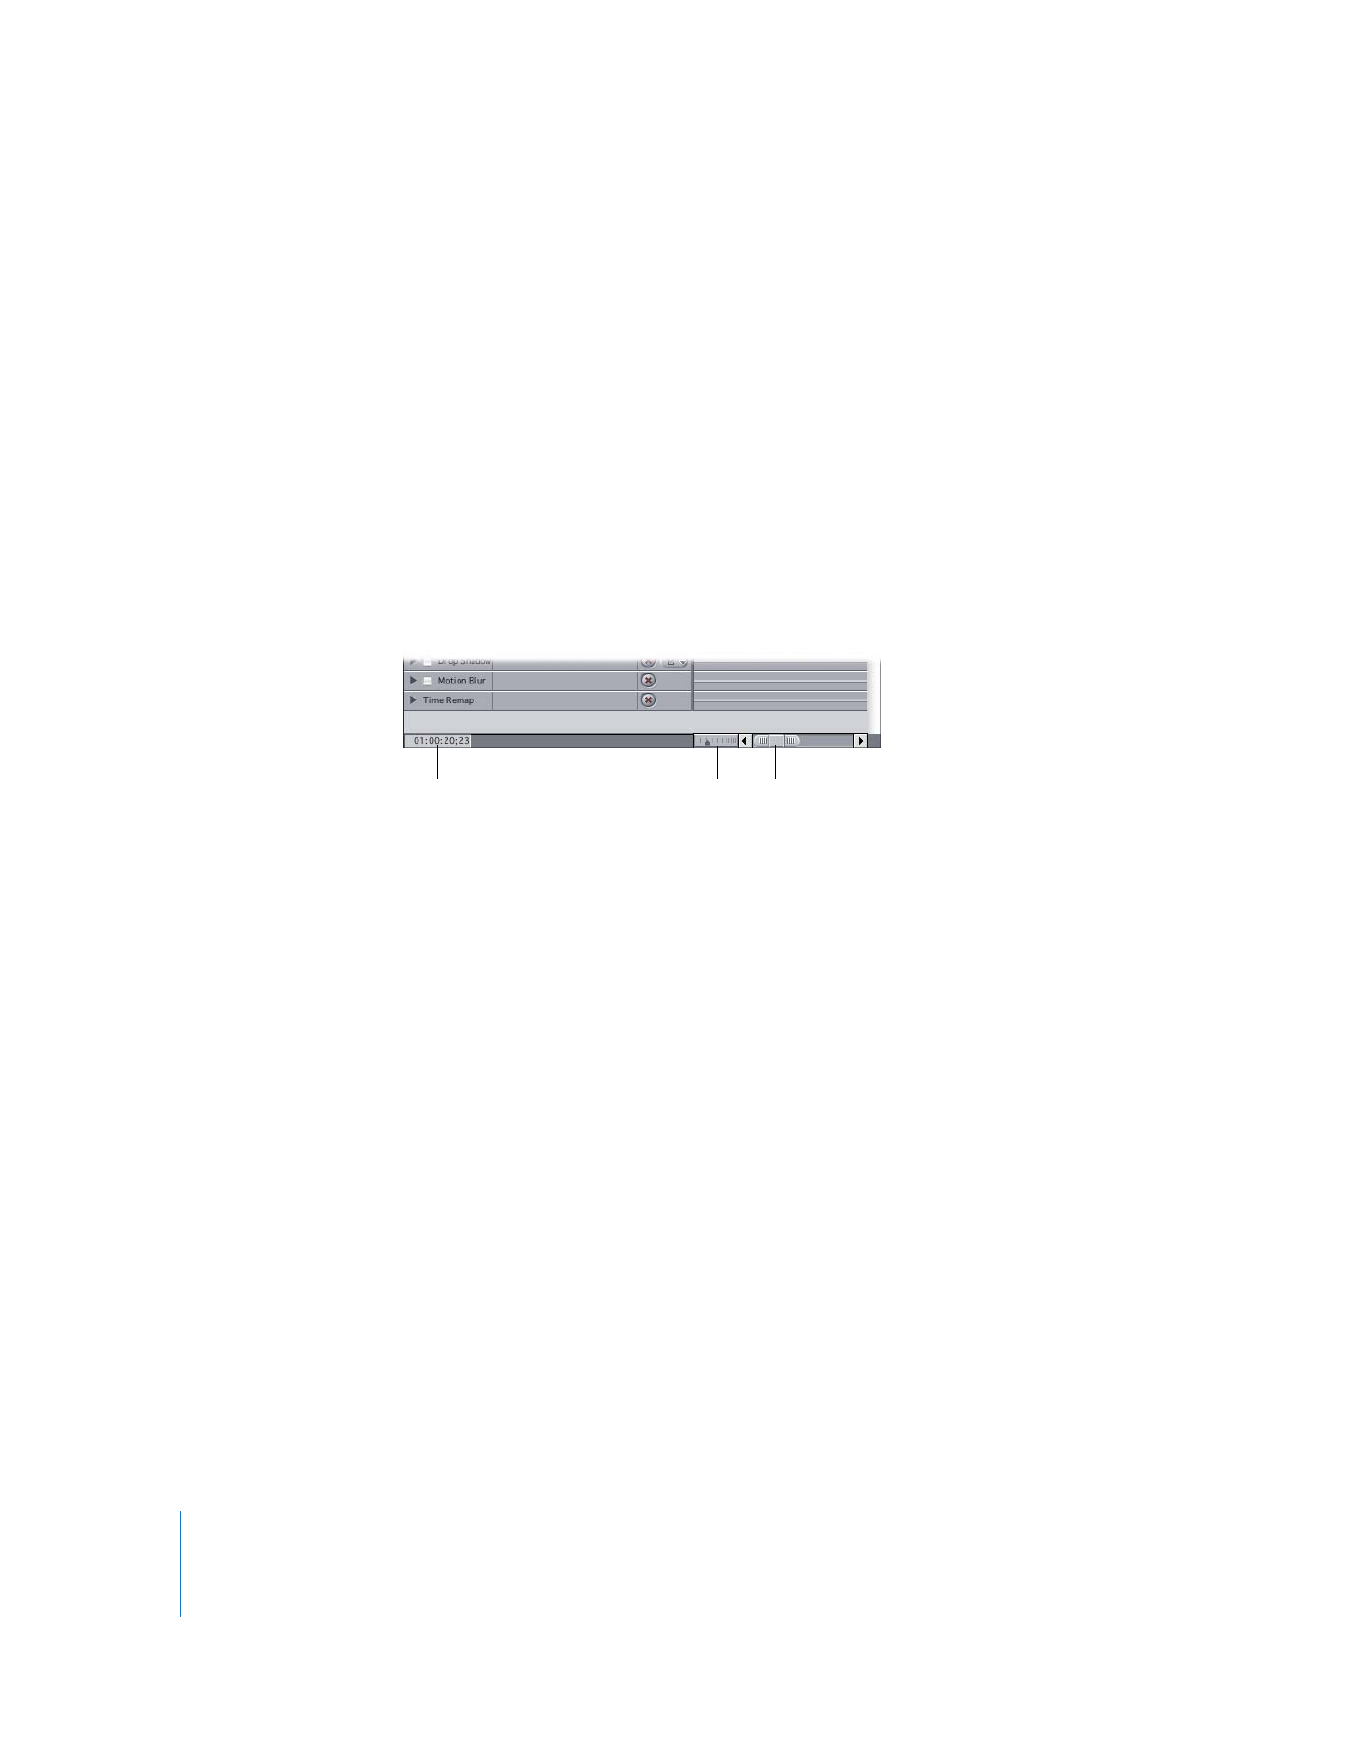
 Current Timecode field: Displays the position of the playhead in the keyframe graph
area. You can enter a new timecode value to move the playhead to another position.
 Zoom control: Lets you zoom in and out of the duration displayed by the ruler in the
keyframe graph area, expanding and contracting the keyframe graph ruler as you do
so. This also keeps the area of the visible keyframe graph centered as you zoom in or
out. For more information, see “
Zooming In to the Keyframe Graph Area
” on
page 300.
 Zoom slider: Lets you zoom in and out of the duration displayed by the keyframe
graph ruler. Drag the thumb tabs on either side of the slider to adjust both thumb
tabs and leave the visible area of the keyframe graph centered. Press the Shift key
and drag one of the thumb tabs to zoom in or out of the keyframe graph, locking
the opposite thumb tab and moving the visible area of the Timeline in the direction
in which you’re dragging. For more information, see “
Zooming In to the Keyframe
Graph Area
” on page 300.
Zoom control
Zoom slider
Current Timecode
field

Chapter 15
Adjusting Parameters for Keyframed Effects
293
II