Controlling Speed Along a Motion Path
The speed at which a clip travels along a motion path is determined by two factors:
 The spatial, or physical, distance between two keyframes in the Canvas.
The farther a clip has to travel in a given duration, the faster its apparent movement. The
less distance a clip moves, given the same amount of time, the slower it appears to go.
 The duration, or distance in time, between two keyframes in the Center parameter of
a clip’s Motion tab
Two keyframes 1 second apart result in faster motion than two keyframes
4 seconds apart.
You can modify a clip’s velocity, changing the quality of its movement. With no velocity
adjustments, clips move at full speed and then come to a full stop. This can result in
abrupt, artificial-looking motion. Final Cut Pro gives you the ability to change the
velocity of a clip’s motion over time, using velocity handles to modify the keyframes of
a clip’s motion path in the Canvas.
By adjusting a keyframe’s velocity in the Canvas, inertia can be added to a clip’s motion.
You can adjust the first keyframe of a motion path so that, instead of taking off at full
speed from a complete stop, the clip starts off slowly and then speeds up over time.
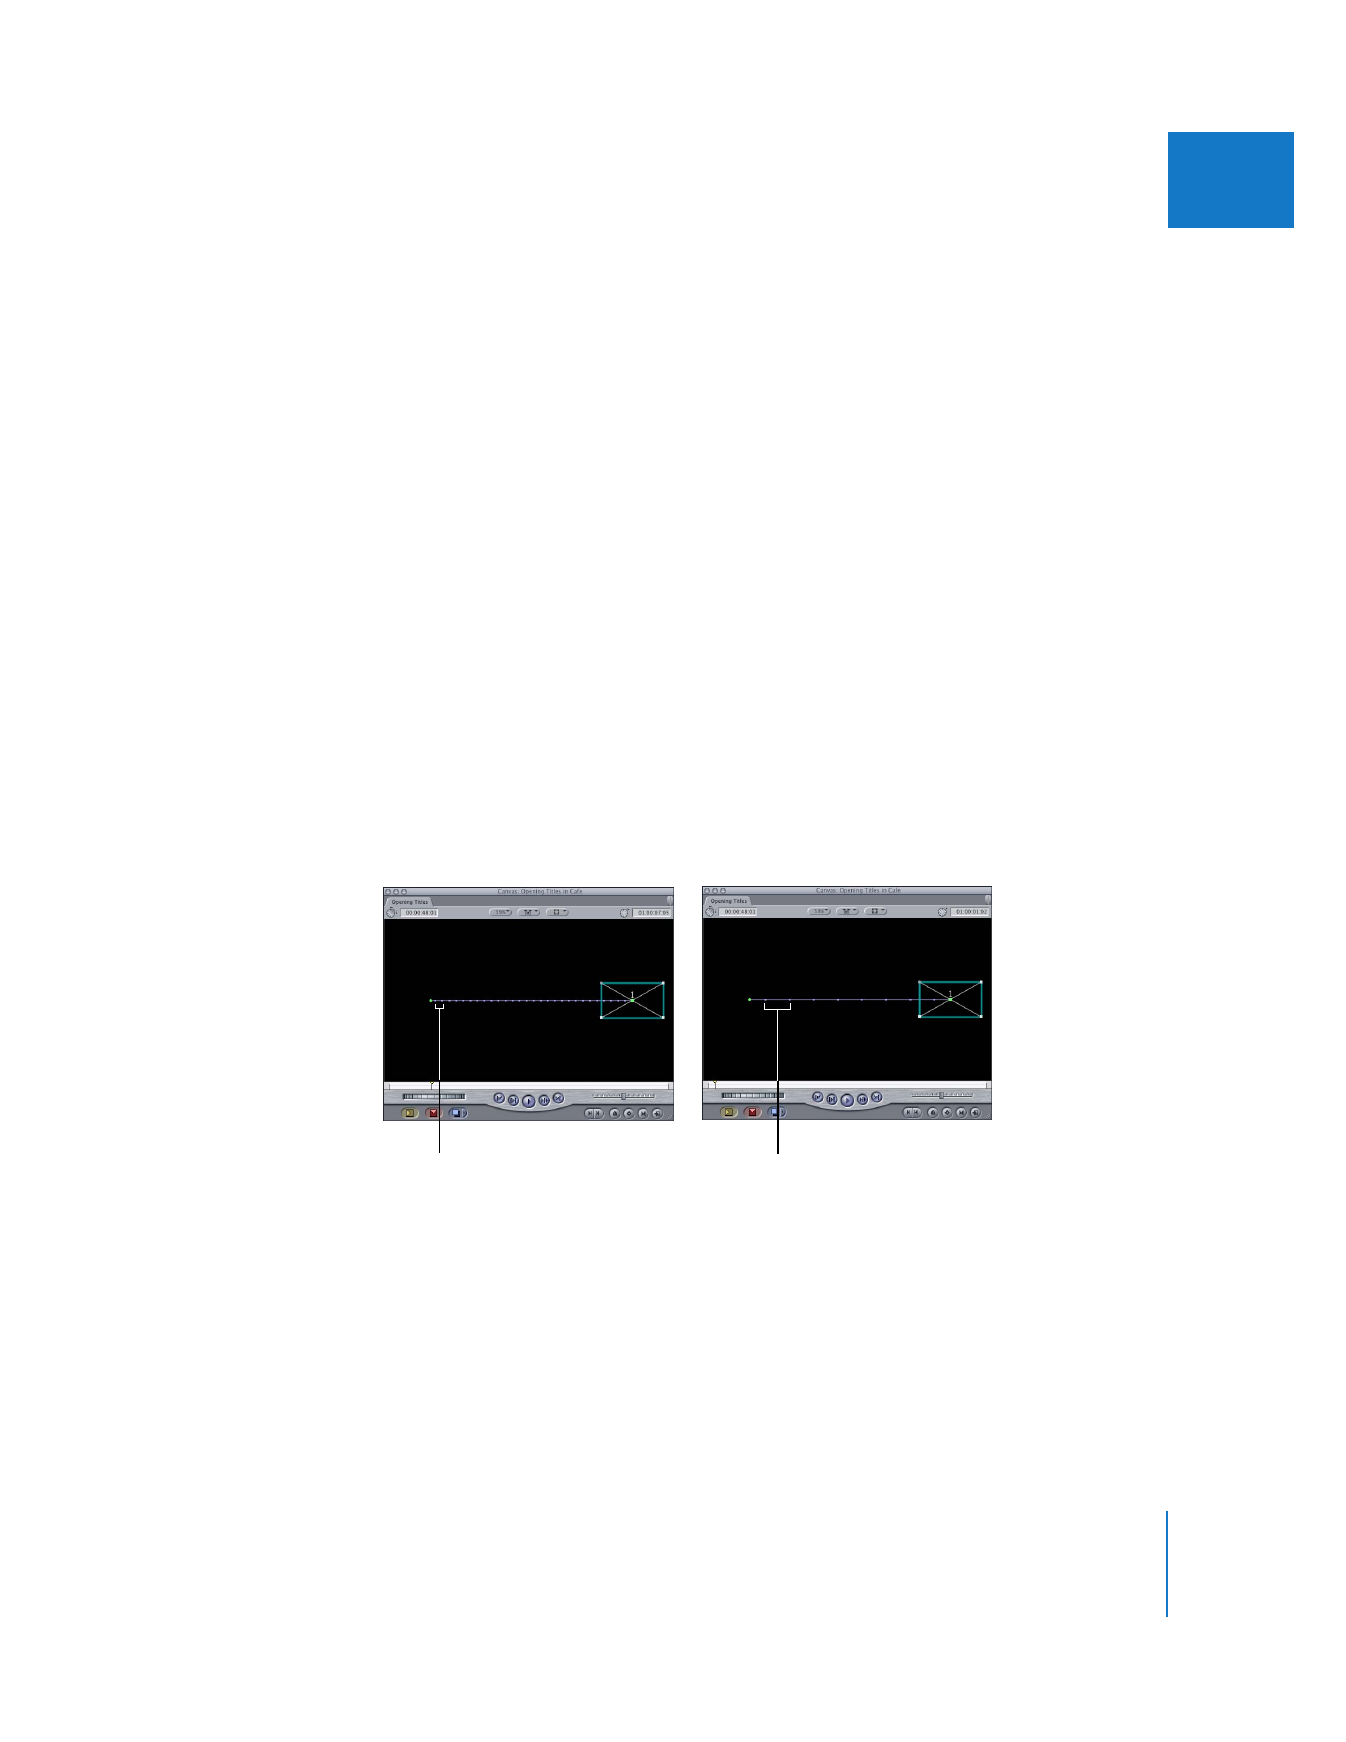
These speed changes are indicated by velocity tick marks along that clip’s motion path.
Note: In the two examples below, the motion is at a single constant speed.
Tick marks farther apart
indicate slower motion.
Tick marks closer together
indicate faster motion.
318
Part II
Effects
To vary the acceleration of this clip along its motion path, you must first add Bezier
handles to the keyframes you want to adjust (see “
Creating Curved Motion Paths Using
Bezier Handles
” on page 314). A velocity handle appears as a small purple dot between
the keyframe and the end of the Bezier handle. You can then modify the velocity
handle attached to each Bezier handle for these keyframes.
The velocity of a clip’s motion from one keyframe to the next can be modified by
dragging the velocity handle in and out along the Bezier handle.
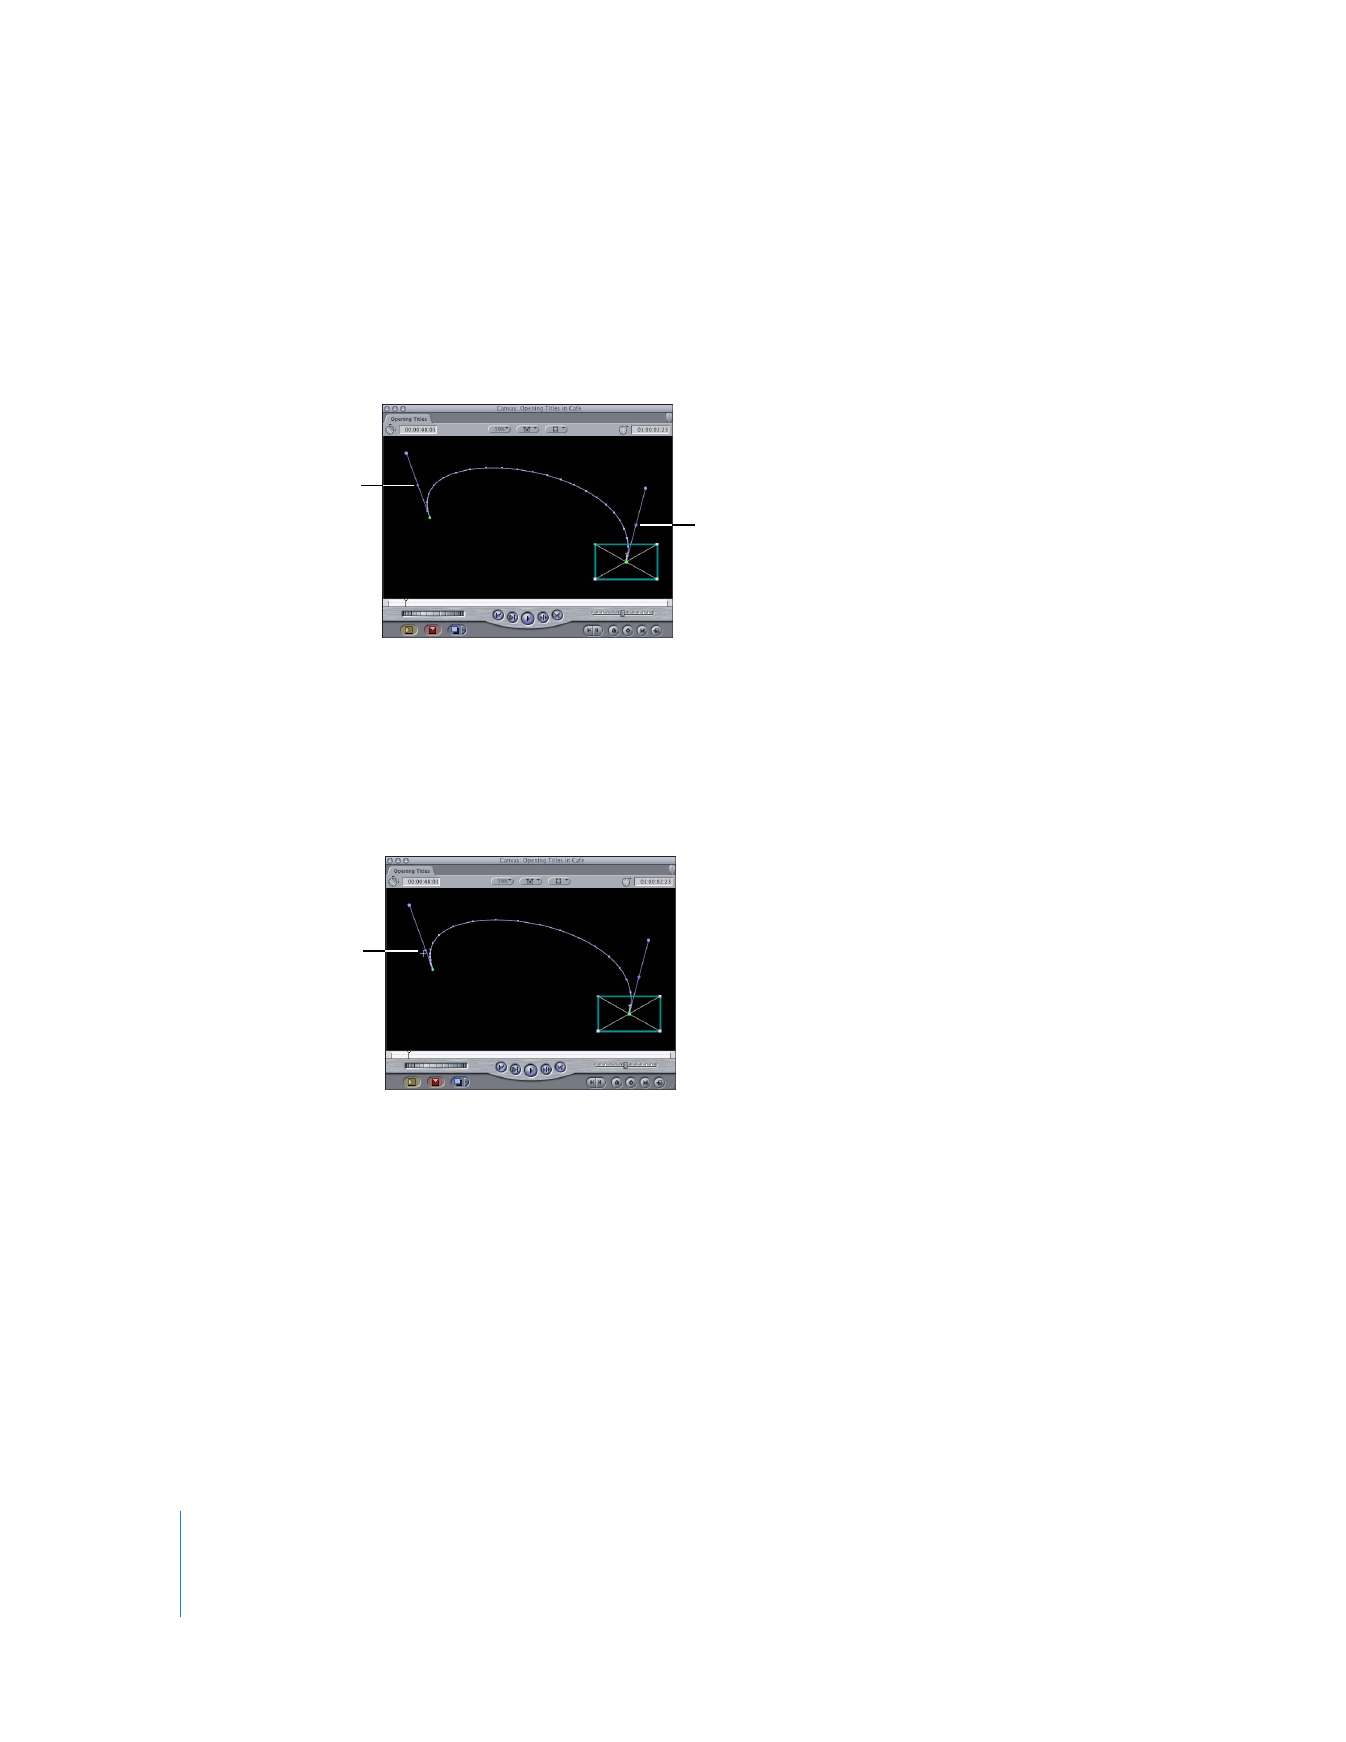
To speed up a clip’s motion at the beginning and slow it down as it nears the
next keyframe:
m
Drag the velocity handle in toward the selected keyframe.
Velocity handle
Velocity handle
Drag toward the
keyframe to speed up the
motion at the beginning
and then slow it down as
it nears the next
keyframe.
Chapter 15
Adjusting Parameters for Keyframed Effects
319
II
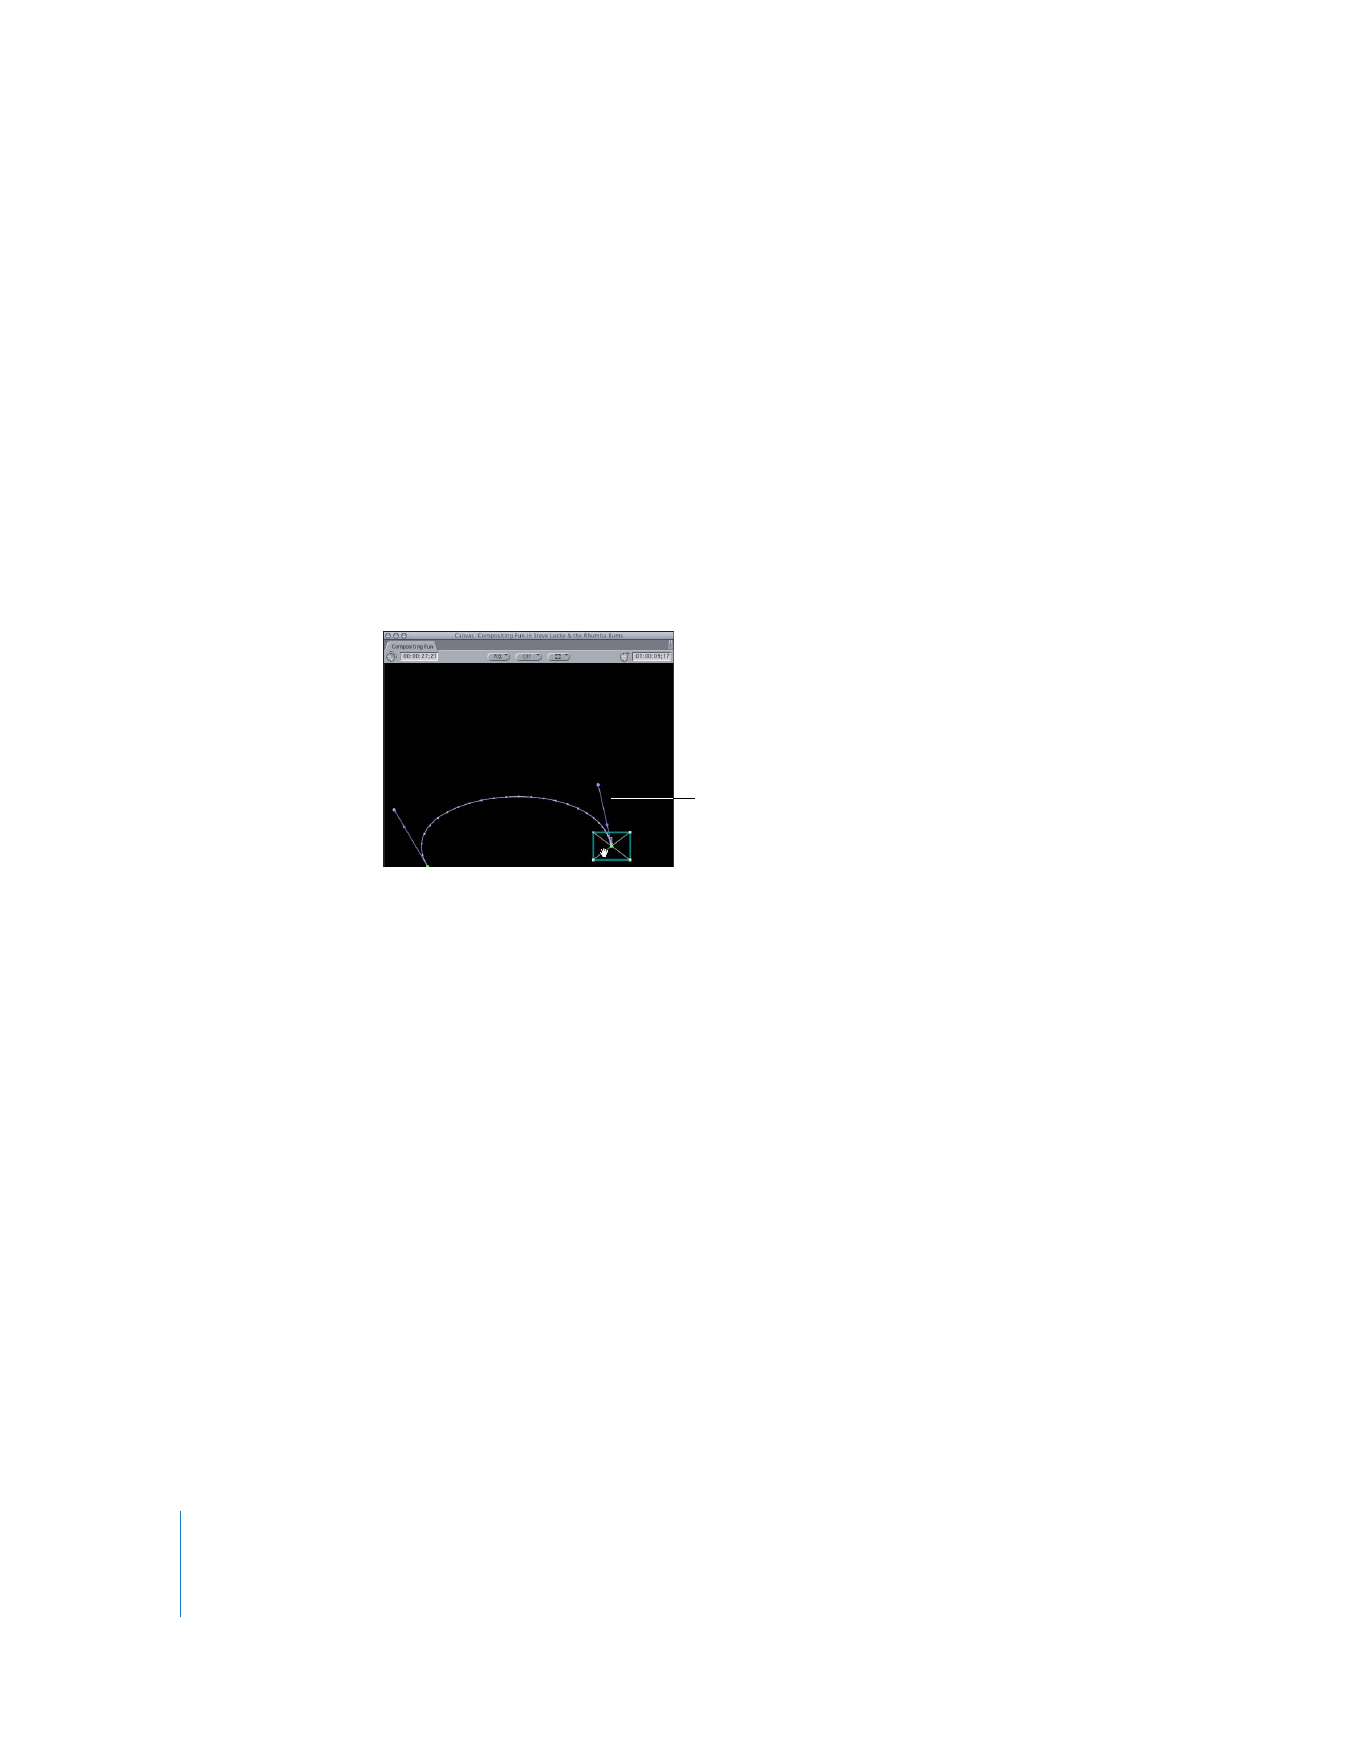
To slow down a clip’s motion at the beginning and speed it up as it nears the
next keyframe:
m
Drag the velocity handle away from the selected keyframe.
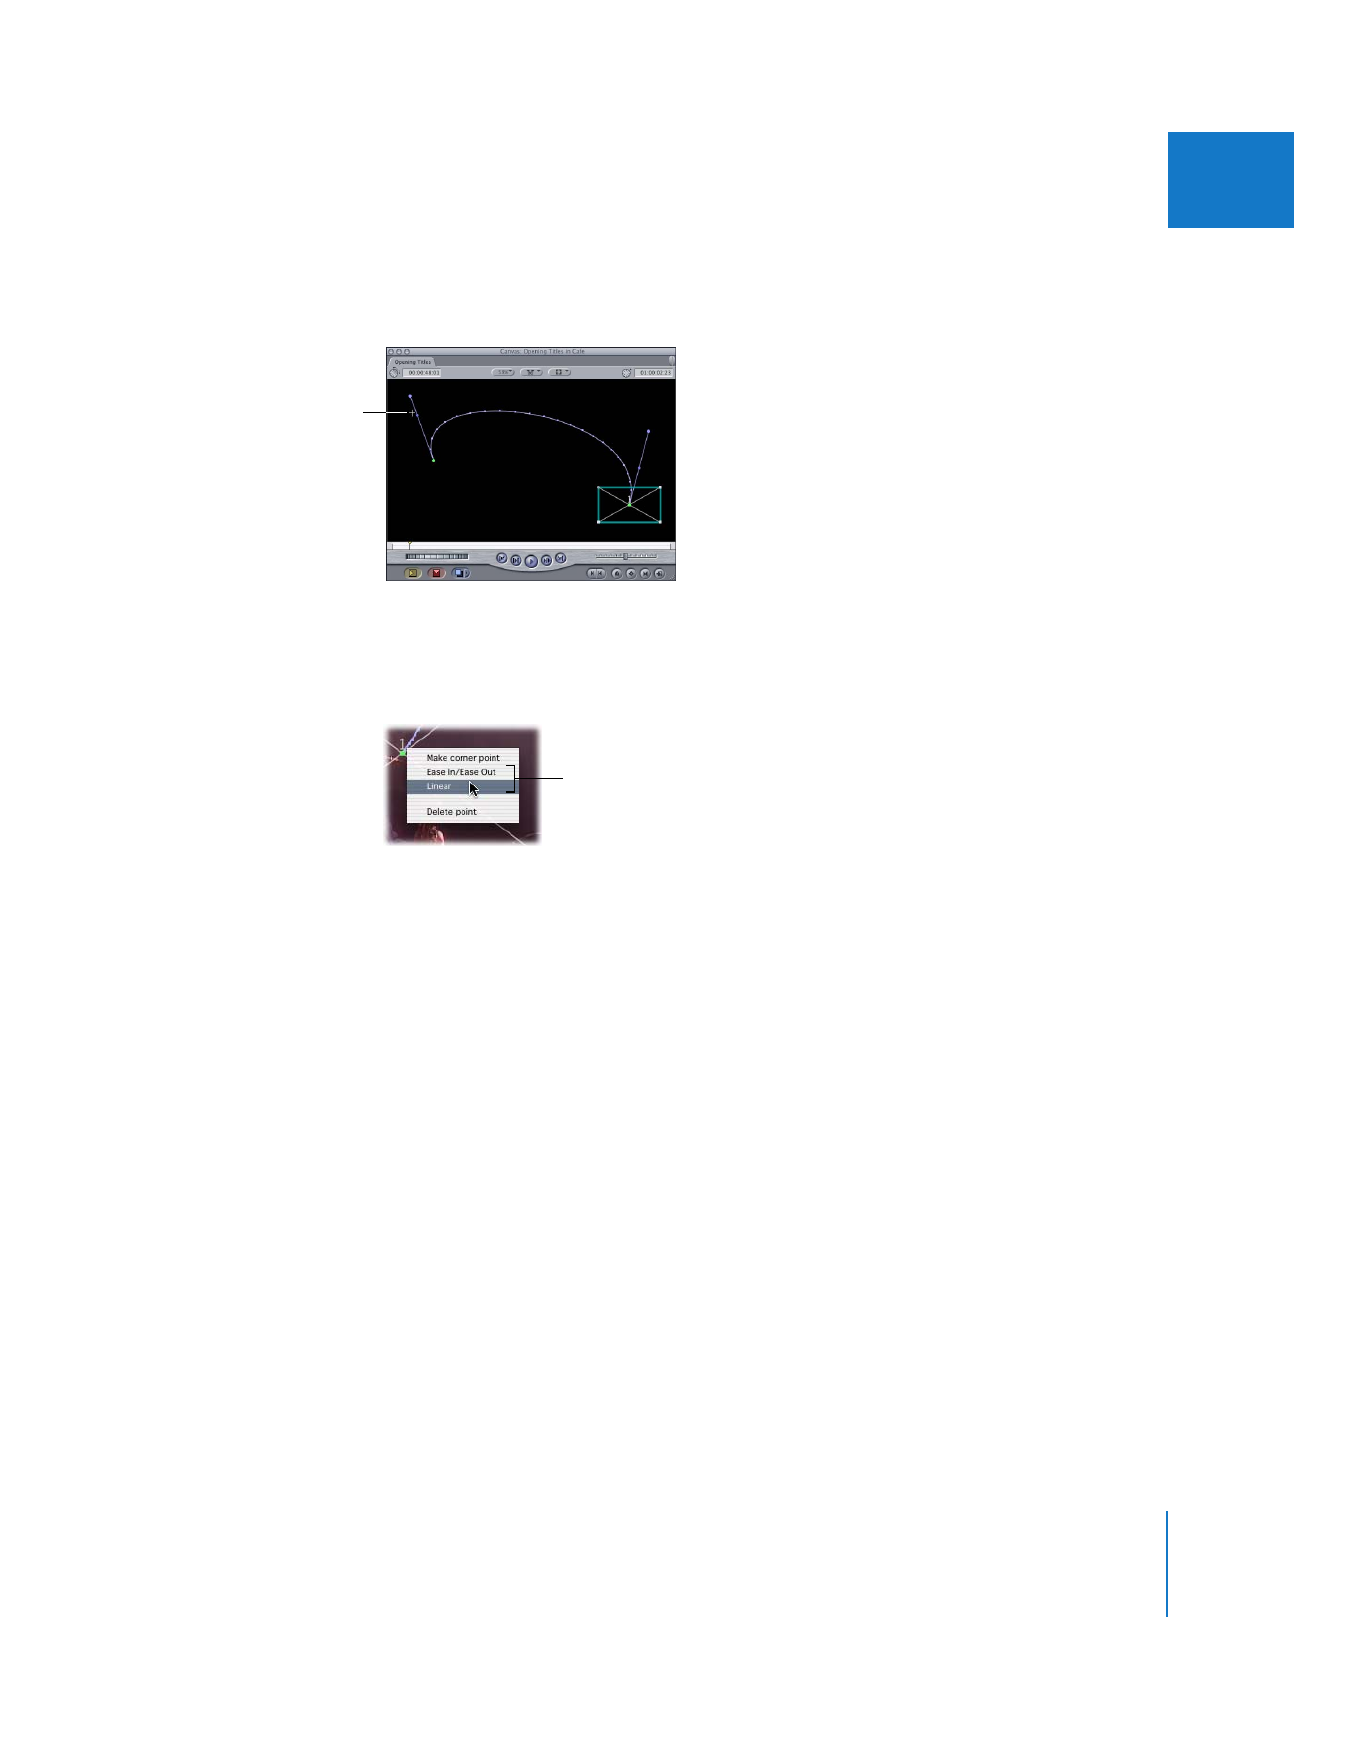
To add Bezier handles to a keyframe and change the acceleration:
m
Control-click a keyframe, then choose an option from the shortcut menu, depending
on the kind of acceleration you want.
 Ease In/Ease Out: Bezier handles are added to the keyframe and the velocity handle is
set for motion to begin slowly and then speed up over time, as the clip moves from
that keyframe to the next one on the motion path.
 Linear: Bezier handles are added to the keyframe and the velocity handle is set to
provide a steady rate of speed as the clip moves from that keyframe to the next one
on the motion path.
Note: Both commands create Bezier handles with the same controls.
Important:
The velocity at which clips speed up into or slow down out of keyframed
motion in the Canvas has no effect on the overall speed of the clip’s motion.
Drag away from the
keyframe to slow down
the motion of the clip at
the beginning and then
speed it up as it nears the
next keyframe.
Two commands in the
shortcut menu let you
manipulate acceleration
on a motion path.
320
Part II
Effects