How Time Remapping Works
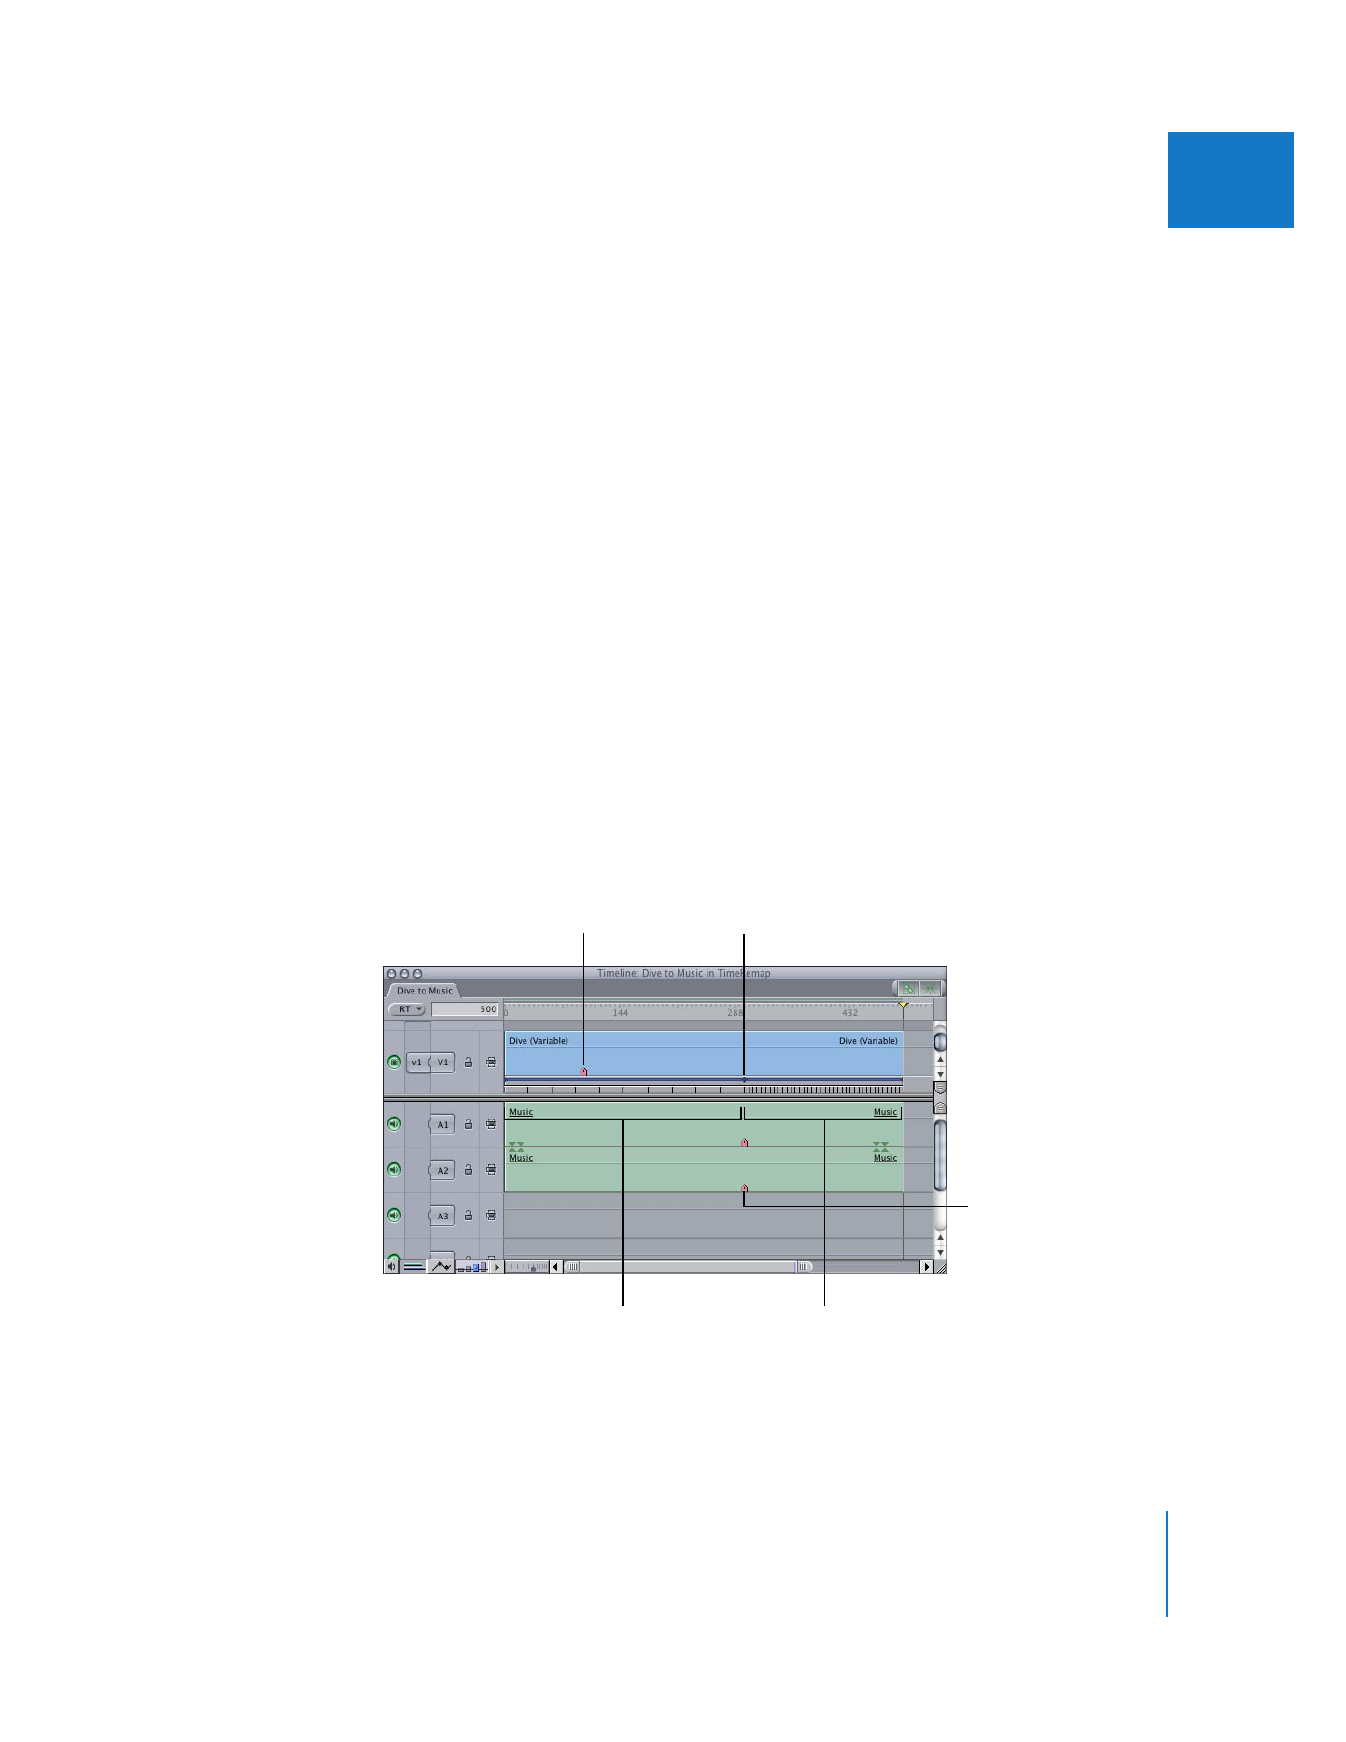
The goal with time remapping is to make a particular frame from your media file
occur at a specific point in the Timeline. For example, suppose you have a clip at the
beginning of a sequence in which a diver hits the water at frame 100 of the clip’s media
file. Suppose you have a musical cue at frame 300 in the sequence. You can use time
remapping to move frame 100 of the clip’s media file to frame 300 of the sequence clip.
To compensate, Final Cut Pro must slow down the media frames to make 100 frames
last for the duration of 300. You only need to remap a single frame in time, and
Final Cut Pro adjusts the rest of the clip’s speed accordingly.
Frame 100 of the
clip’s media file...
...is remapped to line up with
the musical cue at frame 300
of the sequence clip.
Fast motion
Slow motion
Musical cue at frame 300

346
Part II
Effects
Under most circumstances, a clip plays back frames from its media file in chronological
order. If you have a 300-frame clip, it begins by playing frame 1 of the media file, followed
by frame 2, frame 3, and so on, until frame 300. Time remapping allows you to adjust
when frames of a clip’s media file are played back by changing their chronological order,
skipping some frames (fast motion), or repeating others (slow motion).
It may help you to think of the process of time remapping as frame remapping, since what
you are doing is mapping the frames of a clip’s media file (input frames) to different times
in the clip (output frames). You only need to set a few keyframes, and Final Cut Pro
interpolates the rest automatically, creating smooth speed changes over time.
For example, consider the following examples when using a 300-frame clip:
 Instead of playing frames 1–300 from the clip’s media file, you can set time
remapping keyframes so that frames 300–1 play instead. This would appear as
reversed playback.
 You can repeat frame 1 from the clip’s media file for the entire 300-frame duration of
the clip. This would appear as a freeze frame.
 You can set keyframes so that frame 1 from the clip’s media file plays at frames 1, 150,
and 300 of the clip. During playback, Final Cut Pro interpolates which media file frames
to play in between the time remapping keyframes, creating smooth speed changes.
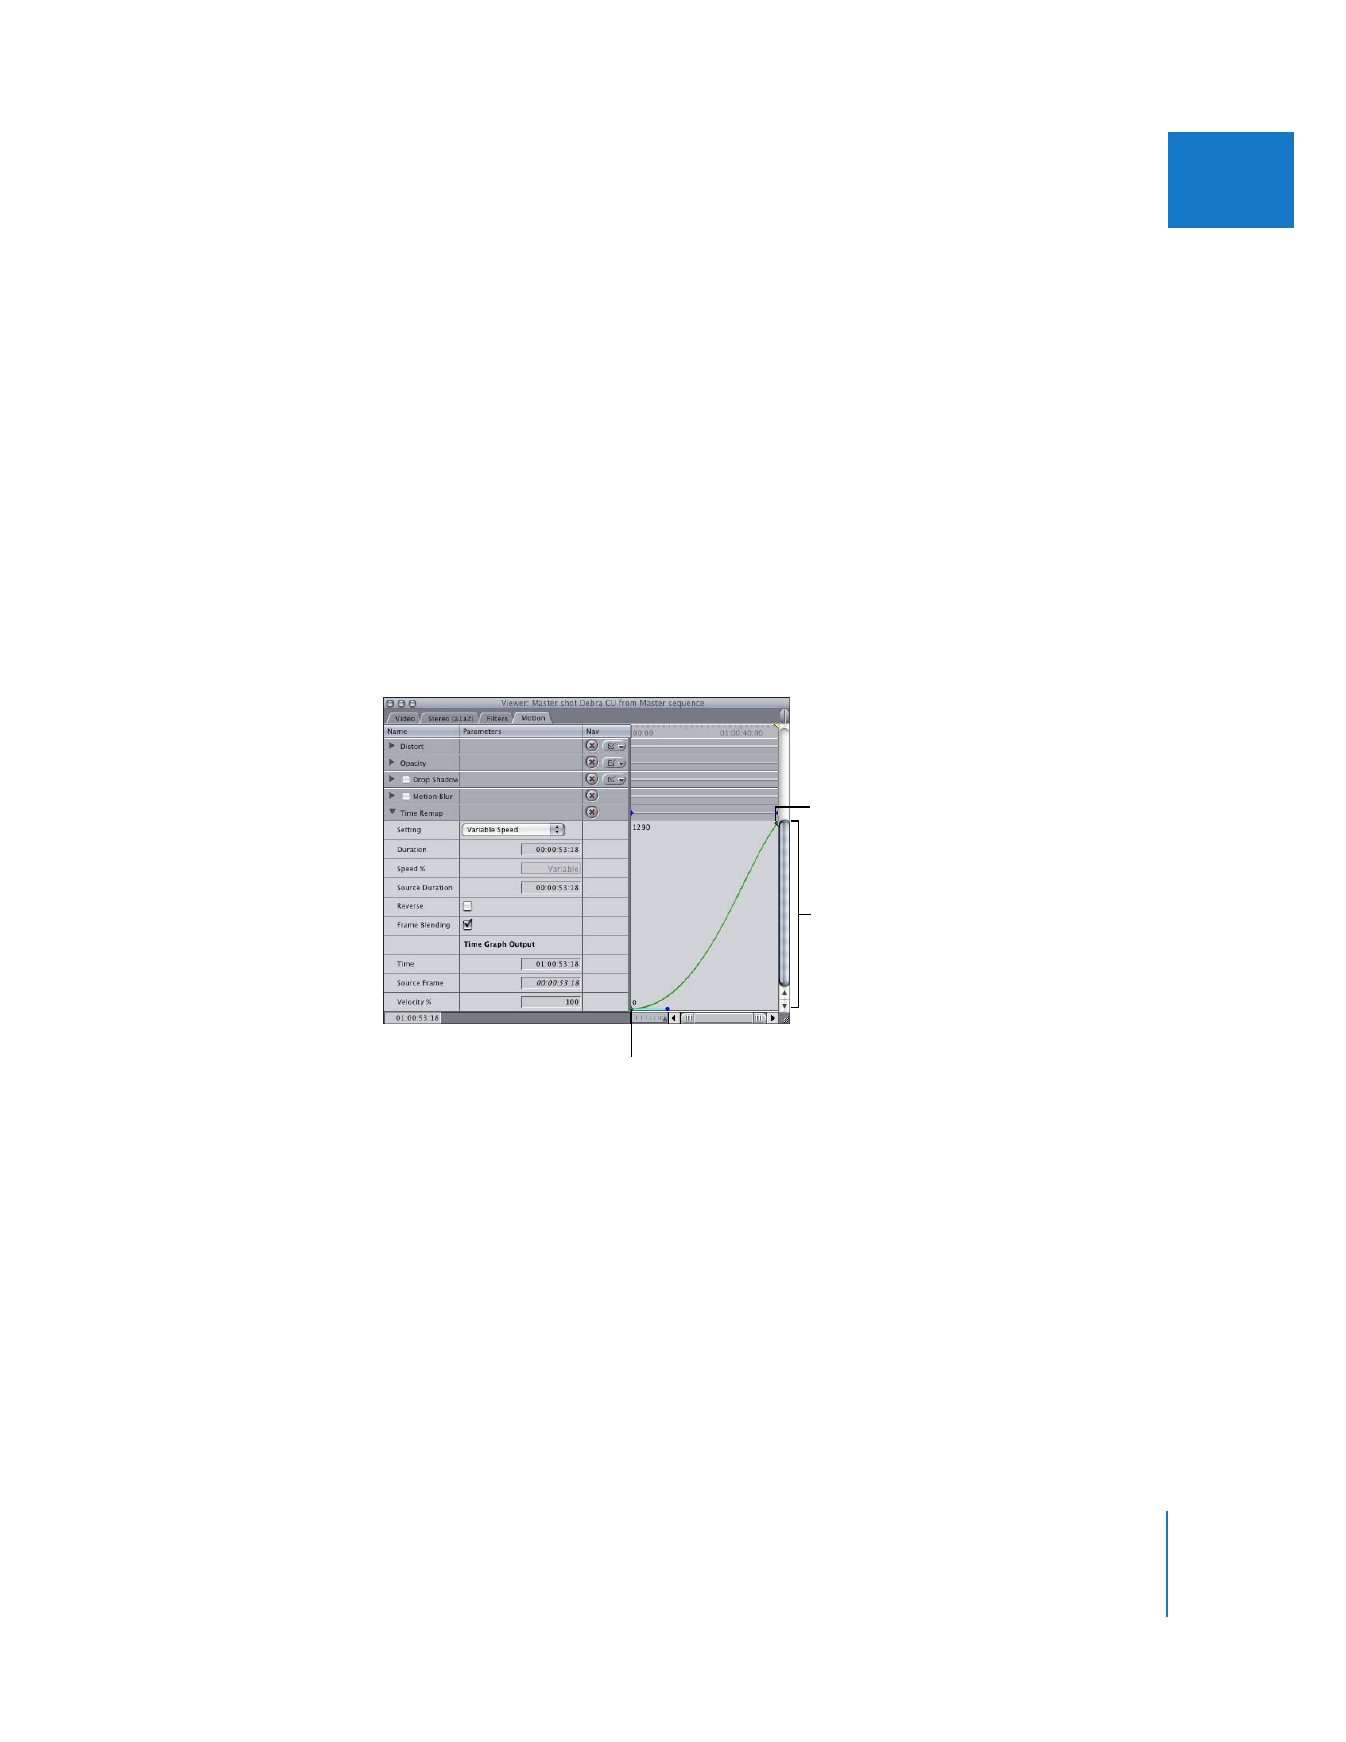
To better understand how time remapping works, apply a variable speed adjustment to
a clip and then look at the Time Remap parameters in the clip’s Motion tab or in the
keyframe editor in the Timeline.
To apply a variable speed adjustment to a clip:
1
Select a clip in the Timeline.
2
Choose Modify > Speed (or press Command-J).
3
Choose Variable Speed from the pop-up menu, then click OK.
Two time remapping keyframes are added; one to the first frame of your clip and one
to the last. Each keyframe has Bezier handles, which cause the clip to ramp from slow
to normal speed at the beginning, and then from normal to slow speed at the end.
For information about viewing time remapping parameters, see “
Viewing Time
Remapping Parameters Applied to Your Clips
” on page 348.
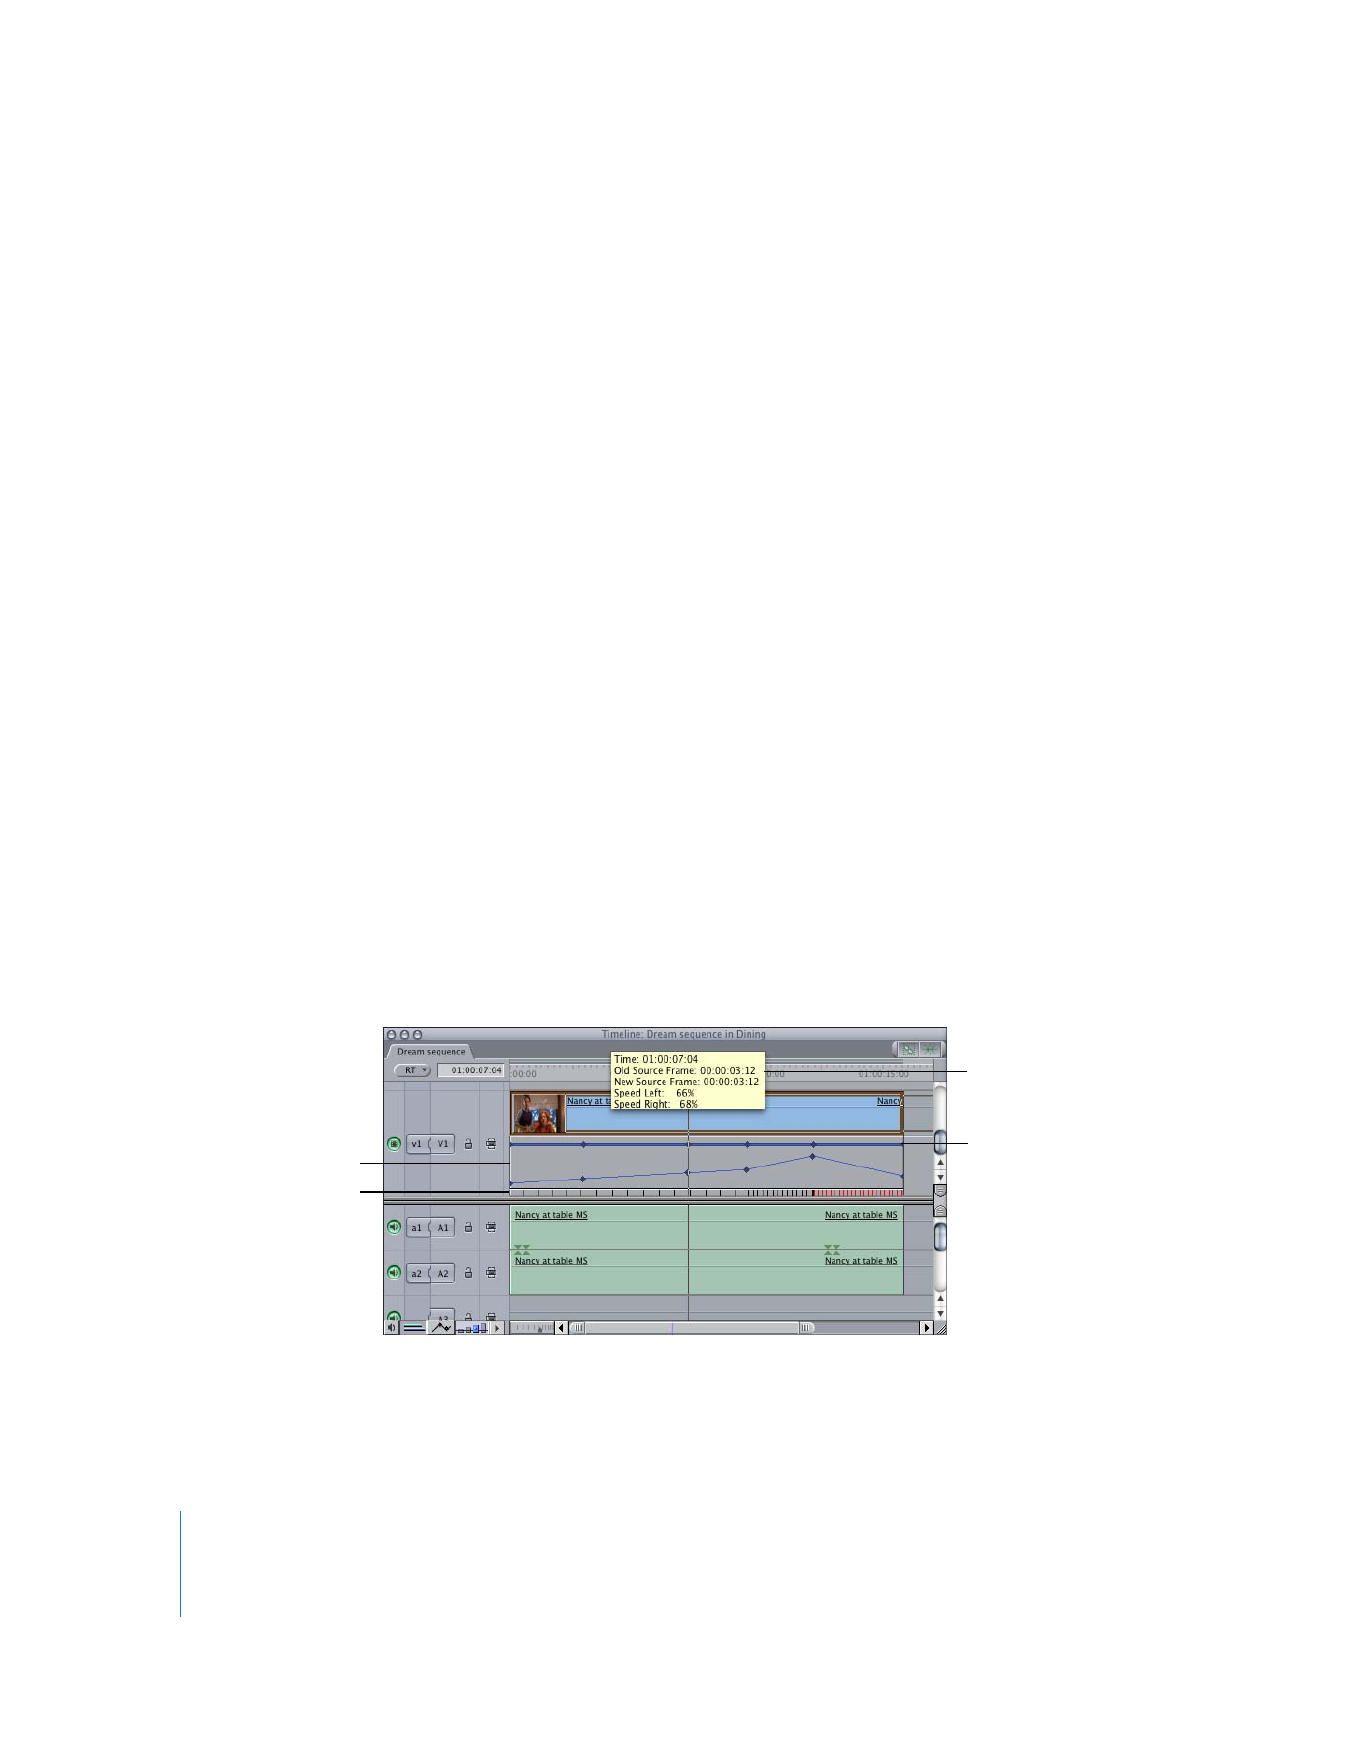
Time remapping allows you to adjust which media file frame is played back (the y axis)
and when during the clip the frame is played back (the x axis).
Chapter 17
Changing Clip Speed and Time Remapping
347
II
The Y Axis
The y axis represents the frame numbers of a clip’s media file. For example, if a clip’s
media file contains 300 frames, the y axis ranges from 0 (the first media file frame) to
299 (the last media file frame).
Note: This is true regardless of the In and Out points you set for the clip. Even if the clip
has an In point at frame 100 and an Out point at frame 200, the y axis of the clip starts
at frame 0 of the media file and goes to frame 299.
When you choose a value for the keyframe on the y axis, you are choosing a frame
from the clip’s original media file. When you drag a time remapping keyframe up and
down on the y axis, a tooltip appears that displays which media file frame you are
assigning to that point in time in your clip. As you move the keyframe up, you choose a
later frame in your clip’s media file; when you move the keyframe down, you choose an
earlier media file frame. The top of the y axis represents the last frame of your clip’s
media file, and the bottom represents the first frame.
The X Axis
The x axis represents a clip’s playback time. Frames are always played back at the frame
rate of the clip. You can set a keyframe at any point on the x axis to specify which
media file frame you want to see at that moment in the clip.
For example, suppose you want frame 100 from a clip’s media file to appear 2 seconds
into the clip. In this case, you set a time remapping keyframe at 02:00 on the clip. Then
you vertically adjust this keyframe to the value 100.
Last frame of clip
First frame of clip
Length of clip’s media
file (in frames)
348
Part II
Effects