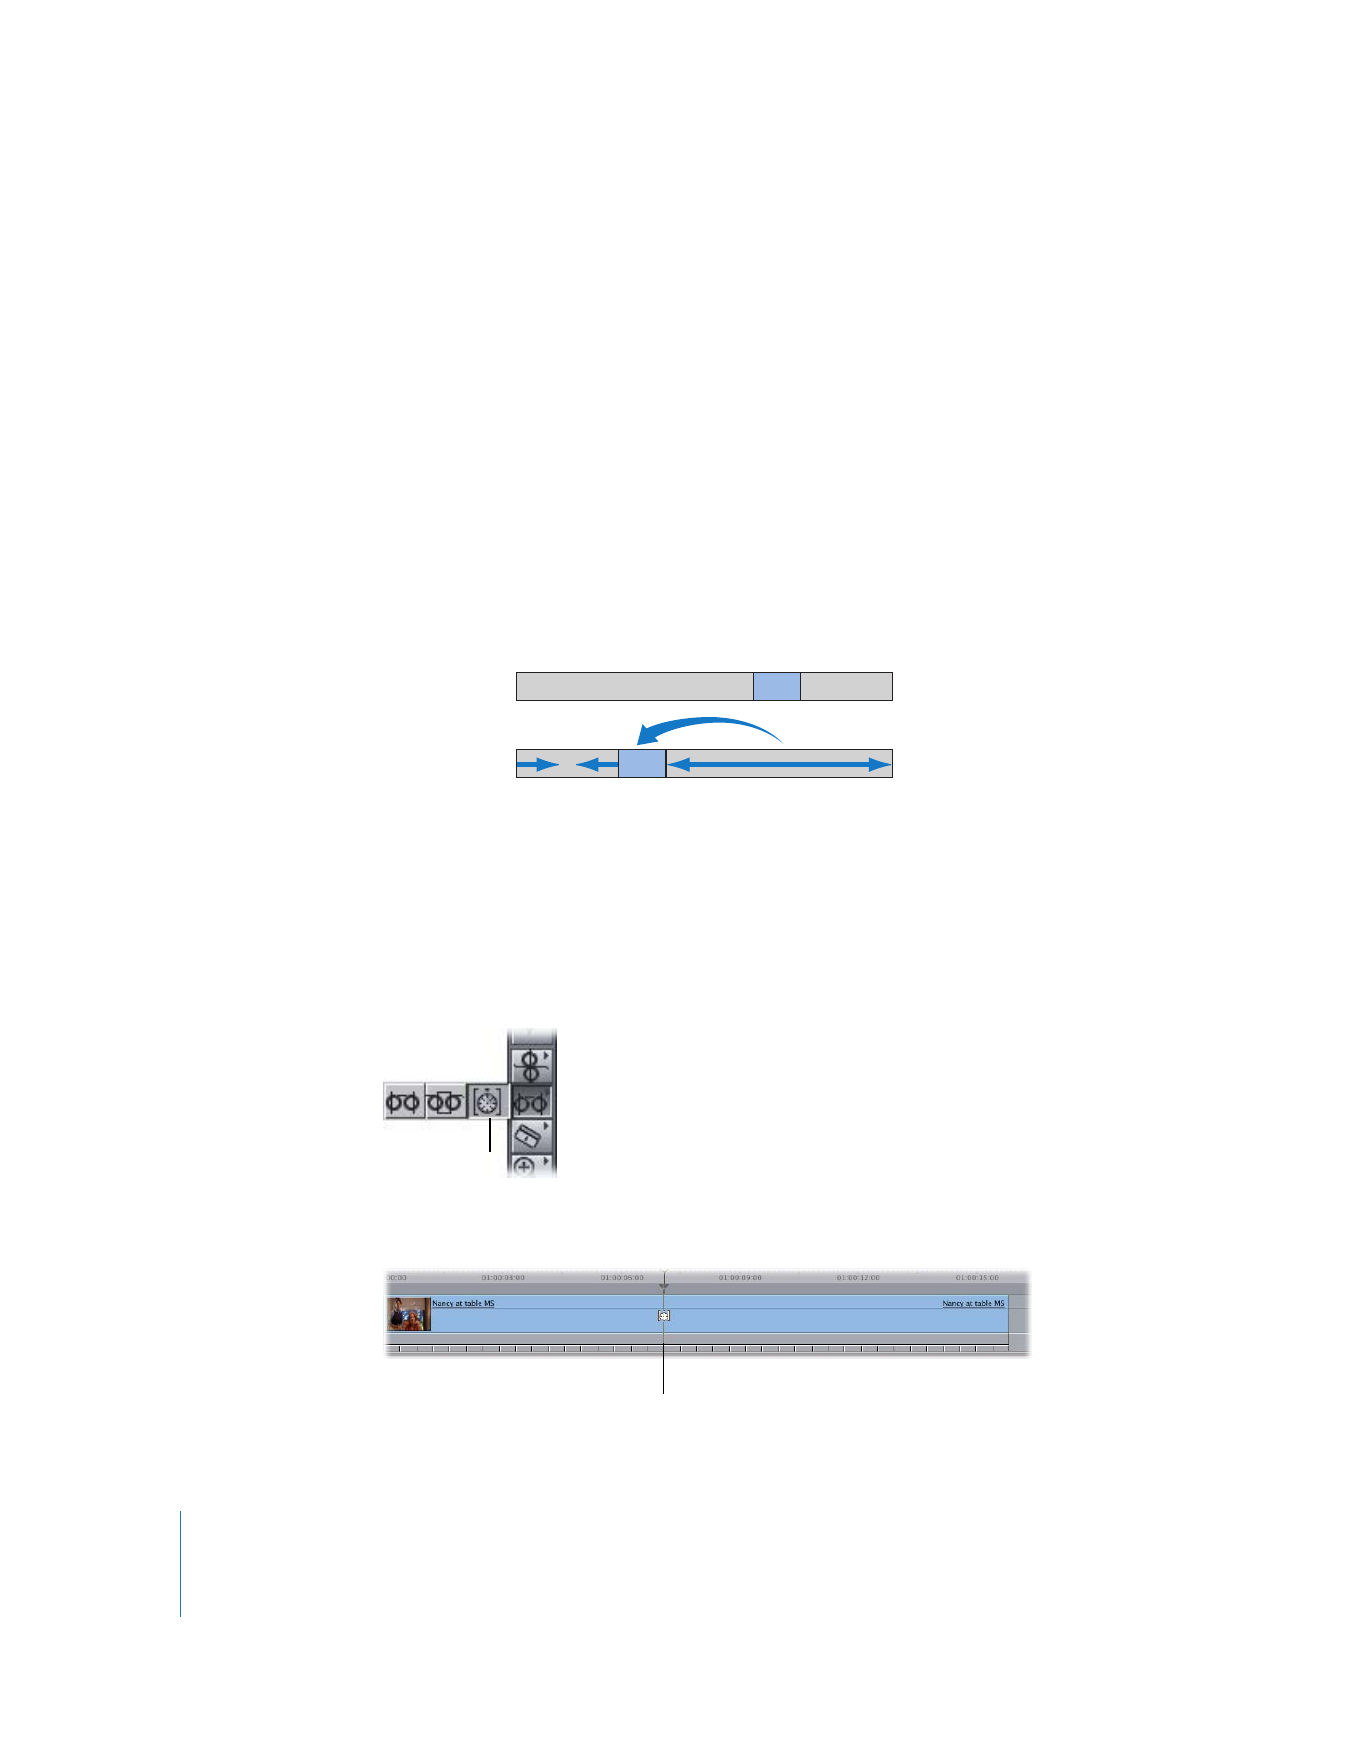
Sliding a Frame from Another Time to the Current Playhead Position
Clicking a clip with the Time Remap tool moves the playhead to the frame at the
position of the pointer, and dragging slides a frame from elsewhere in that clip to the
current position of the playhead. Using this method, you can remap any frame from
your clip’s media file to the current position of the playhead. This is the default behavior
of the Time Remap tool.
Note: For simplicity, the clip in the following example is described as having timecode
starting at 00:00:00:00, and the Timeline starts at 01:00:00:00. In reality, the source
frame you select corresponds to the timecode value of the clip’s media file.
For example, clicking a clip at 01:00:02:00 in the Timeline with the Time Remap tool
places the playhead at that frame in the Timeline. Dragging to the left, you move frame
00:00:06:00 in your clip from 01:00:06:00 in the Timeline to 01:00:02:00, which is the
current position of the playhead.
Frame 00:00:06:00 from the clip’s media file has been remapped to frame 00:00:02:00.
A new keyframe is placed at the position of the playhead, with the right half of your
clip being slowed down and the left half being sped up.
To move a source frame from another time to the playhead position:
1
Select the Time Remap tool in the Tool palette (or press the S key three times).
2
Move the Time Remap tool over the clip you want to adjust in the Timeline.
100% speed
Variable speed
Squeezed, faster
Stretched, slower
Time Remap
tool
An indicator line appears over the
clip showing you which frame
you’re about to select.

Chapter 17
Changing Clip Speed and Time Remapping
355
II
∏
Tip: By holding down the Shift key before clicking a clip with the Time Remap tool, you
can scrub through the clip—watching it in the Canvas as you find the specific frame
where you want to start remapping. As you scrub through the clip, an outline of the
entire range of frames in that clip appears. If you’ve already applied other time
remapping keyframes, this outline moves left and right to provide you with a reference
to see which frame in the clip you’re selecting.
3
Click the clip to choose the point in time at which you want to start time remapping.
The playhead jumps to the location you clicked.
4
With the mouse button still held down, drag left or right to begin moving a frame from
another part of the clip to the current playhead position in the Timeline.
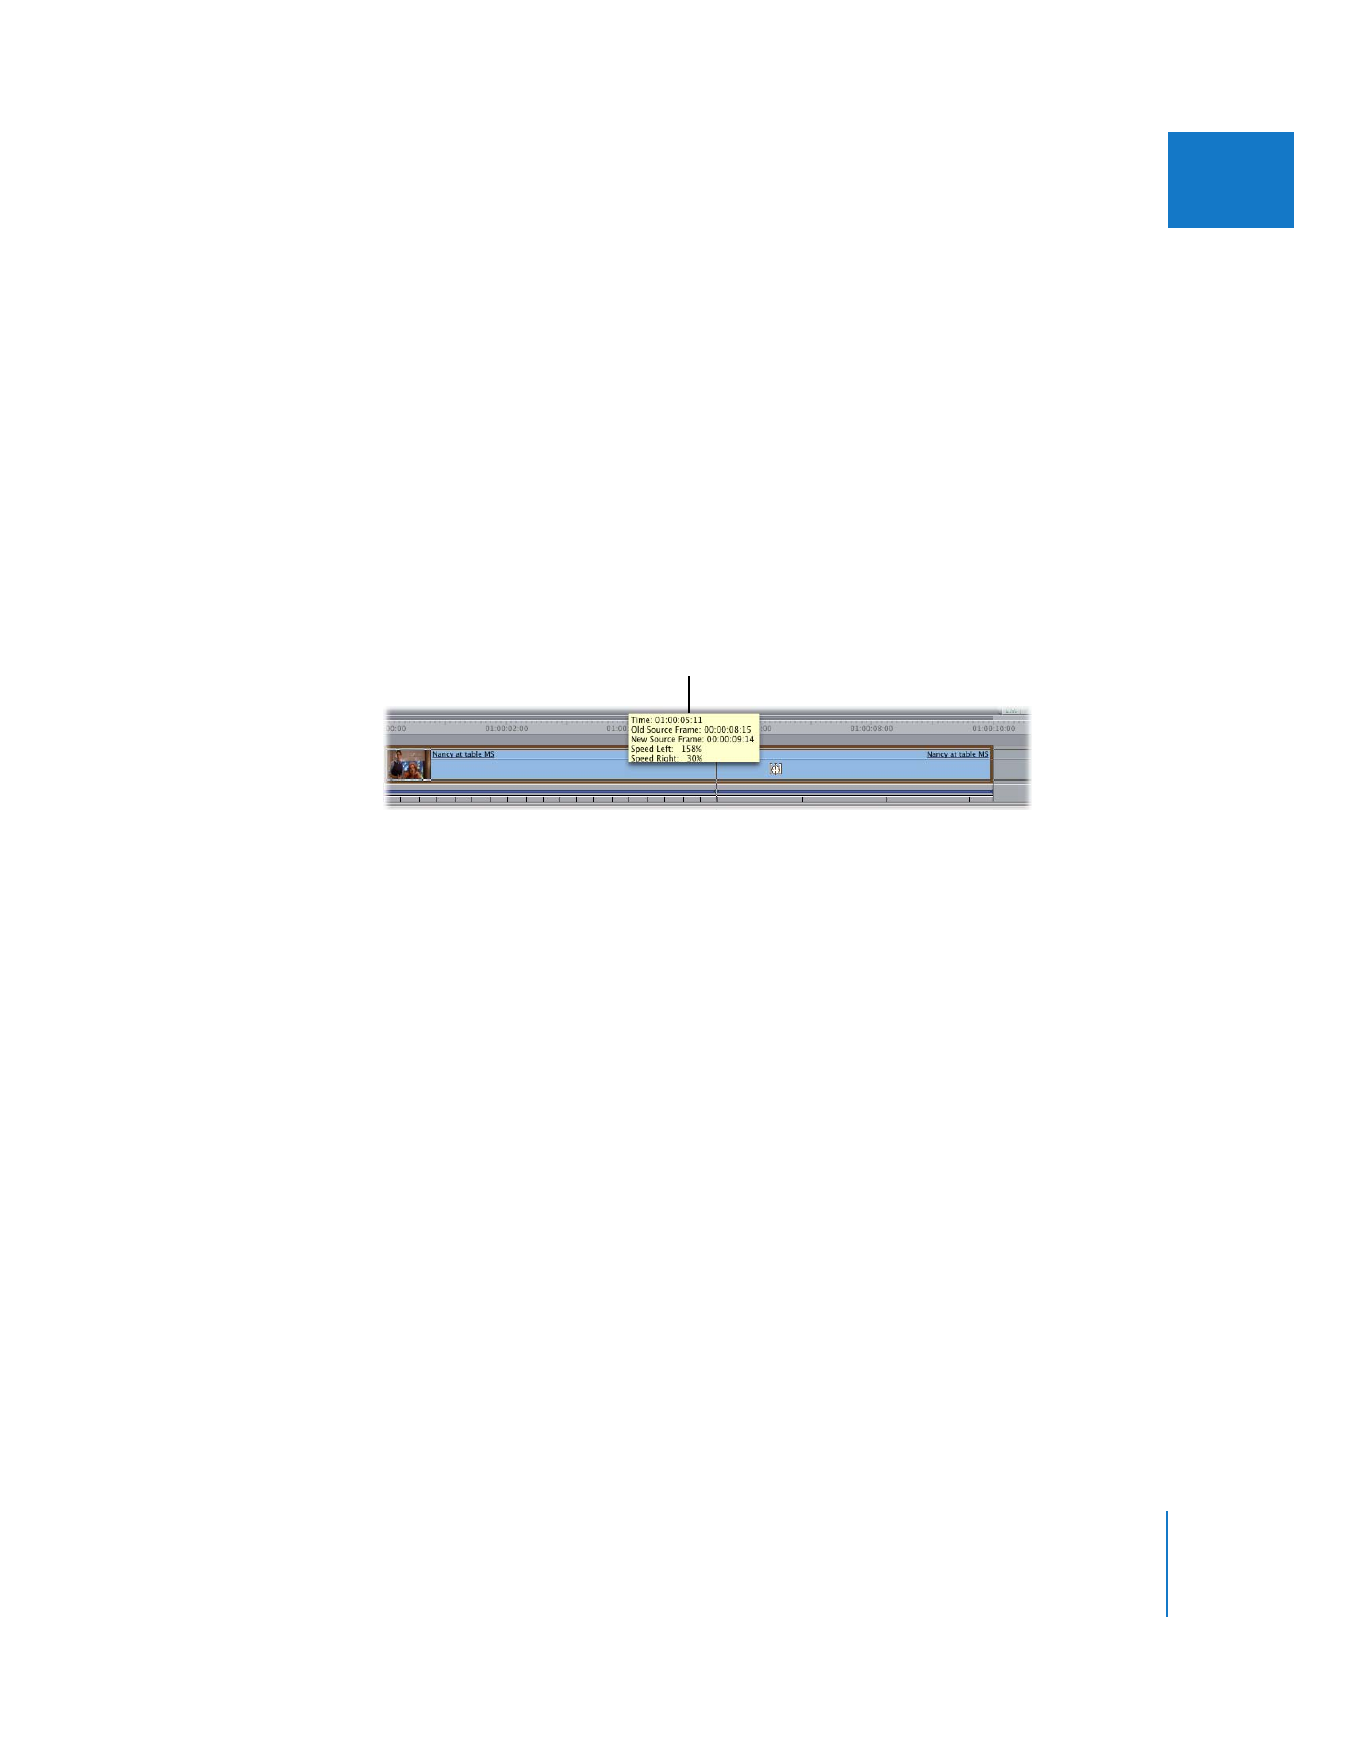
While you drag, the Timeline speed indicators change to show you the modified speed
to the left and right of the new time remapping keyframe at the playhead, and a
tooltip appears with information about the speed change:
 Time: The current position of the playhead in the Timeline.
 Old Source Frame: The timecode number of the clip’s media file frame when you
clicked the clip with the Time Remap tool.
 New Source Frame: The timecode number of the clip’s media file that will be placed at
the position of the playhead. While you drag, this frame is also shown in the Canvas.
 Speed Left: The playback speed, as a percentage, of the section of your clip defined
by the first time remapping keyframe immediately to the left of the current position
of the playhead.
 Speed Right: The playback speed, as a percentage, of the section of your clip defined
by the first time remapping keyframe immediately to the right of the current
position of the playhead.
5
When you’ve dragged far enough to create the desired speed effect, release the
mouse button.
The Timeline speed indicators show the clip’s new speed settings.
Tooltip

356
Part II
Effects
Sliding a Frame to a New Time in the Clip
Option-clicking a clip with the Time Remap tool enables you to grab the frame at that
point in the Timeline and move it to another time within that clip.
Note: For simplicity, the clip in the following example is described as having timecode
starting at 00:00:00:00, and the Timeline starts at 01:00:00:00. In reality, the source
frame you select corresponds to the timecode value of the captured media file.
For example, suppose you click a 10-second clip at frame 00:00:03:00 and drag that
frame to 01:00:06:00 in the Timeline. A time remapping keyframe appears at frame
00:00:06:00 of your clip.
Frame 00:00:03:00 from the clip’s media file has been remapped to frame 00:00:06:00 in
the clip. A new keyframe is placed at 00:00:06:00, with the left half of your clip being
slowed down and the right half being sped up.