Where You Can Make Time Remapping Adjustments
There are four places in Final Cut Pro where you can make variable speed adjustments:
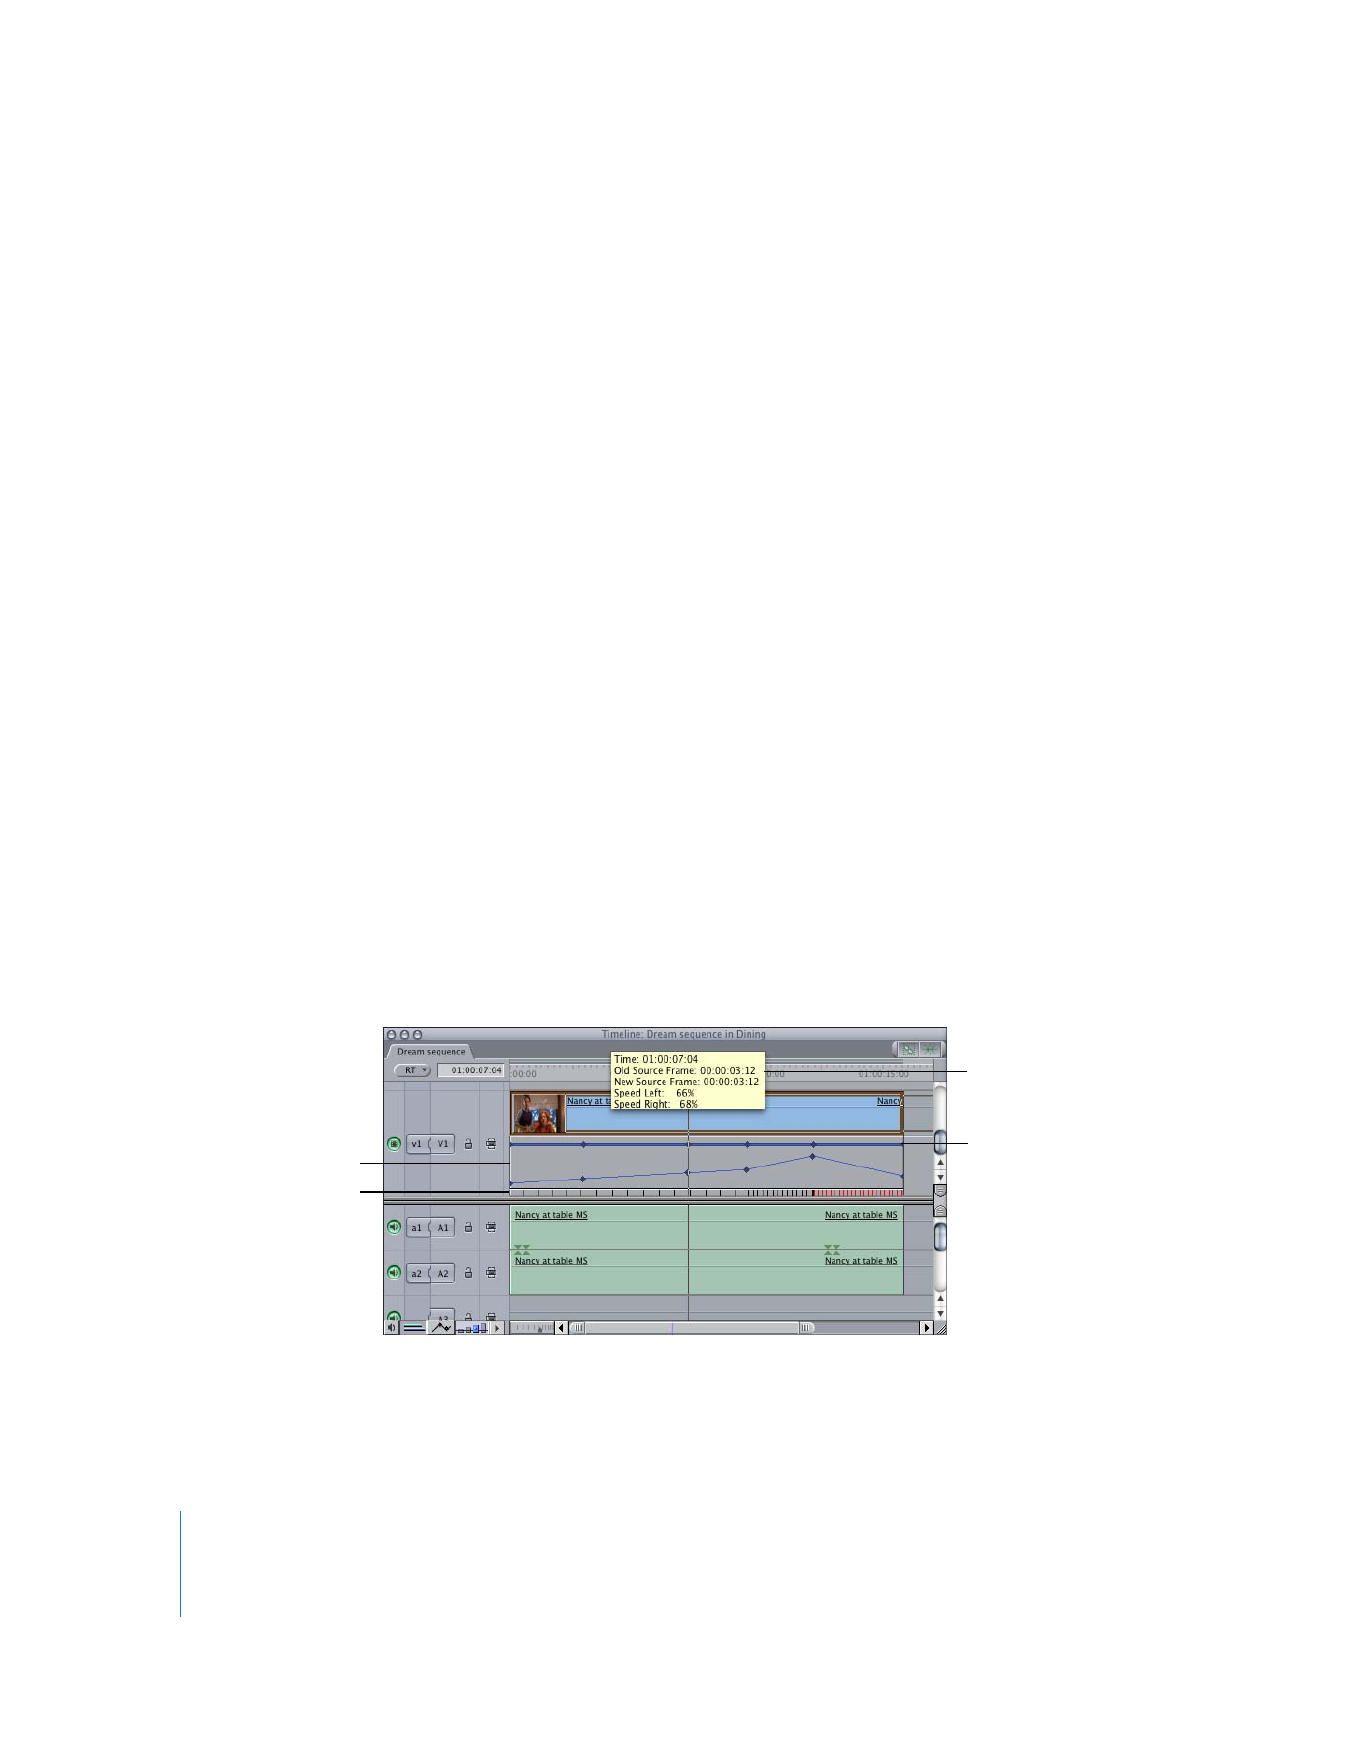
 Timeline: One of the simplest ways to make variable speed changes is to use the
Time Remap tool in the Tool palette to make adjustments to clips directly in the
Timeline. As you work with this tool, an outline of your clip appears that shows you
which source frame in the clip is being remapped to what time. Optionally, you can
choose to display speed indicators and a keyframe graph underneath that clip’s track
in the Timeline, to help you see what you’re doing. For more information on using
the Time Remap tool, see “
Using the Time Remap Tool
” on page 353.
 Keyframe graph: You can also add, subtract, smooth, and adjust time remapping
keyframes using the keyframe graph in the keyframe editor in the Timeline. For more
information on creating variable speed effects using the keyframe graph, see “
Time
Remapping Using the Keyframe Graph
” on page 359.
 Motion bar: Time remapping keyframes appear on the motion bar, and these
keyframes can be dragged backward and forward in time using the Selection tool.
When you use this feature in combination with the Timeline speed indicators, you
can make sophisticated speed adjustments very simply.
 Motion tab in the Viewer: The speed settings you’ve applied to a clip also appear in
the time remapping parameters of a clip’s Motion tab in the Viewer.