
Creating Motion Effects in the Viewer
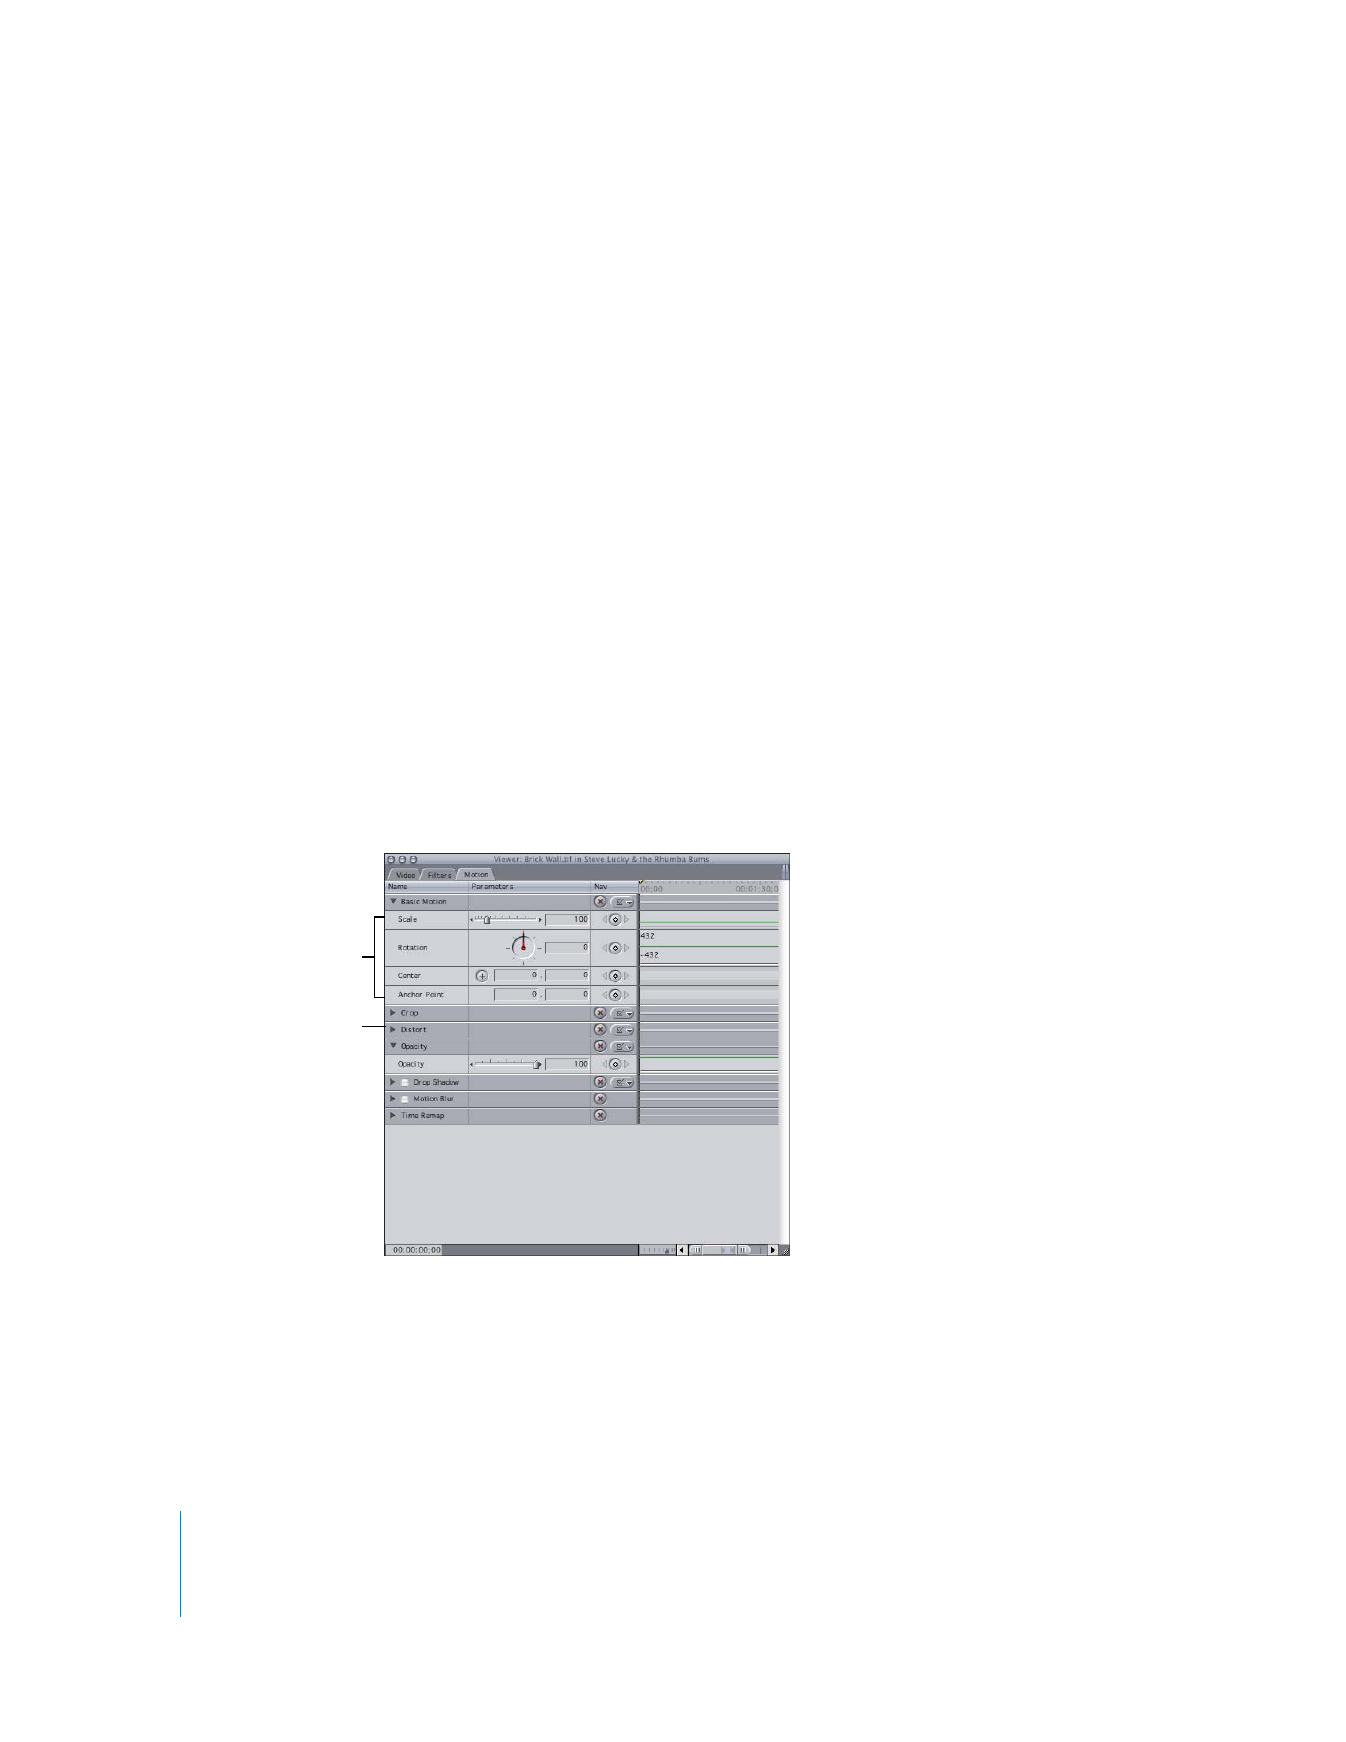
Every video, graphics, and generator clip in Final Cut Pro has a set of corresponding
motion attributes, each of which contains one or more adjustable parameters. When
you change these parameters, you create a motion effect. By adjusting a clip’s motion
settings, you can change its geometry to move, shrink, enlarge, rotate, and distort the
clip in nearly any way you like, relative to your overall project. You can also adjust
motion settings graphically, by manipulating them directly in the Canvas.
Using keyframes, you can dynamically adjust motion effects over time. You can
keyframe each clip’s motion parameters to animate clips in your sequence, making
them move across the screen, rotate, and grow or shrink over time. You can also
change a clip’s opacity to make it fade in and out and dynamically adjust any applied
filter effects—for example, to make a clip go from a blur to sharp focus as a sequence
plays. For details on keyframing, see “
Animating Motion Effects Using Keyframes
” on
page 287.
Note: Audio parameters can be keyframed as well. For more information, see
“
Automating Audio Filter Parameters with Keyframes
” on page 172.
256
Part II
Effects