Keyboard Modifiers for Controls in the Motion Tab
When using slider controls:
 To adjust the value by two decimal places of accuracy, hold down the Shift key.
 To slow down a slider’s movement and select a more precise value, hold down the
Command key.
When using an Angle control (a dial):
 To constrain the dial to 45-degree increments, hold down the Shift key.
 To slow down a dial’s movement and select a more precise value, hold down the
Command key.
 To reset the parameter value to 0, drag out of the dial.

Chapter 14
Changing Motion Parameters
259
II
Distort Parameters
Change a clip’s Distort parameters to alter the rectangular shape of a clip or to give it a
different aspect ratio.
 Upper Left, Upper Right, Lower Right, Lower Left: You can change the shape of a clip by
moving each of four corner points independently of one another. The corner points
defining the relative distortion of a clip are offset relative to the center of the clip.
 Aspect Ratio: Allows you to squeeze a clip horizontally or vertically to change the
ratio of its width to its height. This parameter never increases a clip’s size. You can
enter values between –10,000 and 10,000 in the number field.
Opacity Parameter
Change a clip’s opacity to make it appear solid or with a relative transparency against a
background image.
 Opacity: Increases or decreases the transparency of a clip.
Drop Shadow Parameters
This attribute places a drop shadow behind a clip.
 Offset: Determines how far away from the clip the drop shadow falls.
 Angle: Determines which angle the drop shadow falls toward.
 Color: There are several controls you can use to determine the color of the drop
shadow.
 Disclosure triangle: Click to display sliders and number fields corresponding to the
hue, saturation, and brightness (H, S, and B) of the chosen color for the drop shadow.
 Eyedropper: Lets you quickly select a color that’s in an image in the Viewer or the
Canvas. Select the eyedropper, then click an image in the Viewer or the Canvas to
pick up that color.
 Hue direction control: If you’re keyframing changes in color, click this control to
determine the direction on the color wheel Final Cut Pro uses to interpolate the
color change.
 Color picker: Click to choose a color using the standard color picker.
 Softness: Blurs the drop shadow around its edges.
 Opacity: Sets the transparency of the drop shadow.

260
Part II
Effects
Motion Blur Parameters
Motion blur affects any clip that has motion, whether it’s a moving subject in a video
clip or keyframed motion effects that you’ve created.
Motion Blur allows you to create or exaggerate motion blur in ordinary video clips. For
example, if you apply motion blur to a clip in which someone is standing still and
waving an arm, the arm becomes blurred, while the rest of the image remains sharp.
This happens even though the arm waving is not a keyframed motion effect. Motion
Blur also lets you add motion blur to video clips that have none, such as computer
animation that was rendered without it.
Motion Blur can also add blur to layered clips that are moving because of keyframed
motion effects, such as animated motion along a path, rotation, changes in scale, or
distortion. This way, animated motion within Final Cut Pro can be given a more natural
look, as if the moving clips were actually recorded with a camera.
The amount of blur that appears in either case depends on the speed of the moving
subject. The faster the subject moves, the more blurred it becomes, similar to a motion
picture film or video image. The amount of blur that is added can be modified using
two parameters.
 % Blur: Affects the smoothness of the motion blur. A value of 1000 percent blurs
motion over 10 frames; a value of 100 percent blurs motion in one frame.
 Samples: Determines the detail of the applied motion blur, which is dependent upon
the speed of the motion effects applied to a clip. Additional samples appear as
additional layers of blurring. To change the number of samples, choose a number
from the Samples pop-up menu.
∏
Tip: You can also use Motion Blur to soften the strobing effect that may appear in clips
with extremely slow motion applied to them.
Time Remap Parameters
Time remapping allows you to alter the speed of a clip to create fast- or slow-motion
effects. You can apply constant speed changes or variable speed changes. Applying a
constant speed change to a clip alters the entire clip’s playback speed by the same
percentage. Applying variable speed to a clip allows you to dynamically alter the speed
of a clip, making a clip alternate between a range of speeds throughout any duration
you specify. You can also reverse the speed of a clip, making it play backward. For a
detailed description of the Time Remap parameters, see “
Time Remapping in the
Motion Tab
” on page 362.
Chapter 14
Changing Motion Parameters
261
II
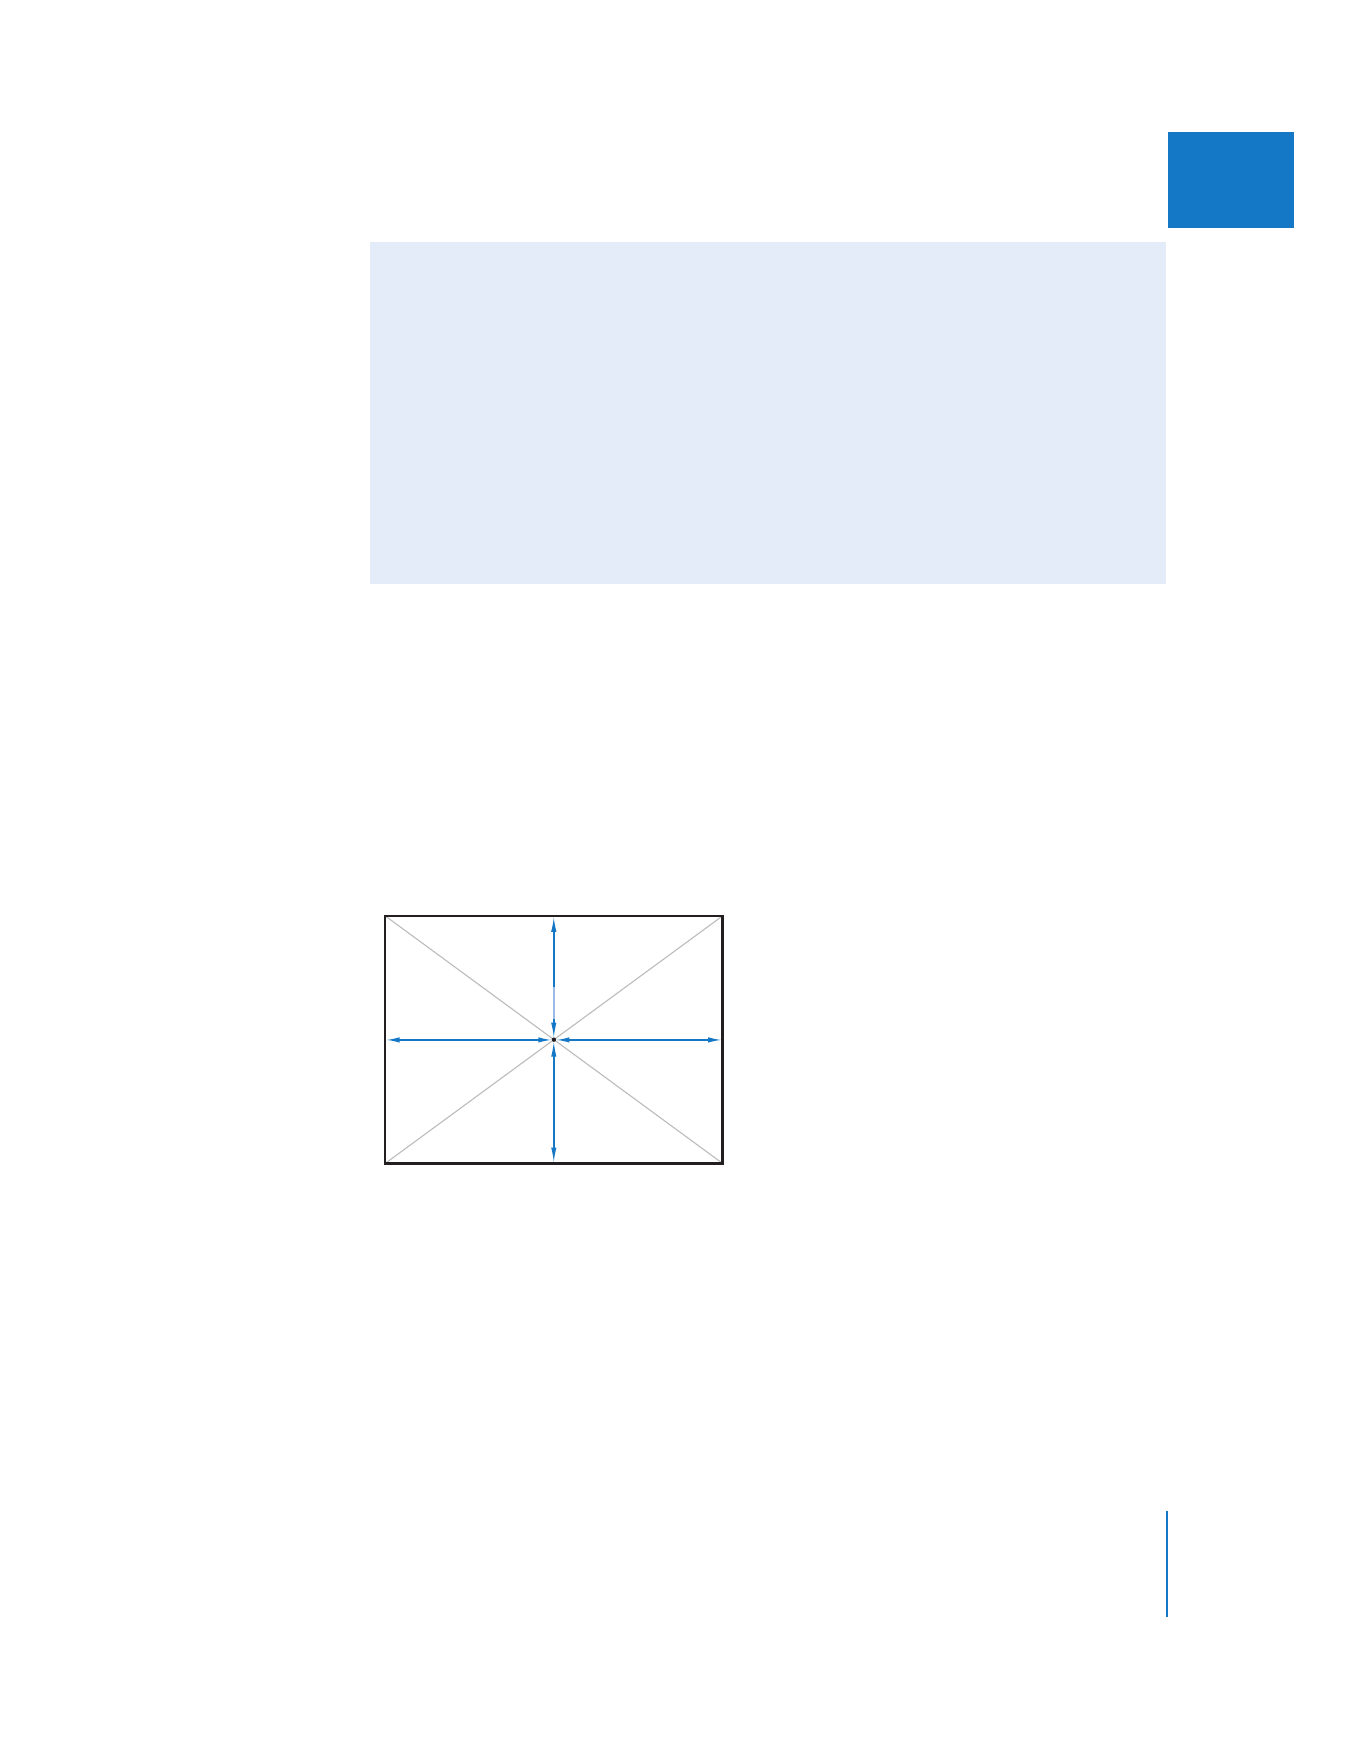
Using Cartesian Geometry to Position Clips
Final Cut Pro compositing features use simple Cartesian geometry to position clips
within the frame defined by the Canvas. This makes the process of symmetrically
arranging layered clips easy and precise. Even though it’s possible to “eyeball” a lot of
compositions, a little math can go a long way, especially when you want to start
creating more precise motion effects using keyframes.
In Final Cut Pro, the center point of a layer is always relative to the center point of the
Canvas; the center point of the Canvas always has x and y coordinate values of 0, 0.
To position clips using their x and y coordinates, you click the Basic Motion disclosure
triangle and enter appropriate values in the Center number fields.
To move a clip to the right:
m
Enter a positive value for the clip’s x coordinate.
To move a clip to the left:
m
Enter a negative value for the clip’s x coordinate.