Example: Using Motion Settings to Create a Multiple Clip Layout
In this example, you’ll create a layered interview segment using the Scale, Rotation, and
Center Point parameters. This example assumes you’ve already created a new sequence
and opened it in the Timeline.
Note: This example uses a sequence created for DV clips, with a frame size of 720 x 480.
1
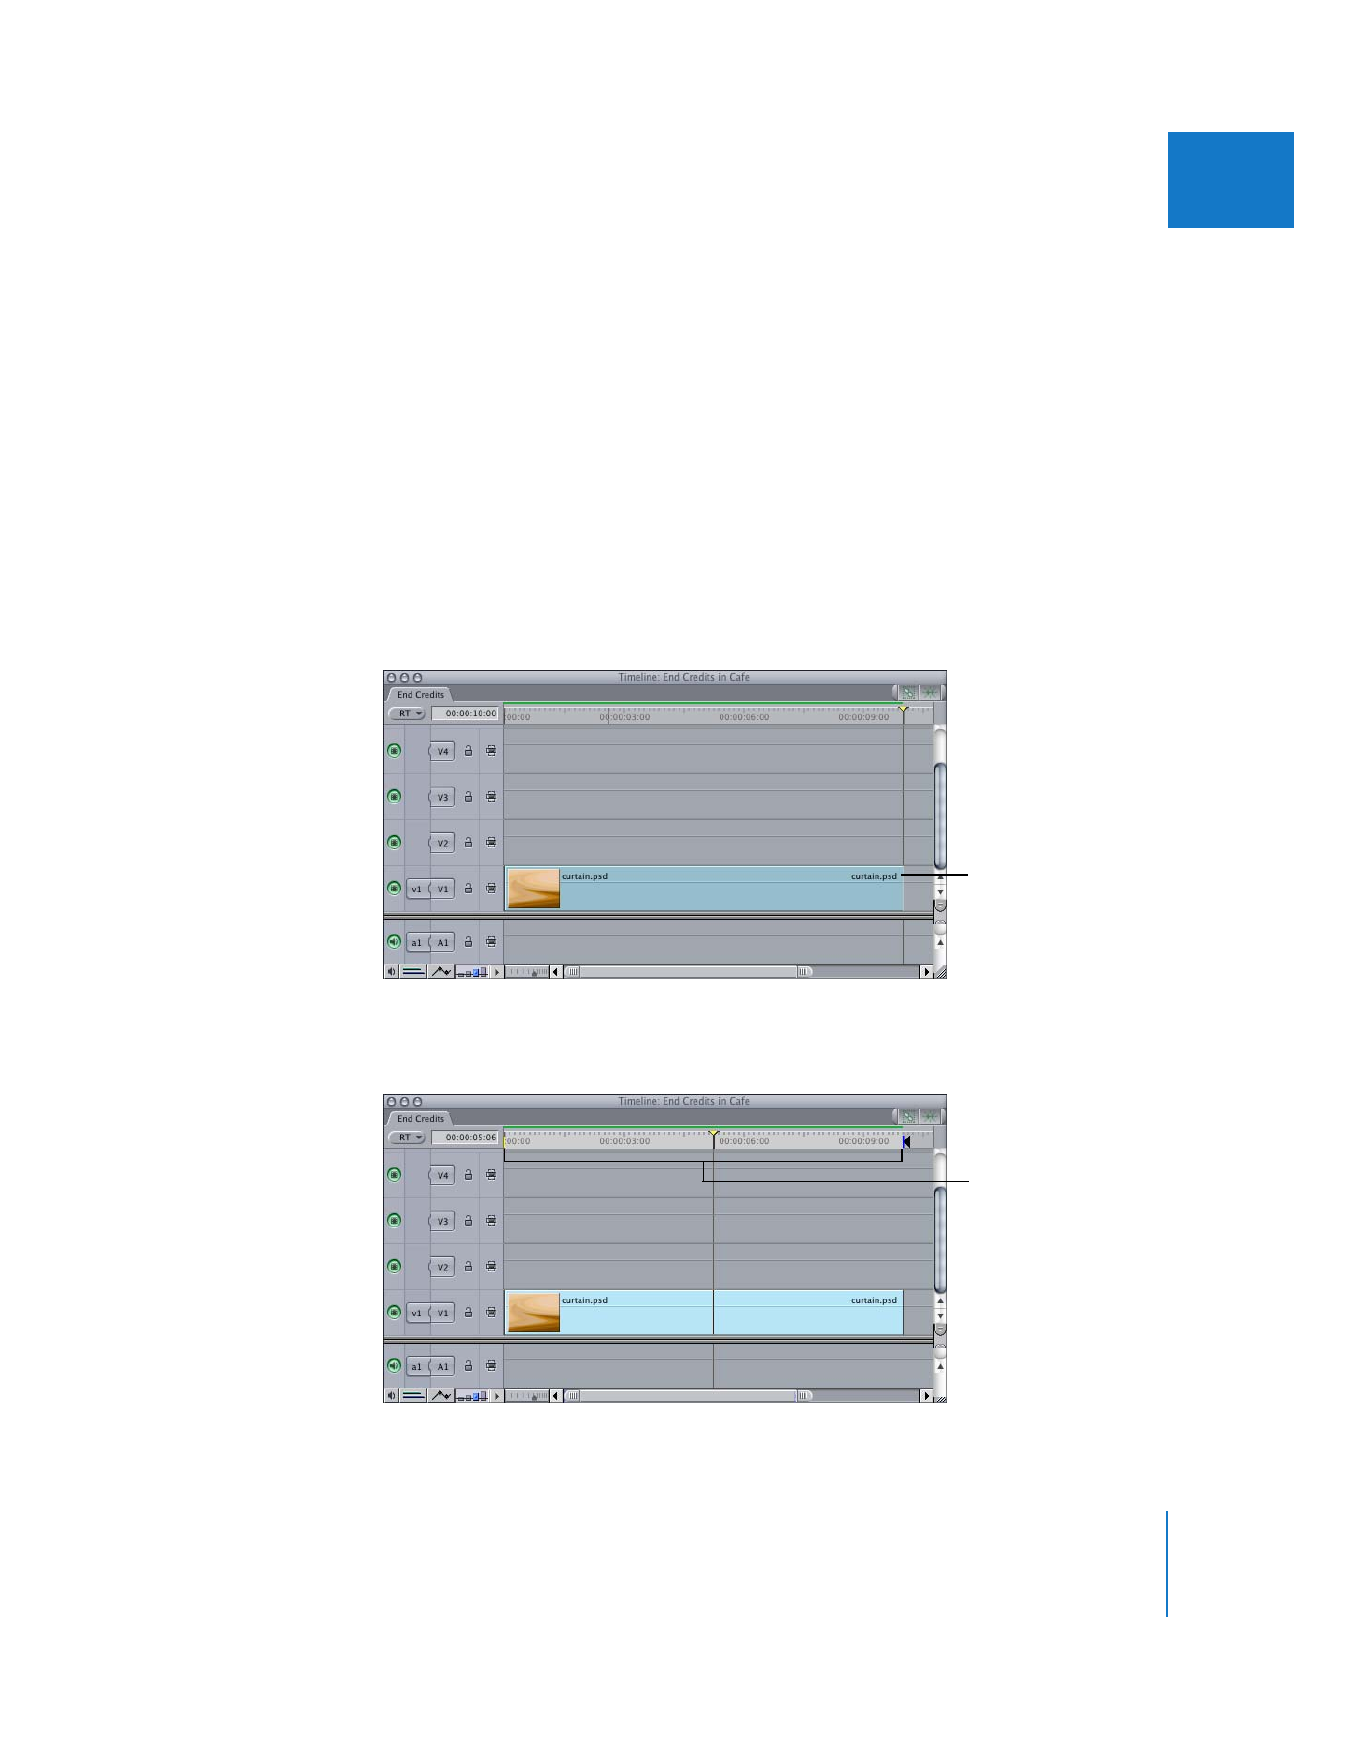
Open a clip in the Viewer that you want to use as a background layer (against which all
other composited layers are to appear), then edit this clip into track V1 of your sequence.
Note: If you don’t use a background layer (such as a graphic, video clip, or Final Cut Pro
generator clip), all layered clips appear against black by default.
2
Set the sequence In and Out points to be the duration of this background clip (choose
Mark > Mark Clip, or press X).
Initial background layer
Sequence In and
Out points
264
Part II
Effects
3
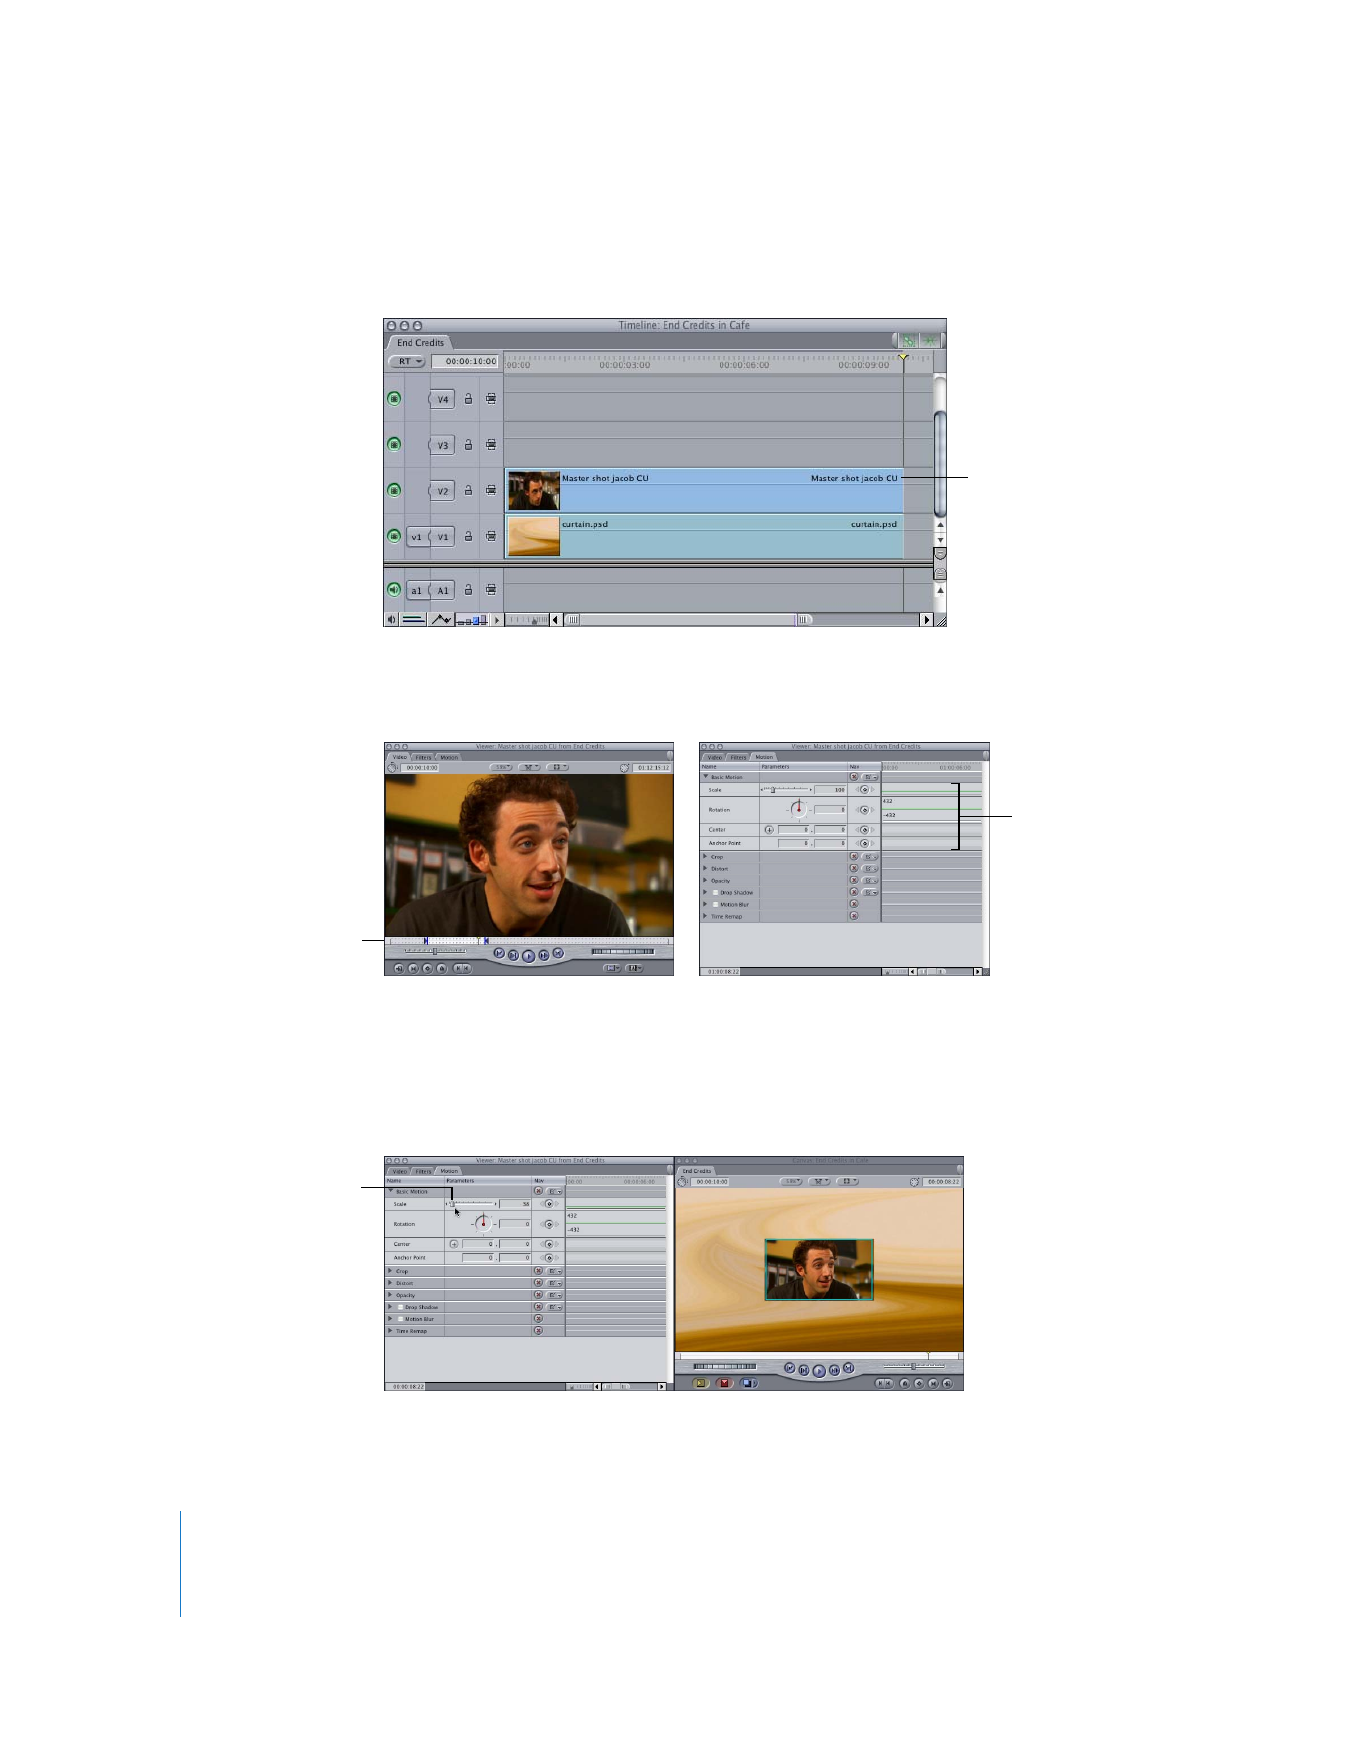
From the Browser, open the first clip you want to arrange in the background of your
composition, then edit it into the sequence using a superimpose edit.
4
Double-click the sequence clip you’ve just edited into the Timeline (not the
background clip) to open it in the Viewer, then click the Motion tab.
First, you’ll change the size of the clip so it’s smaller, and then you’ll change the rotation
so the clip is angled.
5
Click the Basic Motion disclosure triangle to reveal the Basic Motion parameters, then
drag the Scale slider to 38 (or enter “38” in the Scale number field, then press Return).
A new track is created
above the current V1
video track, and your clip
is inserted into it.
Dots in the scrubber bar
indicate the clip is in a
sequence.
Motion settings
for this clip
As you drag the
Scale slider to the left,
the clip gets smaller
in the Canvas.
Chapter 14
Changing Motion Parameters
265
II
6
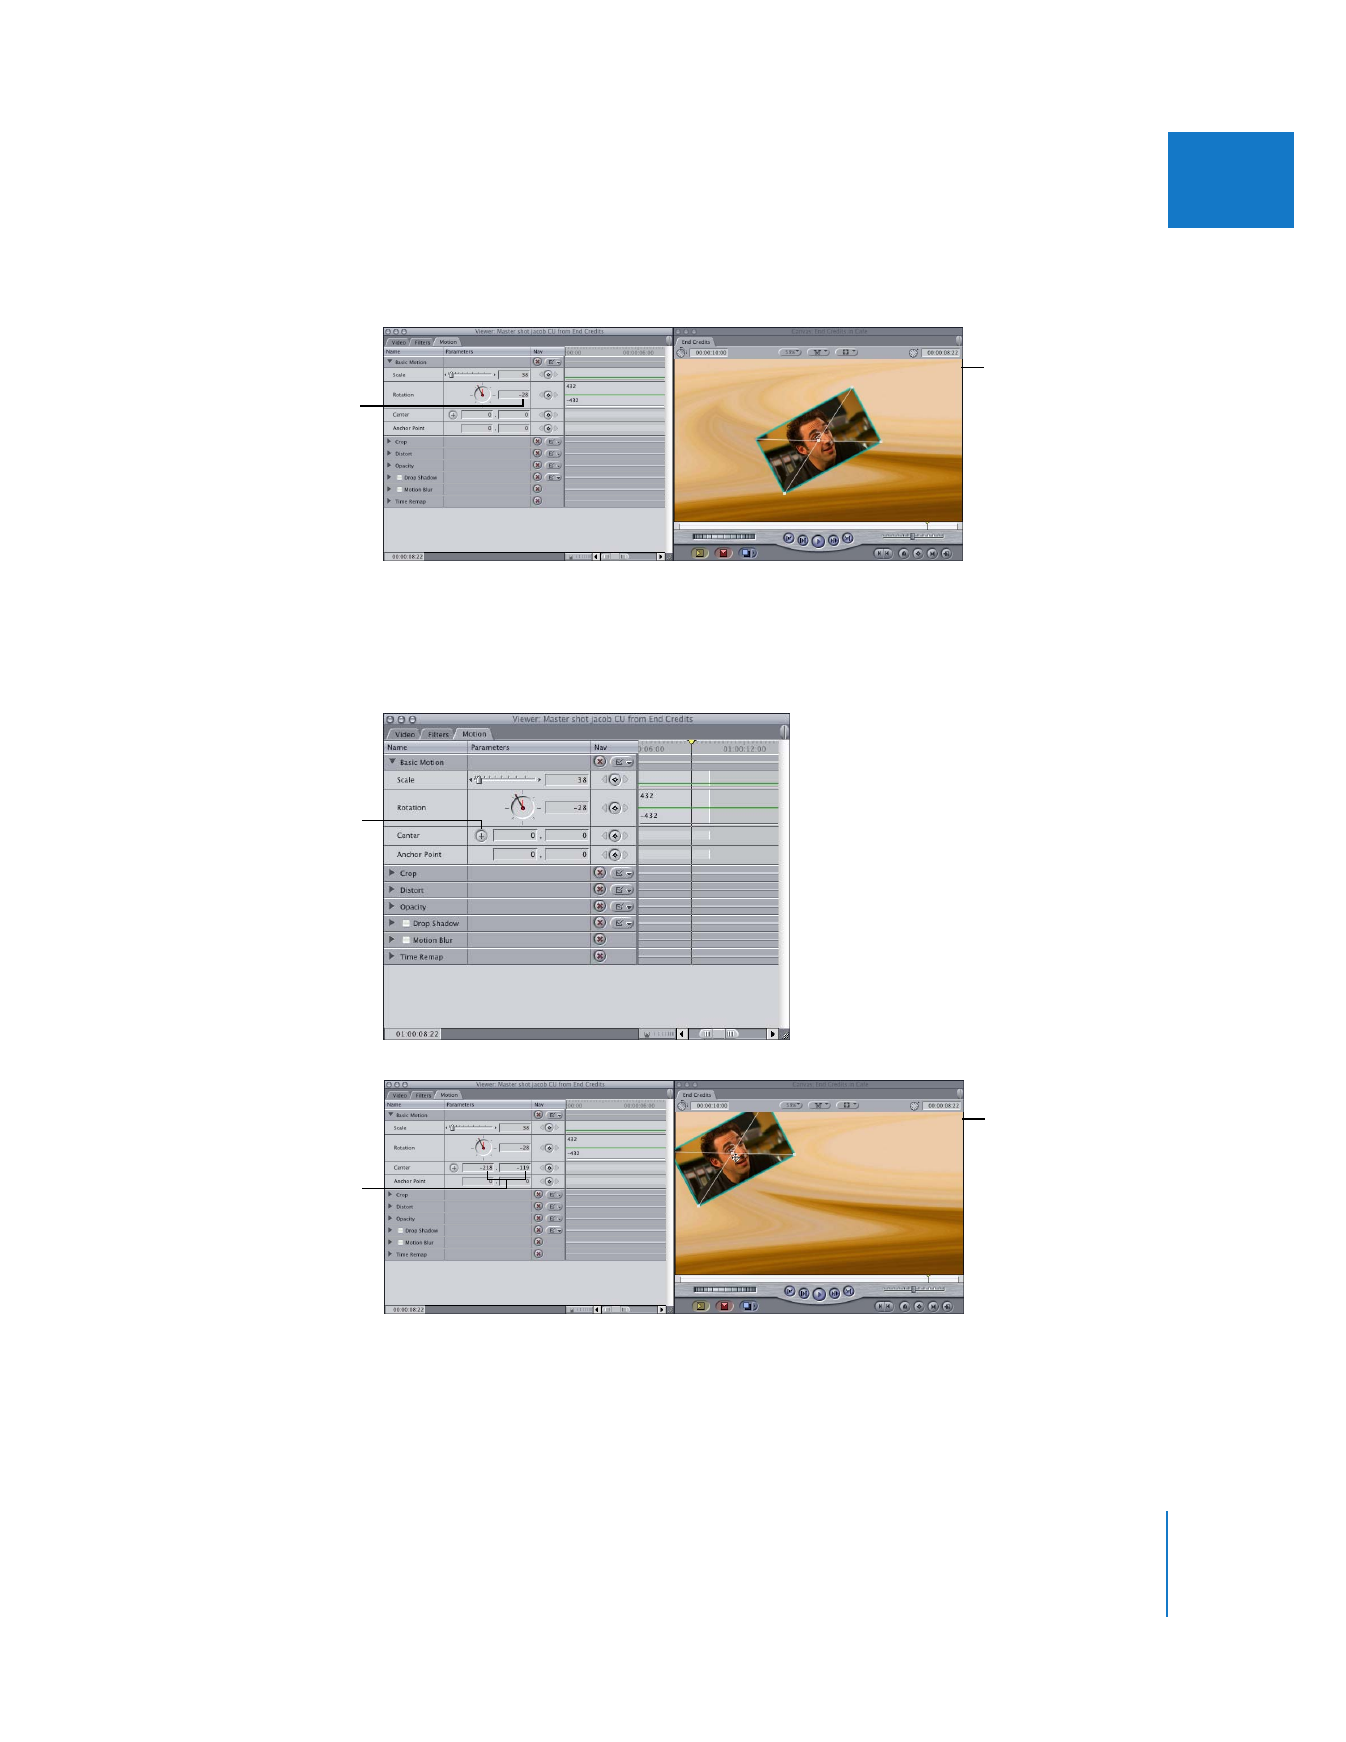
Drag the Rotation Angle control (the dial) to the left so that it reads “–28.”
A negative value rotates the clip to the left; a positive value rotates it to the right.
Next, you’ll change the position of this clip in the Canvas.
7
Select the point control for the Center parameter and move the pointer to the Canvas
(the pointer changes to a crosshair), then click in the upper-left corner of the Canvas.
Clicking in the Canvas with the crosshair moves the x and y values of that clip’s center
point to the pixel you clicked. In this case, the first (x) coordinate reads “–218” and the
second (y) coordinate reads “–119”. You can also reposition the clip by entering these
values in the Center number fields.
This is the angle in
degrees that your
clip is rotated.
The change is also
reflected in the
Canvas.
Point control for the
Center parameter
The new coordinates
of the clip’s center
point appear in these
number fields.
The change is also
reflected in the
Canvas.
266
Part II
Effects
Note: For more information about using basic geometry to position clips, see “
Using
Cartesian Geometry to Position Clips
” on page 261.
Next, you’ll add another clip to your composite.
8
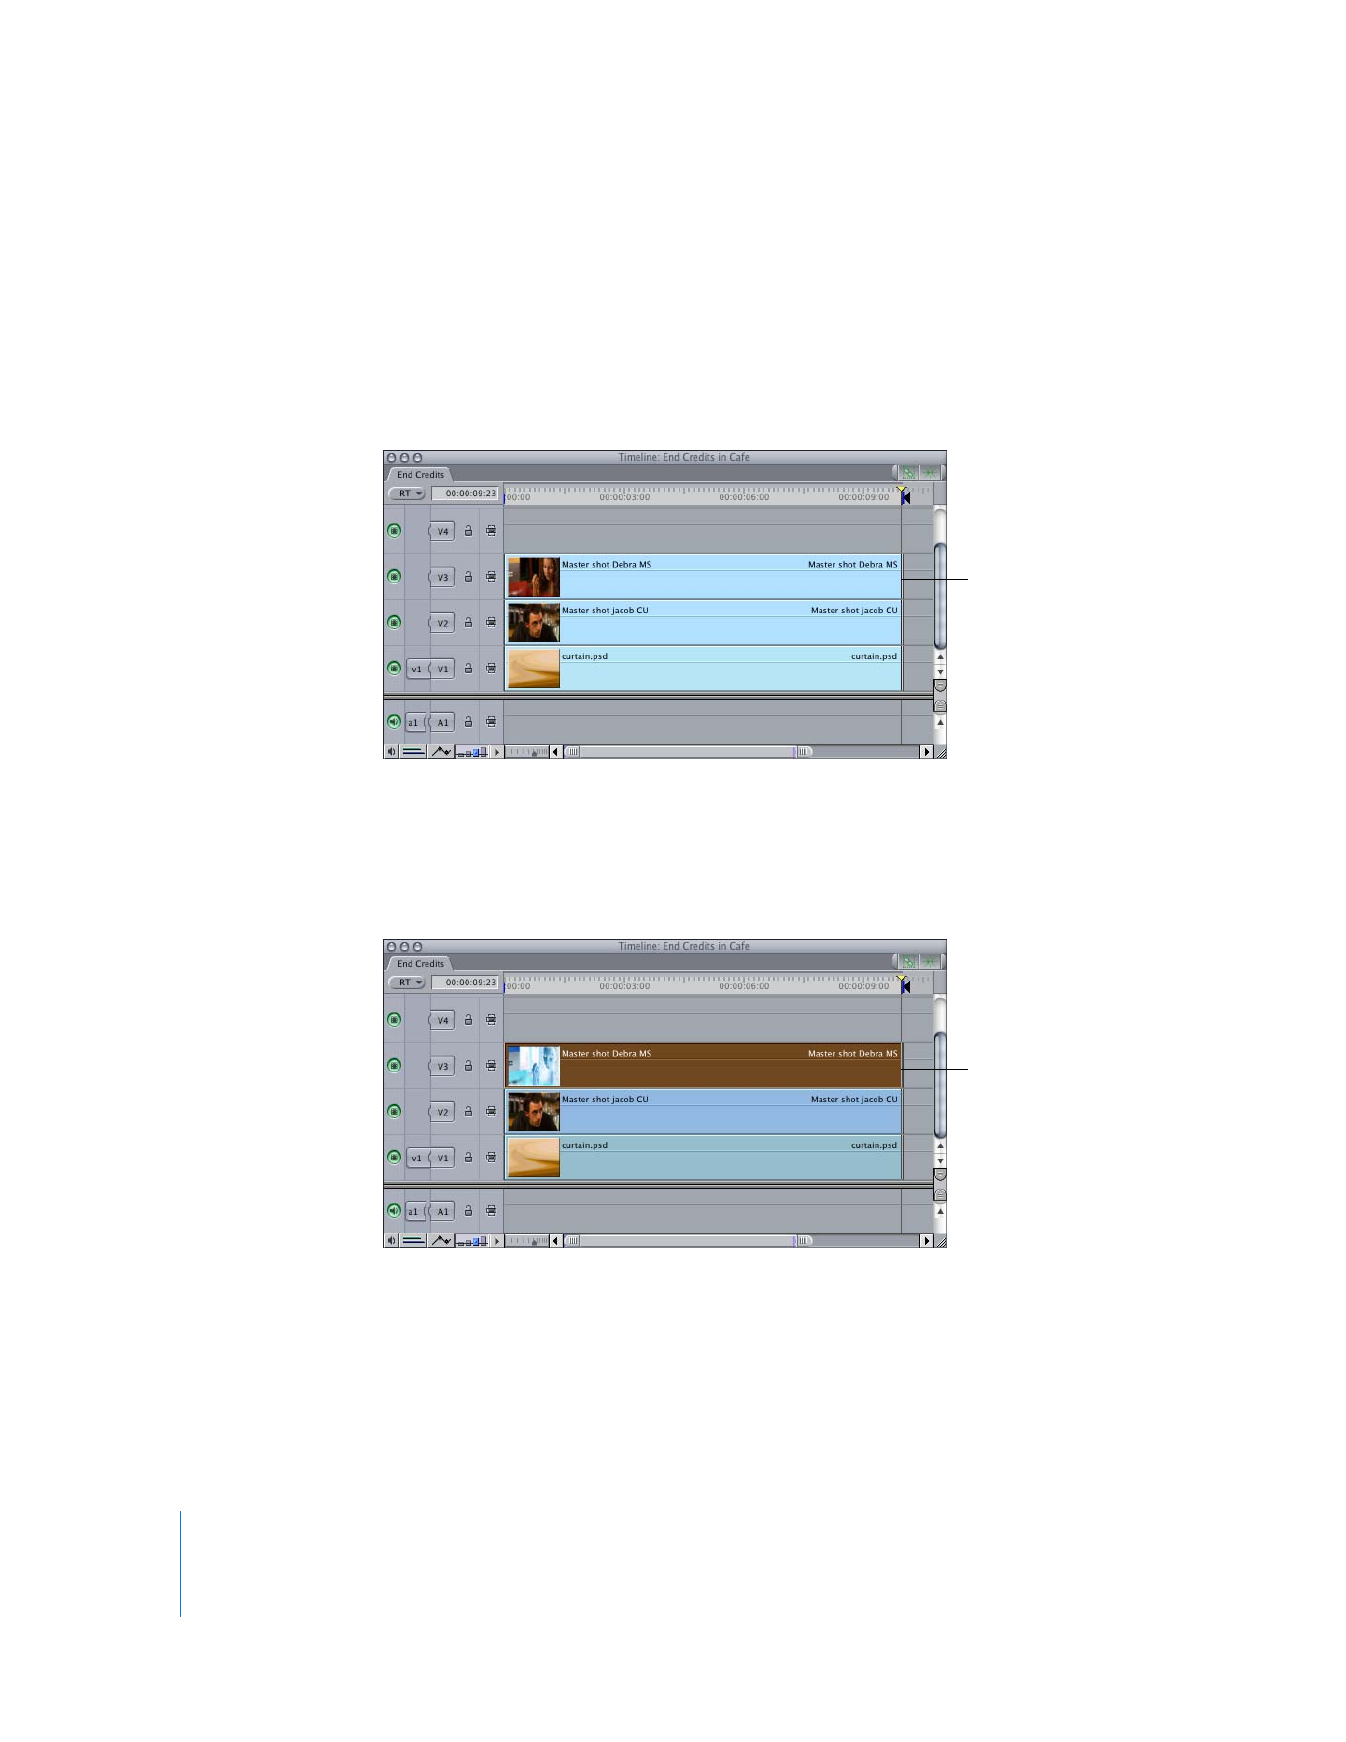
In the Timeline, specify track V2 as the current destination track (click the V2
Destination control). Then, using a superimpose edit, edit in a second clip you want to
place in the background.
Now, you want to copy all the motion settings from the first clip and selectively apply
them to this second clip.
9
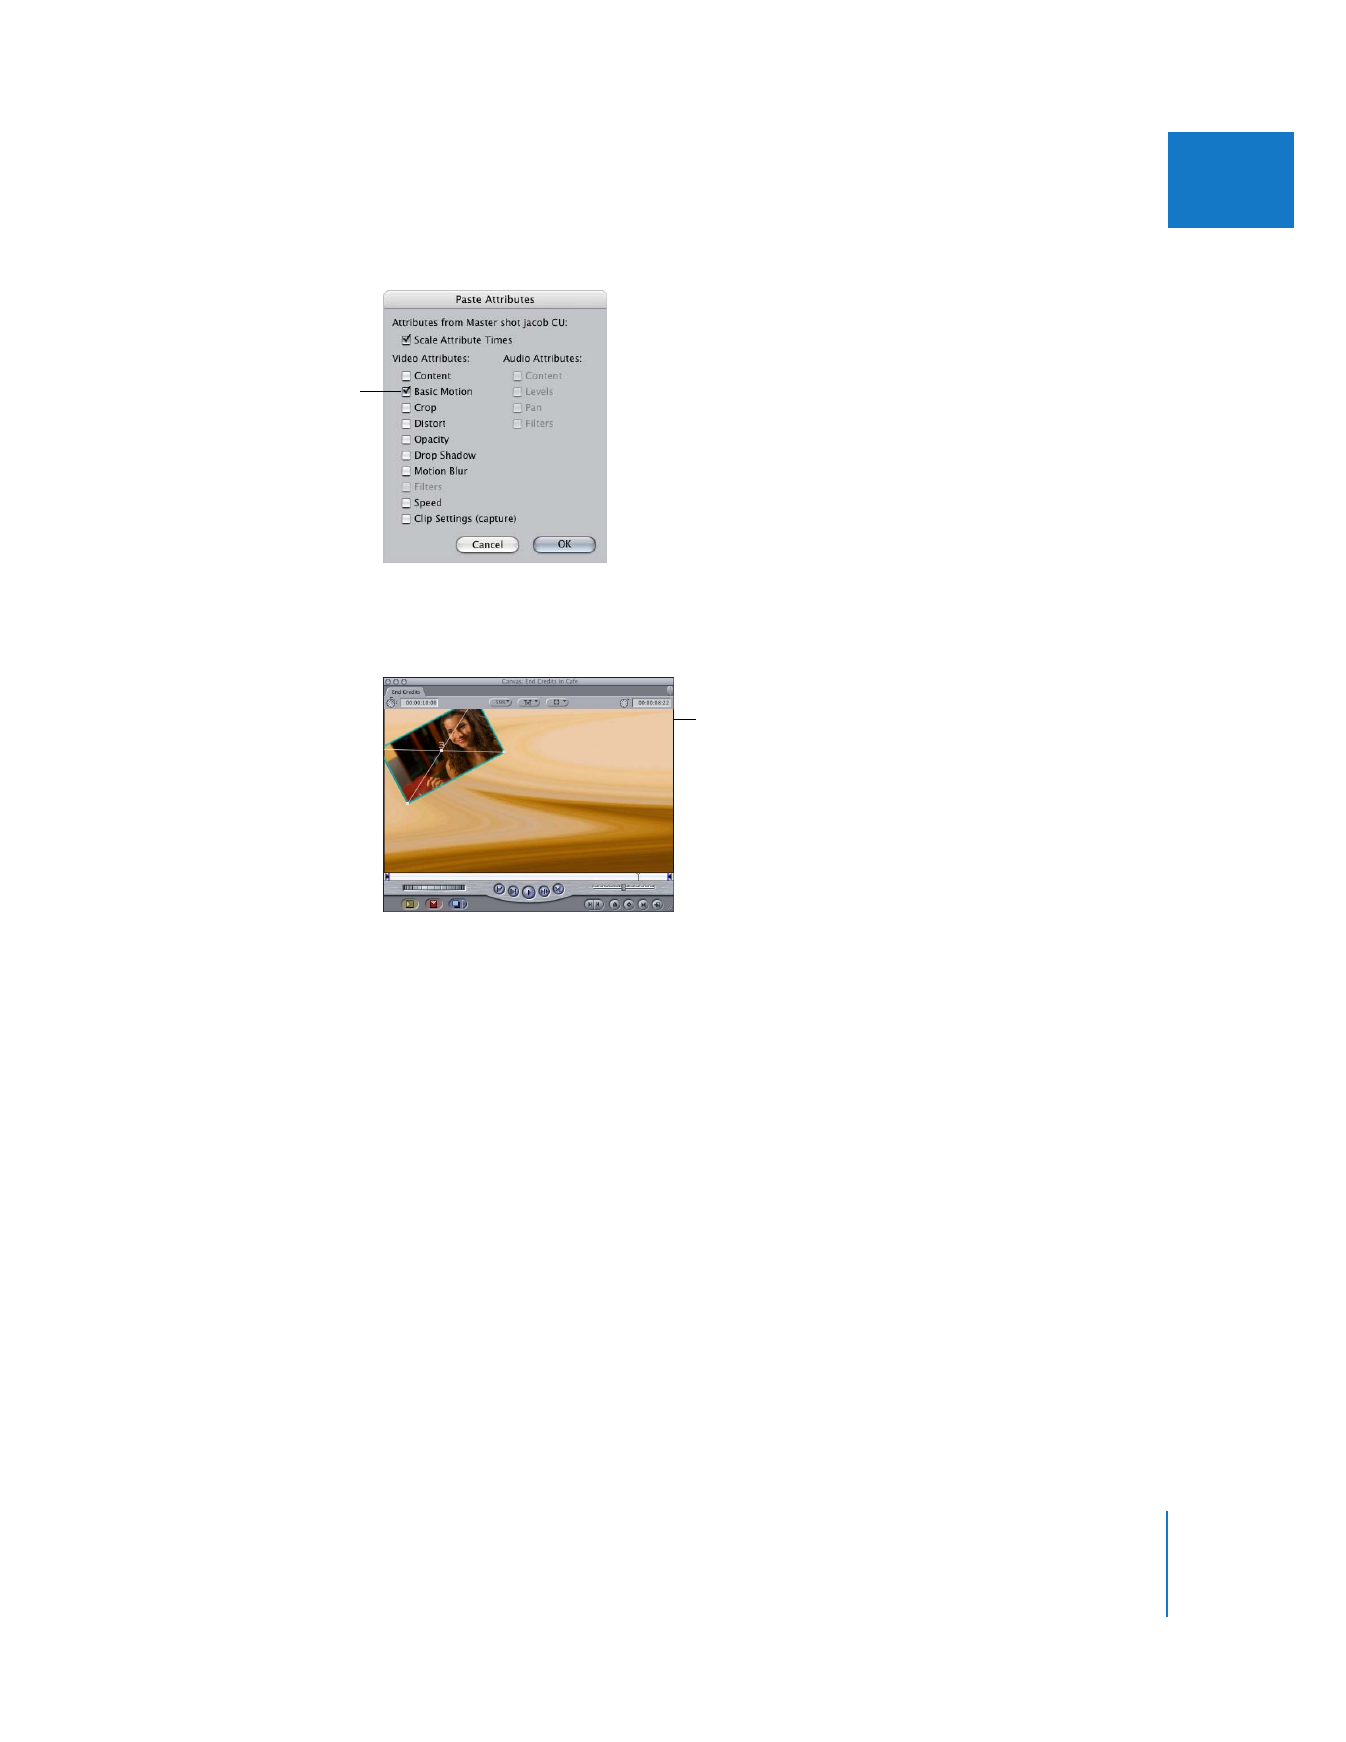
Select the clip in track V2 that you resized and repositioned, then choose Edit > Copy.
Next, select the clip in track V3, then choose Edit > Paste Attributes.
The Paste Attributes dialog appears. By selecting various options in this dialog, you can
paste only the attributes you want to use from the copied clip into the currently
selected clip.
A second clip is placed in
track V3 of the sequence,
using the same In and
Out points.
Select the clip in track V3,
so you can paste
attributes into it.
Chapter 14
Changing Motion Parameters
267
II
10
Select the Basic Motion checkbox, then click OK.
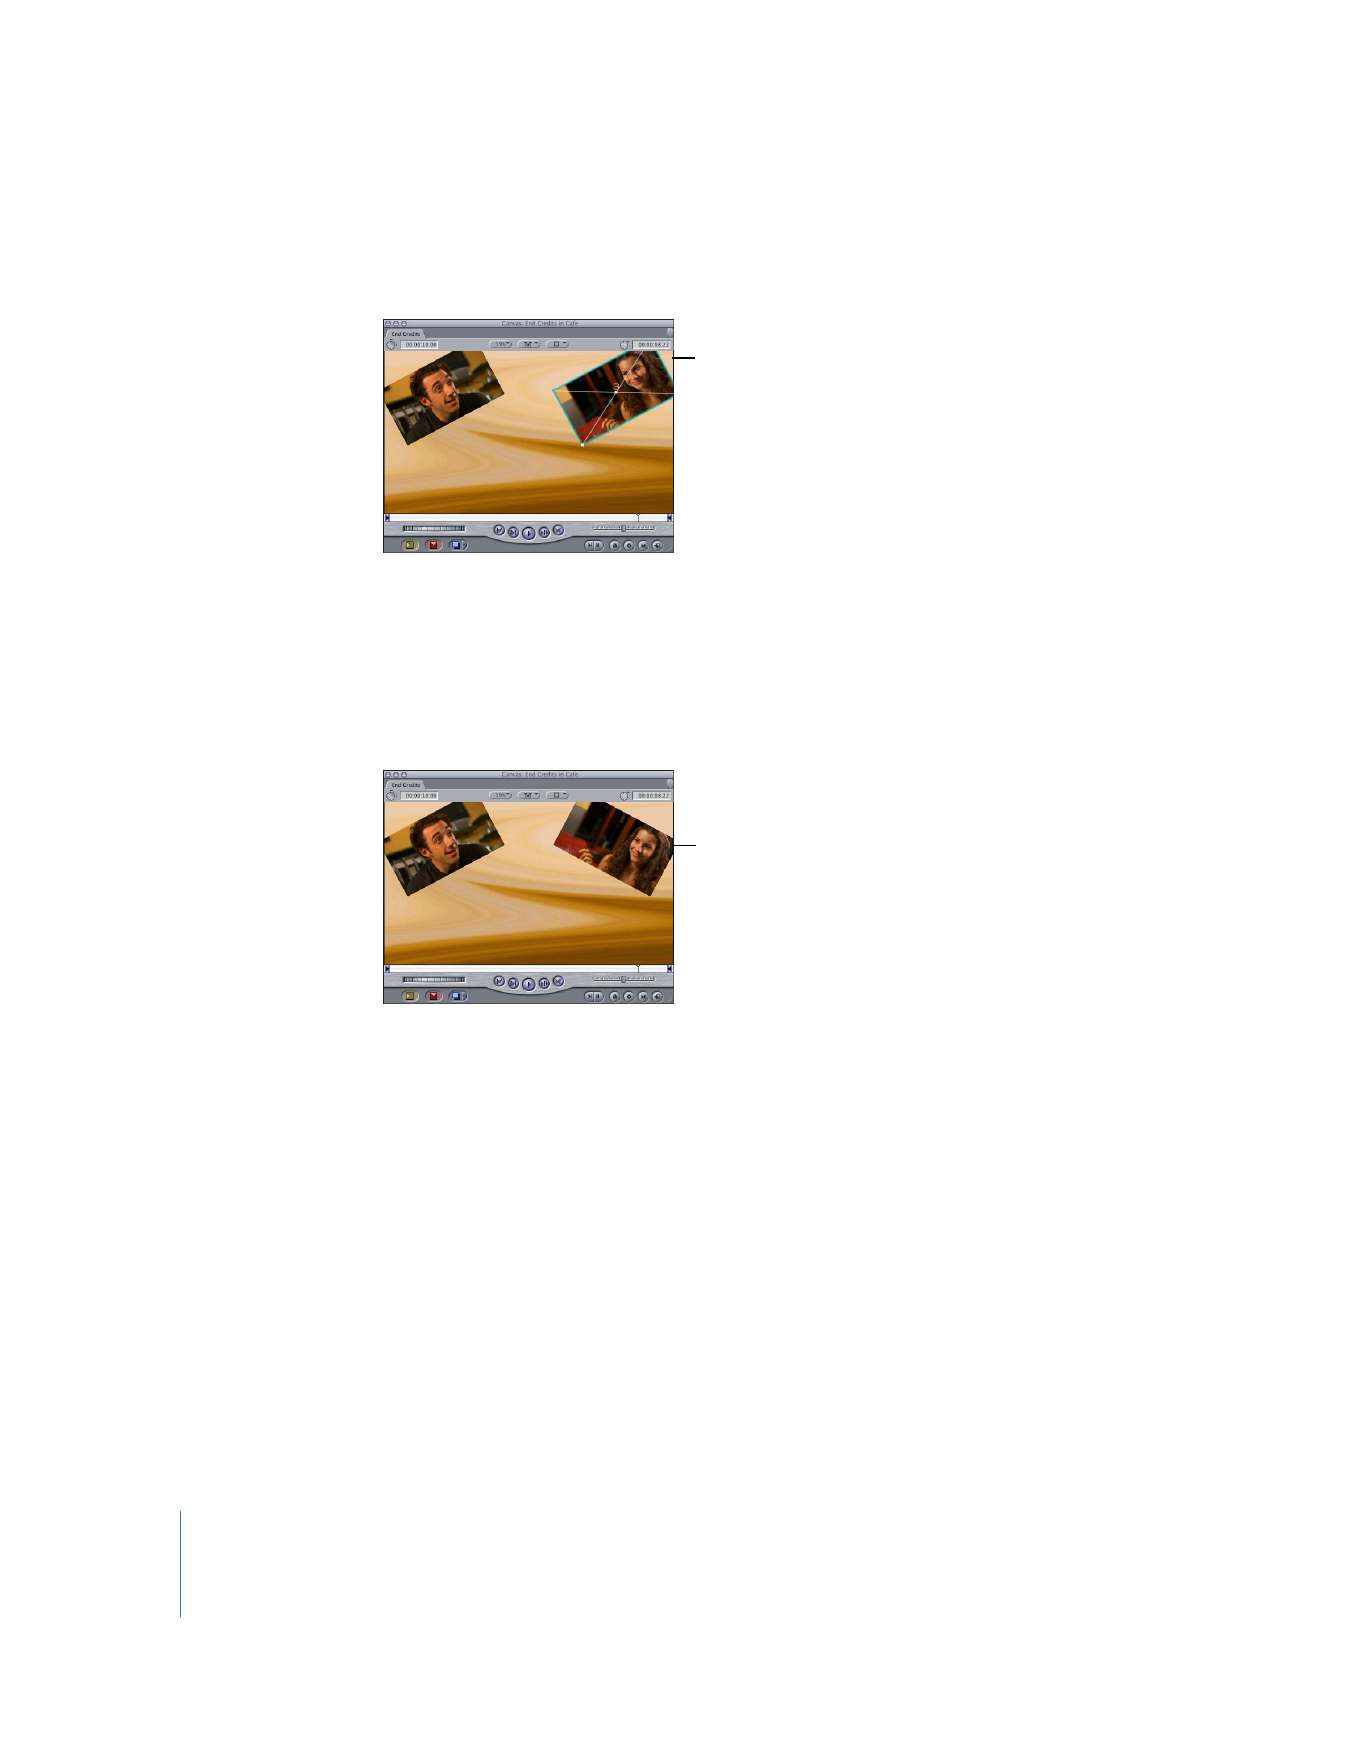
The two clips occupy the same position in the Canvas, but the clip on track V3 takes
precedence and appears in the Canvas.
Although you want to keep the size of this new clip the same, you want to position it in
the right corner, as a mirror image of your original clip.
11
Double-click the clip on track V3 to open it in the Viewer, then click the Motion tab.
This setting is the only
attribute you want
to copy.
The new clip on track V3
now has the same
motion settings as the
clip in track V2.
268
Part II
Effects
12
In the left number field of the Center parameter (the x coordinate), delete the minus
sign (–), then press Return.
Note: The x and y coordinates of a clip in the Canvas are based on the offset between
that clip’s center point and the center point of the Canvas. See “
Using Cartesian
Geometry to Position Clips
” on page 261 for more information.
Now, you want to make this clip rotate to the right rather than to the left.
13
Delete the minus sign (–) from the Rotation number field, then press the Return key.
Now that you have all your background layers set up, it’s time to edit in the foreground
clip that’s going to appear in front of these layers.
The value changes from
negative 218 to positive
218. The results appear
immediately in the
Canvas.
The two clips are now on
opposite sides, rotated
differently.
Chapter 14
Changing Motion Parameters
269
II
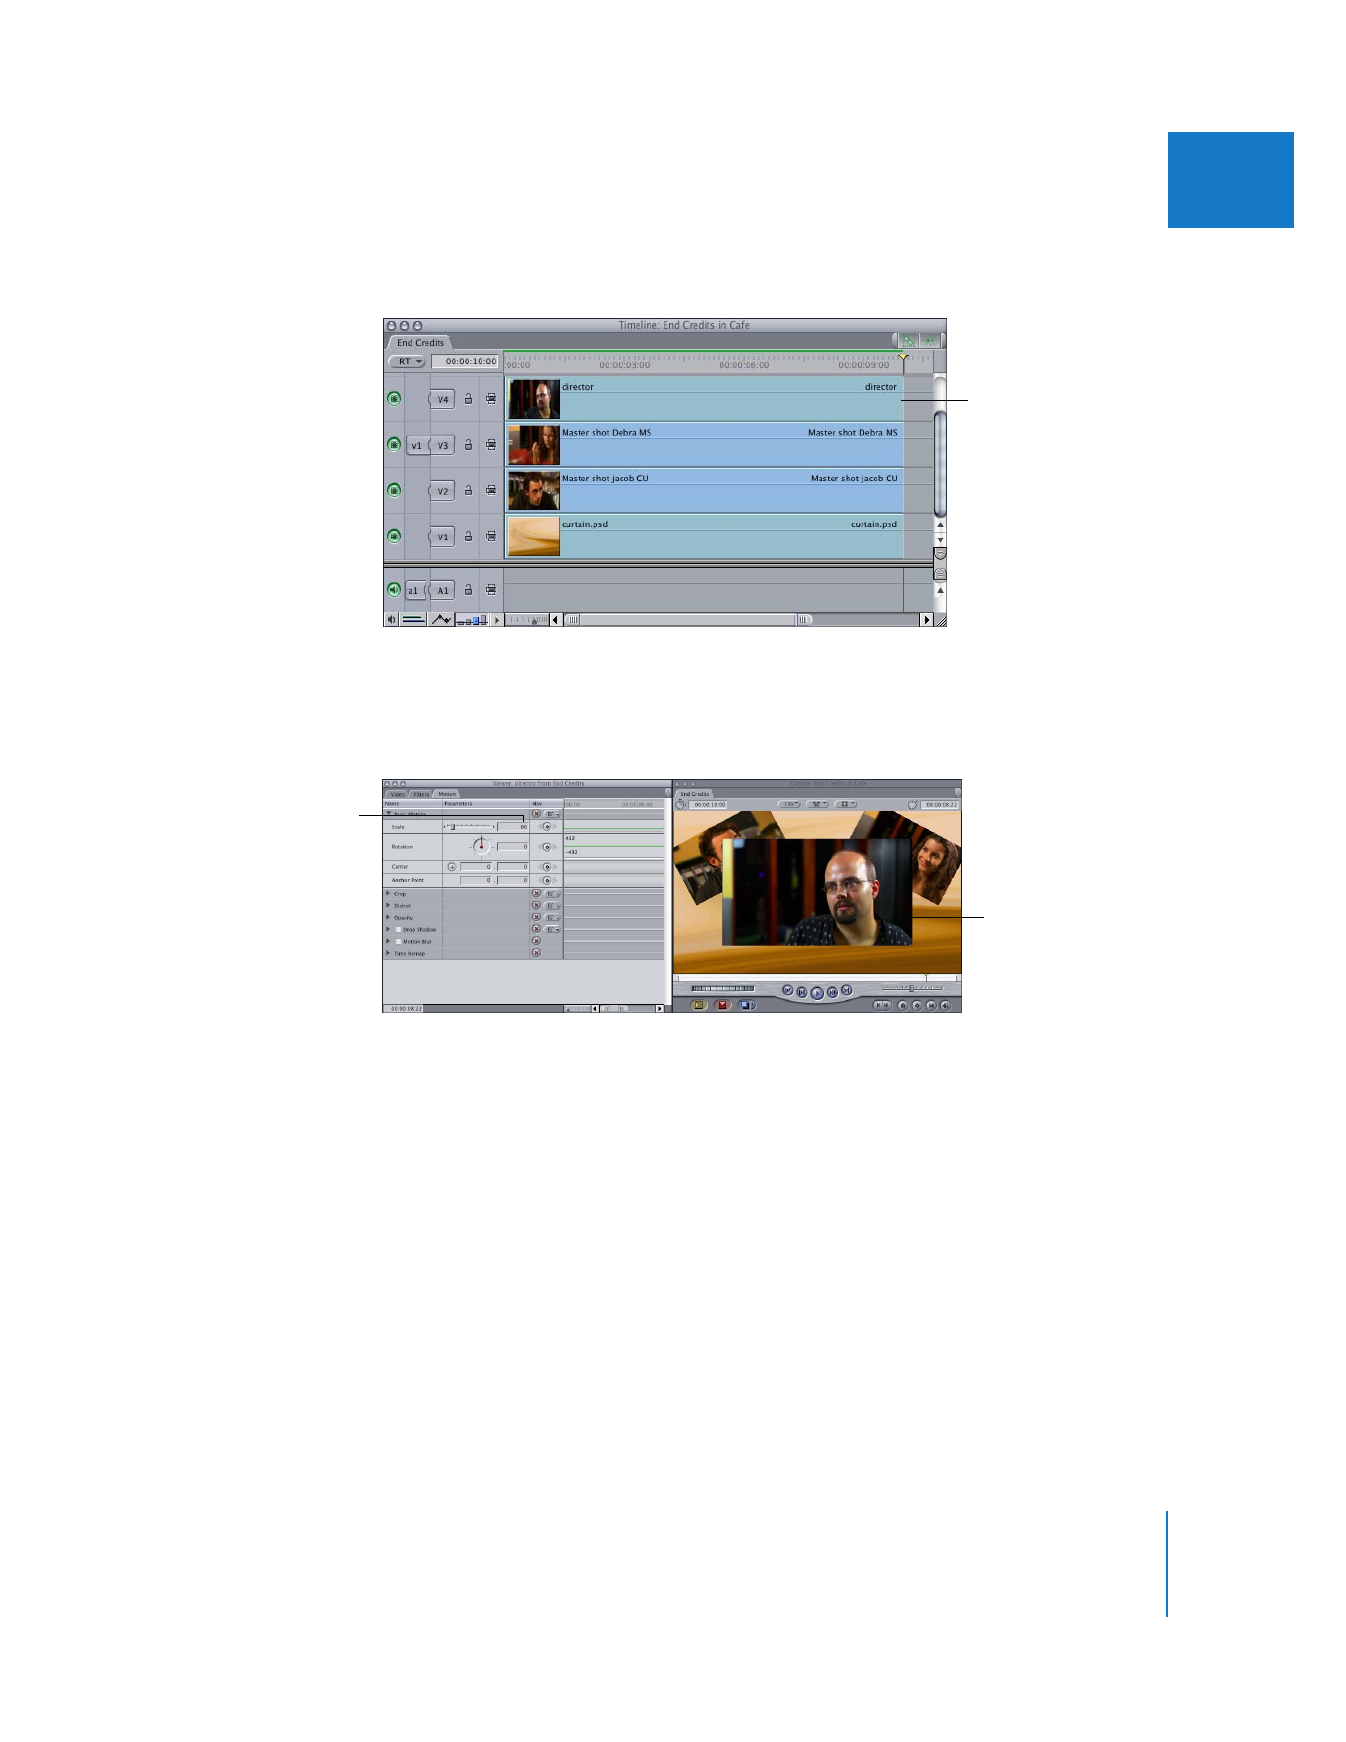
14
Using the same sequence In and Out points that you’ve been using, set the destination
track of your sequence to V3, then edit in the foreground clip using a superimpose edit.
15
Open this new clip in the Viewer, then click the Motion tab.
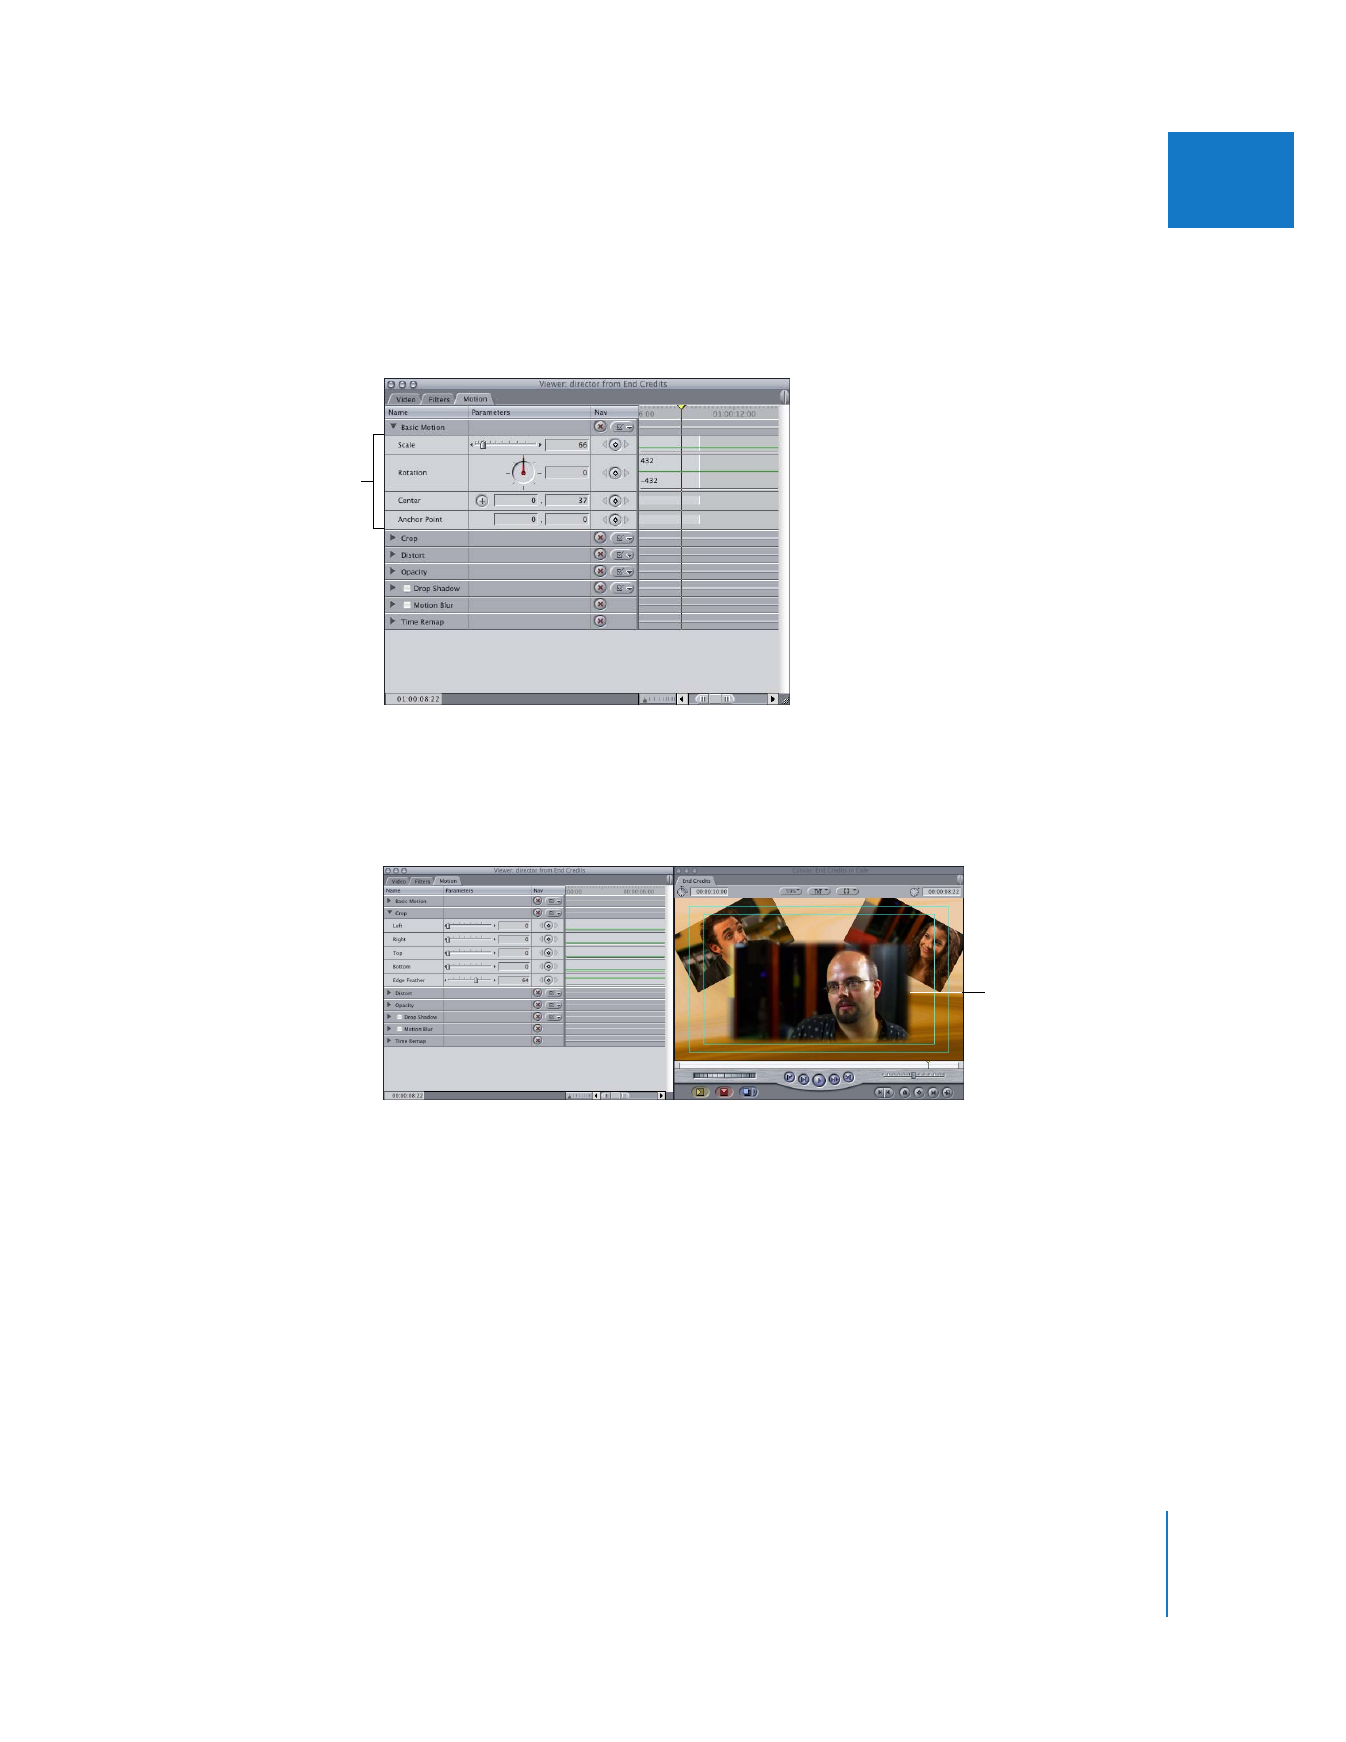
16
Click the Basic Motion disclosure triangle to reveal the Basic Motion parameters, then
adjust the Scale slider to 66, so that this clip is 66 percent of its original size.
Now you need to move this clip down so it doesn’t obscure the clips in the background
as much. To make sure important elements in your sequence are not cut off at the
edges when you’re layering these clips, you should show the Title Safe indicators. The
Title Safe indicators show the title safe and action safe boundaries, so you can position
your composited clips and titles accordingly.
The fourth clip is now
in your sequence.
Set the Scale slider to 66.
The foreground clip
is now 66 percent of
its original size.
270
Part II
Effects
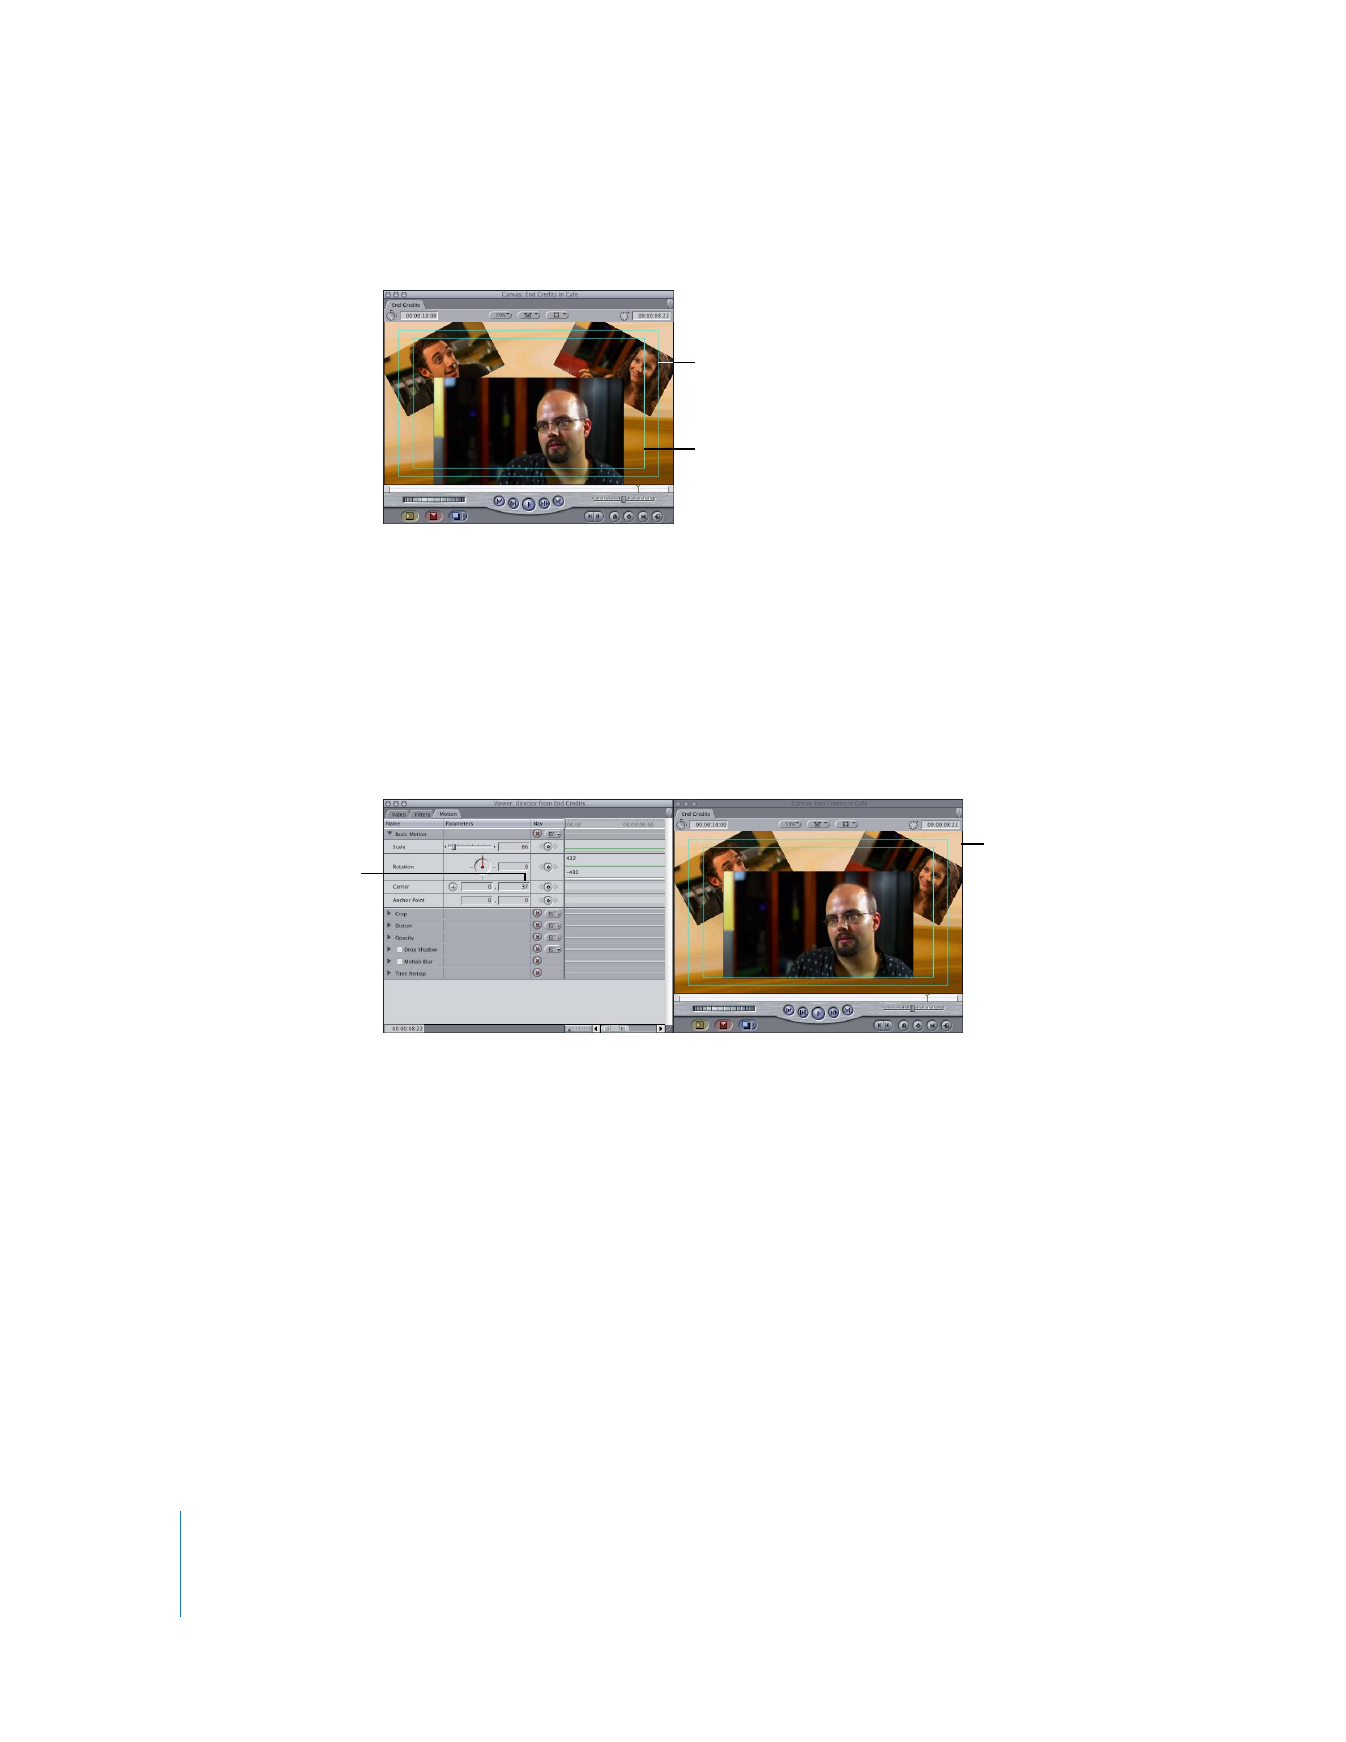
17
Choose View > Show Title Safe.
∏
Tip: Viewing title safe and action safe boundaries is especially important when creating
work that will be broadcast on television. Televisions cut off the edge of the video
frame to give the illusion that the picture takes up the entire TV screen. The amount
that gets cut off varies from manufacturer to manufacturer.
18
In the right number field of the Center parameter, enter “37.”
Viewing the title safe and action safe boundaries, you see that you’re within the area
that is viewable on most television monitors.
The action safe boundary
is 10 percent smaller than
the size of the video
frame.
The title safe boundary is
20 percent smaller than
the size of the video
frame.
Enter “37” here to move
the clip down 37 pixels.
You can now see more
of the clips in the
background.
Chapter 14
Changing Motion Parameters
271
II