Using Travel Mattes to Hide or Reveal Parts of a Clip
Travel mattes are useful when you want to use one clip to selectively hide or reveal part
of another. For example:
 To show parts of a video layer selectively revealed by a round spotlight shape
 To partially reveal video images playing through a title or logo graphic
 To use an imported graphic to obscure, or mask, part of a layer you don’t want to show
Because travel mattes use information in one layer to affect another, if the alpha
channel, black, or white elements of that layer move, then the resulting matte also
moves. This movement can be a result of:
 Using a video or animation clip as your matte layer
 Moving that layer around with keyframed motion parameters
For more information, see “
Creating Keyframed Motion Paths in the Canvas
” on page 311.

406
Part II
Effects
To create a travel matte:
1
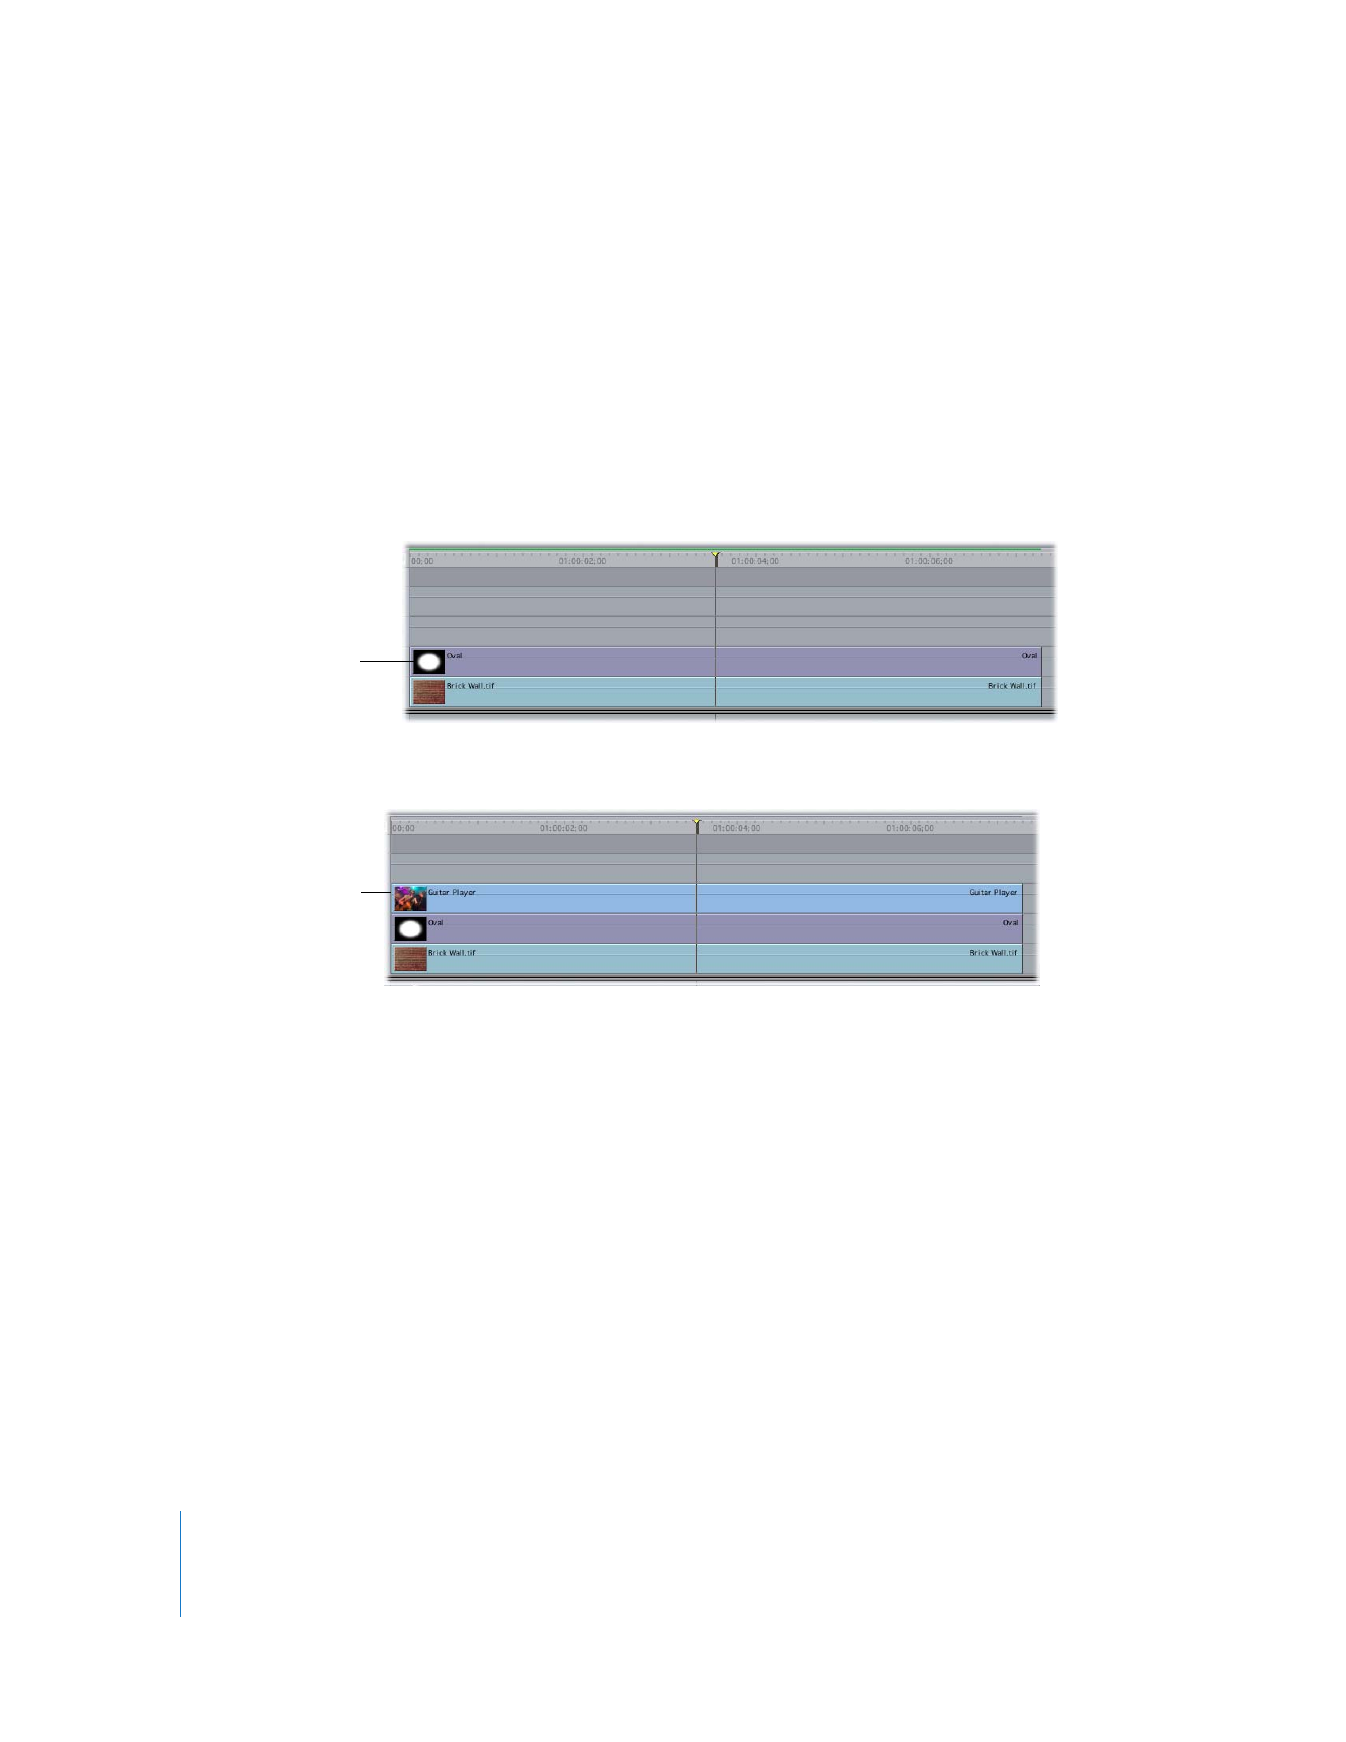
Place the clip you want to have appear in the background of your composite on track
V1 in the Timeline.
2
Place the clip you want to use as your matte layer on track V2, above the background clip.
 When using the Travel Matte - Alpha mode: Make sure that the clip has a properly
formatted alpha track (see “
Using Video and Graphics Clips with Alpha Channels
” on
page 410).
 When using the Travel Matte - Luma mode: Make sure that the black and white areas
of your clip are appropriately set—black for transparent areas, white for solid areas.
3
Place the main clip that you want masked on track V3, directly above the matte layer.
4
Select the main clip on track V3.
5
Choose Modify > Composite Mode, then choose Travel Matte - Alpha or Travel Matte -
Luma, depending on the clip you’re using as your matte layer on track V2.
 Alpha: Uses the clip’s alpha channel, if one exists, as the mask.
 Luma: Uses the luma, or grayscale image, of the clip as the mask.
Note: The matte clip’s RGB information won’t be seen.
The matte clip
goes above the
background clip.
The main clip to be
masked goes above
the matte clip.

Chapter 19
Compositing and Layering
407
II