Creating and Adding a Title Clip
When you’re creating a title clip for a sequence, you can create a basic title or specify
more options, including the font, size, alignment, and more advanced options such as
automatic kerning. Once you create the title clip, you add it the same way you would
edit any clip into your sequence.
Note: Generated text clips always adopt the frame size of the sequences they’re
edited into.
Text
Creates a static element of text.
This generator allows
carriage returns.
 The font, size, style, alignment,
and color of the generated
text can be modified. These
controls modify the entire text
element at once. Tracking,
Leading, and Aspect sliders
allow you to control the layout
of the generated text and can
be keyframed to create
interesting effects.
 Select the Auto Kerning
checkbox to kern your text
automatically so that the
spacing between the individual
letters of your text is correct.
Select the Use Subpixel
checkbox to render your text
with subpixel accuracy.
Typewriter
Generates text that appears
as if typed onto the screen, one
character at a time. This generator
allows carriage returns.
 The Location slider moves the
text element up and down in
the frame, and the Indent slider
moves it from side to side.
 The Pause slider increases or
decreases the amount of time
it takes for each character to
appear onscreen.
Text generator
Result
Tips for making settings

Chapter 23
Creating Titles
477
II
To create a title clip:
1
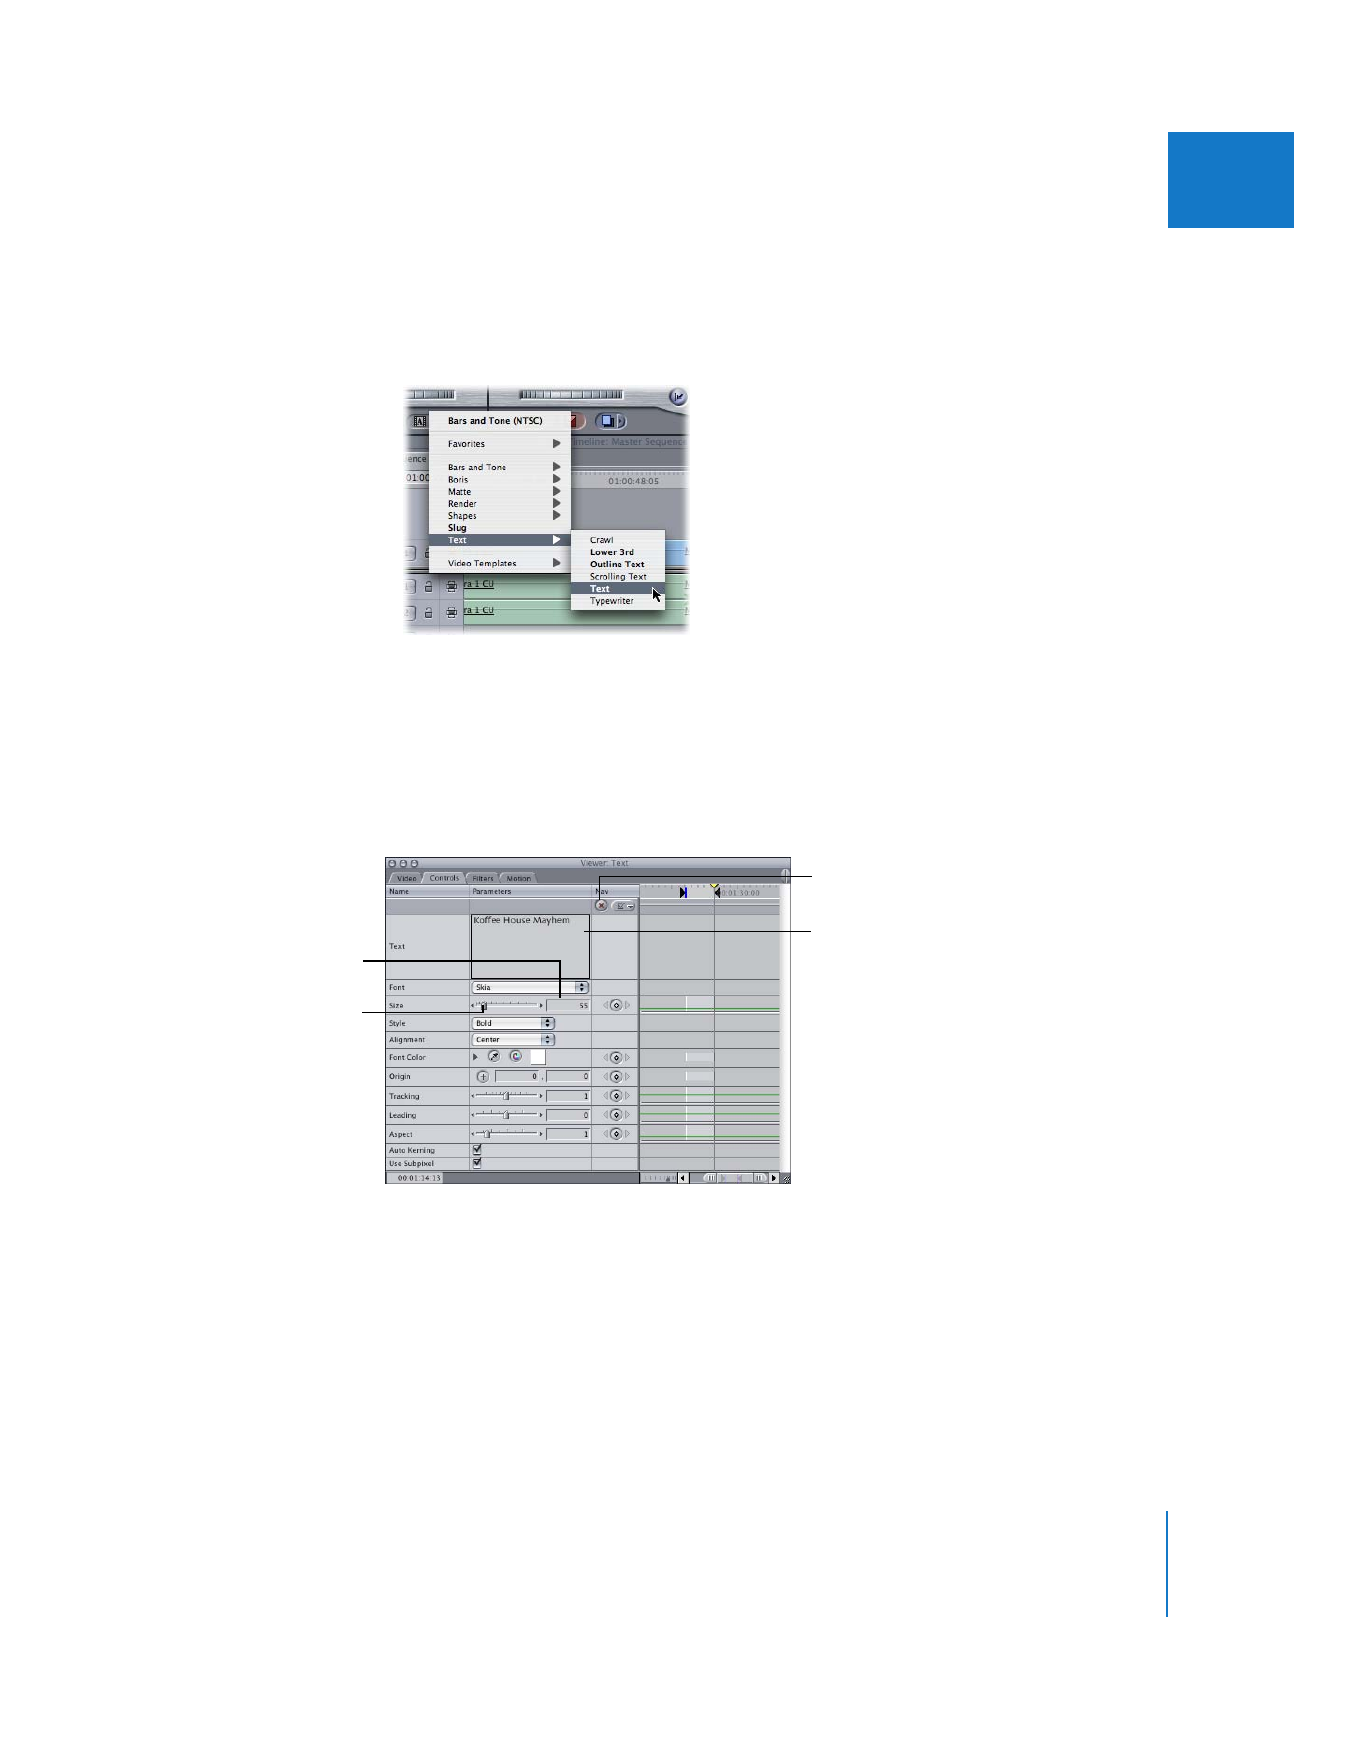
Select a text generator by doing one of the following:
 Click the Video or Audio tab in the Viewer, then choose a text generator from the
Generator pop-up menu.
 In the Effects tab of the Browser, double-click a text generator.
See “
Text Generators Available in Final Cut Pro
” on page 474 for detailed descriptions of
the choices.
2
In the Viewer, click the Controls tab.
3
In the Text field, type the text that will appear in your movie.
Enter title text in
this field.
Slider for the font size,
with arrows on either end
Reset button
Number field for
the font size

478
Part II
Effects
4
If you wish, specify additional settings.
Note: Different text generators have different controls.
 Text: Enter your title text in this field.
 Font: Choose a font from the Font pop-up menu.
 Size: Change the font size by entering a value or dragging the slider to the left or right.
 Alignment: Choose the alignment of your title on the screen from this pop-up menu.
Your choices are Left, Center, and Right.
 Font Color: Choose the color of your font by doing one of the following:
 Disclosure triangle: Click to display sliders and number fields corresponding to the
hue, saturation, and brightness of the range of colors available.
 Eyedropper tool: Click the eyedropper, then click an image in the Viewer or the
Canvas to pick up that color.
 Color picker: Click to choose a color using the standard color picker.
 Hue, saturation, and brightness controls (H, S, and B): Hue determines which color is
chosen; saturation determines how vivid the color is. If saturation is 0, the resulting
color is always white. Brightness determines how bright or dark the color is. If
brightness is 0, the resulting color is black; if brightness is 100, the color is the
lightest possible value.
 Origin: Origin refers to the center of the text. The Origin setting determines where
the text appears within the screen. You can position the text by clicking the point
control (a round button with crosshair) and then clicking a point in the Canvas or
Viewer (the pointer becomes a crosshair pointer). Or, you can enter x and y
coordinates in the Origin number fields.
It’s often easiest to make large adjustments manually with the point control and then
fine-tune the position by making numerical changes to the number fields. The most
visual way to position the text is to tear off the Viewer tab, click the point control,
and then drag the text to position it in the Viewer.
Note: Once you release the mouse button, you have to click the point control again
if you want to make further manual adjustments.

Chapter 23
Creating Titles
479
II
 Tracking: Use the slider to adjust the space between letters, or enter a value in the
number field.
 Leading: Use the slider to adjust the space between lines of text, or enter a value in
the number field.
 Aspect: Use the slider to adjust the ratio of letter height to letter width for your
selected font, or enter a value in the number field.
 Auto Kerning: Select the Auto Kerning checkbox to kern your text automatically so
that the spacing between the individual letters of your text is correct.
 Use Subpixel: Select the Use Subpixel checkbox to render your text with
subpixel accuracy.
Once you’ve created your text generator clip, you can add it to your sequence. For
more specific information, see Volume II, Chapter 6, “The Fundamentals of Adding Clips
to a Sequence.”
To add the title clip to your sequence:
1
In your sequence in the Timeline, set your destination track.
If you place the title clip on a track that’s above another track, the lower clip appears as
the background to the title.
2
Set the sequence or clip In and Out points.
3
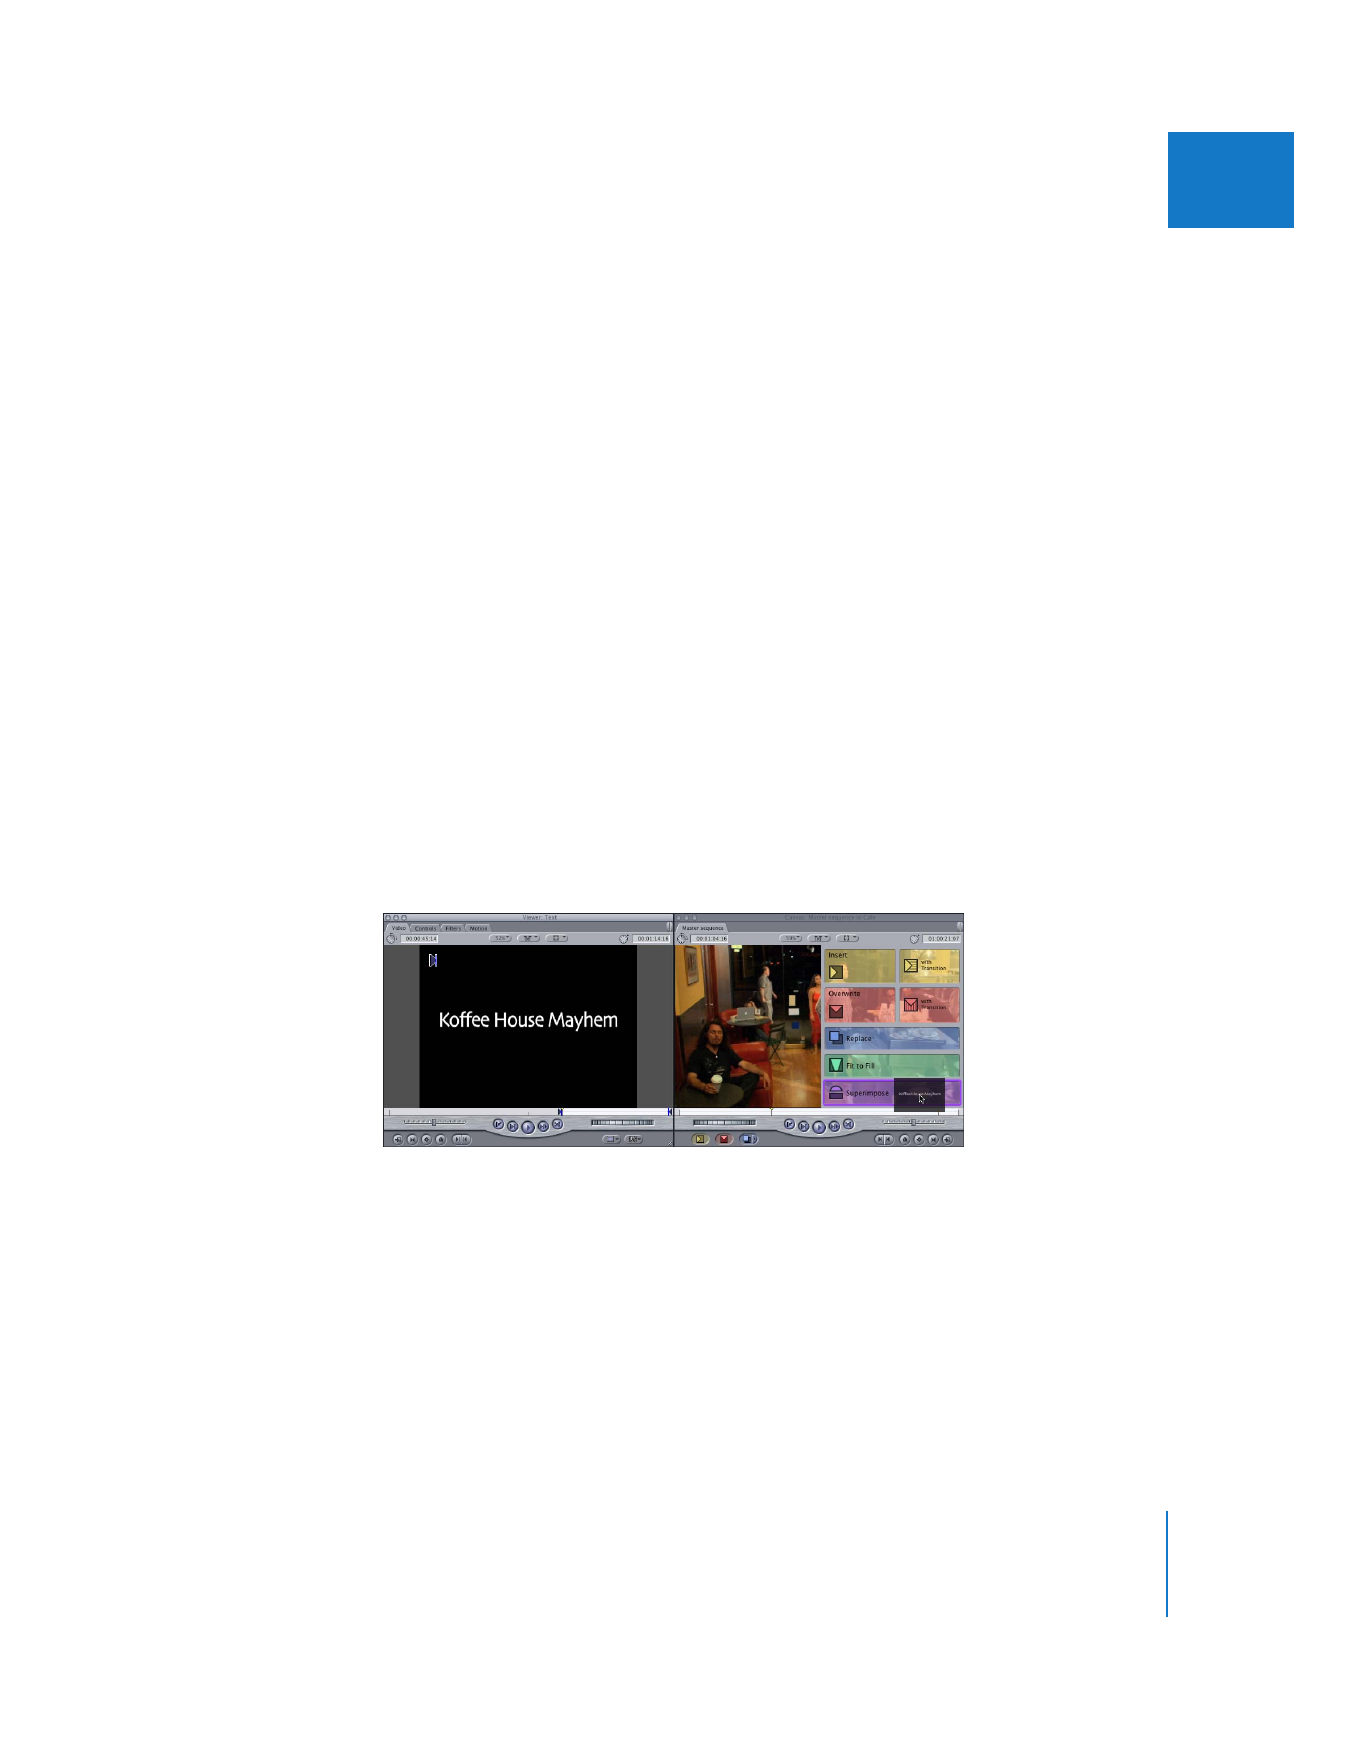
Click the Video tab in the Viewer, then drag the title clip from the Viewer to the Canvas
or Timeline.

480
Part II
Effects