
Example: Using the Chroma Keyer Filter
The following example illustrates a typical use of the Chroma Keyer filter.
1
Edit the green-screen clip you want to key into the Timeline.
If you wish, you can use a superimpose edit to place the green-screen clip over a clip
you want to use as the background.
∏
Tip: If you edit the clip into track V2 of the Timeline, you’ll have room to insert another
clip as the new composited background.
2
Apply the Chroma Keyer filter to the green-screen clip you just edited in.
For more information, see “
Applying a Filter to a Clip
” on page 218.
3
In the Timeline, double-click the green-screen clip to open it in the Viewer; then, in the
Viewer, click the Chroma Keyer tab.
Note: In this example, you won’t use the numeric controls that appear in the Filters tab.
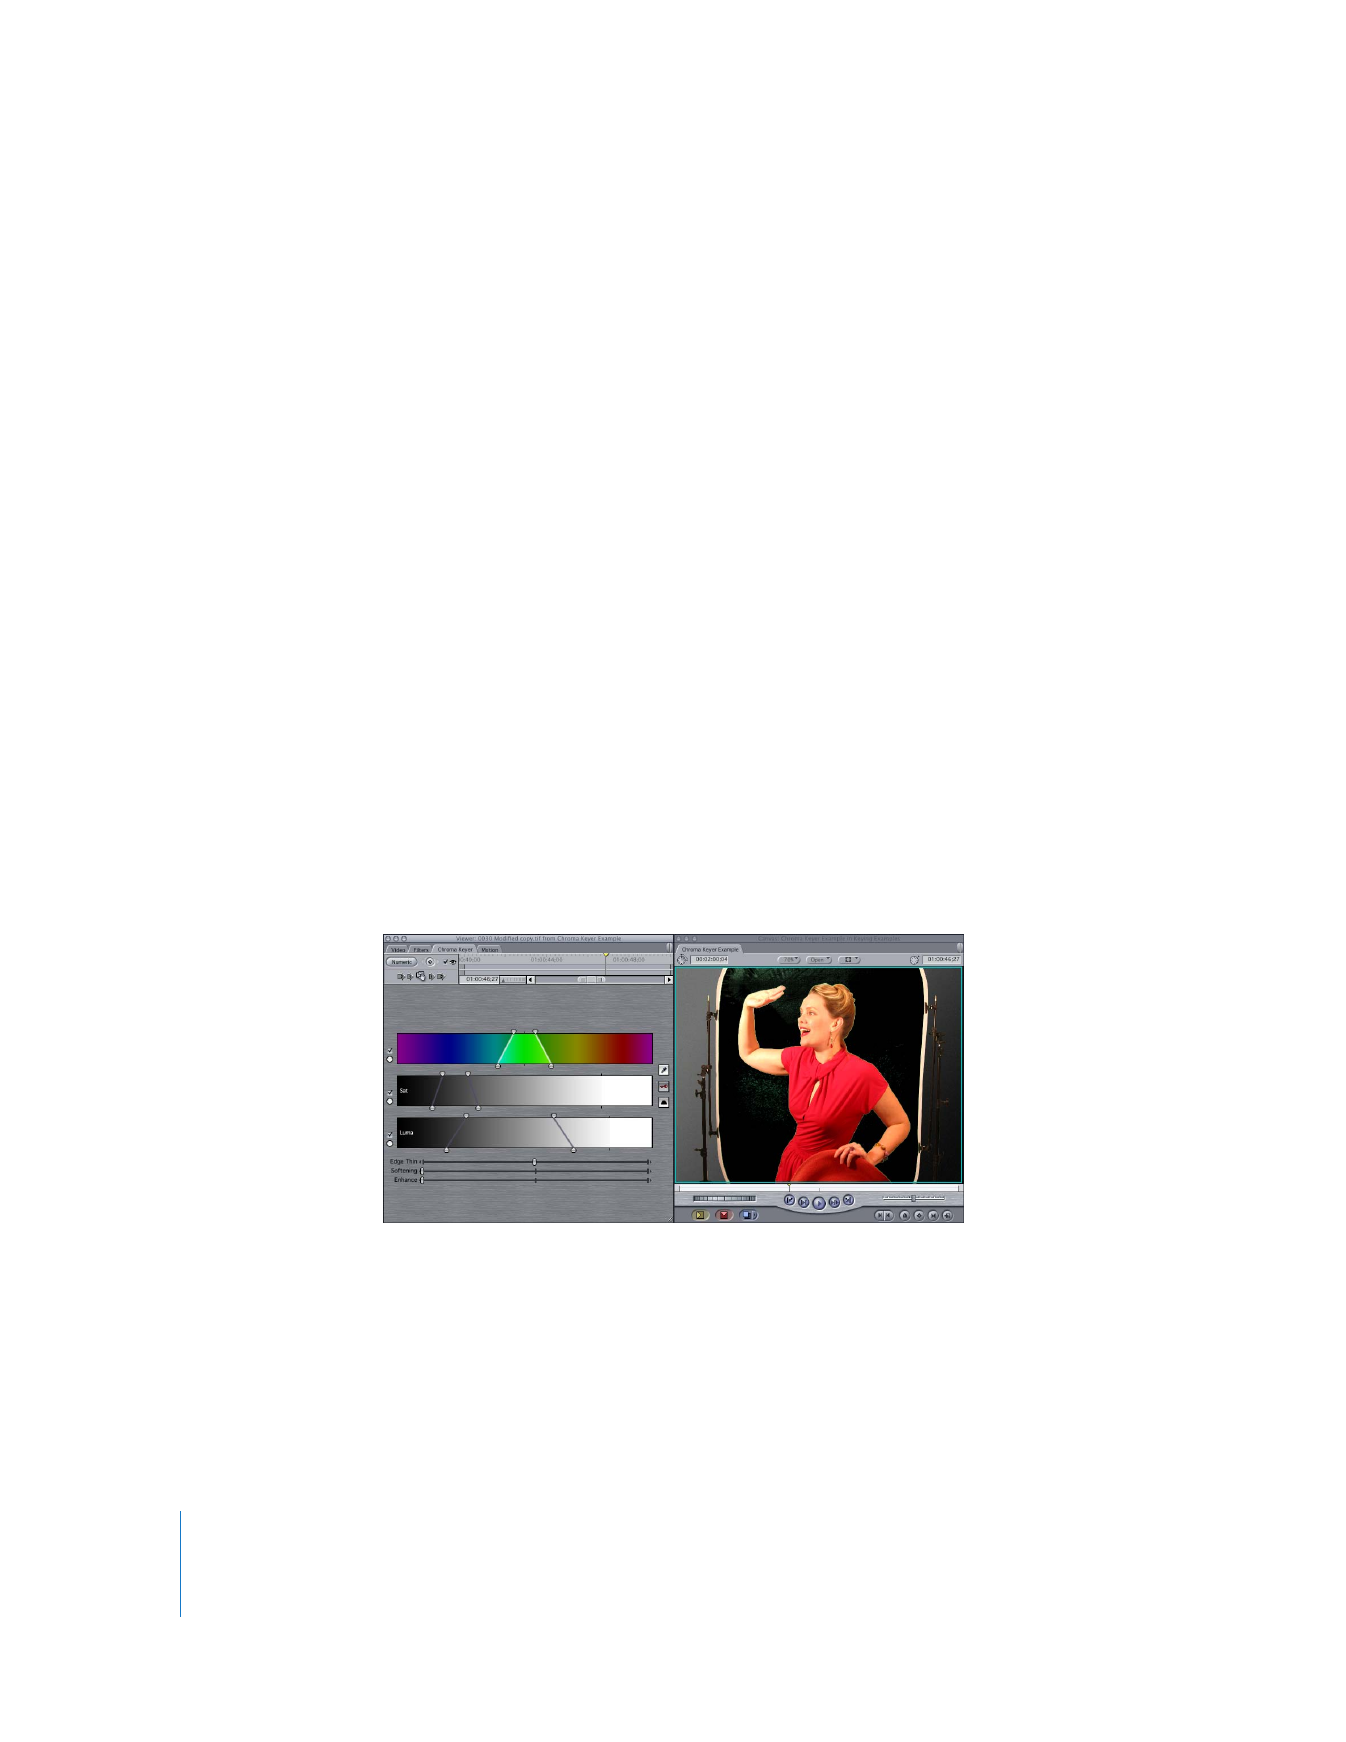
Three sliders at the bottom of
the Chroma Keyer let you make
further adjustments.
Chapter 20
Keying, Mattes, and Masks
435
II
4
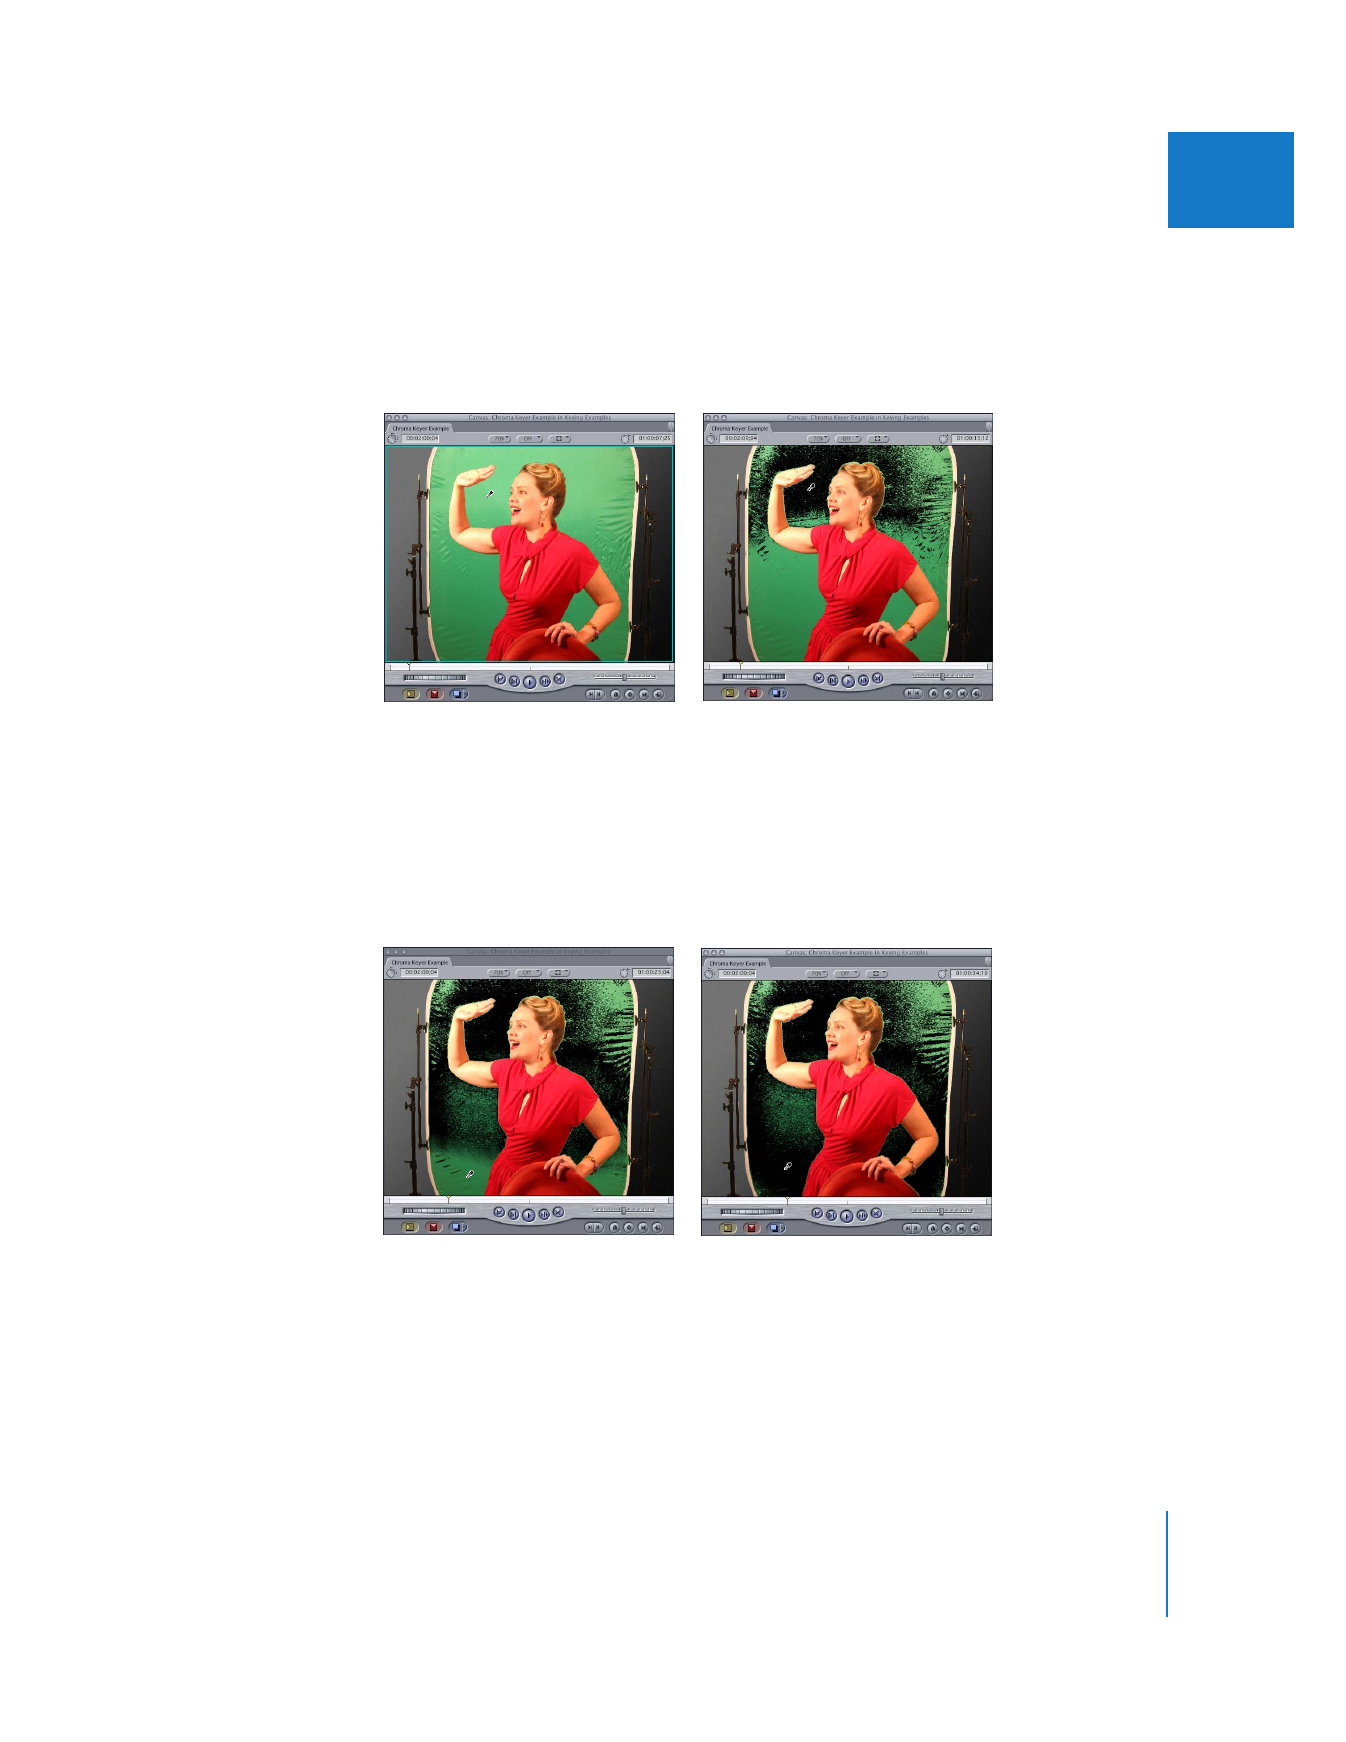
Click the Select Color eyedropper to pick a color in the clip to key, move the pointer to
the Canvas (it turns into an eyedropper), then click the desired key color. Choose a
color that’s fairly close to the edge of your foreground subject, so that the area near the
subject is the first area of color you key out.
The color range you select with the eyedropper becomes transparent in the clip.
Next, you want to expand the keyed area to include regions of the background that
weren’t immediately eliminated by the first key.
5
Click the Select Color eyedropper, and in the Canvas, Shift-click another region of the
background you want to key out to enlarge the region of transparency.
After selecting the first key color
(not all of the green is keyed out)
Before clicking with the
eyedropper tool
Before selecting another range
of color with the eyedropper tool
After selecting an additional range of
color
436
Part II
Effects
You can perform this step as many times as you need to. The goal is to eliminate as
much of the background as you can without affecting the foreground subject. If you
start encroaching on the outline of your foreground element, you’ve gone too far and
should undo. It is not necessary to remove all the background fringe around your
foreground subject with this step; you should focus only on eliminating the major areas
of the background screen.
∏
Tip: As you key out more and more of the background, you may find it helpful to use a
different background in the Canvas. The Checkerboard 1 and 2 backgrounds may make it
easier to see fringing areas of your picture that aren’t yet keyed out. You can also use other
background shades and colors to compare the key effect against a lighter background.
6
If necessary, adjust the Color Range, Saturation, and Luma controls to remove more of
the key color from the background and eliminate more fringing from the foreground
layer without affecting the foreground subject.
The top handles adjust the overall range of hue, saturation, or luma keyed out, while
the bottom handles blur the difference between the range of color that’s keyed and
the range of color that isn’t.
Note: You should remove the majority of the green screen using the top handles, but
stop at the point where there’s still some fringing around the areas of fine detail in the
foreground subject. This is the point where you should start using the bottom handles
to expand the keyed area more softly. It is not important, at this point, to completely
eliminate this fringing, only to make sure that it’s soft and translucent, rather than
pixelated and solid.
Chapter 20
Keying, Mattes, and Masks
437
II
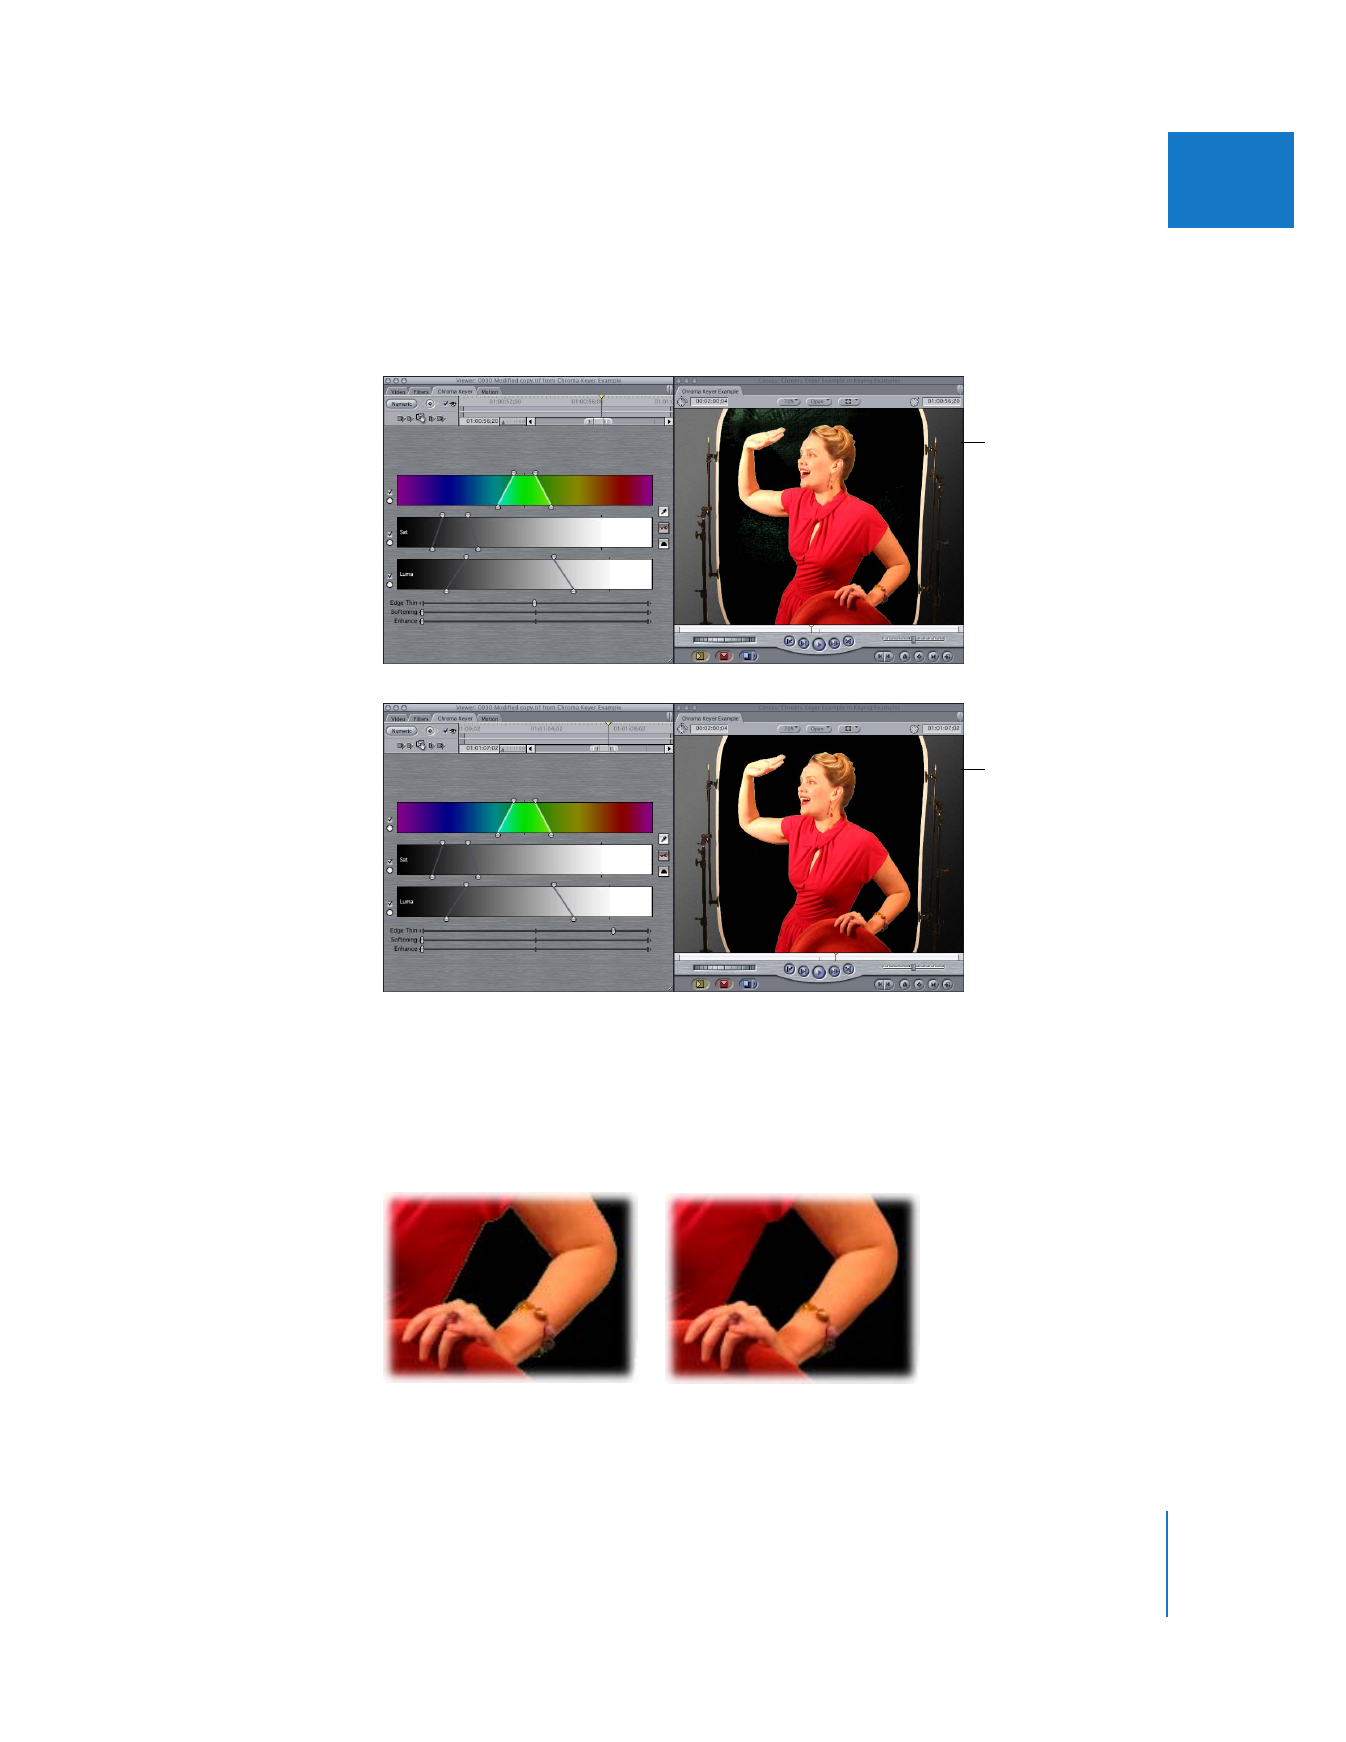
7
Depending on how the edges of your foreground subject look, you may want to make
adjustments using the Edge Thin slider. The Edge Thin slider allows you to shrink the
alpha channel created by the Chroma Keyer to begin to eliminate the light fringing
that remains around the edges of the foreground subject.
8
An optional step at this point is to use the Softening slider to blur the edges of the
foreground subject. This is especially helpful if the edges of your foreground subject
look rough because of compression artifacts that appear as blocky edges around your
foreground subject. Don’t overdo this adjustment, as you could start to lose details in
the subject that you’re trying to preserve.
Before adjusting the
Edge Thin slider
After dragging the
Edge Thin slider to the
right
Before adjusting the
Softening slider
After dragging the Softening slider
slightly to the right
438
Part II
Effects
9
If you still see light fringing at this point, or if you were forced to use settings so
extreme in the Chroma Keyer that some of your foreground subject was eaten away
around the edges, apply the Matte Choker filter. After you apply the Matte Choker filter,
adjust the Matte Choker’s Edge Thin and Edge Feather sliders. This is the point where
you should work to eliminate all the background fringing.
Moving the Edge Thin slider to the right further shrinks the alpha channel around the
foreground subject, eliminating still more fringing. Moving the Edge Thin slider to
the left expands the alpha channel, allowing you to replace areas of the foreground
subject that were lost. The Edge Feather slider allows you to blur the edges even
further, if necessary.
10
If you’re satisfied with your key, but there is some color from the background that is
spilling onto the edges of your foreground subject, go back to the Chroma Keyer tab in
the Viewer and adjust the Enhance slider to desaturate this spill so that it’s not
noticeable. Don’t move the Enhance slider too far, or you may get undesirable
coloration in the edge of your subject.
11
If there’s still more colored spill on your foreground subject that the Enhance slider
didn’t eliminate, apply the Spill Suppressor filter.
The Spill Suppressor filter desaturates color spill that may appear anywhere on the
foreground subject, not just on the edges. For example, a little of the background color
may show through translucent areas of the foreground subject, such as wispy hair or
sheer clothing. Once you’ve applied the Spill Suppressor filter to your keyed clip, adjust
the Amount slider to determine how much to desaturate the spill color in the
foreground image.
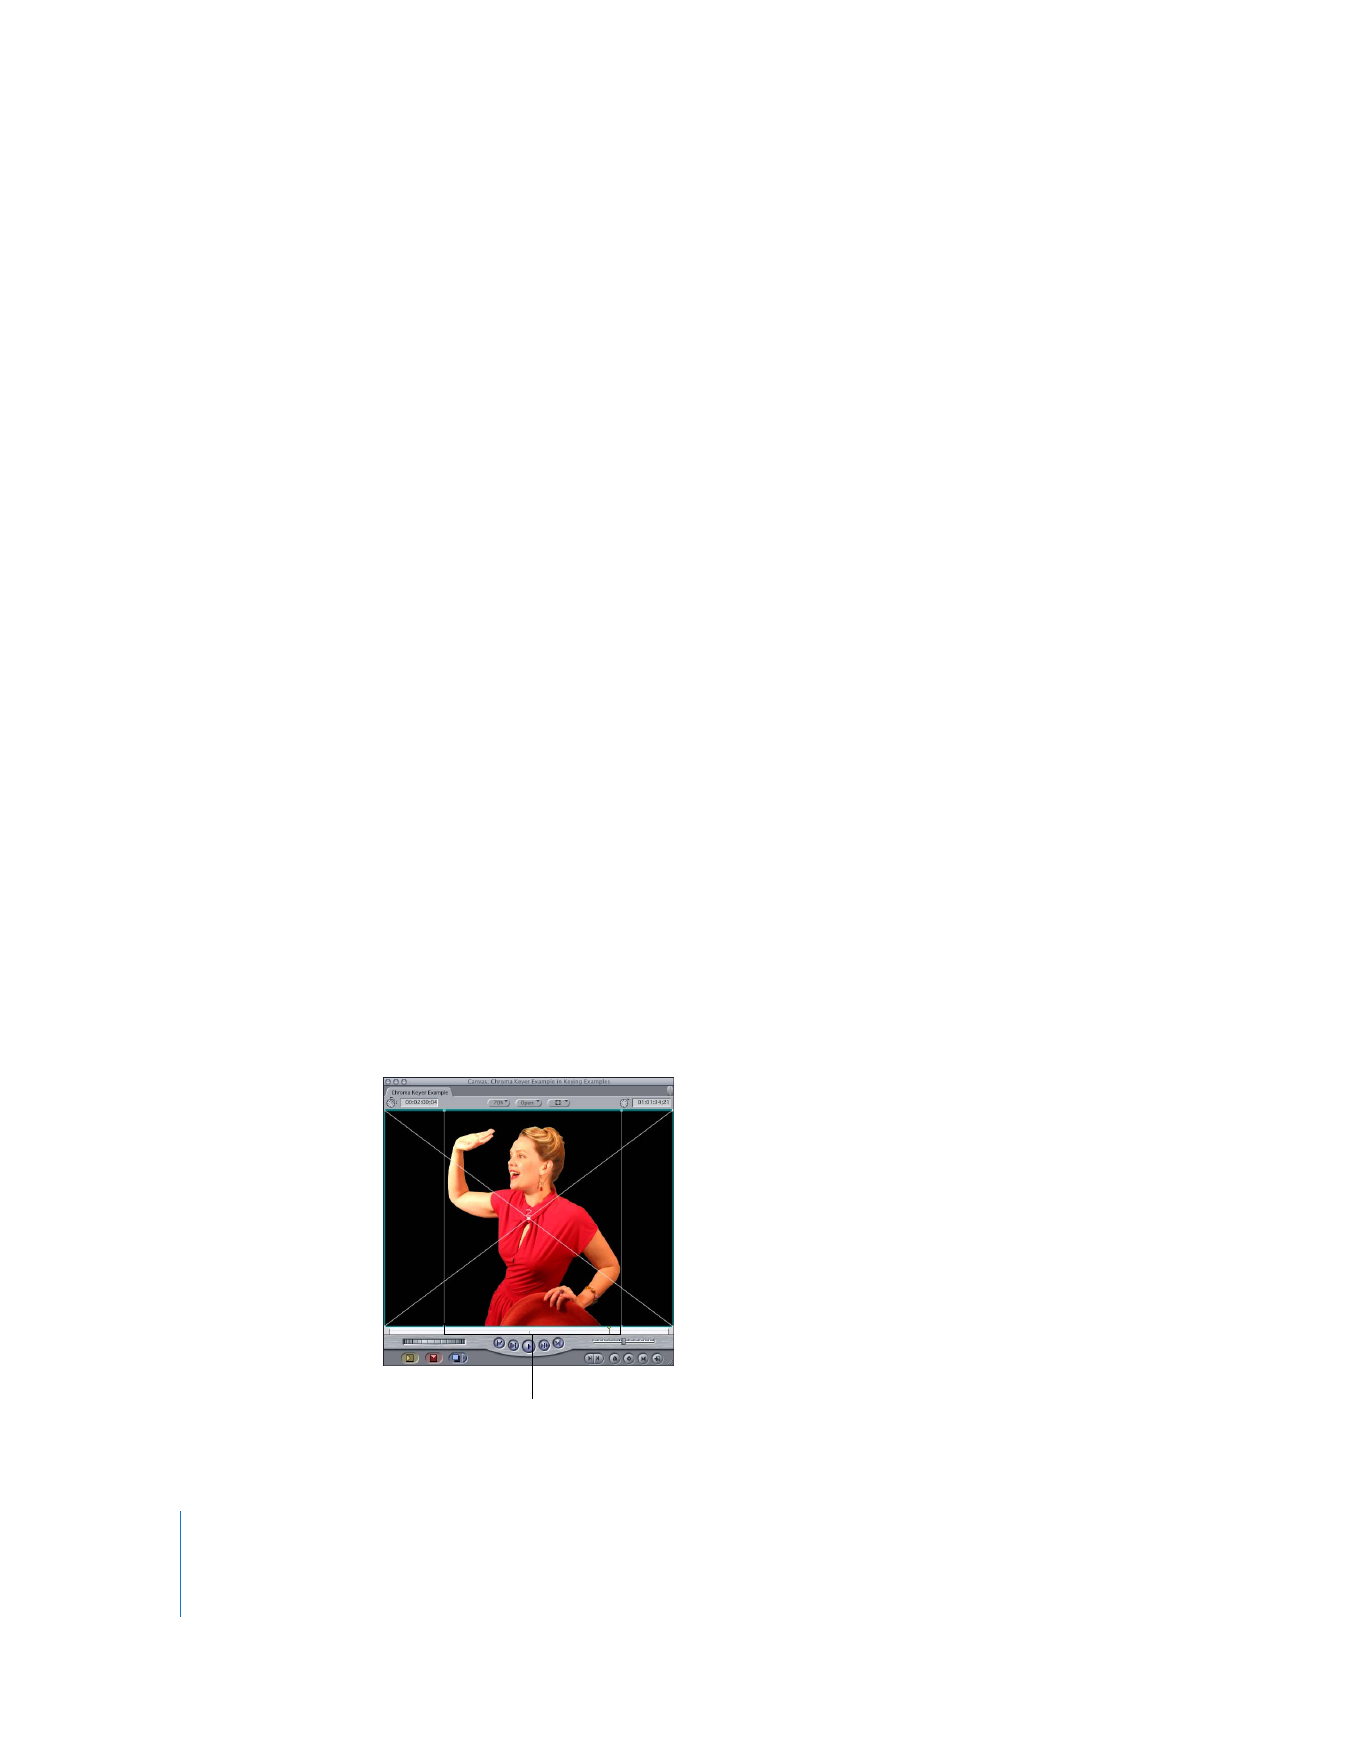
12
To eliminate any unwanted elements that didn’t get keyed out, such as rigging and lights
around your subject or the edge of the blue or green screen itself, use the Crop parameter
controls in the Motion tab of the foreground clip to cut those elements out of the picture.
If the area you need to crop is irregular, you can apply a Garbage Matte filter, instead.
The image is cropped
on both sides to remove
extraneous elements.
Chapter 20
Keying, Mattes, and Masks
439
II
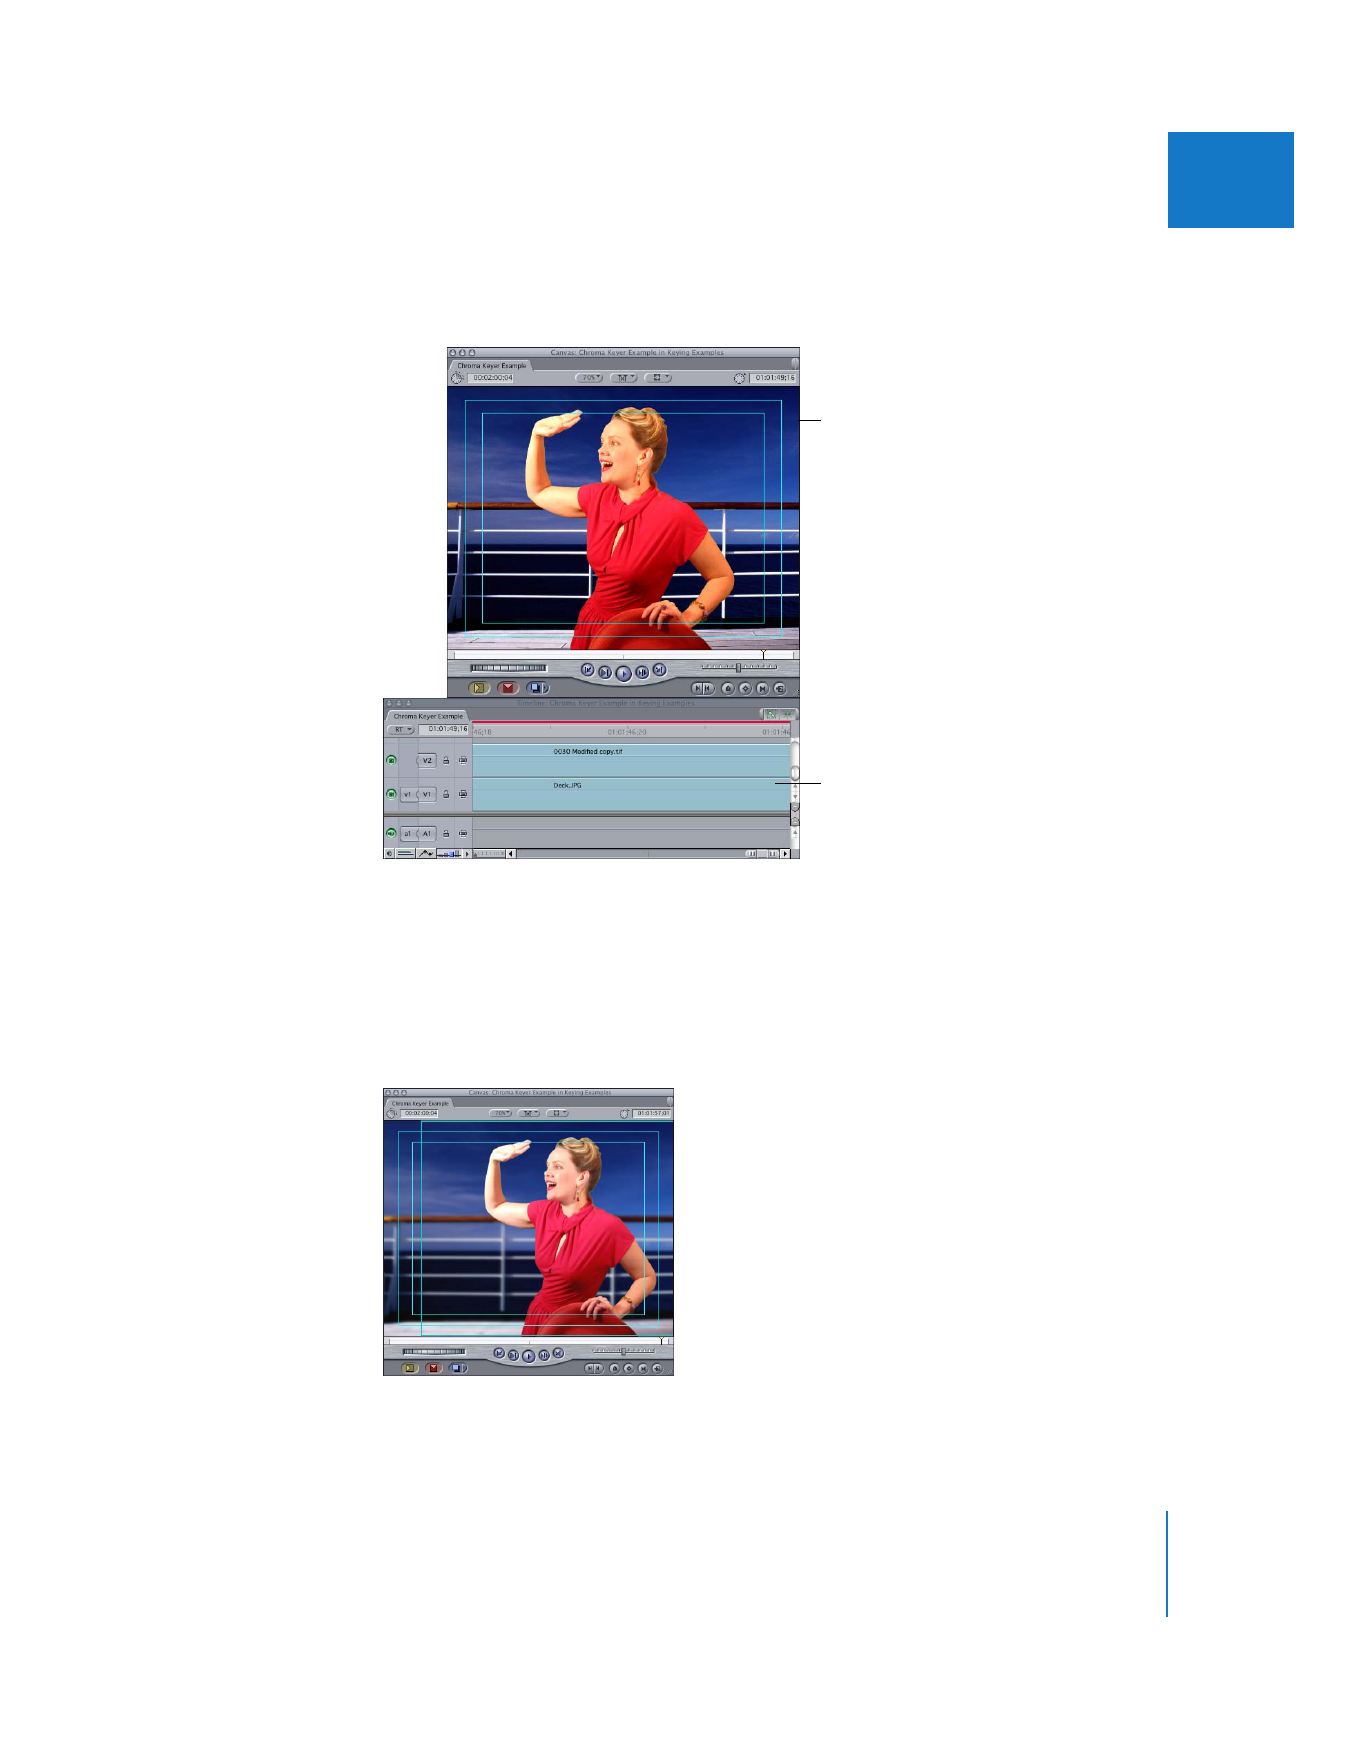
13
Finally, you’re ready to insert the background image. Make sure that the clip you’re
editing into your sequence to use as the background image appears in a video track
below the foreground clip being keyed.
14
To really make the foreground and background look as if they were shot together, it
may be necessary to perform additional compositing steps such as blurring the
background to make it look out of focus, color correcting the foreground subject to
have the same color temperature as the background, or using motion effects to move
the foreground subject. Even with a successful key, these are the details that make a
composite look like a finished shot.
The background image
now appears.
The background image
is placed below the
foreground clip that
was keyed.

440
Part II
Effects