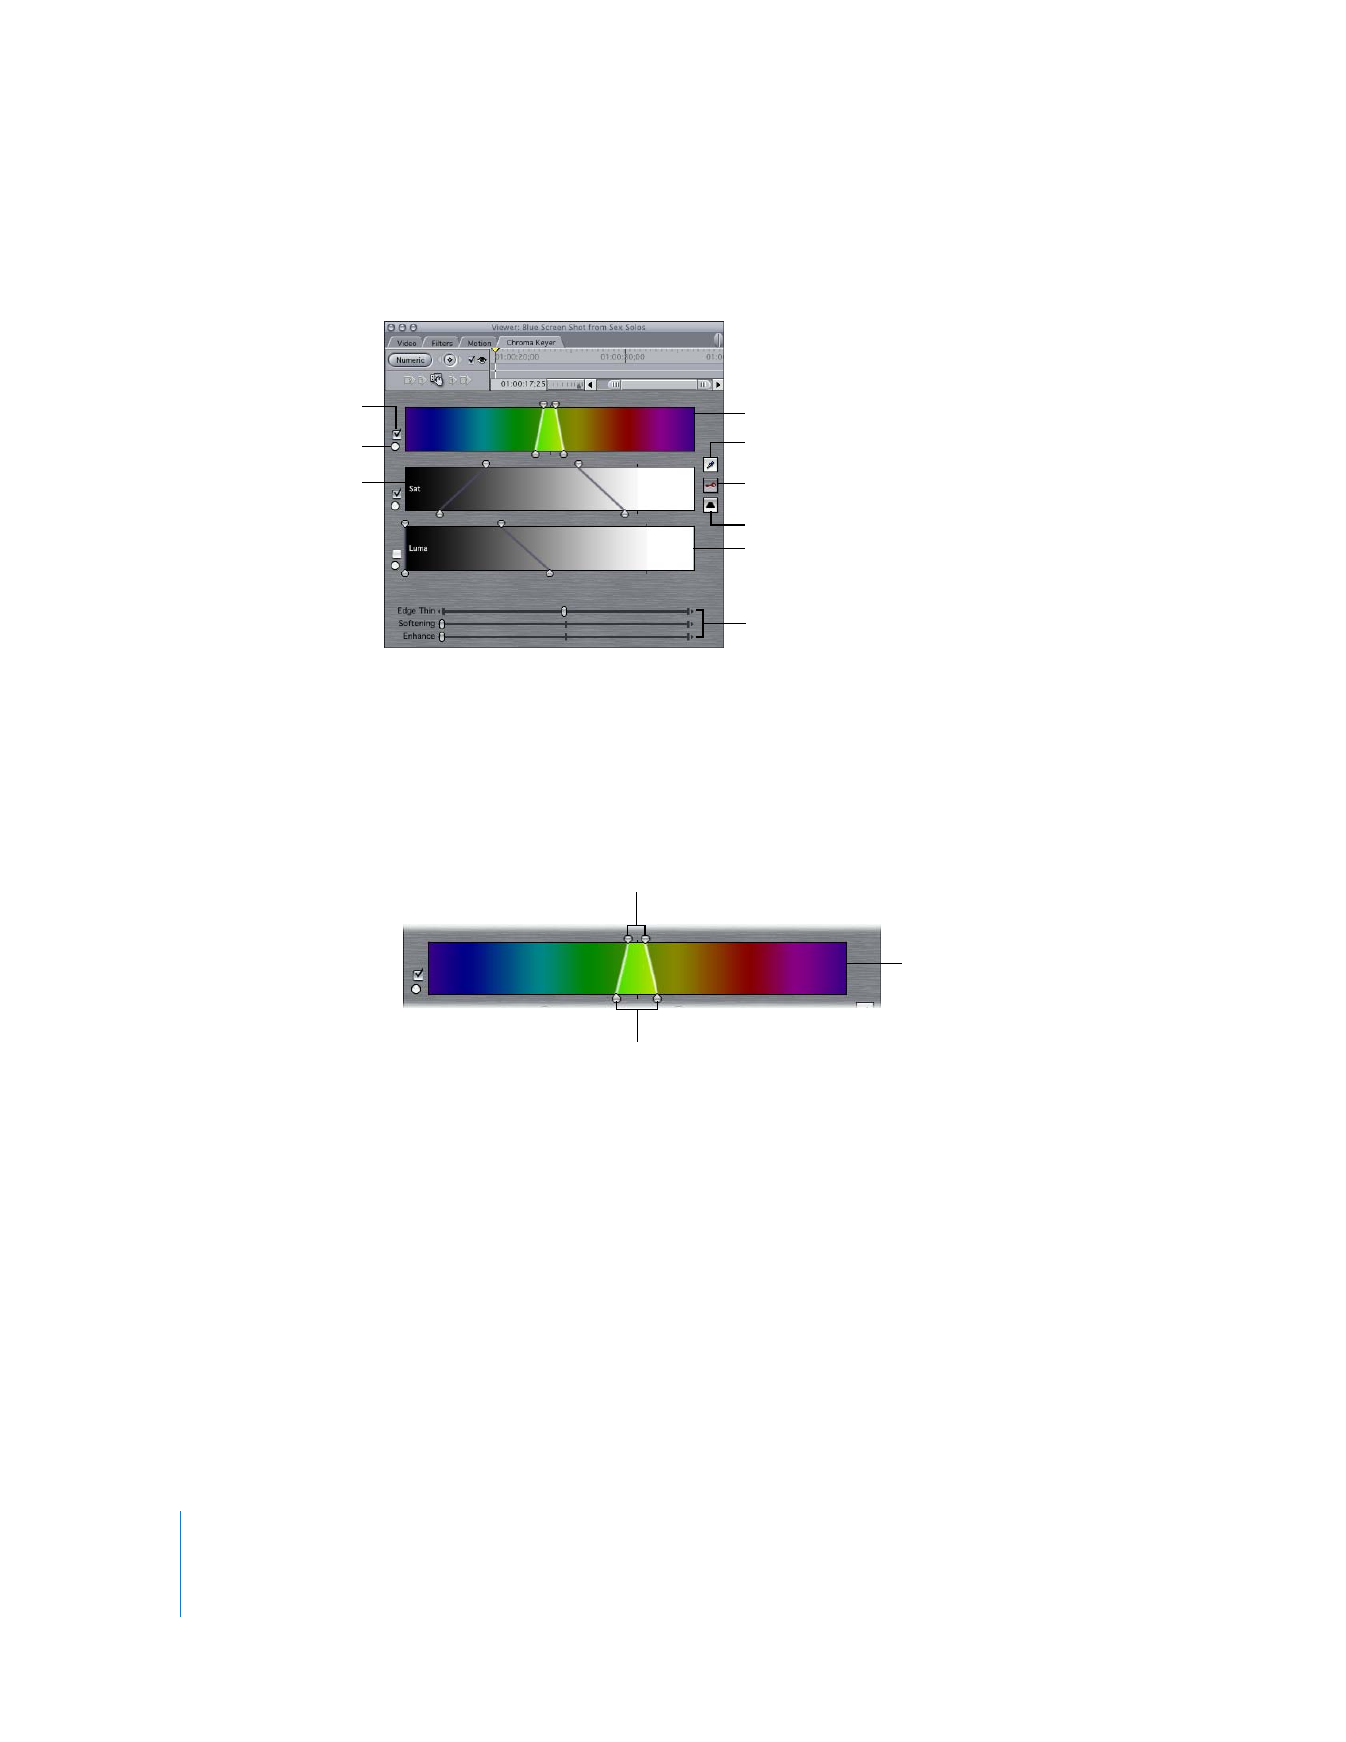
Visual Controls in the Chroma Keyer Filter
The following controls appear in the Chroma Keyer tab in the Viewer.
 Enable/Disable checkbox: Make sure there’s a checkmark in this checkbox for the
controls you want to use. This lets you add or remove color, saturation, or luma from
the criteria used to define a key.
 Reset button: Click to restore the Color Range, Saturation, and Luma controls to their
default values. Shift-click the button to reset all three controls at once.
 Color Range control: Allows you to fine-tune the range of color that you want to key on.
 Top handles: Let you select a larger or smaller range of colors that are keyed, based
on the original colors you selected with the Select Color eyedropper tool. These
handles correspond to the Width control in the Key on Chroma area of the filter’s
numeric controls.
 Color gradient: Drag left or right within the color gradient to shift the overall hue
of the color range you’ve set with the top set of handles. This corresponds to the
Center On control in the Key on Chroma area of the filter’s numeric controls.
 Bottom handles: Allow you to define the tolerance of your key. These handles
correspond to the Softness control in the Key on Chroma area of the filter’s
numeric controls. Use these handles to gently eliminate additional fringing from
your key while attempting to preserve fine detail around the edges of your
foreground subject.
View Final/Matte/Source button
Color Range control
Enable/Disable checkbox
Reset button
Saturation control
Luma control
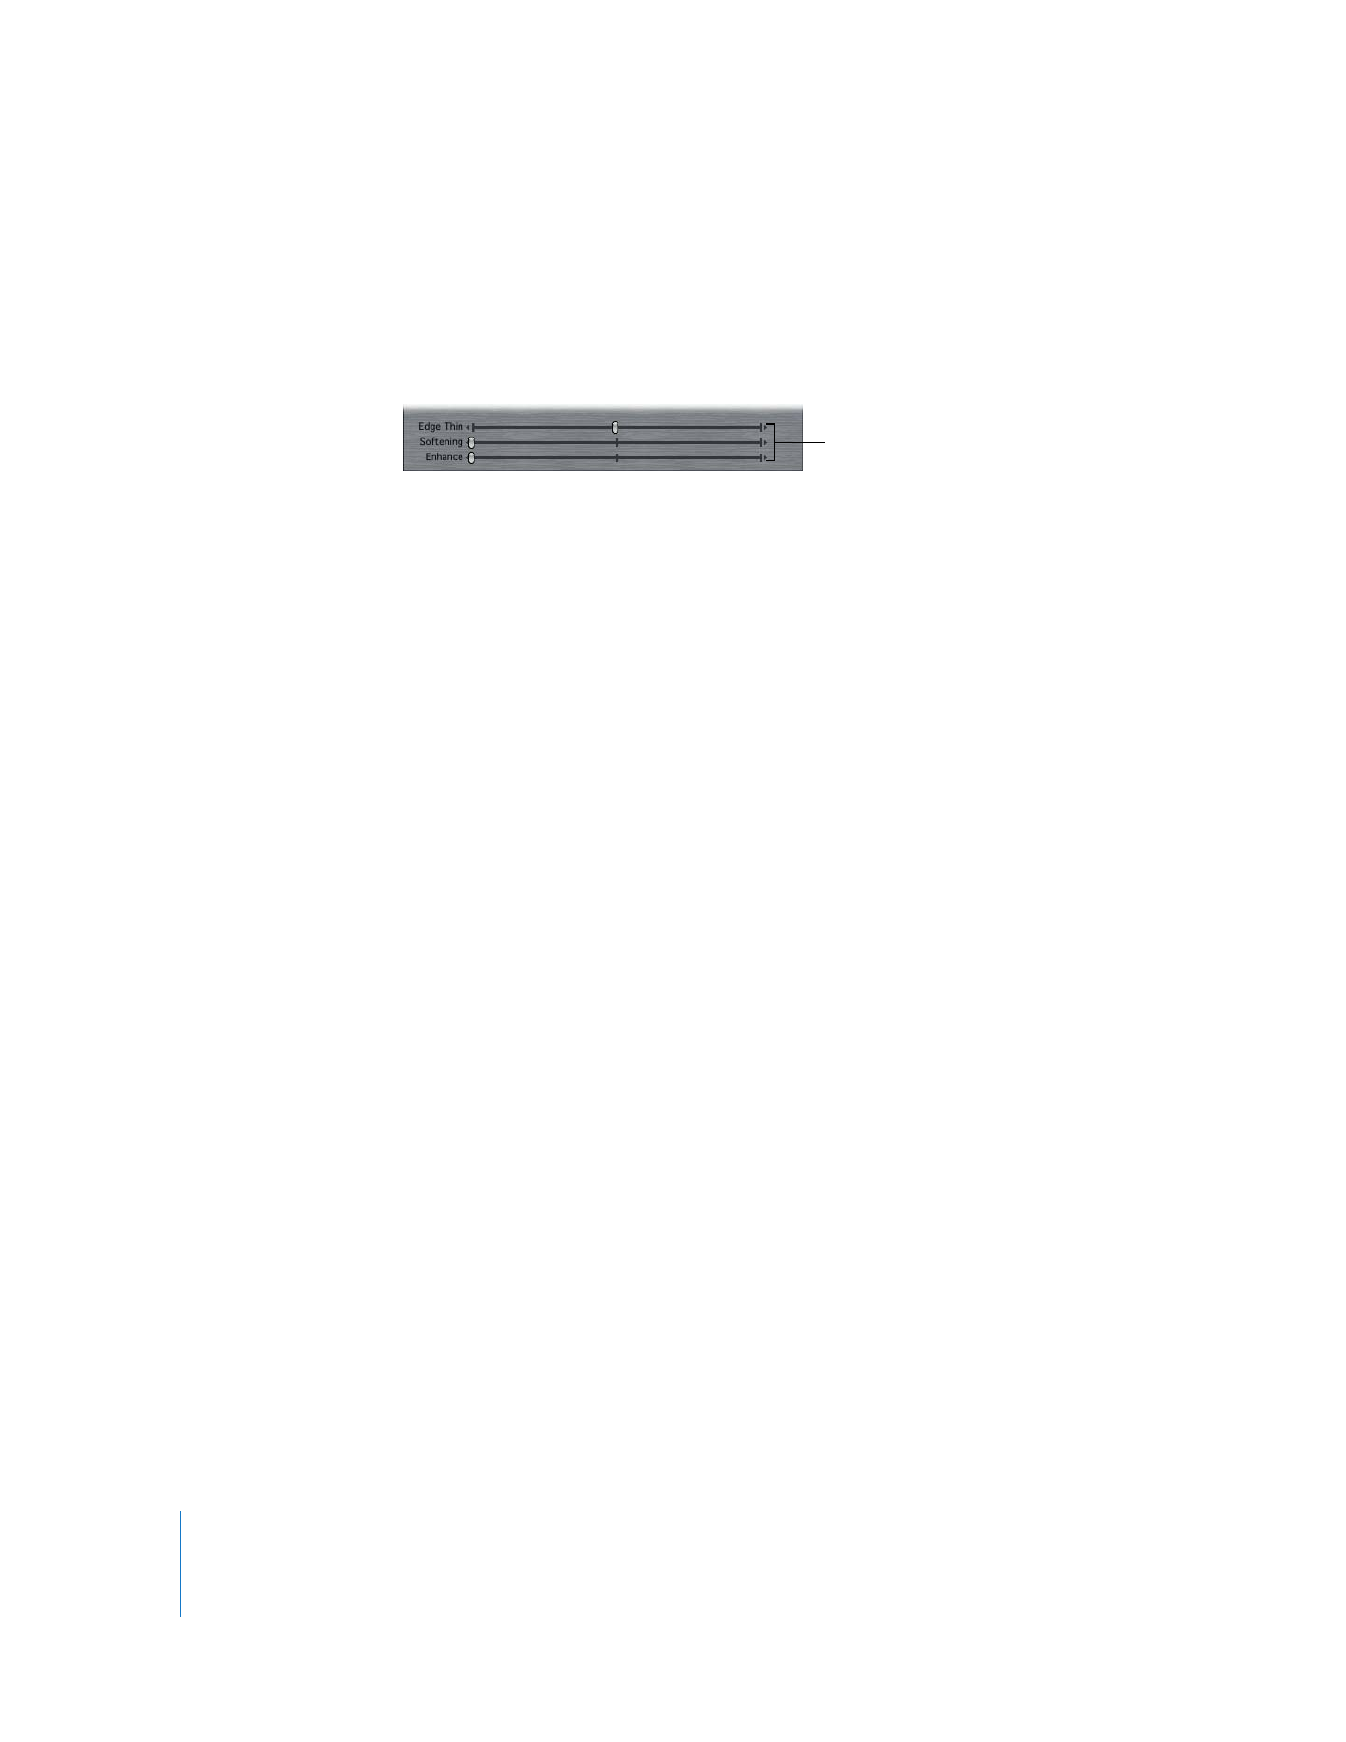
Sliders for further adjustments
Select Color eyedropper
Invert Selection button
Bottom handles
Color gradient
Top handles
Chapter 20
Keying, Mattes, and Masks
433
II
 Saturation control: Allows you to adjust the degree and range of saturation that
contributes to defining your key. The top and bottom handles work the same as
those in the Color Range control. Drag left or right within the gradient to move all
four handles simultaneously.
 Luma control: Lets you adjust the degree and range of luma that contributes to defining
your key. The top and bottom handles work the same as those in the Color Range
control. Drag left or right within the gradient to move all four handles simultaneously.
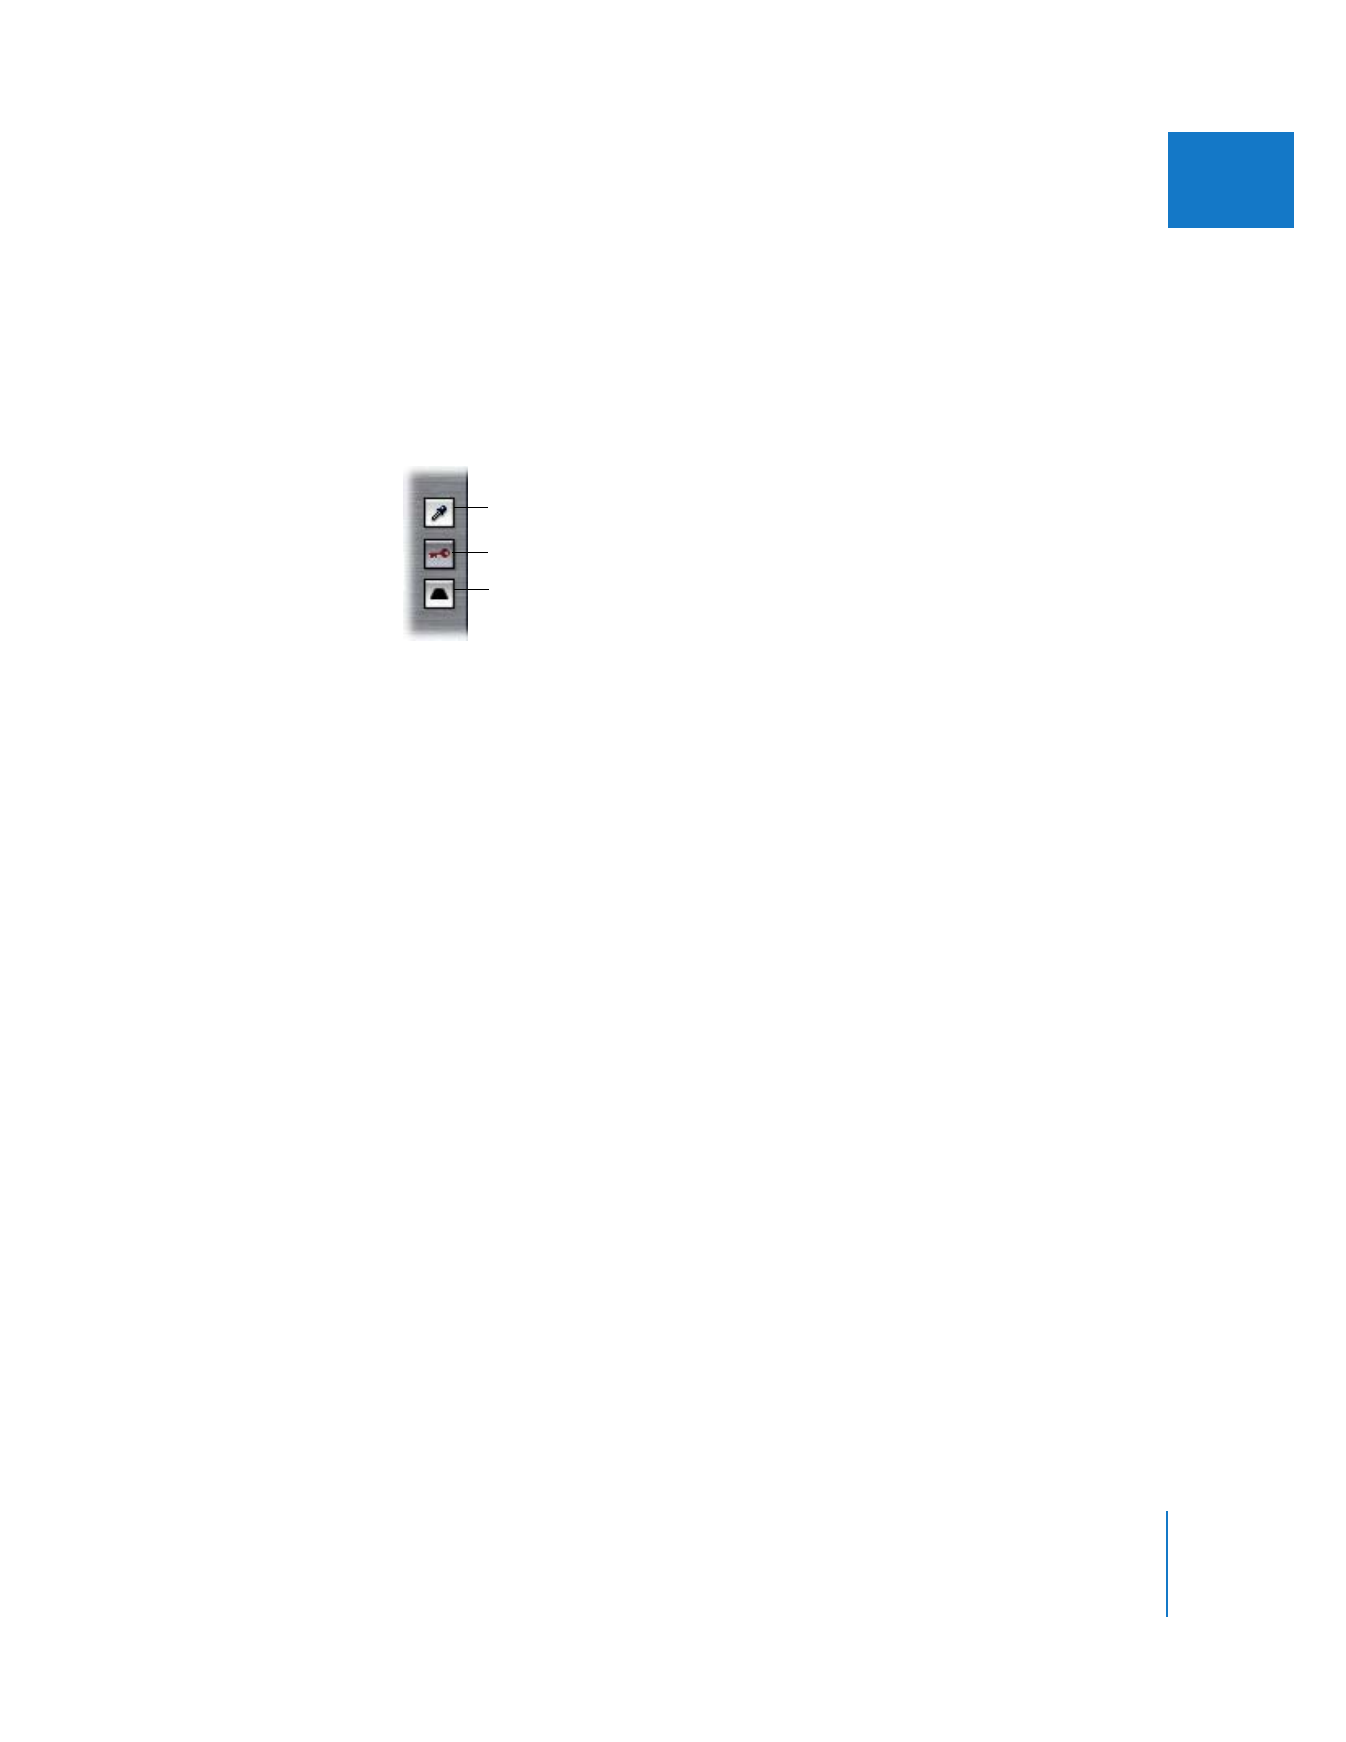
 Select Color eyedropper: When you click this button, the pointer turns into an
eyedropper you can use to select a color from a clip in the Video tab of the Viewer or
in the Canvas.
Clicking this button and then Shift-clicking with the eyedropper in the Viewer or
Canvas allows you to select another region of the background screen that wasn’t
keyed out by your first use of this control. This broadens the range of colors to be
keyed out and enlarges the keyed-out area. You can do this repeatedly to broaden
the range of keyed-out color to include shadows or highlights on the background
screen, if necessary.
 View Final/Matte/Source button (the key): This button has three states:
 Final: The default state (a key against a gray background) lets you see the end
result, the effect happening within the keyed area.
 Matte: The second state (a black key against a white background) displays the key
itself as a grayscale image, so you can fine-tune the key without being distracted
by the image.
 Source: The third state (a key against a blue background) shows only the original
video image.
Important:
Before you render or output video using the Chroma Keyer filter, make sure
that the View Final/Matte/Source button is in the Final state.
View Final/Matte/Source button
Select Color eyedropper
Invert Selection button
434
Part II
Effects
 Invert Selection button: Click this button to invert the key you’ve defined. For
example, suppose you’ve set up a key based on the color of a green car and used a
grayscale copy of the clip in the background so that the car is grayscale and the
background is color. Clicking the Invert Selection button reverses the key so that you
see the car in color and the background appears in grayscale.
 Edge Thin slider: Drag this slider to make the size of the currently defined key larger
or smaller. This can help you remove unwanted edging around your subject.
 Softening slider: Use this slider to blur the edges of your key to make it blend better
with the background image. This can come in handy to soften the jagged edges that
sometimes develop when chroma keying material captured with the DV codec.
 Enhance slider: Adjust this slider to selectively eliminate any spill of the key color that
may be visible in the semitranslucent areas of your key, such as edges and holes.