Controls in the Filters Tab of the Viewer
There are various controls you can use to manipulate filters in Final Cut Pro. While
each filter has its own individual parameters and controls, all filters have some controls
in common.
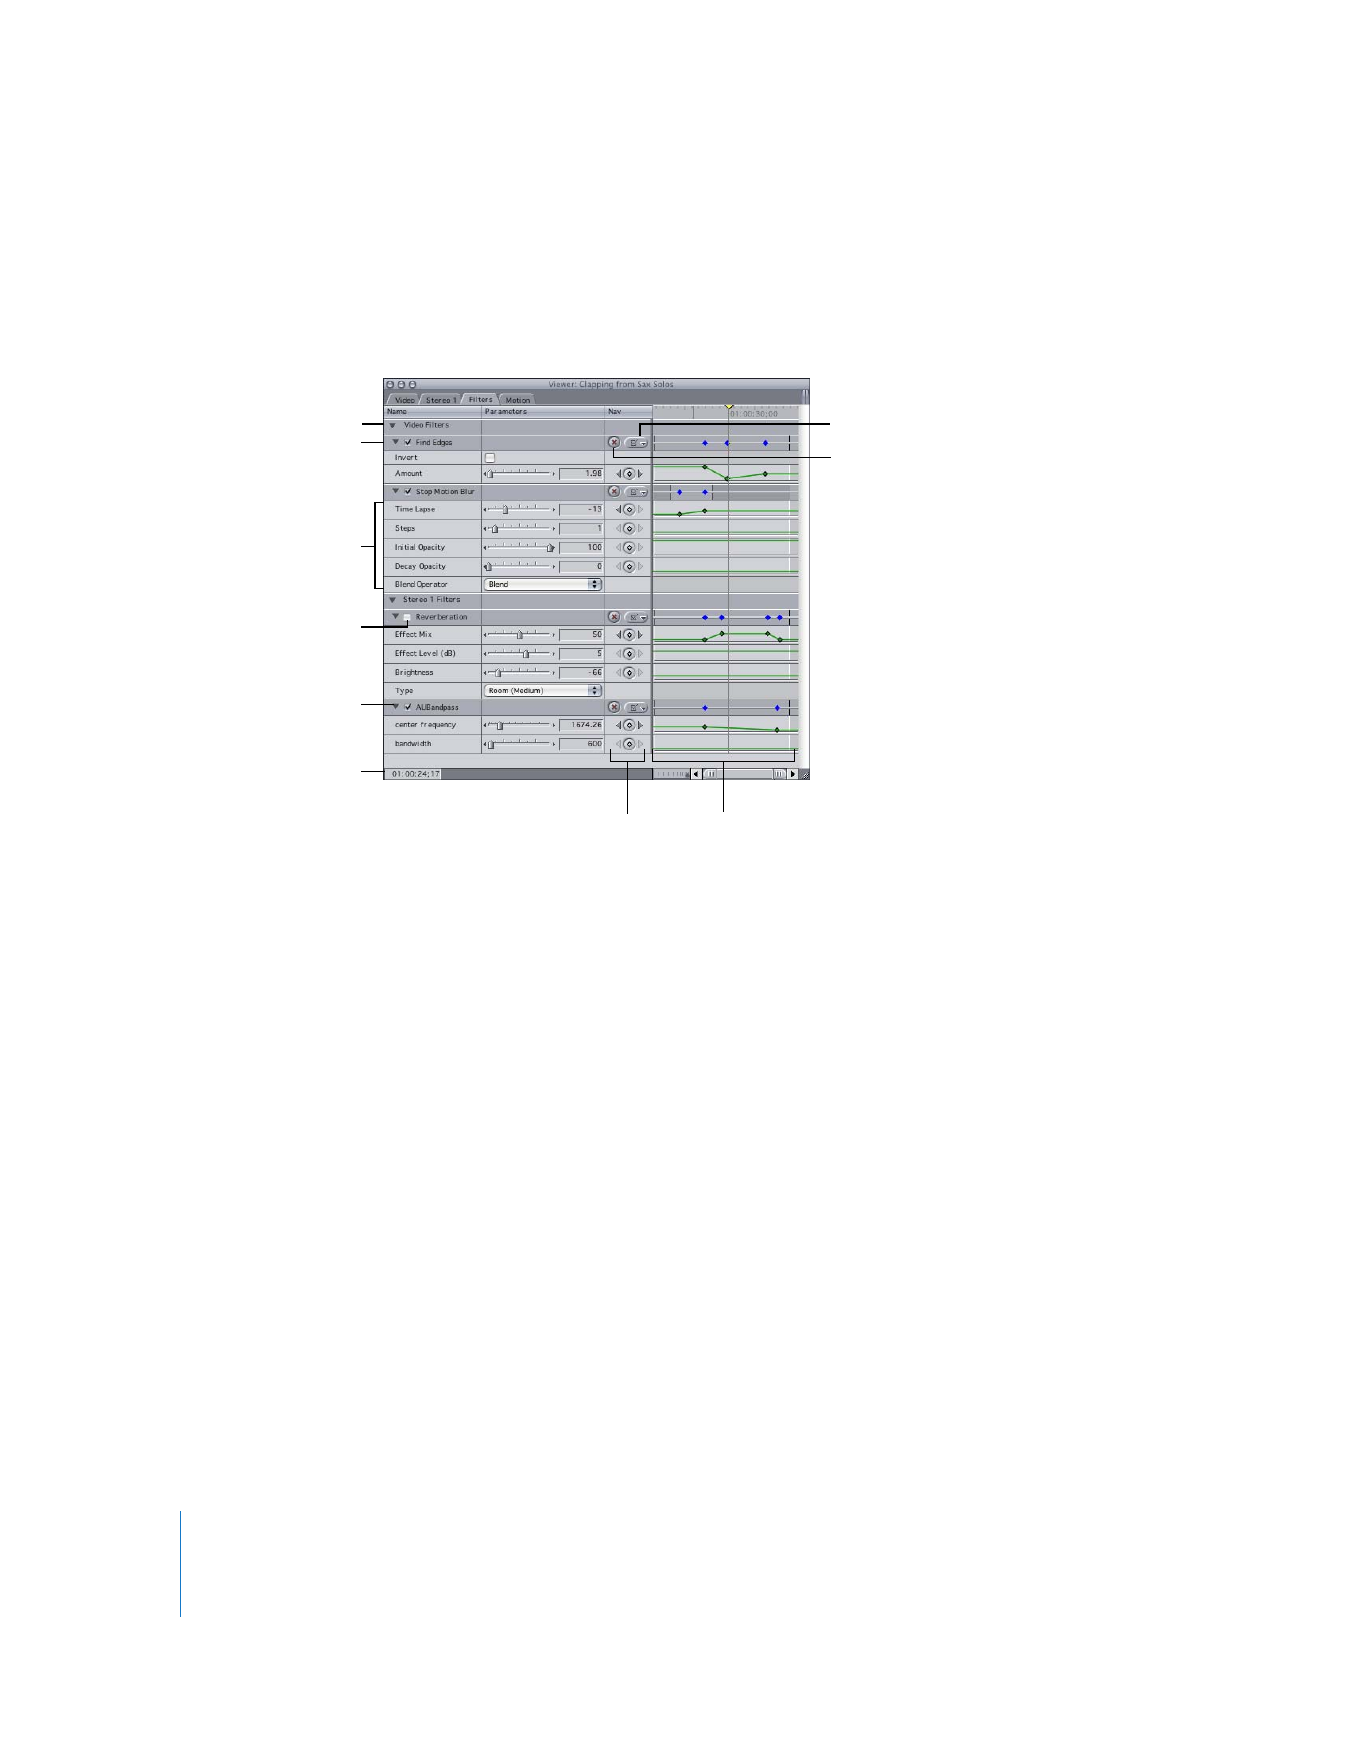
 Filter category bar: Video filters are listed first, then audio filters. (This is for clips with
both video and audio items.) Click the video filter category bar or the audio filter
category bar to select all the filters in that category.
 Name bar: Each filter has a name bar that contains a disclosure triangle, Enable/
Disable checkbox, and the filter’s name. Drag the name up or down to change a
filter’s position in the list. (It’s easier to do this if the filter’s controls are hidden.)
 Reset button: The Reset button is in the Name bar, under the Nav column. Click to
delete all keyframes for the corresponding parameter or parameters and reset those
parameters to their default values.
 Show/Hide Keyframes pop-up menu: This pop-up menu is in the Name bar, under the
Nav column. Use this pop-up menu to choose the parameters that have keyframes
displayed (or hidden) in the keyframe graph area.
 Enable/Disable checkbox: Select or deselect to enable or disable a filter. When this
checkbox is not selected, the filter isn’t applied or rendered.
 Disclosure triangle: Click to show and hide all of the controls for a filter.
 Parameter controls: Each filter has its own set of parameter controls.
Filter category bar
Current Timecode field
Name bar for the
Find Edges filter
Parameter controls
for the Stop Motion
Blur filter
Enable/Disable checkbox
Disclosure triangle
Keyframe buttons
Keyframe graph area
Reset button
Show/Hide Keyframes
pop-up menu

Chapter 12
Using Video Filters
225
II
 Current Timecode field: This field displays the position of the playhead in the keyframe
graph area. When you enter a new timecode value, the playhead moves to that time.
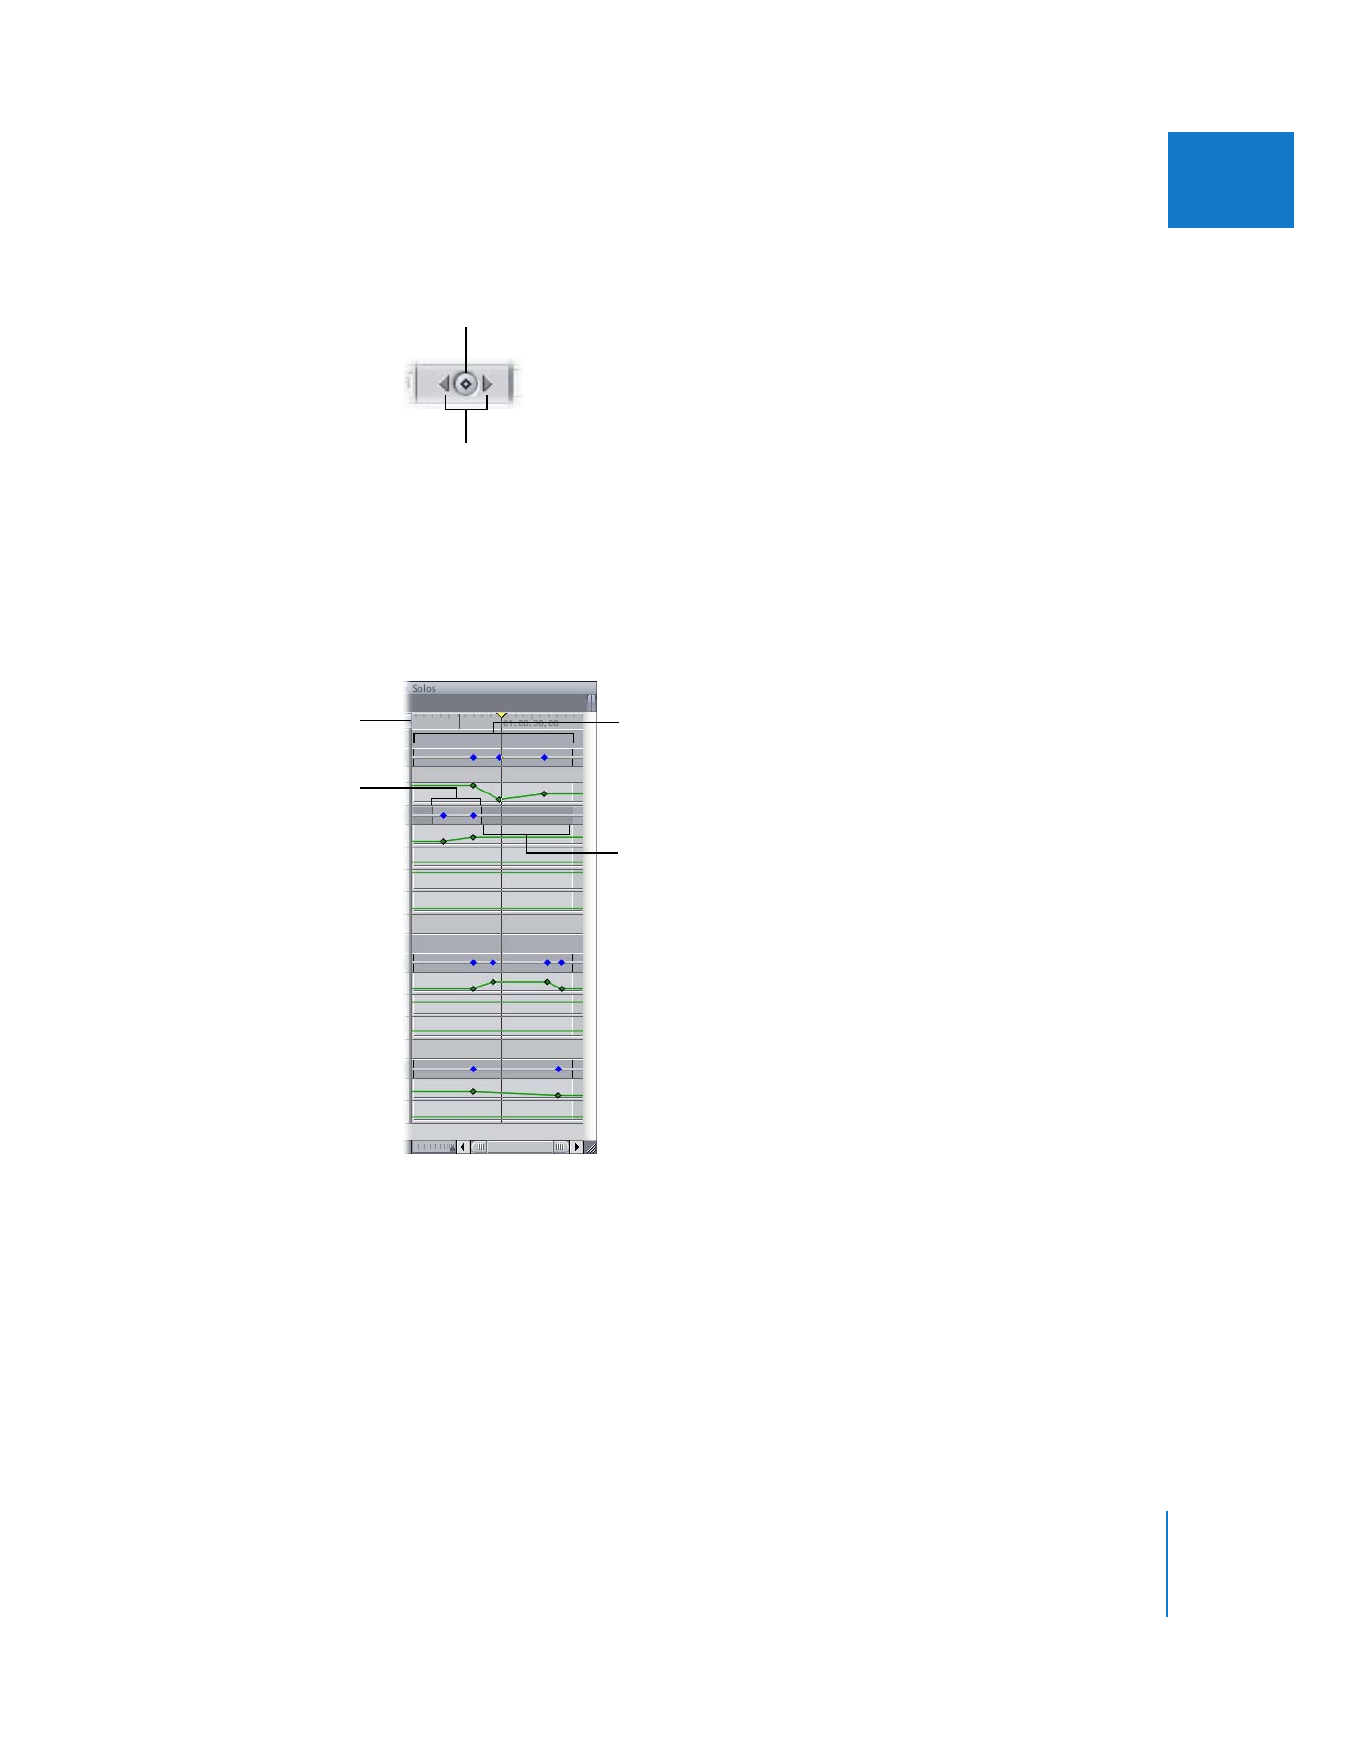
 Keyframe button: Click to place a keyframe for the corresponding parameter at the
playhead location in the keyframe graph, in preparation for creating a dynamic
change in an effect.
 Keyframe navigation buttons: Use to move the playhead from one keyframe to the
next on the corresponding overlay, either forward or backward.
 Keyframe graph area: The keyframe graph area shows all the keyframes and
interpolated values associated with parameters currently displayed in the Viewer.
Keyframe navigation
buttons
Keyframe button
Keyframe graph ruler
Keyframe graph area
Filter Start and
End points
Section of clip not used

226
Part II
Effects
 Keyframe graph ruler: The keyframe graph ruler corresponds to the duration of the
clip or the location of a clip in a sequence:
 If a clip is opened from the Browser: The keyframe graph ruler shows the duration of
the clip itself. The playhead in the Viewer moves independently of the playhead in
the Timeline or Canvas.
 If a clip is opened from a sequence in the Timeline: The keyframe graph ruler shows
the section of the Timeline that the clip is edited into. The playhead in the Viewer
is locked to the playhead in the Timeline and the Canvas.
 Filter Start and End points: If a filter is applied to part of a clip, filter Start and End
points appear in the clip’s keyframe graph area.
 Section of clip not currently used: The frames of a clip displayed in the Viewer’s Filters
tab that are outside the duration specified by the clip’s In and Out points are darker
gray than the part of the clip in use. This helps you know where to apply keyframes.
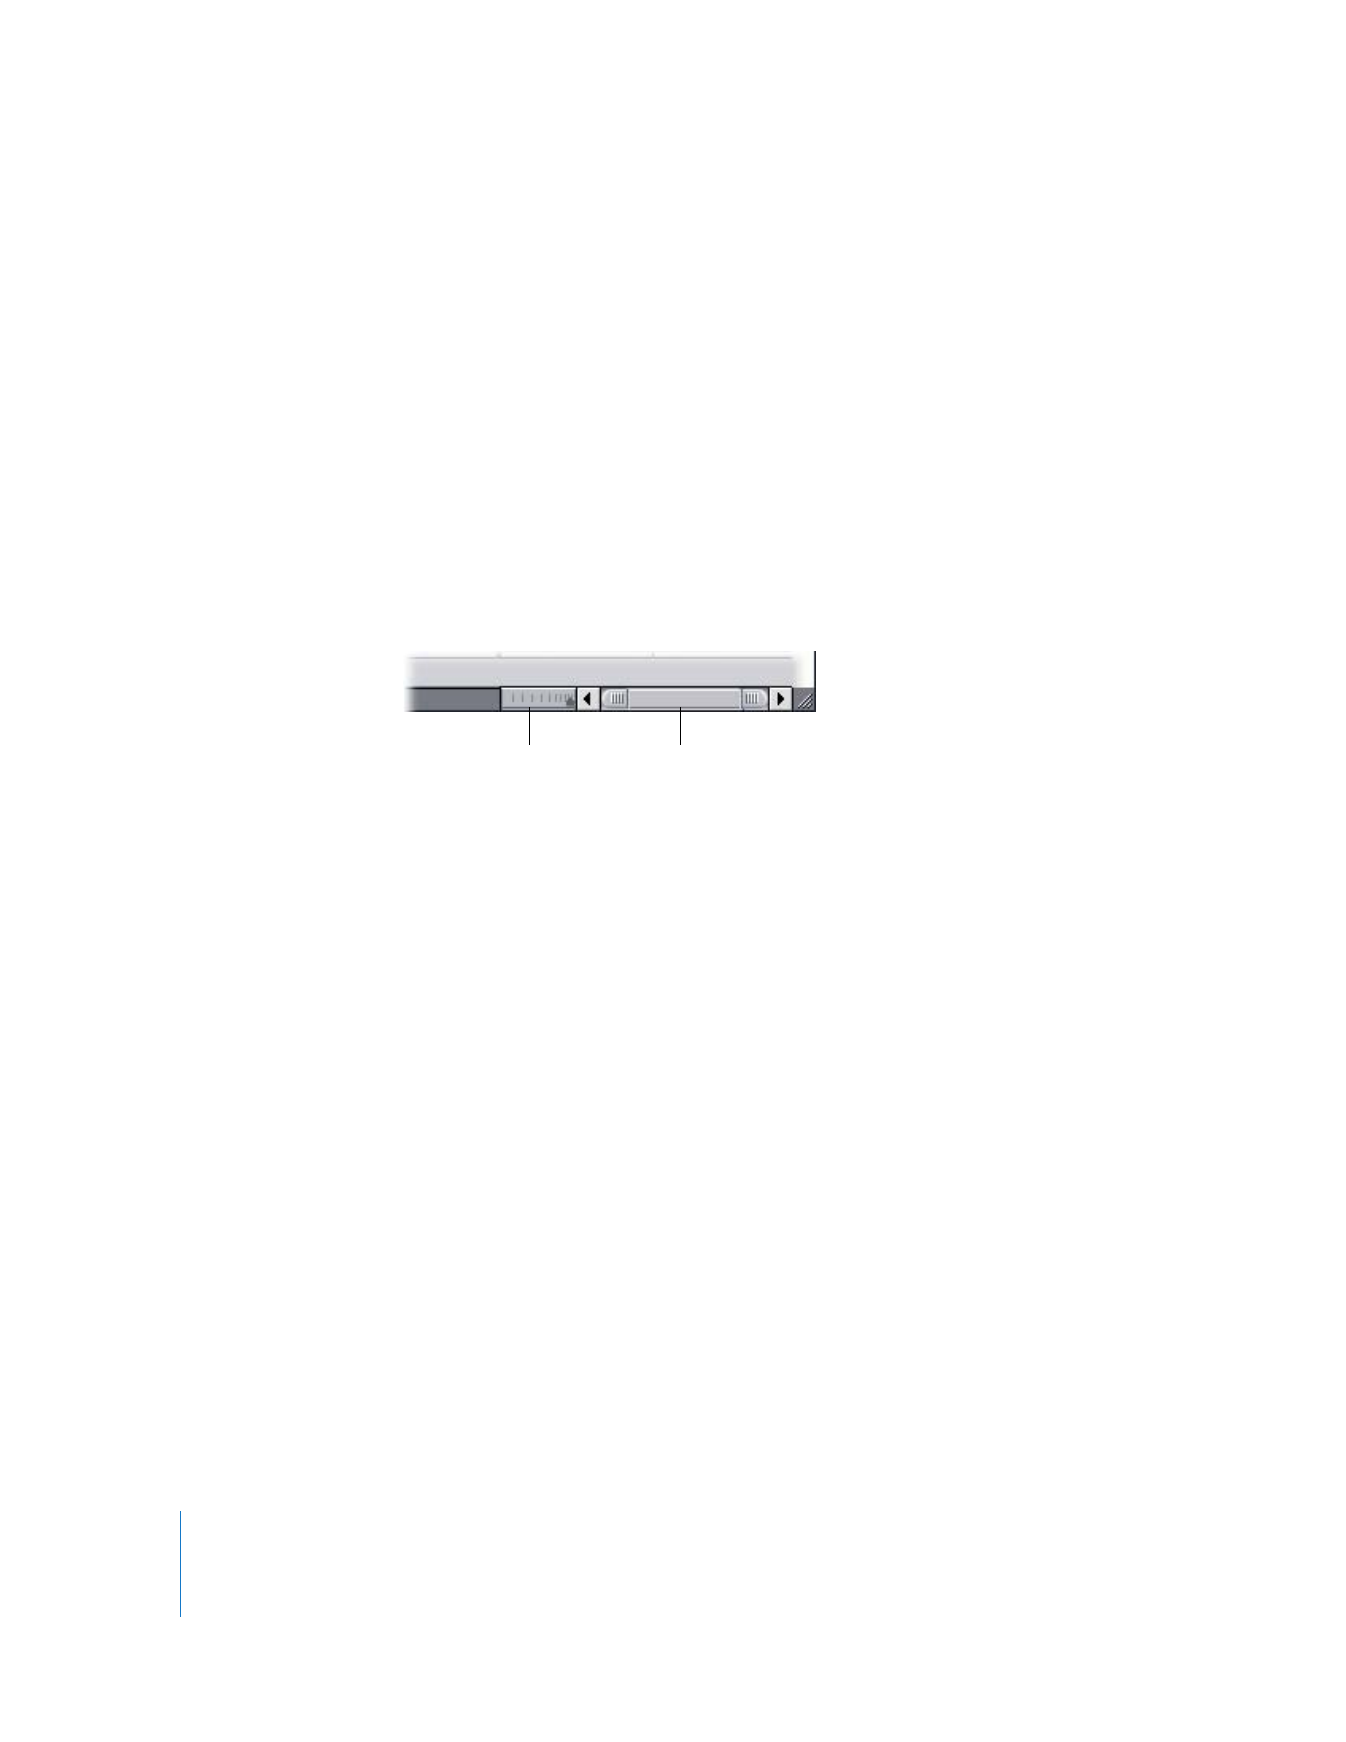
 Zoom control: This control lets you zoom in and out on the duration displayed by the
ruler in the keyframe graph area, expanding and contracting the keyframe graph
ruler as you do so. This also keeps the area of the visible keyframe graph centered as
you zoom in or out. For more information, see “
Zooming In to the Keyframe Graph
Area
” on page 300.
 Zoom slider: This slider lets you zoom in and out of the duration displayed by the
keyframe graph ruler by dragging the thumb tabs on either side, adjusting both
thumb tabs and leaving the visible area of the keyframe graph centered. Pressing the
Shift key and dragging one of the thumb tabs zooms in or out of the keyframe
graph, locking the opposite thumb tab and moving the visible area of the keyframe
graph in the direction in which you’re dragging. For more information, see “
Zooming
In to the Keyframe Graph Area
” on page 300.