Using Filter Controls
Each filter has its own graphical (visual) and numeric controls, including sliders, point
and Angle controls, color controls, and clip wells. Some filters, such as the Color
Corrector 3-way and Chroma Keyer, have alternate visual controls that you can use to
modify their effects. The parameters set by visual controls are mirrored in the numeric
controls and vice versa. These filters are discussed in detail in separate chapters. For
more information, see “
The Color Corrector and Color Corrector 3-Way Filters
” on
page 563 and “
Overview of Compositing Using the Chroma Keyer Filter
” on page 427.
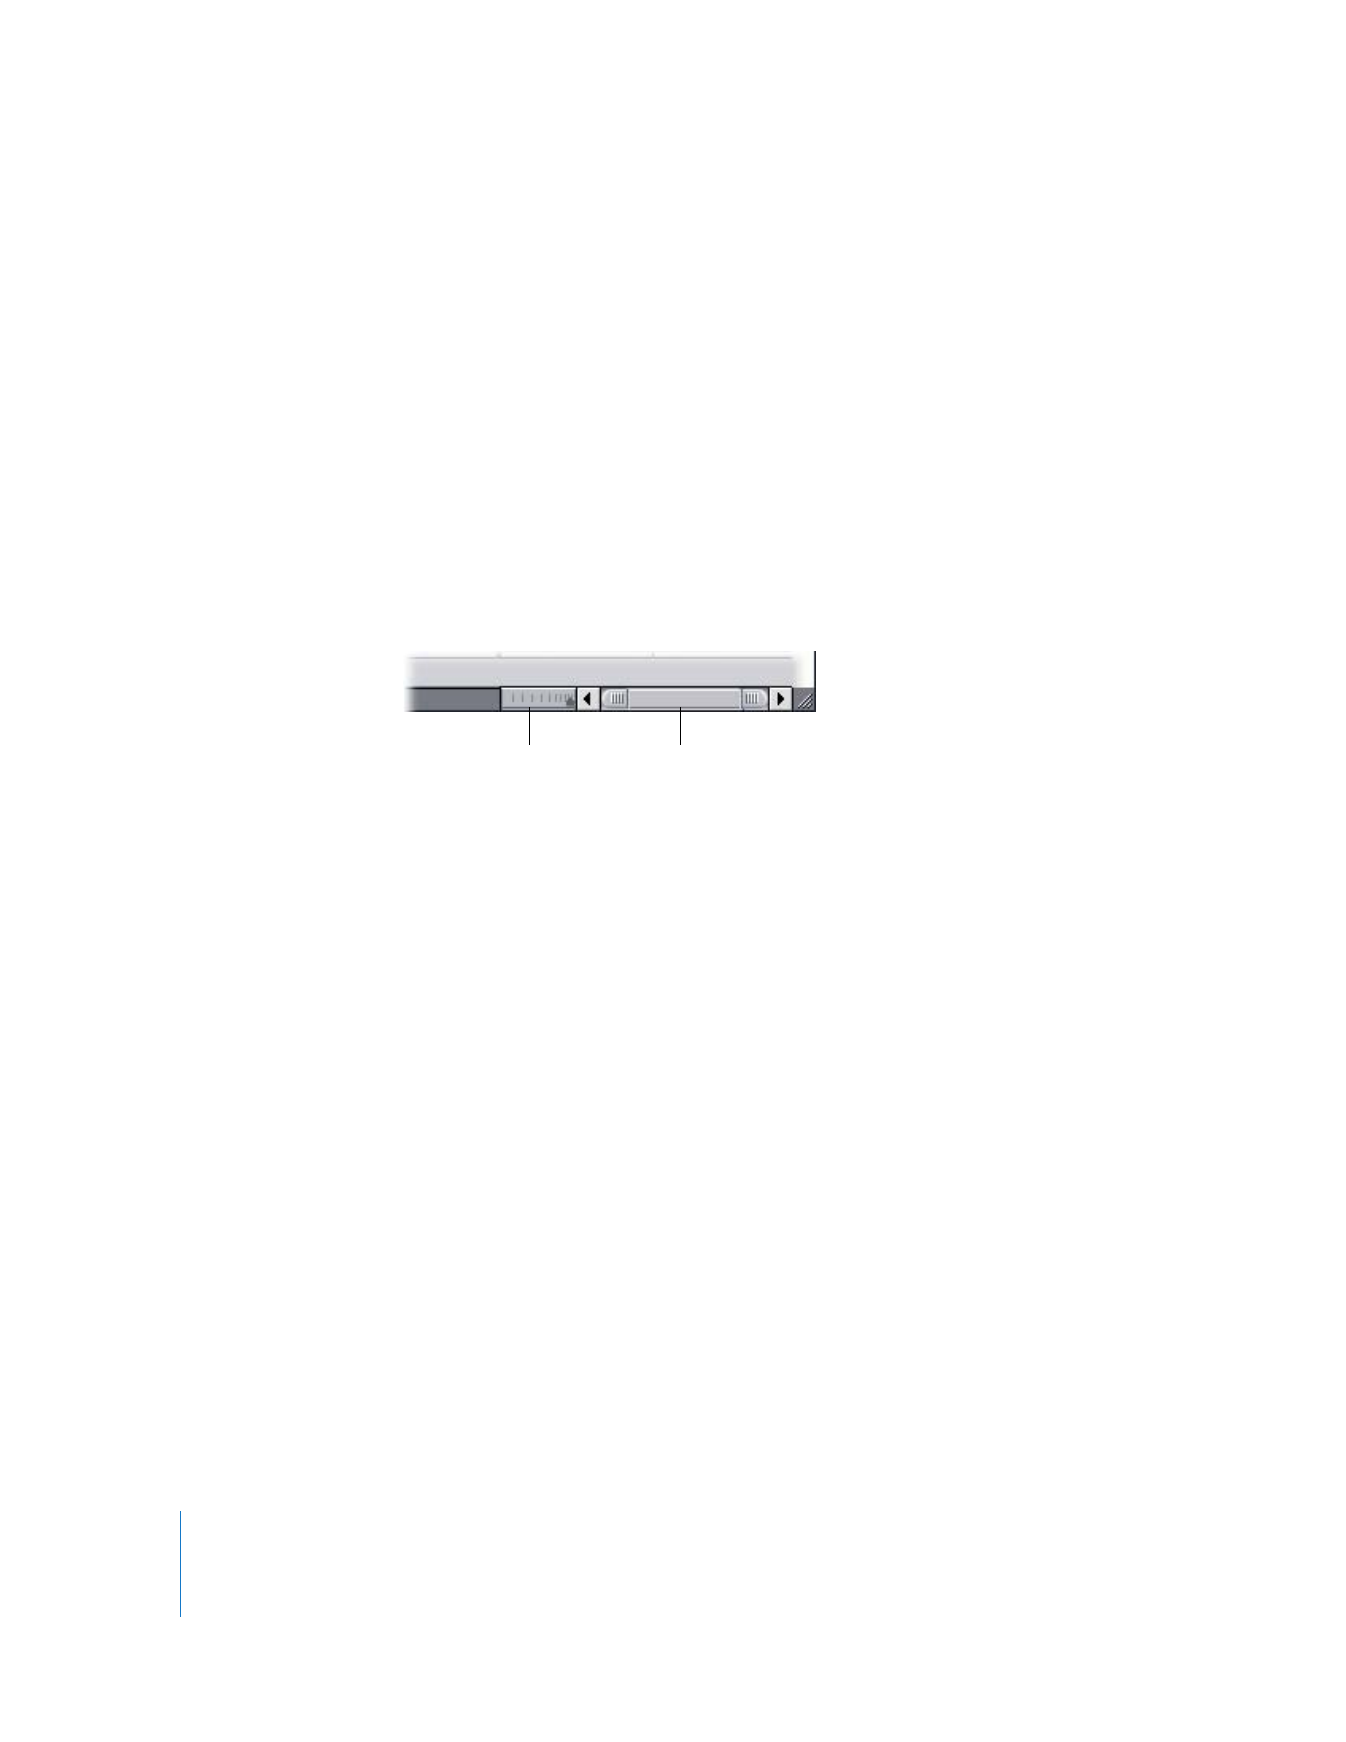
Zoom control
Zoom slider
Chapter 12
Using Video Filters
227
II
Sliders
By default, sliders only show whole integer values.
To adjust the corresponding value to within two decimal places of precision:
m
Hold down the Shift key while dragging a slider.
To gear down a slider, allowing you to make more precise changes to the parameter:
m
Hold down the Command key while dragging a slider.
Logarithmic Sliders
As you move the handle on a logarithmic slider, the rate of change increases faster in
one part of the slider than in other parts. The tick marks for logarithmic sliders are
unevenly spaced; where they’re closer together, the change in the parameter’s value
occurs more slowly. Final Cut Pro uses two types of logarithmic sliders:
 Logarithmic slider: This slider has tick marks closer together only on one end,
indicating that the rate of change increases faster at the other end.
 Double-sided logarithmic slider: This type of slider has tick marks closer together in
the center, indicating that the rate of change increases more slowly at the center and
more quickly at the ends.
Logarithmic sliders are useful for parameters that have a huge range of possible values,
with a particular range at the top or at the bottom being more useful than the others.
Typical
slider
Numeric value of the
slider setting
Double-sided
logarithmic slider
Logarithmic slider
228
Part II
Effects
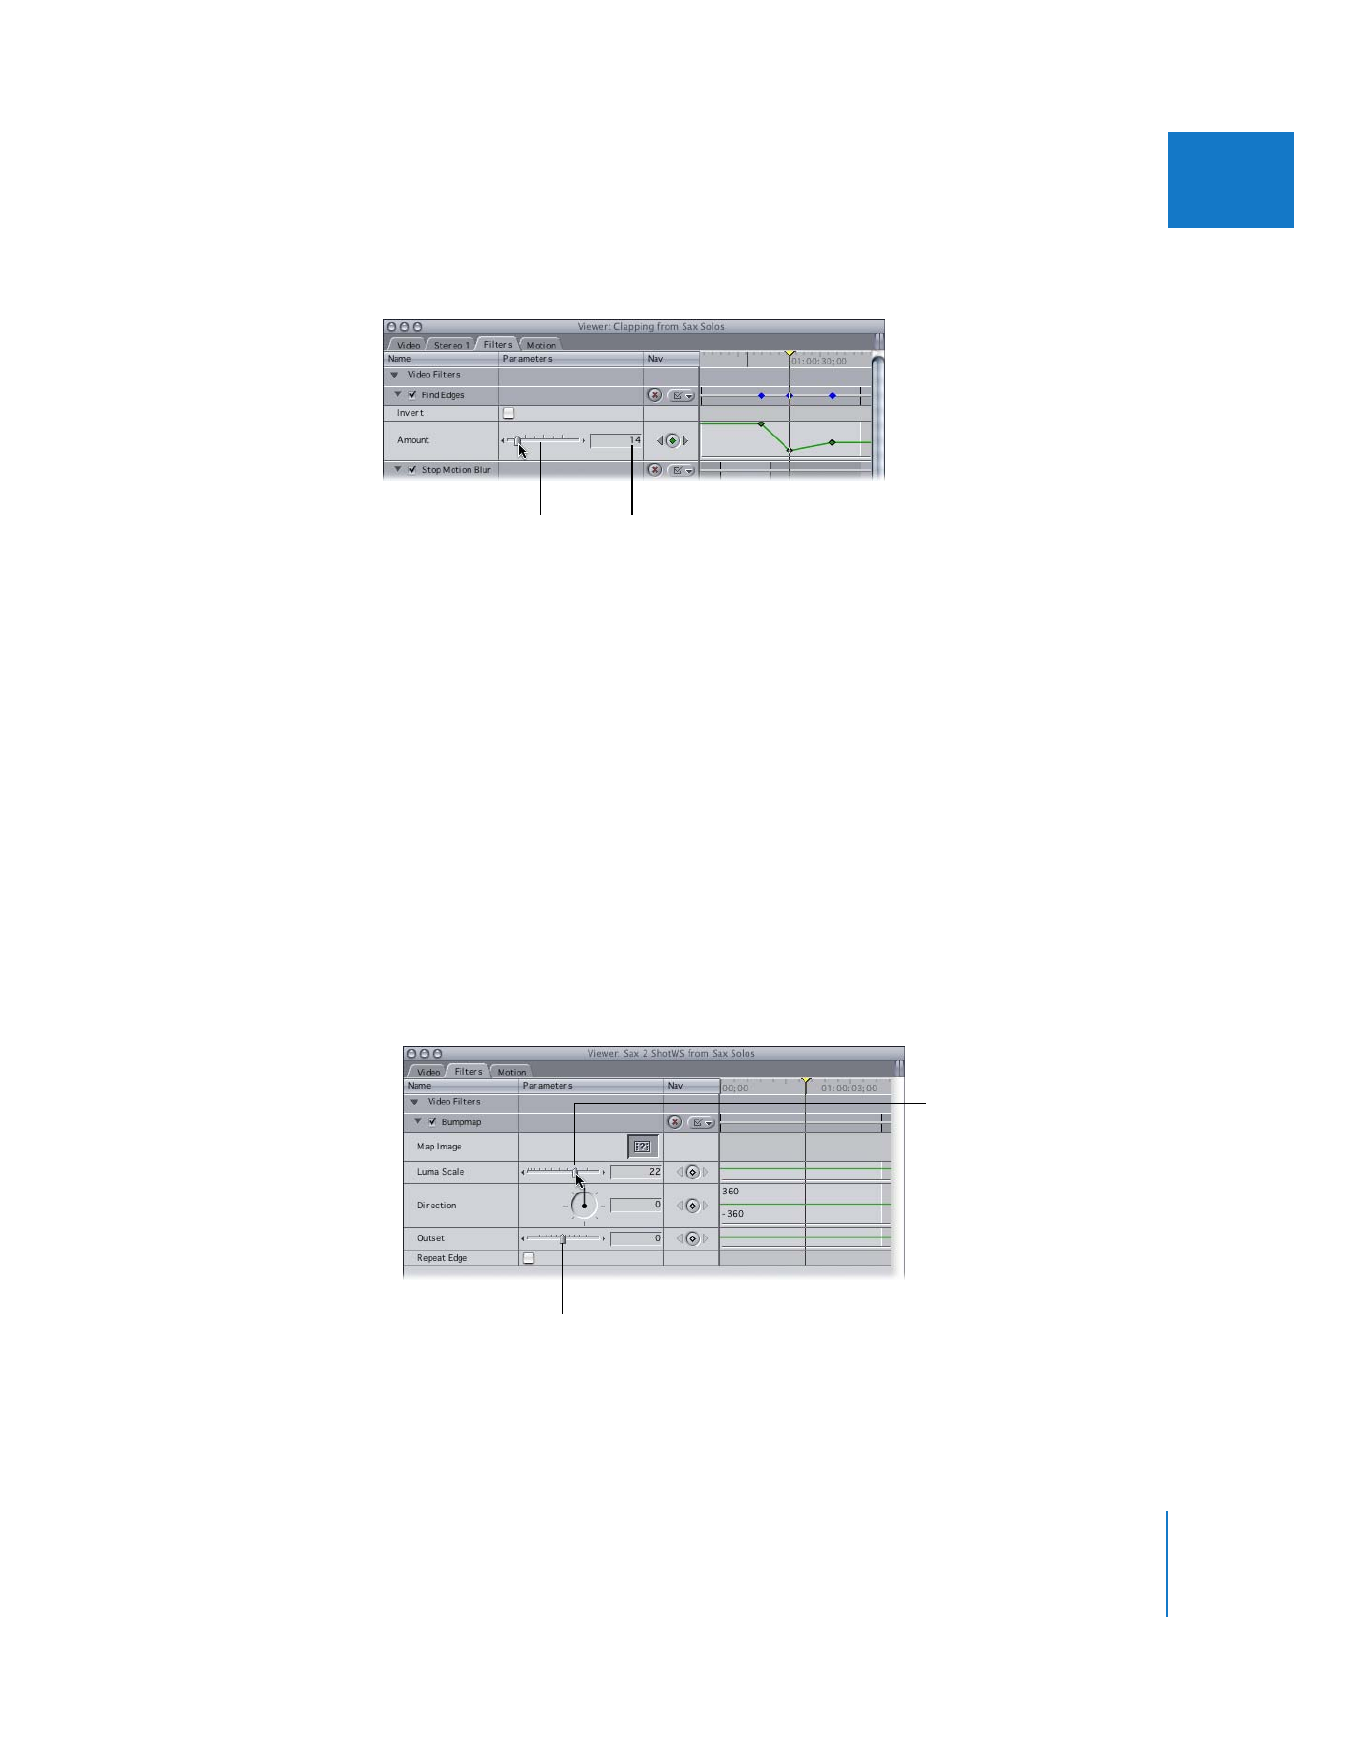
Point Control
Point controls are used to specify locations in the Canvas.
To define a new location with x and y coordinates:
1
In the Filters tab of the Viewer, click the point control.
2
Move the pointer to the Canvas.
The pointer changes to the crosshair pointer in the Canvas.
3
Click anywhere in the Canvas to position a coordinate at that location.
∏
Tip: You can also drag in the Canvas and then release the mouse button when the
pointer is at the appropriate location. If you drag instead of clicking, the values update
as the crosshair moves.
For more information about positioning clips in the Canvas, see “
Using Cartesian
Geometry to Position Clips
” on page 261.
Angle Control
This control specifies angles and rotations. The longer, black hand of the dial indicates
the angle. The smaller, red hand indicates how many total rotations forward or
backward are specified.
To constrain the dial to 45-degree increments:
m
Press the Shift key while you adjust the Angle control.
To gear down the dial’s movement for a more precise value:
m
Press the Command key while adjusting the control.
Point control
X and y coordinates
Angle control

Chapter 12
Using Video Filters
229
II
To reset the dial to its previous setting while adjusting a parameter:
m
Drag the pointer all the way out of the effect parameter.
Color Controls
The color controls give you several ways to select a color value.
 Disclosure triangle: Click to display sliders and number fields corresponding to the
hue, saturation, and brightness of the range of colors available.
 Eyedropper: This tool lets you quickly select a color that’s in an image in the Viewer
or Canvas. Click the eyedropper, then click an image in the Viewer or the Canvas to
pick up that color.
 Hue direction control: If you’re keyframing changes in color, click this control to indicate
the direction on the color wheel Final Cut Pro uses to interpolate the color change.
 Color picker: Click to choose a color using the standard color picker.
 Hue, saturation, and brightness controls (H, S, and B): Hue determines which color is
chosen; saturation determines how vivid the color is. If saturation is 0, the resulting
color is always white. Brightness determines how bright or dark the color is. If
brightness is 0, the resulting color is black; if brightness is 100, the color is the
lightest possible value.
Clip Well
Some filters, such as the Bumpmap filter, contain a clip well that allows you to use
video from any clip in your project as a parameter for the filter.
Hue direction control
Click the disclosure
triangle to display the
hue, saturation, and
brightness controls.
Color picker
Hue, saturation, and
brightness controls
Eyedropper
Clip well
230
Part II
Effects
To use a clip as a parameter in a filter:
m
Drag any clip from your project to the clip well in the Filters tab.
∏
Tip: Final Cut Pro generators can be dragged to clip wells the same as other clips.
To clear a clip that’s currently attached:
m
Control-click the clip well, then choose Clear from the shortcut menu.