
Displaying Images in the Frame Viewer Tab
By default, the Frame Viewer tab displays the previous clip from the selected sequence.
As you play a sequence, the Frame Viewer shows the last displayed frame. When
playback is paused, the contents of the Frame Viewer are updated relative to the new
position of the playhead.
If you’ve arranged multiple Frame Viewer tabs to accomplish a specific task, you can
save your custom configuration by choosing Window > Arrange > Save Window
Layout. For more information about saving window layouts, see Volume I, Chapter 10,
“Customizing the Interface.”
556
Part III
Color Correction and Video Quality Control
To open the Frame Viewer tab:
m
Choose Tools > Frame Viewer (or press Option-7).
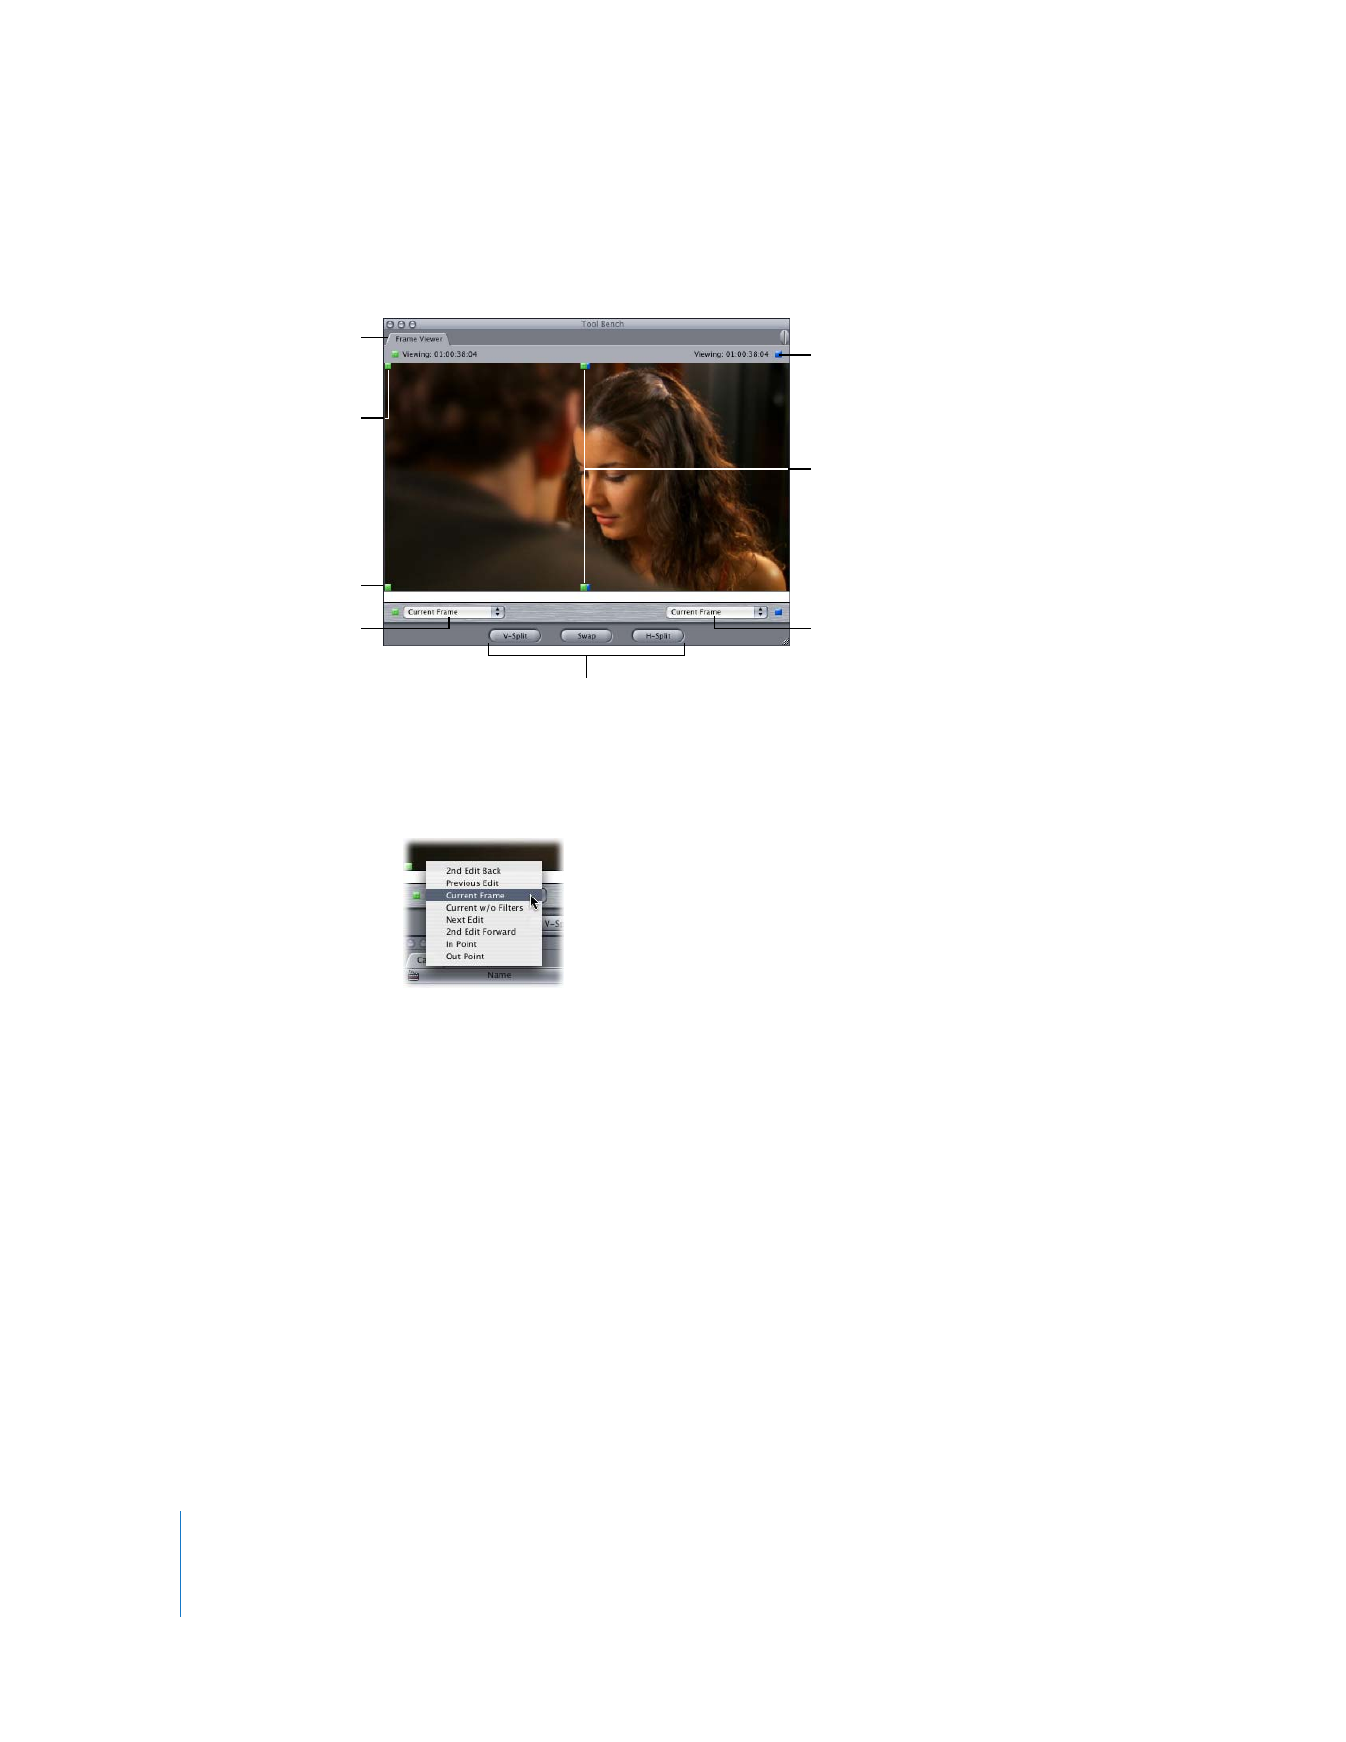
You can customize the contents of the Frame Viewer tab using the following controls:
 Frame Viewer pop-up menus: Two pop-up menus near the bottom control which two
frames are displayed in the Frame Viewer.
 None: This option is available only in the Frame Viewer pop-up menu on the right.
If you don’t want to use the split-screen feature in the Frame Viewer, choose this
option. When the None option is chosen, only the frame corresponding to the
green frame boundary indicators is displayed.
 2nd Edit Back: Displays the frame of the Out point two edits back.
 Previous Edit: Displays the frame of the Out point one edit back.
 Current Frame: Displays the frame corresponding to the position of the playhead in
the Timeline.
 Current w/o Filters: Displays the same frame as the Current Frame option, without
filters applied to the clip. If you have several layers composited together,
composite modes are still calculated. However, all filters are disabled on all clips.
Frame boundary
indicators
Split-screen buttons
Frame boundary
indicator
The Frame Viewer
appears as a tab in the
Tool Bench window.
Indicates the timecode of
the frame chosen in the
Frame Viewer pop-up
menu below.
Frame boundary
indicator
Frame Viewer
pop-up menu
Frame Viewer
pop-up menu

Chapter 27
Color Correction
557
III
 Next Edit: Displays the frame of the In point one edit forward.
 2nd Edit Forward: Displays the frame of the In point two edits forward.
 In Point: Displays the frame corresponding to the currently defined In point of the
sequence in the Timeline.
 Out Point: Displays the frame corresponding to the currently defined Out point of
the sequence in the Timeline.
 Frame boundary indicators: Next to each Frame Viewer pop-up menu is a green or
blue square indicator. These indicators are also located at the top of the Frame
Viewer tab and indicate the timecode values of the frames displayed from the
sequence. There are also four blue and four green frame boundary indicators at the
corners of the split-screen window that correspond to the frames chosen in the
Frame Viewer pop-up menus. The edges of the split screen can be manipulated by
selecting one of the frame boundary indicators and dragging it to a new position.
Note: By default, you won’t see two of the blue frame boundary indicators because
they are slightly off the screen.
 Split-screen buttons: These buttons allow you to quickly alternate between vertically
split and horizontally split screens.
 V-Split: Splits the screen vertically. (Click twice to switch sides.)
 Swap: Alternates the content in each frame and switches the two Frame Viewer
pop-up menus accordingly.
 H-Split: Splits the screen horizontally. (Click twice to switch sides.)