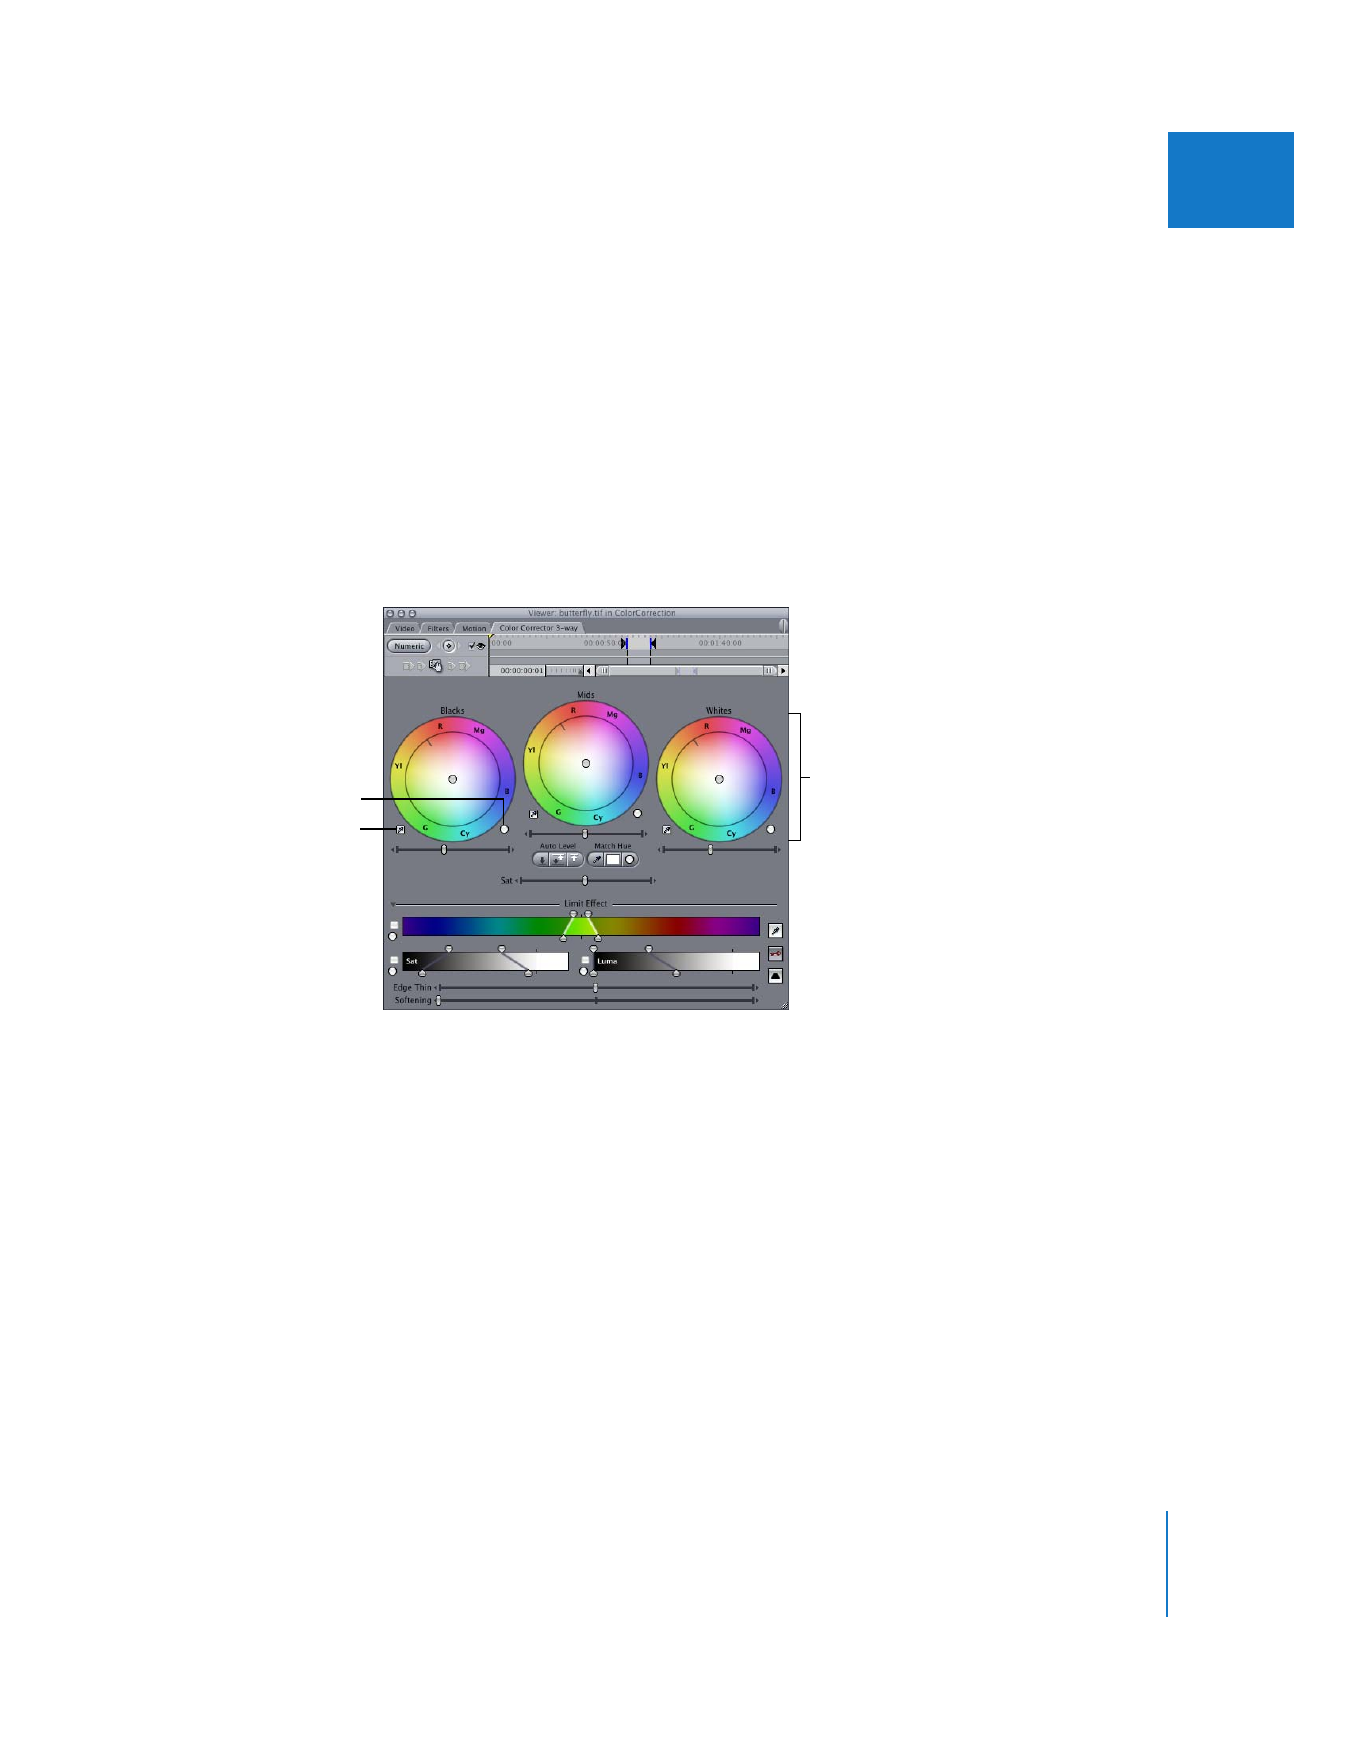
Color Balance Controls in the Color Corrector 3-Way Filter
You use the controls in the Color Corrector 3-way tab to color balance the blacks,
midtones, and whites displayed in a clip.
 Blacks control: Drag in the Blacks color wheel to move the color balance indicator
and change the mix of red, green, and blue in the blacks of your clip.
 Blacks Auto-Balance eyedropper: Clicking the Blacks Auto-Balance eyedropper turns
the pointer into an eyedropper when it’s moved into the Video tab of the Viewer or
into the Canvas. Position the tip of the eyedropper in what is supposed to be the
blackest area of your image, such as the innermost shadow in a dark area of the
picture, then click. The color value of the pixel you selected is analyzed, and the
Blacks control is automatically adjusted to turn that pixel into true black.
Note: When color correcting a clip, adjusting this control is usually the second step
you take, after first using the Auto Level controls and the Blacks, Mids, and Whites
sliders (described in the next sections) to maximize the contrast of your image.
Blacks Reset button
Blacks Auto-Balance
eyedropper
Color balance controls

580
Part III
Color Correction and Video Quality Control
 Blacks Reset button: Click this button to reset the Blacks control to its default settings
and restore your clip to the original color mix.
 Mids control: Drag in the Mids color wheel to move the color balance indicator and
change the mix of red, green, and blue in the midtones of your clip.
Note: The areas of your picture affected by the Mids control overlap the areas
affected by the Blacks and Whites controls, so adjustments to the mids affect
adjustments you may have already made to the blacks and whites. This overlapping
ensures that you have the maximum amount of control necessary to accurately
manipulate the color of your clips.
 Mids Auto-Balance eyedropper: Clicking the Mids Auto-Balance eyedropper turns the
pointer into an eyedropper when it’s moved into the Video tab of the Viewer or into
the Canvas. Position the tip of the eyedropper in what is supposed to be an area of
neutral gray, then click. The color value of the pixel you selected is analyzed, and the
Mids control is automatically adjusted to turn that pixel into a neutral gray.
Note: This neutral gray corresponds to the neutral gray chip on a production color
chart. If a chip chart was shot along with the slate of your clip, you can click the Mids
Auto-Balance eyedropper in this part of the chart to get an accurate reading.
 Mids Reset button: Click this button to reset the Mids control to its default settings
and restore your clip to the original color mix.
 Whites control: Drag in the Whites color wheel to move the color balance indicator
and change the mix of red, green, and blue in the whites of your clip.
 Whites Auto-Balance eyedropper: Clicking the Whites Auto-Balance eyedropper turns
the pointer into an eyedropper when it’s moved into the Video tab of the Viewer or
into the Canvas. Position the tip of the eyedropper in what is supposed to be the
whitest area of your image, such as a highlight on a white shirt, then click. The color
value of the pixel you selected is analyzed, and the Whites control is automatically
adjusted to turn that pixel into white. For example, clicking a pixel that’s slightly
yellow nudges the color balance indicator toward blue, to turn that yellow into a
neutral white.
When using the Whites Auto-Balance eyedropper, don’t select an area that’s
overexposed, such as a light source or a shiny highlight. This won’t give you the
result you want. Instead, select a properly exposed area of your picture that’s white,
like a well-lit shirt sleeve or white wall.
 Whites Reset button: Click this button to reset the Whites control to its default
settings and restore your clip to the original color mix.
Note: Holding down the Shift key while clicking the Blacks Reset, Mids Reset, or Whites
Reset button resets all of the color balance, level, and saturation controls to their
default settings.
Chapter 27
Color Correction
581
III
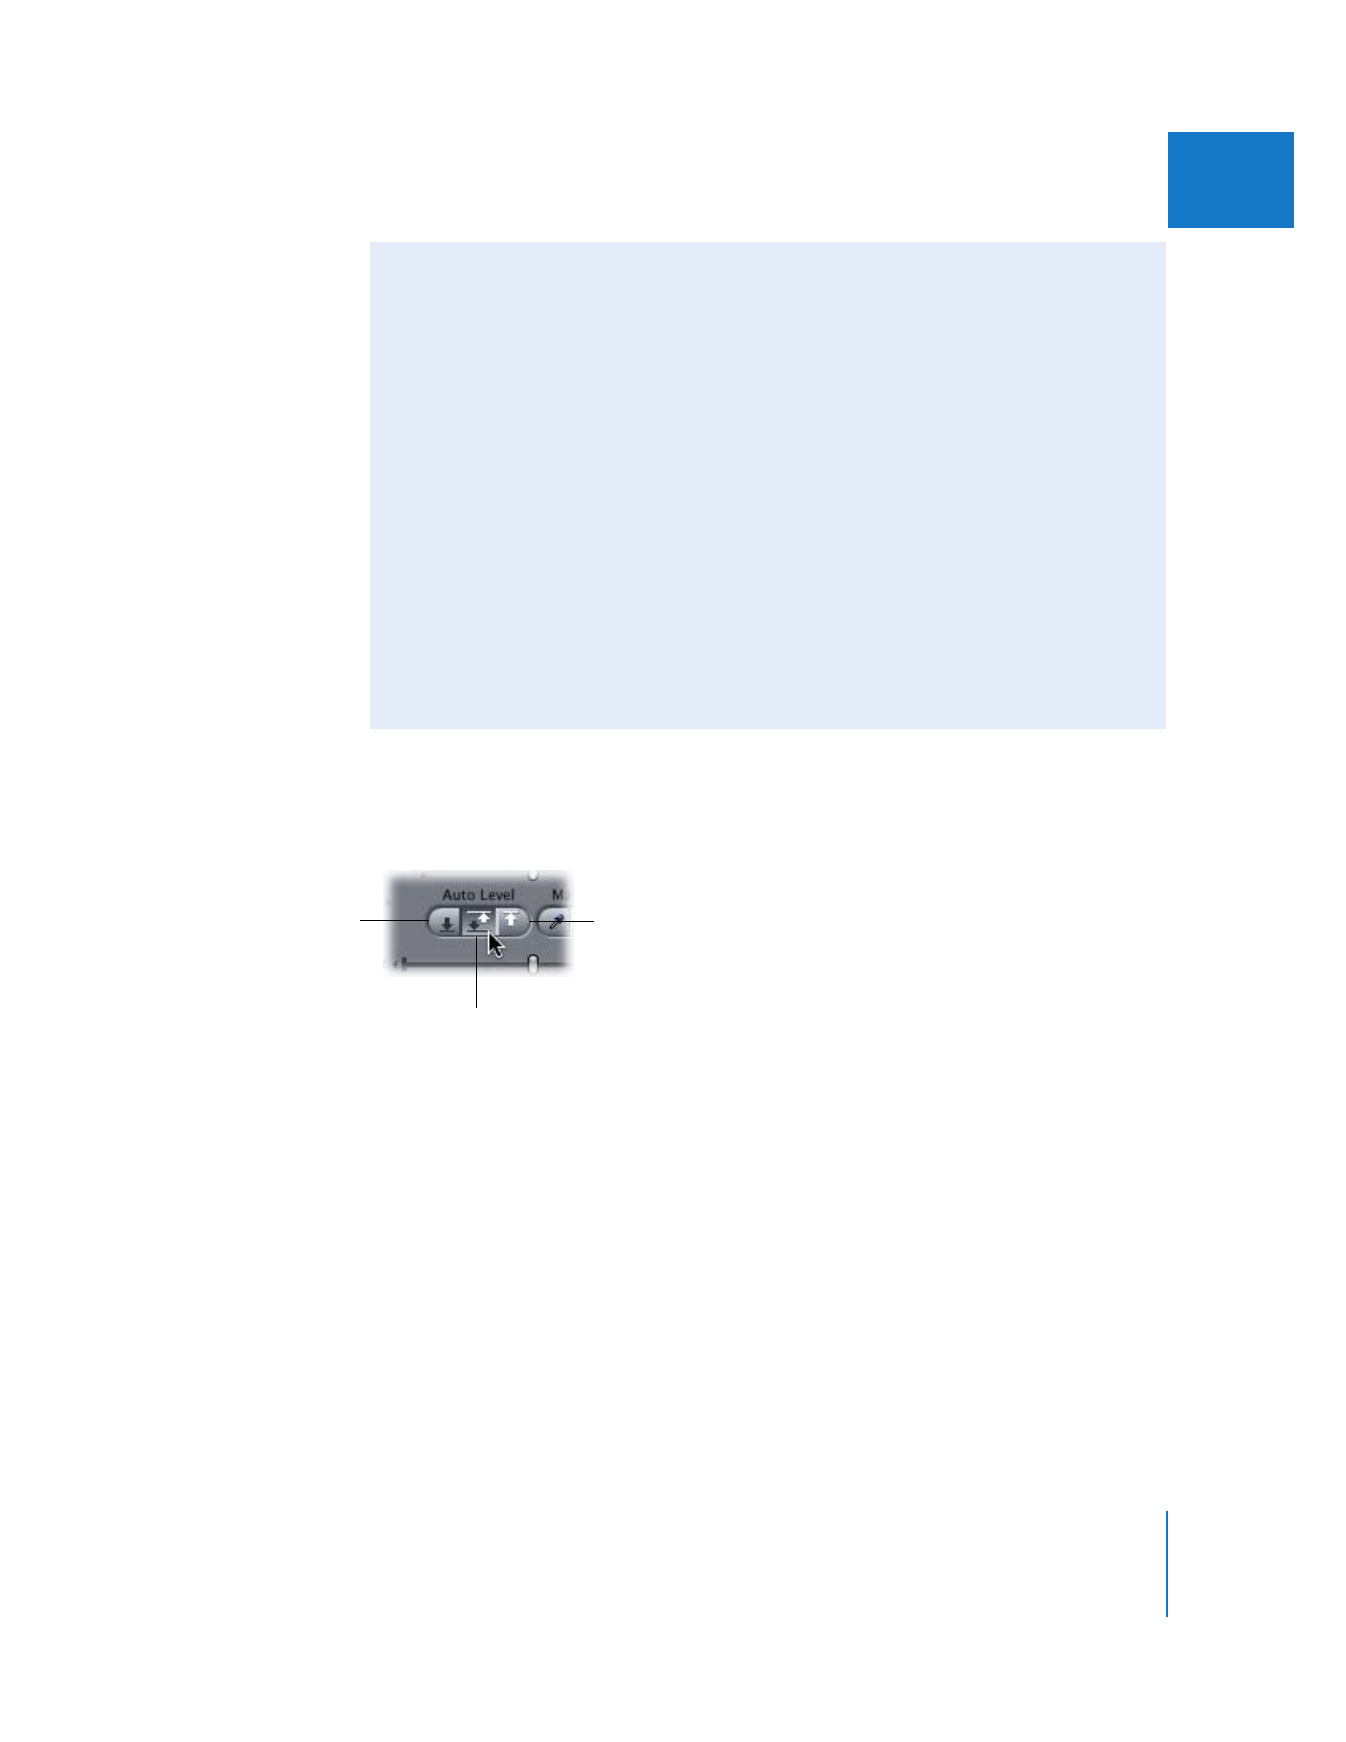
Auto Level Controls in the Color Corrector 3-Way Filter
Using the Auto Level controls and the Whites, Mids, and Blacks sliders to maximize the
contrast of your image is usually the first step you take when color correcting a clip.
 Auto White Level button: Click this button to analyze your clip and find the maximum
level of white in the frame. The Whites slider is then adjusted to move the maximum
white level to 100 percent as viewed in the Histogram.
 Auto Black Level button: Click this button to analyze your clip and find the maximum
level of black in the frame. The Blacks slider is then adjusted to move the maximum
black level of your clip to 0 percent as viewed in the Histogram.
 Auto Contrast button: Click this button to perform the functions of both the Auto
White Level and Auto Black Level buttons simultaneously.