Example: Color Correcting a Three-Shot Sequence for Continuity
Now that you’ve examined the specifics of using the Final Cut Pro color correction
filters, you are ready to use these filters to make a series of three shots in a scene match
one another. In the three shots shown in this example, two shots are taken from the
same clip, and one is an insert shot taken from a completely different clip.
1
Apply the appropriate color correction filter to all the shots in the sequence.
This makes it easy to use the Copy Filter controls to copy filter settings from one clip to
another as you make your adjustments.
2
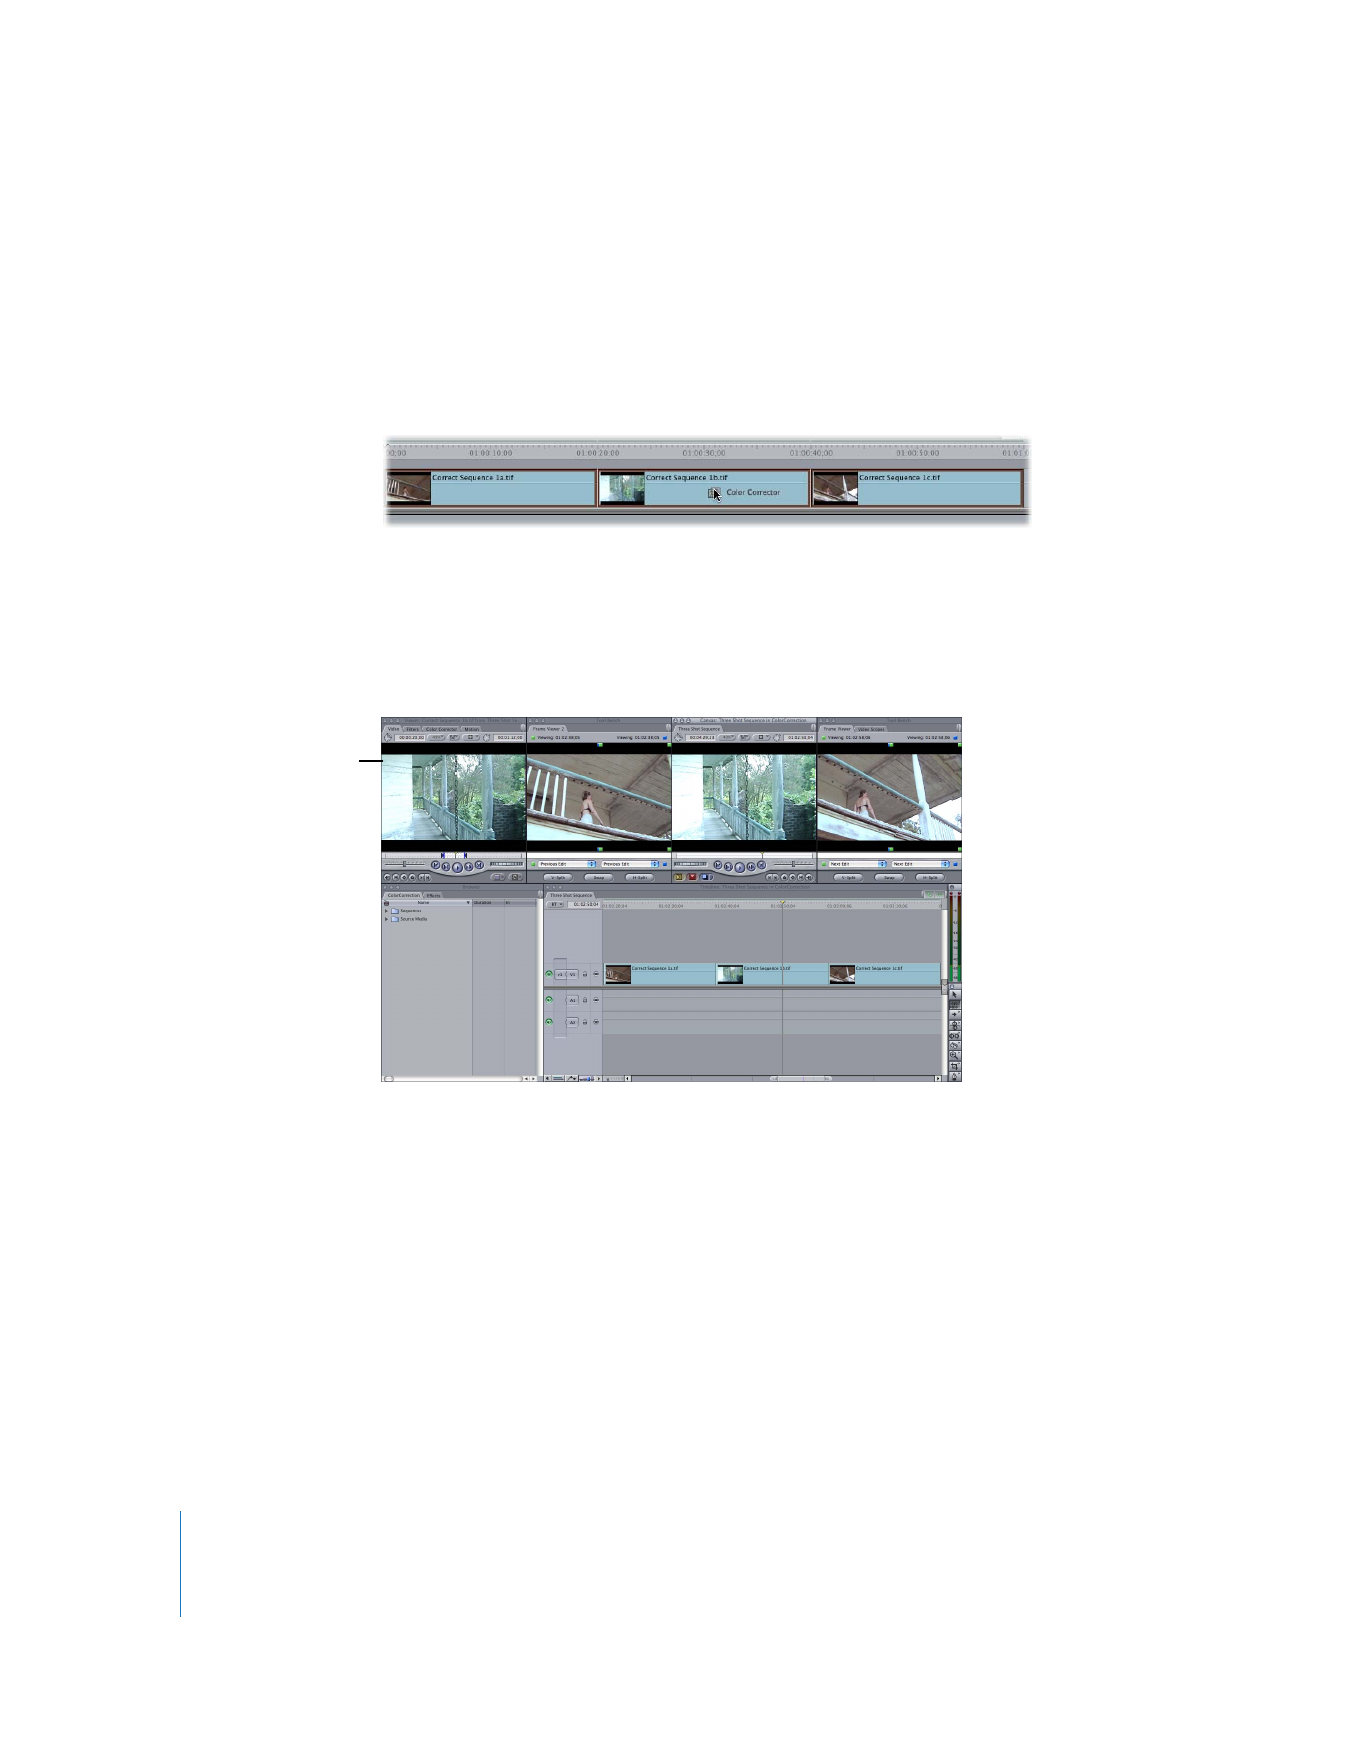
Choose Window > Arrange > Multiple Edits to select the Multiple Edits window layout.
This is a useful layout for comparing multiple clips in a scene.
3
Choose Open from the Playhead Sync pop-up menu in the Viewer or Canvas (choosing
an option from the pop-up menu in either window sets both to the same playhead
sync mode).
This way, whichever clip is at the position of the playhead is automatically opened in
the Viewer. If all three clips have color correction filters applied to them and a Color
Corrector or Color Corrector 3-way tab is selected in the Viewer, the Viewer always
displays the color correction filter for the clip at the current position of the playhead.
Note: For more information about the Playhead Sync pop-up menu, see Volume II,
Chapter 24, “Matching Frames and Playhead Synchronization.”
Multiple Edits layout
Chapter 27
Color Correction
593
III
4
In the Timeline, move the playhead to the first clip of the scene (for this example, the
master shot) to open it in the Viewer. (With the Playhead Sync pop-up menu set to
Open, the clip automatically opens in the Viewer.) Then click the color correction tab in
the Viewer to show the visual controls for that clip’s color correction filter.
Note: Make sure that the playhead in the Timeline is over the first clip so that you can
see your adjustments output to your broadcast monitor as you make your corrections.
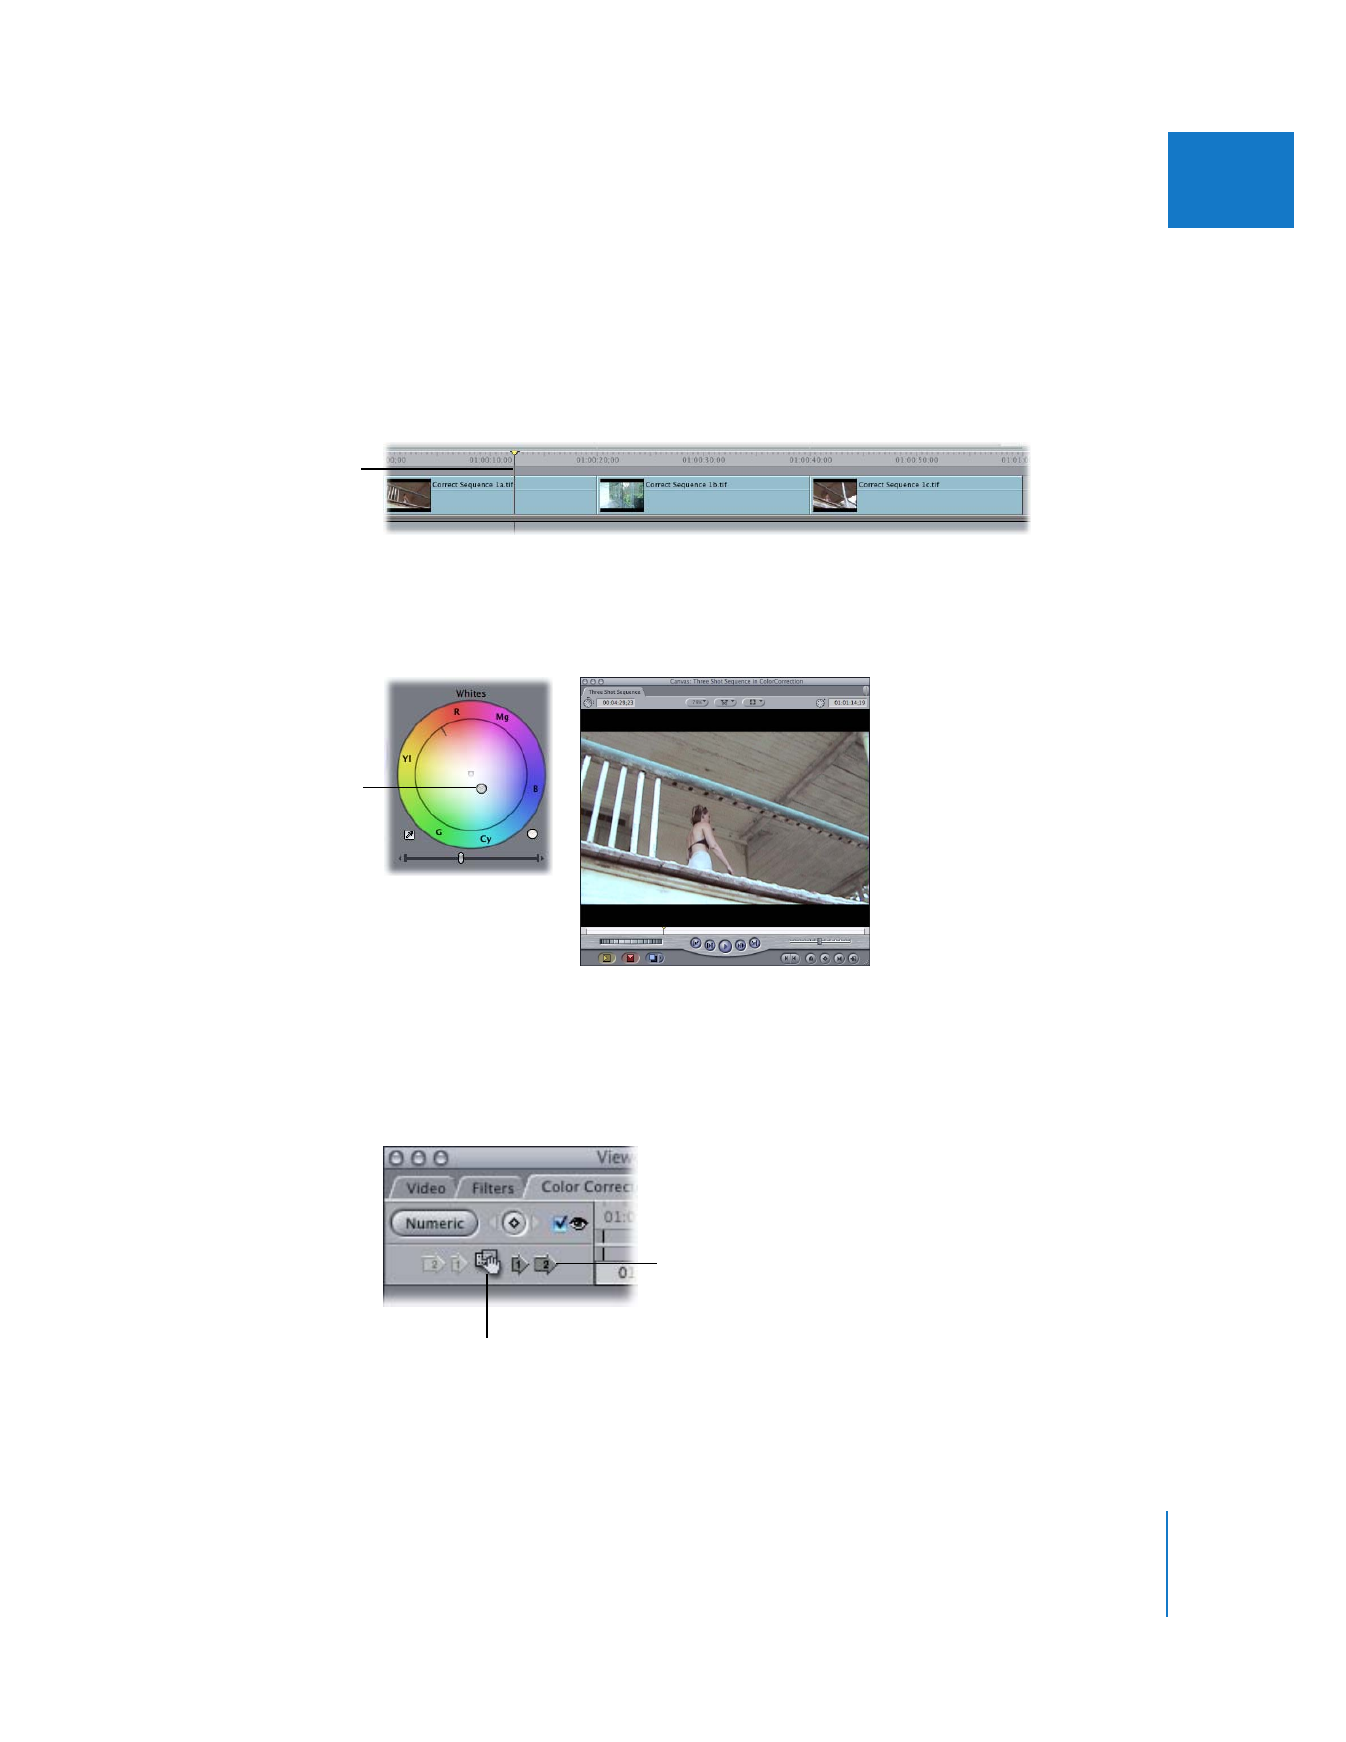
5
Perform your color correction. In this case, you’ll want to add a mix of blue and cyan to
cool down the shot of the woman on the balcony to match the tone of the shot
around the corner.
Because the third shot in the sequence comes from the same clip as the first shot, you’ll
want to use exactly the same color correction settings to ensure continuity.
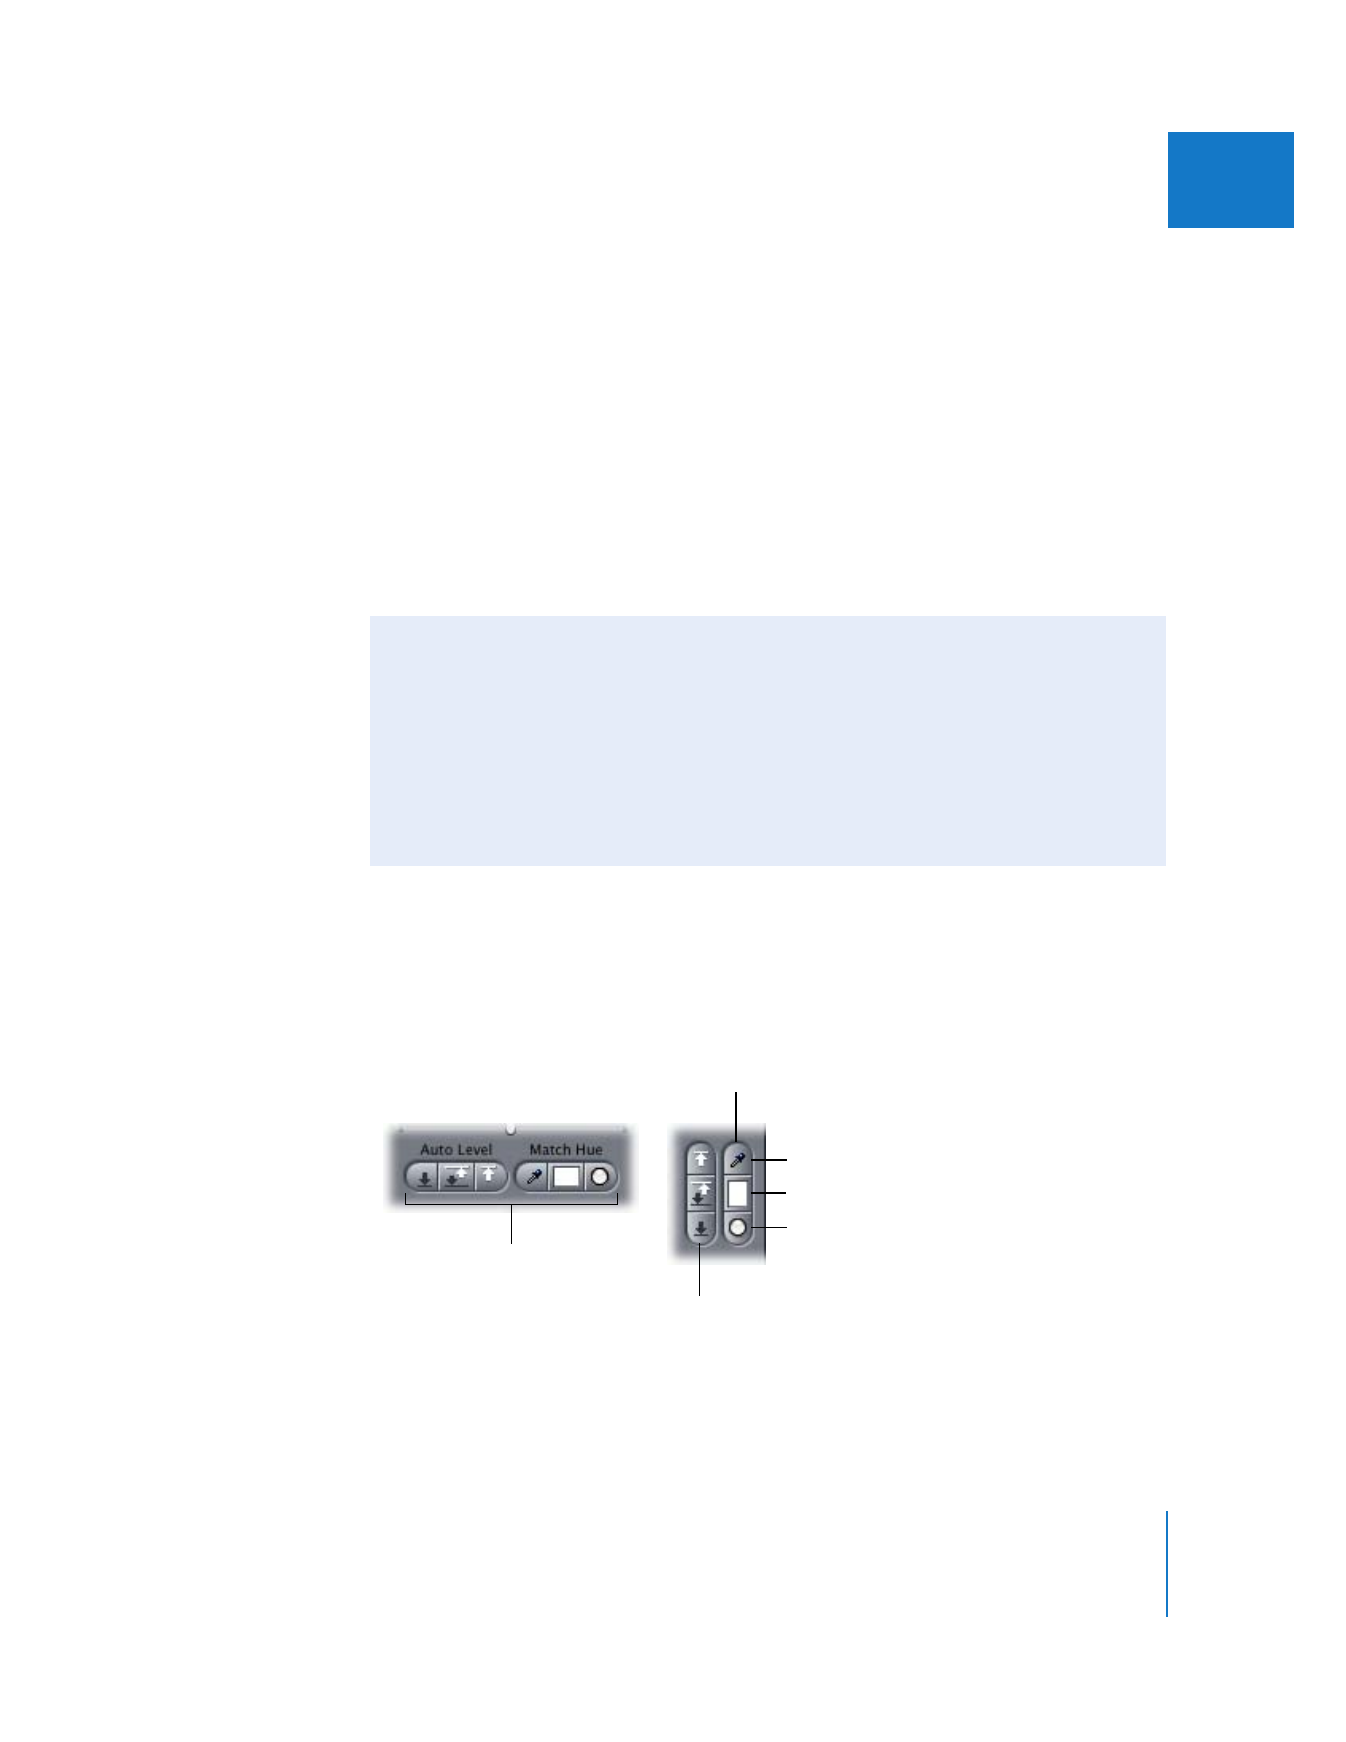
6
Apply the filter settings from the current clip to the third shot of the sequence using
the Copy To 2nd Clip Forward button (Control-5) or the Drag Filter button.
Move the playhead so it’s
in the first clip.
Adjust the
Whites control
to add more cyan.
Drag Filter
Copy To 2nd Clip Forward
594
Part III
Color Correction and Video Quality Control
7
In the Timeline, position the playhead over the second clip so that it opens in the Viewer.
There are three approaches you can take to compare the colors of the first and
second shots:
 Hold down the Control key while pressing and releasing the Up Arrow key to flip
back and forth between this clip and the first one to see the differences in color and
luma levels in the Canvas. As you do this, the image on your external video monitor
updates to show these two images. By flipping back and forth quickly, you can spot
differences in hue and contrast.
 With Final Cut Pro set to the Multiple Edits window layout, compare both clips side
by side on your computer screen. The previous clip appears in the Frame Viewer 2
tab to the left, while the current clip appears in the Canvas. Although this won’t give
you as accurate a view of your clip as will looking at it on an external video monitor,
you can still compare the relative differences between the clips.
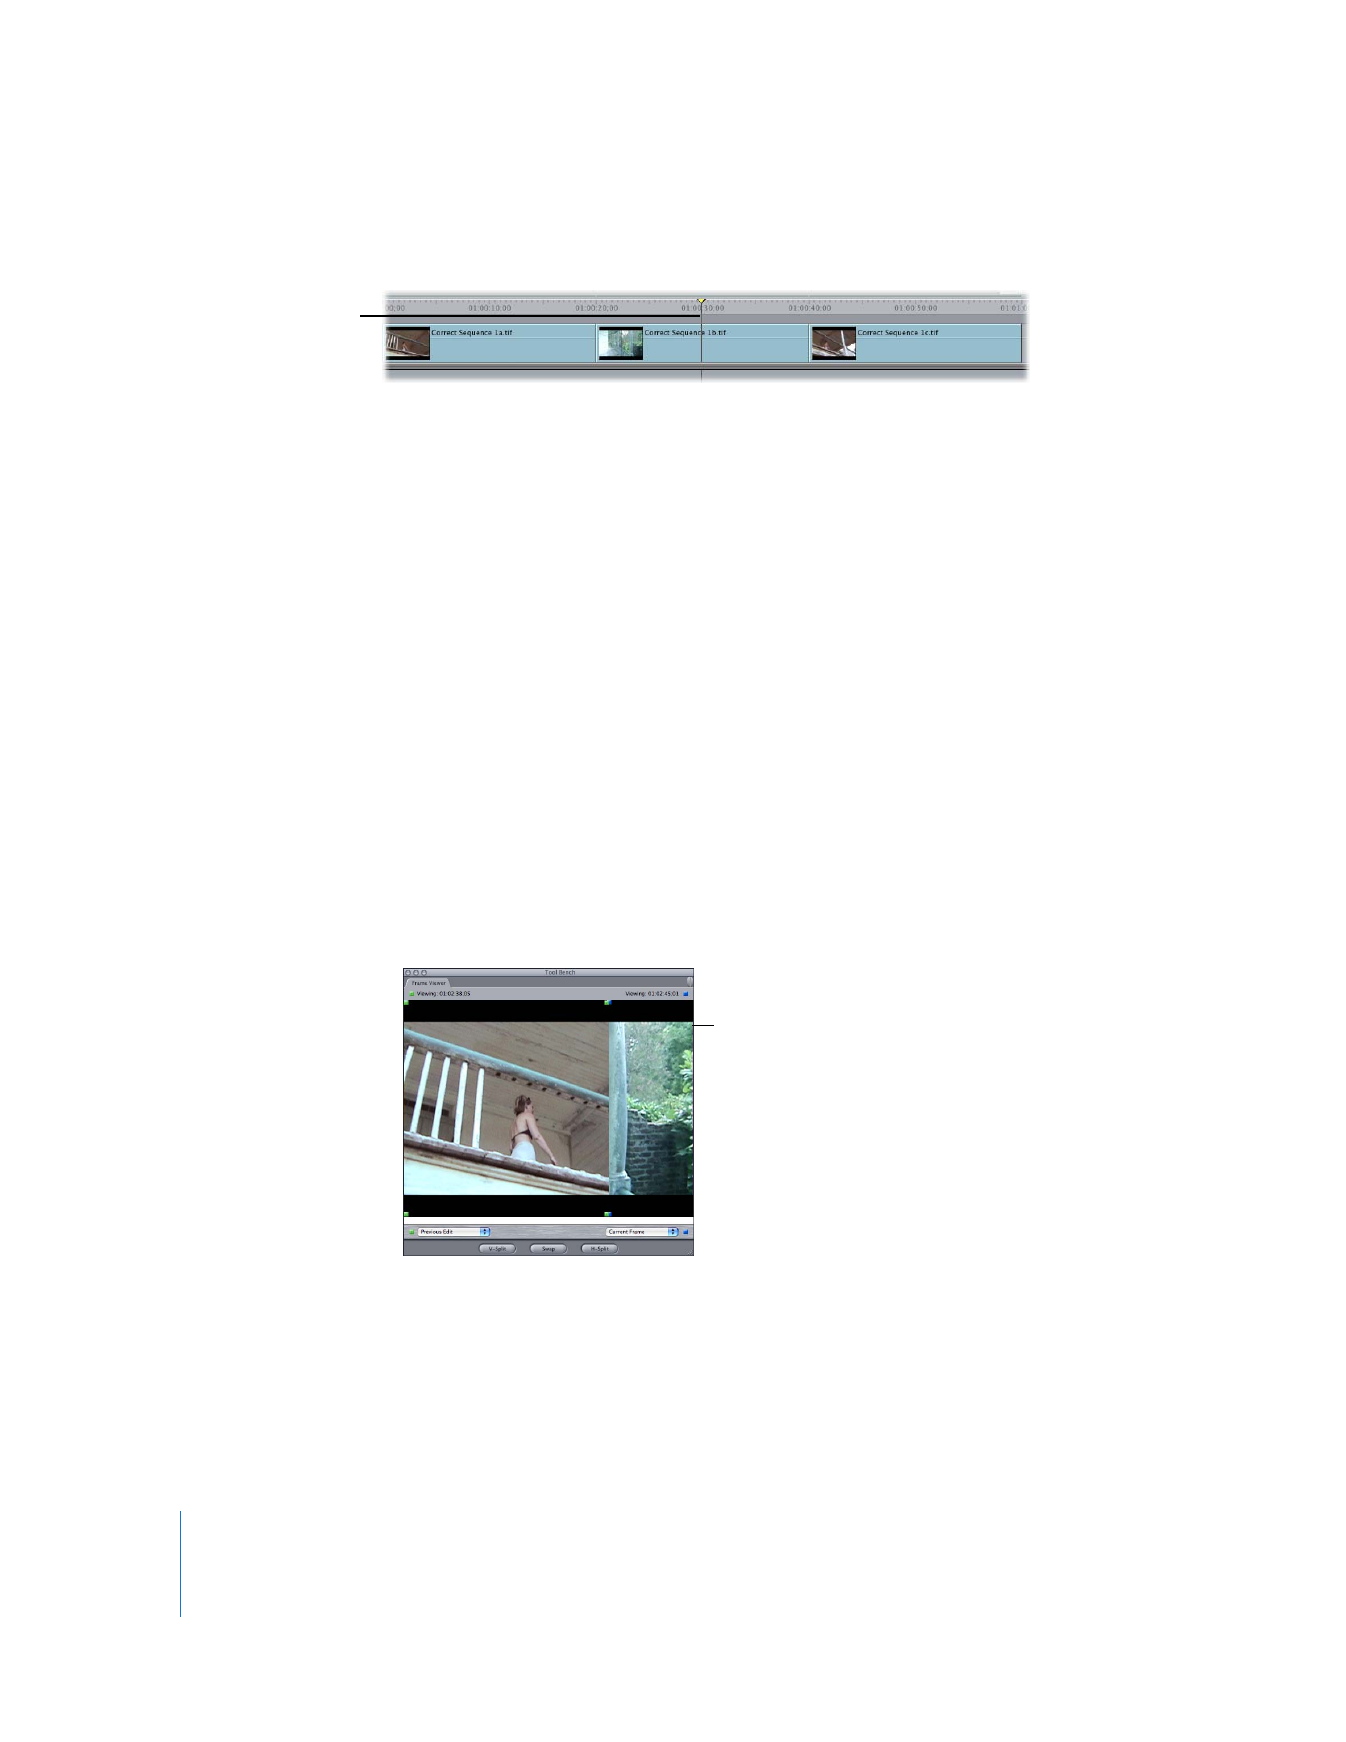
 Put the Frame Viewer 2 tab into split-screen mode. Clicking the V-Split or H-Split
button splits the Frame Viewer in half, by default showing the previous edit on the
left or top, and the current frame at the position of the playhead on the right or
bottom. This allows you to closely compare elements in both clips. The split screen
can be freely adjusted horizontally, vertically, or as a rectangular picture within a
picture that can be moved anywhere within the frame.
∏
Tip: To view the contents of a Frame Viewer tab on an external video monitor, select
the Frame Viewer tab you want to view and press Shift-F12.
For more information on using the Frame Viewer, see “
Comparing Two Frames in the
Frame Viewer
” on page 555.
Move the playhead so it’s
in the second clip.
Split-screen mode
Chapter 27
Color Correction
595
III
As you compare adjacent clips in your sequence, remember to pay attention to the
video scopes. With Final Cut Pro set to the Multiple Edits layout, you can select the
Video Scopes tab in the far-right Tool Bench window.
Note: The Video Scopes tab can be set to display the same choice of edit points as the
Frame Viewer tab. If you have a large enough display, you can create a custom layout
with multiple video scopes, each corresponding to a Frame Viewer tab showing the
same edit point.
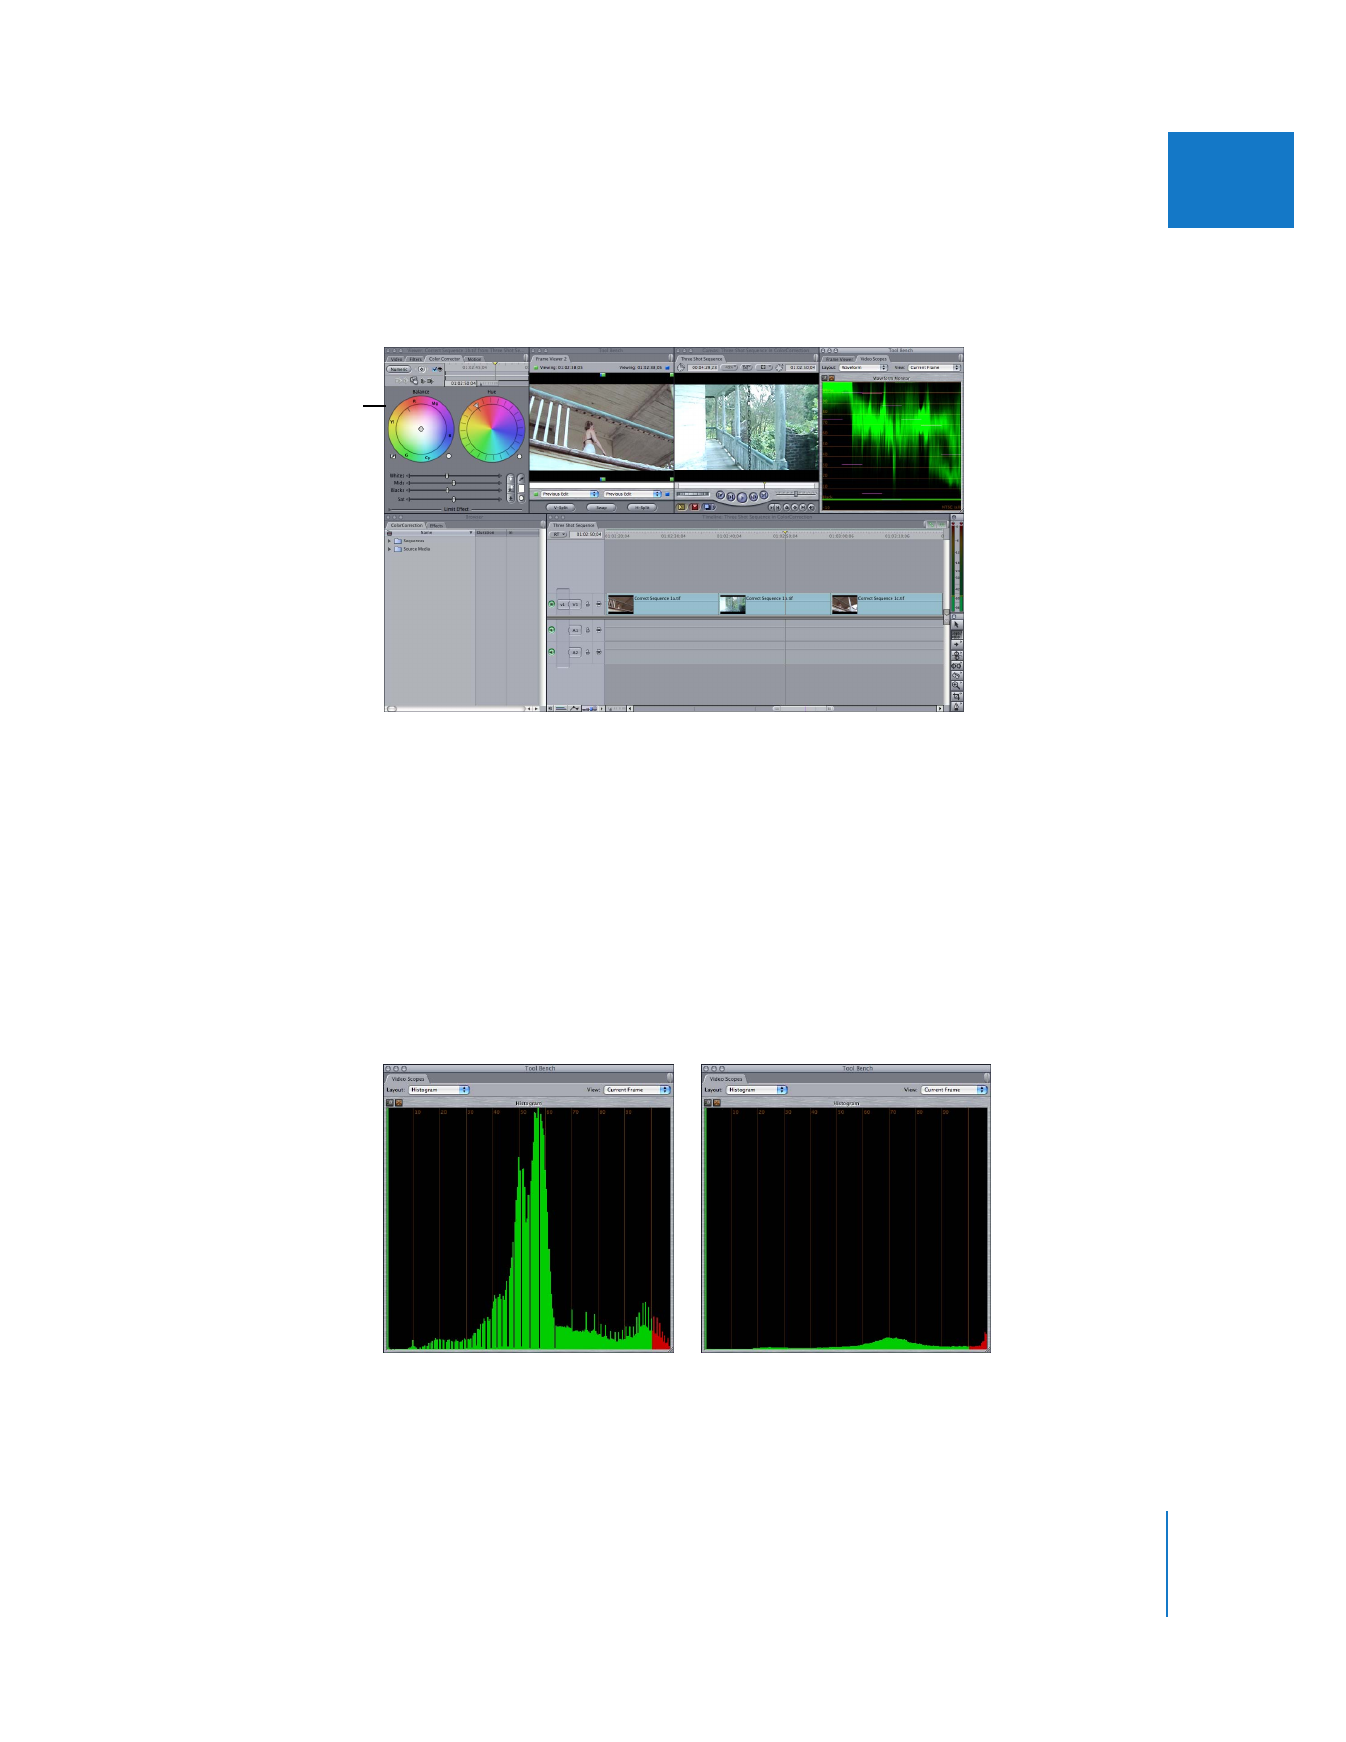
Using the video scopes, you can quickly pinpoint specific differences between these
shots that may be difficult to figure out visually. For example, the Histogram and
Waveform Monitor show that the second shot is a little darker than the first. Pay
particular attention to the spike in the middle of the Histogram. By comparing the
difference between the size and location of each spike, you can adjust the level sliders
to compensate.
The Multiple Edits
layout lets you easily
compare clips.
Second clip
First clip
596
Part III
Color Correction and Video Quality Control
Using information from the Video Scopes tab, you can adjust the Whites and Mids
sliders to make the two spikes of the Histogram match more closely, so you get
comparable luma levels. Moving one invariably results in some movement in the other,
but keep making your adjustments until the Histogram for the second shot
approximates the Histogram for the first shot.
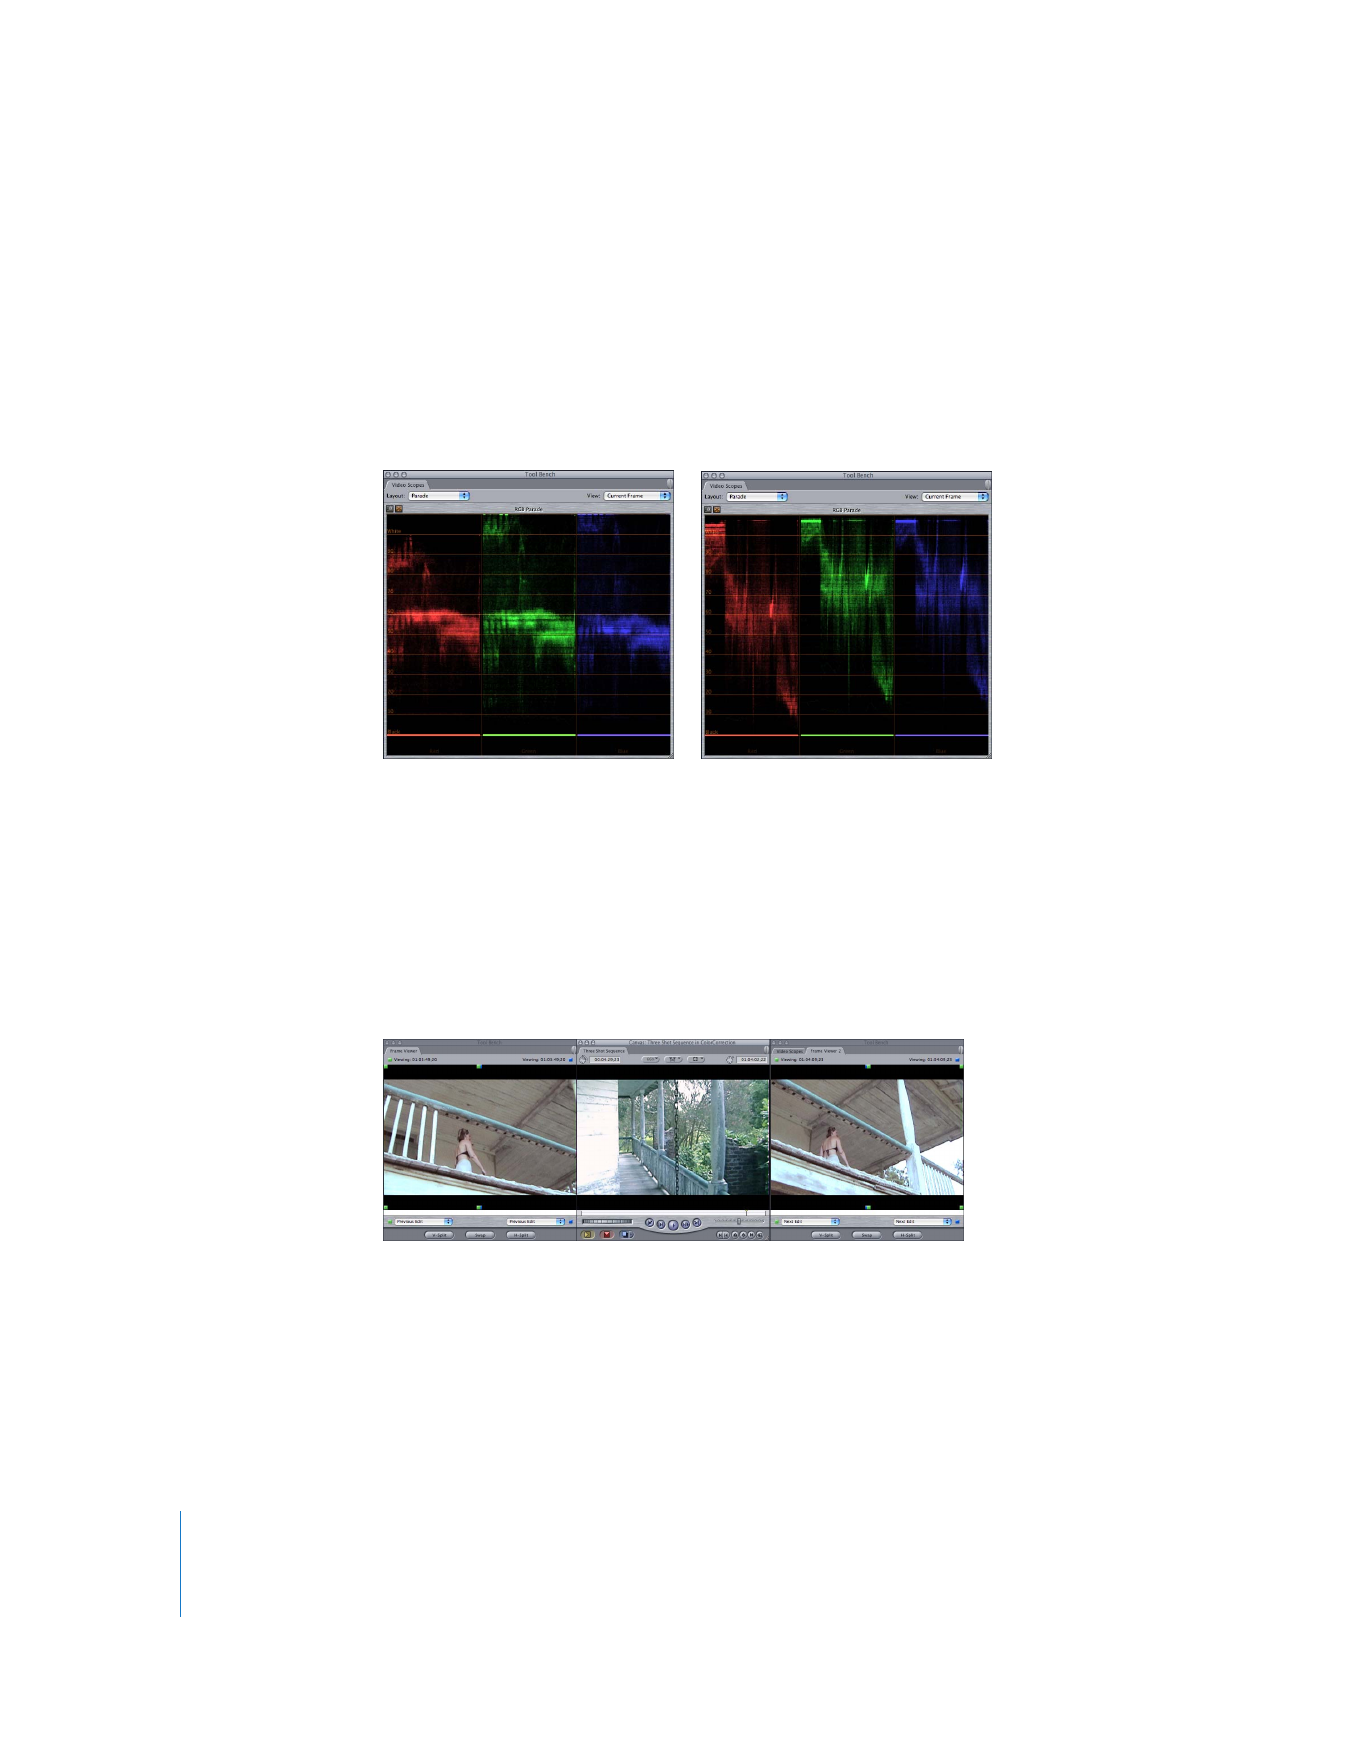
8
With this accomplished, focus on the RGB Parade scope. It shows that the second clip
has far more blue and green than the first.
Adding progressively more cyan to the midtones brings the hues of the two shots
closer to one another. As you adjust the Mids control, continue comparing the previous
shot and the current shot as outlined in step 7. Continue to make adjustments until the
shots match as closely as you need them to.
Note: Remember that your goal, in this case, is to balance all the shots in the scene so
that as the sequence plays, no one shot stands out from any of the others.
Second clip
First clip
Chapter 27
Color Correction
597
III