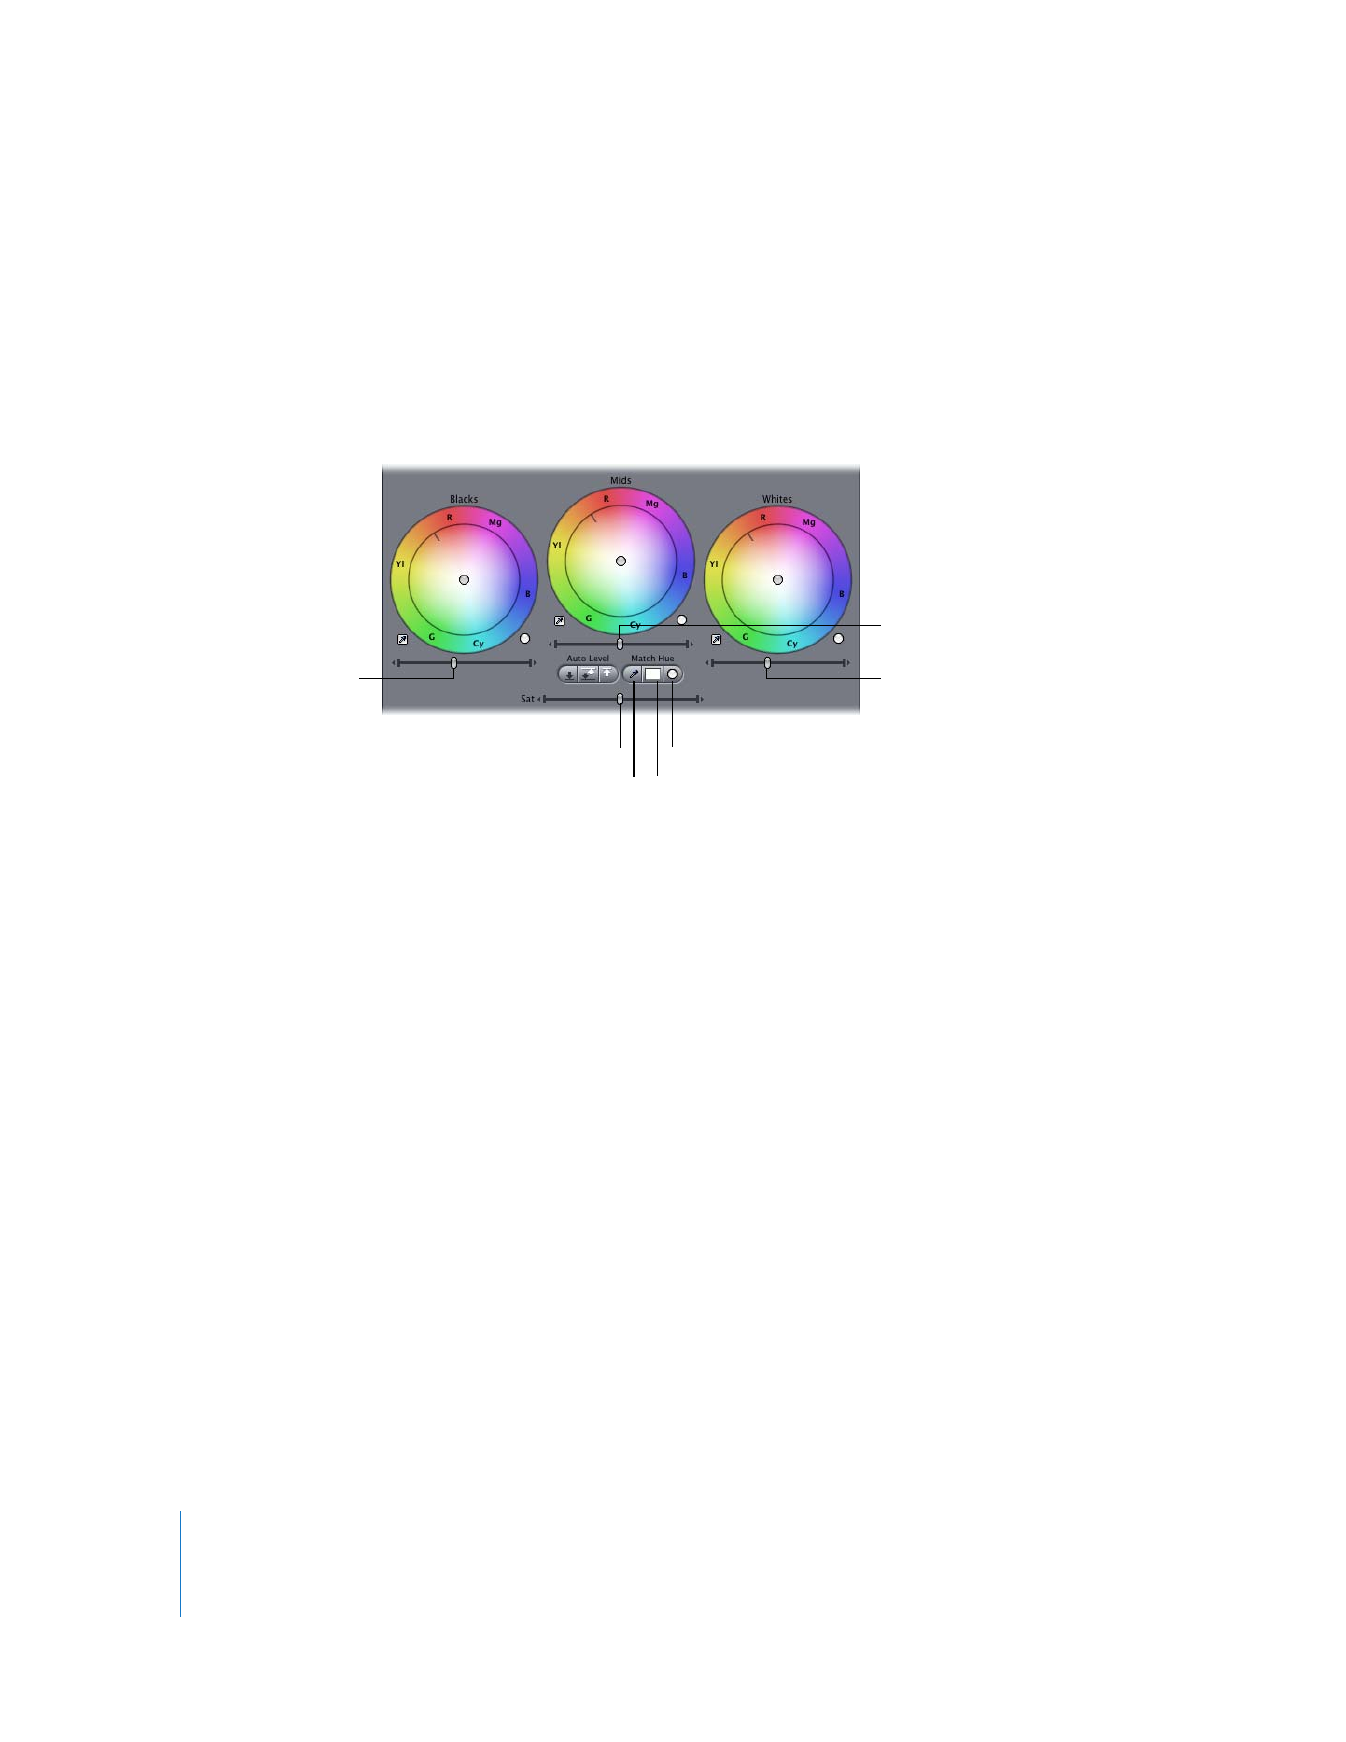
Level and Saturation Controls in the Color Corrector 3-Way Filter
The level sliders allow you to adjust the levels of the whites, midtones, and blacks in
your clip to adjust the contrast of your image. The first step when color correcting one
clip to match another is to adjust its overall luma levels to match those of the other.
Only after doing this are you able to adjust the colors appropriately and achieve the
results you want. The Saturation slider lets you increase or decrease the intensity of the
color in your image.
 Blacks slider: Drag this slider to adjust the minimum level of black in the affected clip,
deepening or reducing the level of absolute black in your image. To move the slider
in increments, click the small arrows to the right or left of the slider.
 Mids slider: Drag this slider to adjust the average distribution of values in between
white and black in the affected clip. To move the slider in increments, click the small
arrows to the right or left of the slider. You can use this slider to adjust the midtones
of your image, increasing or decreasing the apparent contrast of your image without
washing out the whites or blacks. For example, you could manipulate the Mids slider
to bring out detail in the shadowed areas of your clip.
 Whites slider: Drag this slider to adjust the maximum level of white in the affected
clip. To move the slider in increments, click the small arrows to the right or left of the
slider. Moving the slider to the left lowers the maximum white level (letting you
bring the whites in overexposed clips down to a more acceptable level, for example).
Whites slider
Saturation slider
Reset Match Color button
Match Hue eyedropper
Blacks slider
Mids slider
Match Color indicator

Chapter 27
Color Correction
583
III
 Saturation slider: This slider raises or lowers the overall saturation, or intensity of
color, in the affected clip. Drag the slider all the way to the left to desaturate the clip
completely. This results in a grayscale image. Drag the slider to the right to increase
the saturation of color in the affected clip. To move the slider in increments, click the
small arrows to the right or left of the slider.
Note: Be very careful when raising the saturation of a clip using this slider. It is very
easy to raise the saturation too high, resulting in saturation values that are illegal for
broadcast. Never adjust the saturation of clips based on how they appear on your
computer display. NTSC and PAL video never look as vivid on a computer display as
they do on a properly calibrated broadcast video monitor, and it’s often tempting to
overcompensate when basing your adjustments on the way video looks on a
computer display. It’s a good idea to enable the Excess Chroma option (in the Range
Check submenu of the View menu) to warn you when you’re boosting the saturation
too much. For more information, see “
The Importance of Using a Properly Calibrated
Broadcast Monitor
” on page 553 and “
Displaying Excess Luma and Chroma Levels
in the Viewer and Canvas
” on page 524.